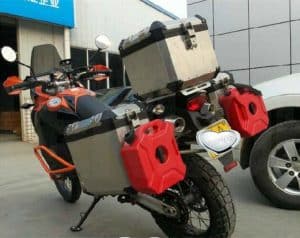
Motorcycle gas cans are a necessity for any motorcycle rider who needs to carry more fuel than their tank can hold. There are many different types of gas cans, all of which are mounted in different ways onto your bike, and they come in a variety of sizes for different needs.
If this is your first article about gas cans on our site it might be worth checking out the 5 best ways to carry motorcycle gas cans and then come back to read the remainder of this article.
In this article, we will break down the basics of what to look for when purchasing a motorcycle gas can and how your unique riding situations might affect your purchasing decision. We will cover how to know how much gas will cover your needs. We will also share out recommended gas cans.
What are the different sizes of motorcycle gas & our top recommendations:
Motorcycle gas cans come in a variety of sizes, shapes, and sizes but below are the most common sizes & our top recommendations when it comes to carrying extra gas on your motorcycle:
How to calculate what size gas can I need for my situation?
When planning a large ride you need to determine how many gas stops there are on your route.
To do so follow the below steps:
Open Google Maps
Enter your route and click start
Click the search button and enter ‘petrol stations’
Measure (roughly) the longest distances between each stop
The below example used a Honda CBR 500R (2015) @ 80.2 MPG for reference
So for example, you’ve got a leg of a trip with 400 miles between 2 gas stops and your fuel tank takes 4.1 Gallons, which @ 80.2 MPG will give you 336 Miles.
You will need an additional 0.8 Gallon to go the extra 63 miles.
PLUS add an additional 1 gallon for ‘contingency’. No one wants to be stranded out in the middle of nowhere, so however much gas it is you need to add an additional 1 gallon for safety.
Gallons to Miles Table below (assuming you’re running a CBR 500R (2015) @ 80.2 MPG:
Gas Can Capacity Measured in Gallons
Expected Milage @ 80.2 MPG
0.08
6.4
0.15
12
0.23
18.5
0.8
64
1
80.2
1.75
140.4
2
160.4
3
240.6
4
320.8
5
401
5.3
425.1
6
481.2
How Much Extra Gas you will Need on your Touring Trip
*This is a rough estimate based on averages in the motorcycle industry, your individual mileage will vary depending on specific bike and rider conditions. Please consult your owner’s manual for information provided by the manufacturer regarding fuel capacities for your exact model.
Common Mistakes & Misconceptions about motorcycle Gas Cans
Purchase Bigger “Just in Case”
There are many misconceptions about motorcycle gas cans, especially when it comes to how much they can hold. Many people purchase a larger can than they need because they think having more capacity means that it will last longer between fill-ups. However, carry stupid amounts more gas than you need is not only inconvenient but can be dangerous.
Heavier containers are safer than lighter ones
NOPE! When in motion, heavier objects create an unstable ride for your motorcycle. Not only are heavier gas cans more of a liability when riding they also add a heap of weight to your bike which you won’t be used to when mounting and dismounting your bike. This could result in tipping over in that cafe car park. Not cool.
I should be able to use any sturdy Plastic Containers
The containers I’ve mentioned above are all Plastic containers are all EPA and CARB compliant fuel containers. Please don’t use a random plastic container.
Don’t Store Gasoline in your garage for a prolonged period of time
Many people don’t consider the effect of storing gasoline for long periods of time, but it’s important to know that gasoline will evaporate after about 2 or 3 months when stored outside. The longer it’s stored, the more water and other impurities which collect in gas during evaporation which makes it extremely dangerous as this creates a highly flammable mixture. So after that long ride, empty the remainder of that gas can into your bike.
So, you’re looking for some saddle bags to install on your motorcycle, but with hundreds of options to choose from, how are you going to decide which to buy? There are so many things to consider such as, what type of motorcycle you ride, how much carrying capacity do you need, and whether or not you’ll be carrying a passenger. Even more important, how do you know they will fit your bike? In this article, we’ll talk about how to measure your bike for bags and other obstacles that should be addressed before you invest in saddle bags.
Some common motorcycle saddlebag options include soft saddlebags, lockable saddlebags, leather bags, hard bags, rear tire mounting hardware and other components.
Different motorcycle styles require different types of saddle bags, so we can’t just make a sweeping claim that if you measure from A to B, then buy this style or that style. Instead, let’s approach this based on motorcycle type: sport bike vs. cruiser vs. standard, exhaust placement, rear shock style, seat style, etc. My goal for this article is to help you determine what type of throw-over hard bags to purchase without having to install a mounting system, brackets or stays. While this may not be possible on every bike in every travel situation, there are plenty of saddlebags that will fit your needs without spending more money on a complicated mounting system.
Sport Bikes
The rear end of a sports bike is usually very minimal and leaves the rear wheel somewhat exposed. The most common problem with saddle bags on a sports bike is preventing them from folding under, or sagging, thereby getting caught up in the rear wheel. Buying a set that is too large contributes to this problem. So, here are some things to consider and where you should measure.
To determine what size you should buy, measurements should be taken from the front of the rear turn signal to the back of the rider’s seat. Some sport bikes have rider’s seats that are separate from the passenger seat or cowl cover. But other sports bikes have a one-piece seat. In this case, find the point in the seat that transitions to the passenger portion and use that for your measurement point. Also, if you will be carrying a passenger, you will need to measure that width from the turn indicator light to the rear of the passenger foot peg. Honestly, the way rear pegs are set on a sports bike doesn’t leave much room for saddle bags and your passenger’s boots. If you plan to do two up trips on your sport bike often, I’d consider a sport touring motorcycle instead, for your passenger’s sake. A happy passenger is a happy rider. Back to the measurements.
The second measurement should be taken on the side of the exhaust pipe since the pipe placement is going to determine how tall your bags can be. measure from the top of the seat, down to two inches from the pipe. You want to keep the bottom of the bag a minimum of 1 inch away from a hot pipe, and 2 inches is ideal. Sportbike saddle bags are tear drop shaped so they fit the angles of the sloping exhaust. The narrow end of the bag should go towards the rear giving the pipe more room. This is not the case with every sports bike, but, in general, this is the case.
One last measurement to consider is the bike’s rear width, not just the rear seat width, but the width of the plastics or grab bars as well. You want to know the measurement at its widest point. This measurement will determine the maximum width between the bags.
Now that you have the measurements, you need to transfer those measurements to a set of throw-over bags. On a sports bike, the saddle bags need to sit up high so they don’t sag down and under the rear of the bike. So use that width measurement to make sure the bags can be adjusted to accommodate that maximum width. With the bags sitting up high, you can incorporate the height measurement to make sure they are clear of your pipes. Lastly, check the length to make sure the bag will fit without interfering with the rear turn indicators, or with your riding position, or your passenger’s ability to use the foot pegs.
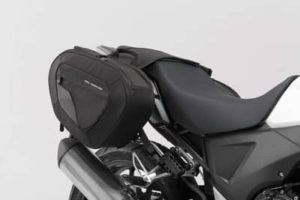
If you need a larger set of bags than what’s available without hardware, you may have to consider installing some kind of stay brackets to support larger bags and prevent them from sagging into the rear wheel. Check to see what’s available from your bike manufacturer or from the bag manufacturer as many will have bike-specific brackets and stays. If you need something with brackets, I highly recommend the SW-Motech Blaze saddlebag system. It’s great for smaller bikes and the mounting brackets are easily removable and don’t spoil the lines of your sports bike.
One more consideration with a sports bike is a tail-ed exhaust. This presents a set of problems that you’ll have to consider. Depending on the placement of your exhaust, you may have to consider bags with some kind of heat-resistant layer on the exterior portion that comes close to the pipes. Also, this will determine how you will secure the bags. Under tail exhaust prevents you from running a strap under the seat, so you will have to consider how your bags will stay secure on your specific motorcycle.
Cruisers
If you ride a cruiser, your choices greatly increase, which could make your job of choosing a bag system a lot more confusing. But let’s start with the measurements to eliminate bags that won’t fit your bike. The measurements will be very similar to the sports bike measurements but there are a couple of things to determine before you take measurements.
Will you be carrying a passenger? If so, you need to determine how much room your passenger will need for their boot on the rear foot peg. Your length should be measured from that point to the front of the rear turn indicator light. This will be the maximum length of the bag you choose.
Another factor is the placement of your rear shock. If you have an internal mono-shock, then you don’t have to worry about it, however, if you have exposed rear shocks, you need to measure from the top of the rear shock to the turn indicator light. Also, you will need to select an angled bag that will leave room for, and sit behind the shock.
For the bag’s height, measure from the top of the rear seat, down to two inches above the exhaust pipes. This will be the maximum height of the bags you choose.
If throw-over saddle bags simply won’t work for your needs, then check to see what kind of mounting hardware your motorcycle already has. Many cruisers are manufactured with the perfect place to easily mount brackets. Consider the quick release, or quick removal mounting system. This system consists of a couple of mounting bolts on your motorcycle, a set of bags with a hard exterior and mounting holes that fit on the mounting bolts. They are easy to remove when you get to your destination, and they have the convenience of a lock to keep them secure from theft. Also, if you want to go sporty, you can leave the bags at home and you still retain the sporty look of your motorcycle; no bulky, unsightly brackets.
Standard Retro-Style Motorcycles
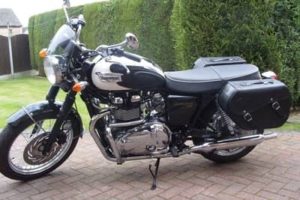
There is some speculation out there as to what a standard motorcycle is. For the sake of this article, a standard motorcycle is one in which the rider is in an upright position, handlebars at a comfortable level, and feet in a neutral sitting position on the pegs. Think of something like the Triumph Bonneville, Ducati Scrambler, or the BMW 1200R.
The same basic measurements will apply as well as the same considerations for external rear shocks, location of the exhaust pipes, rear turn signals, and passenger foot pegs. Retro-style motorcycles often have external rear shocks and a saddle bag thrown over the seat can interfere with those spring shocks or wear out your bags faster than usual. This may limit your selection of saddlebags that will fit with those measurement constraints and you might consider bags that sit up high. If this doesn’t work, you’re more likely to have to find a mounting system that will keep the bags away from the shocks. However, that doesn’t mean you have to install big, ugly, bulky brackets. All you need is something to give the bag support and keep it away from the shocks and wheels. Triumph makes simple brackets for many of their retro-style models and SW-Motech also makes removable brackets for many of these bikes.
Some of the newer standard-style motorcycles have rear ends that look a lot like sport bikes, for example, the Yamaha FZ9, Yamaha XSR900, or the Triumph Street Triple. For these bikes, you could consider the same style of bags that would fit on a sports bike. Again, measure the length from the rear turn signal to the back of the rider seat; the height from the top of the rear seat to two inches from the exhaust; and the width at the widest part of the rear seat, including fender and/or grab bars. One of the most important things to look out for is how the bag hangs and if it is at risk of rubbing against the rear wheel.
Modifications
On any style bike, there are a number of modifications that you can make to your motorcycle to accommodate a set of throw-over saddle bags. First, consider a rear turn signal relocation kit. Often bag manufacturers will provide a kit so that a certain type of saddle bag will fit with your bike. A good kit should come with everything you need to relocate your existing stock turn signals.
There is a wide variety of after-market, low-profile turn signals available. LED light technology provides a brighter, longer-lasting light in smaller sizes than conventional motorcycle turn signals. They can be mounted in a variety of locations or can be integrated into the tail light, eliminating external turn signals completely. Installing these modifications will require some mechanical know-how, and some re-wiring, but who doesn’t love a good Sunday morning project anyway. Installation instructions will most likely come with the turn signals that fit with your motorcycle, and YouTube is a great resource for installation instructions.
If you find your bags sitting dangerously close to your exhaust pipe, and this can happen more often with under tail exhausts, you could consider installing a heat shield to the portion of the bags that sit close to the pipes. Thermaflect Tape, or heat shield tape, provides a layer that will reflect most of the heat away from your bags. However, for the tape to be effective, it needs to have at least 1-inch clearance from the heat source to provide sufficient airflow to keep the tape from overheating. So, this will not protect your bag if it is actually touching the exhaust. Frankly, if it is touching, you need to adjust the bag’s installation or use a bracket.
Another modification to consider when using throw-over saddle bags is something to protect your paint from scratches. Often a bag system will sit directly on rear fenders or side plastics and, over time, the bags will scratch the paint. Many bag manufacturers provide a thin, clear plastic barrier that sticks directly to the bike. If you’re not comfortable putting this sticker permanently on your bike, like me, then consider a saddle bag system that includes an extra soft barrier to place under the yoke to protect the paint. For a DYI fix, a clean, soft towel under the yoke will do the trick.
If you’re riding a cruiser and you spend your hard-earned money on easy lock bags, some have found that the OEM mounting bolts aren’t perfectly designed. In some instances, the bags may not sit in the ideal spot, and you’ll figure this out as you ride with loaded bags. If you find that your bags should sit farther away from the back of the motorcycle, you can install spacers to the mounting bolts. Sometimes it can be as little as a couple of washers, other times it may require 1/2 inch or more. This is a simple DIY fix and washers and spacers can be found at any hardware store.
Often times a rider simply isn’t happy with the mounting brackets or stays that a bag or bike manufacturer provides, or the chosen bag system simply doesn’t come with mounting brackets. In this case, a lot of riders will design and build their own custom mounting brackets. The perfect excuse to spend time in the garage and break out those metal working tools. This gives you all the freedom in the world to build the perfect, removable brackets that will give you the option to go sporty when the bags are not in use, and then convert to a touring bike when you’re ready.
So, as you can see there are a lot of things to consider when selecting a set of throw-over saddlebags and with all the choices out there you can easily get overwhelmed. So, start with the measurements first to eliminate the ones that won’t fit. Then pick your style and storage capacity. After that, you can determine if any modifications need to be made. Lastly, after your first trip with your saddlebags, you’ll get a good idea of ways you can improve the fit, where they can be tightened, and how they should be tied down to prevent wiggle or slipping. Also look for any unusual wear that might indicate they are rubbing on the wheel or sitting too close to the exhaust, then make adjustments as needed.
I hope this quick article has helped you determine what kind of saddlebags to buy for your motorcycle. Riding on a trip without having to worry about your gear makes for a much nicer, stress-free journey.
Conclusion
Soft saddlebags are great riding gear for short motorcycle trips. The storage space for motorcycle saddlebags varies. You can get all types of motorcycle saddlebags and other motorcycle luggage Mon-Fri on all motorcycle shop outlets or online.
Let’s assume you’ve purchased a sexy sport bike with sleek lines and a slim tail, but you need some saddle bags so you can take your sexy bike to more than just the local bike night at Hooters. You want to do some multi-day rides and you need a place to pack your PJs. The problem is, finding saddlebags that safely fit a sport bike is not an easy task, and the last thing you want to do is mess up those clean lines with bulky pannier brackets. Lame.
So, what’s the best saddle bags for a sport bike? SW-Motech has designed a saddlebag system specifically for sport bikes and smaller bikes called the Blaze saddlebag system. It includes and ingenious removable mounting system that won’t spoil the look of your bike when the bags are not in use and it’s incredibly easy to install and secure the bags whenever you’re ready to use them.
I ran into the problem of finding a saddle bag solution when I purchased my 2014 Honda CB500X. There are several pannier systems on the market for this bike, one designed by Honda and very over priced. But, I didn’t like the idea of having mounting brackets permanently installed on the bike. I didn’t want it to look like an adventure bike. So, I found the SW-Motech Blaze system for the CB500X and I’ve loved them ever since day one.
The secret to this saddle bag system is the low profile mounting brackets and the removable support arms unique to your model of motorcycle. These brackets solve the dangerous problem that a lot of smaller bikes have. Throw over, soft saddlebags have a tendency to sag too low, and sag inward coming dangerously close to the tail pipe and rear wheel. A bag tangled up the the rear wheel could spell disaster, and contact with the pipes will destroy your bags and whatever is in it. The support arms prevent this from happening.
The saddle bags themselves have a sleeve that slips right over the support arm to prevent them from bouncing or swinging outward while riding. A quick release clip on each bag snaps into place at the support arm bracket to prevent the bags from sliding backwards and possible off the bike. With this system, no additional tie-down straps are necessary.
What Motorcycles do they Fit?
SW-Motech has developed unique support arms and mounting brackets designed for over 150 different motorcycles. They make brackets that will fit numerous models from Honda, Ducati, Triumph, KTM, Kawasaki, BMW, Yamaha, and I’m probably forgetting some. Every kit is unique to the bike as far as the mounting brackets and where they fit as well as the curve and bend of the support arms. They are designed to fit around pipes, external shocks, rear foot pegs and any other obstacle that your bike might present.
What you won’t find are saddle bag system that fit cruisers. Generally there are so many other ways to fit a saddle bag on cruisers and they don’t tend to have the same luggage issues as sport bikes or smaller sporty bikes.
What’s Included?
In the kit you will receive everything you need to install and use the saddle bag system. The kit will include:
All necessary bolts, washers, spacers and hardware to mount the brackets.
Two support arms with plastic end caps.
2 male and female mounting brackets.
2 semi-rigid panniers.
2 waterproof dry bags that fit inside the panniers.
two sheets of clear plastic protective adhesive.
Installation instructions.
This kit does not include rain covers for the saddle bags, and instead provides the two dry bags. I actually prefer this because I’ve used saddlebags that come with rain covers, but I’ve actually lost a couple while riding due to the wind pulling them off. Since then, I’ve always packed my gear in dry bags if rain is expected.
The Support Arms and Brackets
The support arms at first glance don’t look like much but are surprisingly sturdy. They are light weight and smooth yet rugged enough to hold your fully loaded saddle bag.
When you put the support arms on the bike, you slide the male end of the brackets into the female on the bike. Each arm is labeled Left or Right and they will lock into place with a noticeable and satisfying click, letting you know that they are secure in place. And they are indeed secure. The bars are easily removed by pressing on the spring loaded clip, giving it a little wiggle, and pulling the bar out. You do have to depress the clip fairly hard to get them off, but that’s a sign that they are secure when in place and they aren’t going to come loose on the road. One complaint I have is that I always manage to pinch my thumb somehow, but maybe that’s just me, or I have a low tolerance for pain.
Once the support arms are in place, the bags slide on to the arms via the sleeve. Next, you’ll secure the bag by connecting the quick release clips at the bracket. Pull the strap tight and it will pull the bags forward, preventing it from sliding around. Once you pull the straps tight you can wind up the excess and tuck it under the elastic strap holders. It’s a great mechanism for securing the bags.
Installation
Installation of the mounting hardware and brackets doesn’t require any specialty tools nor does it require any drastic modifications to your motorcycle. By this I mean, you don’t have to relocate your turn indicators and you don’t have to drill, cut or slice anything. It will probably take you about an hour to do.
The only tools you will need are a hex key, a small wrench or two, and possible a phillips screw driver. That’s it. Follow the mounting instructions provided in the kit. The placement of the mounting brackets will be unique to your model of motorcycle. Often the female end of the bracket will be integrated into the rear foot peg bracket. In this case you will be required to remove that bracket to install the kit. The kit will include spacers and longer bolts to make this possible.
One thing to watch out for when assembling everything, is the remember to install one end of the quick release clip between the bracket and the mounting hardware. When you tighten the screws, make sure the clip end is pointing towards the rear of the bike and lined up nicely so you can easily clip in the other side when you put the bags on the bike.
Bag Design and Capacity
The bags themselves are very sturdy and are made from high quality 1680 ballistic nylon. The seams are strong and they don’t look like they’re on the brink of tearing when the bag is stuffed full like some other cheaper bags. The zippers are smooth and don’t snag on anything when used. The bags have a really nice, sleek look. They don’t look bulky or strange. They look like they belong on the bike and I reckon they make your motorcycle look pretty cool.
There is a side zippered pocket that’s great for small items that you need quick access to, however, when your bags are stuffed, these pockets can get a little tight. They are better suited for something flat, like maps or paperwork. The inside compartment is a bit small, but this depends on how much stuff you need to carry. They are big enough to fit a pair of sneakers along with clothing and other over-night items. The bags are a good size if you’re going on one or two night trips.
If you need more room, they will expand with the expansion zipper to 21 liters. This gives you a surprisingly large amount of additional space. Because of the curved bag shape, you can stuff small items, such as socks, into every available space. If you pack smart, you’d be surprised at how much you can fit in these bags when they’re expanded.
The main compartment is top loading and has a sturdy flap and zipper with two pulls so you can easily pull it open. It zips toward the back so the wind will not catch the edge of the cover in the wind. The zipper pulls are metal and include two holes so that you can install a small lock if you want to deter an opportunist thief while you’re away from the bike. Like all soft sided saddle bags, these are not theft proof, but, they are so easy to take off, there’s no reason why you would leave them on the bike overnight when you get to your hotel. However, it would be nice if there was some way to secure the bags to the motorcycle. While you can secure the opening, it would take a thief no more than a few seconds to run off with your bags. So, it’s best to keep them with you.
What Doesn’t Work?
Complaint #1: One concern I had was that the support arm or the brackets would bend or break if I dropped my bike. Luckily (?) I had the opportunity to test this theory when I laid down my motorcycle in the sand going about 20 miles and hour. The mounting brackets stayed solid and did not break or crack; the support arms stayed in place and did not bend at all. However, the quick release clip snapped in two and broke. It wasn’t surprised since these plastic quick release clips are usually the first thing to break on anything. To get past this, I tie the strap around my rear foot peg bracket to secure the bag. Currently, SW-Motech or their distributors don’t offer a replacement clip that you can purchase separately.
Complaint #2: The bags, whether expanded or not, are not big enough to carry a laptop, not even a 13″. That can be a problem if you want to use these bags to commute to work and you need to transport your laptop. You’d have to find a different way to carry your computer. They will, however carry a tablet computer such as an iPad.
Complaint #3: The top opening is a bit small. It’s not a huge problem, but if I want to store my riding jacket in the bag, it takes some doing to get it in there. And, the bag is not big enough to store a helmet.
Modifications
To eliminate the risk of theft, you can try to put the yoke of the bags under your seat rather than on top of it. This won’t work for every motorcycle because the yoke on these bags is one wide strap and it might interfere with your seats locking mechanism. I can say that it works on the CB500X so it will likely work on some similar bikes.
Some owners of these bags have noticed that the bags will rub against the paint on their framework even when they use the clear acrylic stickers that are provided with the kit to prevent this problem. This won’t be a problem with all motorcycles but some have experienced wear over time. So, some have found easy to modify the bags and add some extra protection at these contact points. One suggestion is to find a thicker clear adhesive, and apply it only to the points of contact. Another modification is to install a piece of soft padding to the bag at the point where the bag contacts the bike.
Modification to the friction points. People who own these bags have noticed that the clear tape provided with the kit does not last very long. It has a tendency to come unstuck over time and may not provide adequate protection for some motorcycle models. So, people have come up with some other ways to protect their paint when using the bags.
All-in-all, while these bags won’t be the best choice for everyone’s needs, they are a great solution for smaller motorcycles or sport bikes and for shorter trips. They leave plenty of room for a passenger to sit comfortably with the bags installed, and they expand nicely to carry a good amount of clothes, gear and personal items. Combine these bags with a tail bag or an additional top case and you’re ready for a multi-day camping trip or tour of the countryside.
Interested in these bags for you and your motorcycle? Follow this link to find a set for your motorcycle on Amazon.