Most motorcycle manufacturers suggest that the brake fluid be changed or flushed every 2 to 3 years, and the level should be checked approximately every 100 to 200 miles.
Air bubbles can infiltrate the master cylinder reservoir and affect the brake pads. The master cylinder should be filled with the right brake fluid. Fluid manufacturers recommend glucol based fluids and silicone based fluids for the master cylinder reservoir. Mixing brands and old fluid affect the master cylinder and hinder the flow of brake fluid regularly. The brake system and brake pads have a direct impact on the master cylinder of the motorcycle.
Obviously, according to the manufacturer, I’m a bit late in the brake fluid department, but, is it really necessary to change it that often? Why do they suggest this?
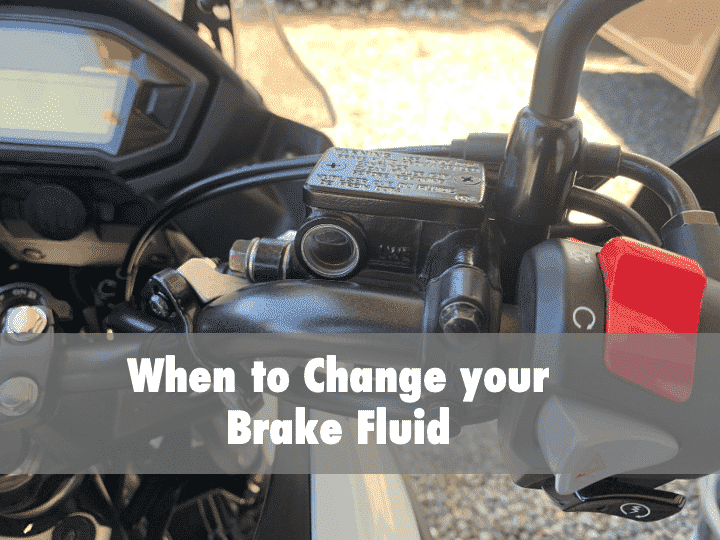
Why you Should Flush the Brake Fluid
Brake fluid doesn’t last forever. Over time, with constant heating, then cooling, it begins to degrade and because glycol based brake fluids are hygroscopic, it absorbs water. If the water content within the brake fluid gets to be too high, it can be less effective or can cause damage to your calpers, resulting in an expensive repair.
While not as common, sometimes a leaky seal, leaking hose clamp or simply not putting the reservoir lid on properly, can cause air to get into the brake lines. This will cause mushy and ineffective braking and the best way to get rid of the air, is to flush the brake fluid. Be sure to repair or replace any parts that may have been causing the leak in the first place.
Lastly, the brake fluid could become dirty or contaminated if the reservoir covers are removed without proper care in keeping the work area clean of dust and debris.
How to Check Brake Fluid Levels
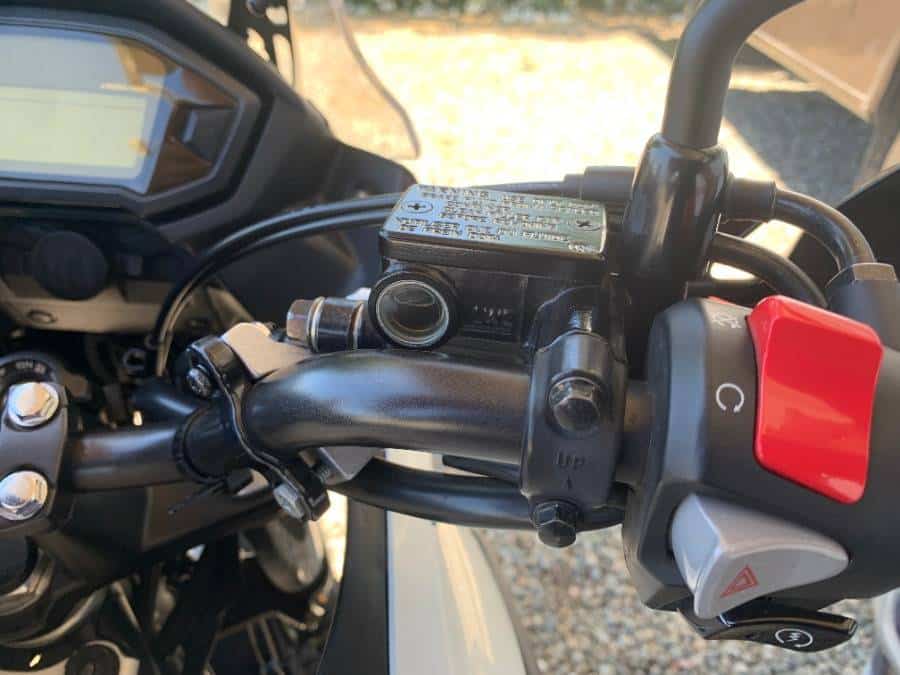
Every motorcycle will have two brake fluid reservoirs, one for the front brakes and one for the rear. The front reservoir is the easiest to find because it almost always sits on top of the handlebars next to the front brake lever.
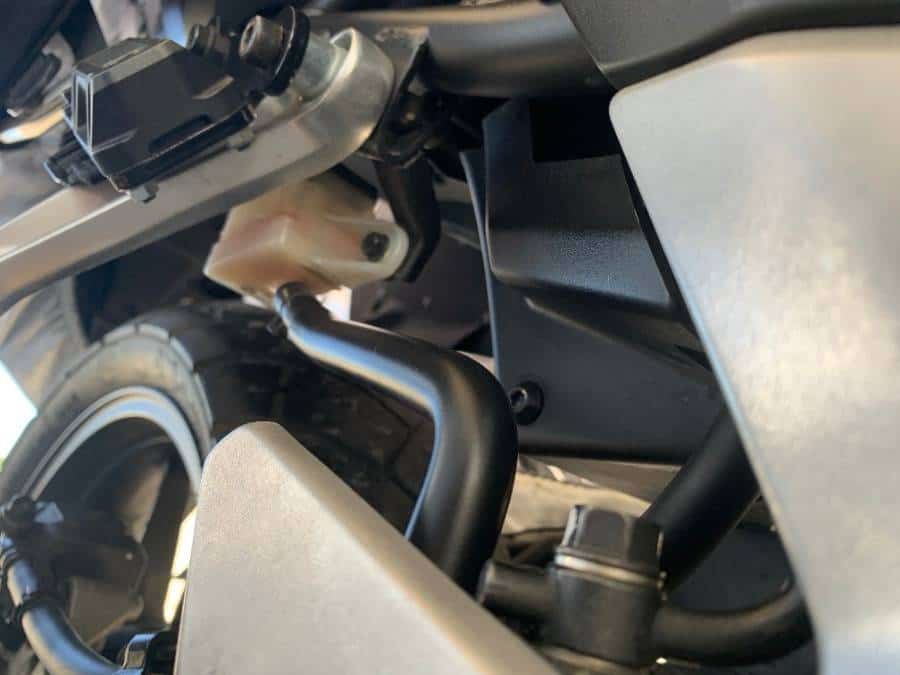
The rear brake reservoir location will depend on what motorcycle you own. It might be tucked behind body panels or behind the rear brake pegs, but they are often found fairly close to the rear brake and should be visible without taking off any parts.
The reservoirs can be round or square, some are opaque so you can see the fluid level at a glance, and some have a small, round window to check the level. All of them will come with two indicator lines on the outside of the reservoir. Your fluid level should always be between those lines. Never above the top line, and never below the bottom line.
When you check the fluid level, always make sure the motorcycle is standing upright so you get an accurate reading. Sometimes, to check the front reservoir, you have to turn your handlebars slightly to make sure the reservoir is flat, or level to the ground.
Each time your ride, or every week or two, do a visual inspection of both front and rear fluid levels. Top them off if necessary before you ride.
How to Top Off Brake Fluid
Topping off the brake fluid is quick and simple but there are a few precautions you should take. The last thing you want to do is get air or dirt into the fuel lines.
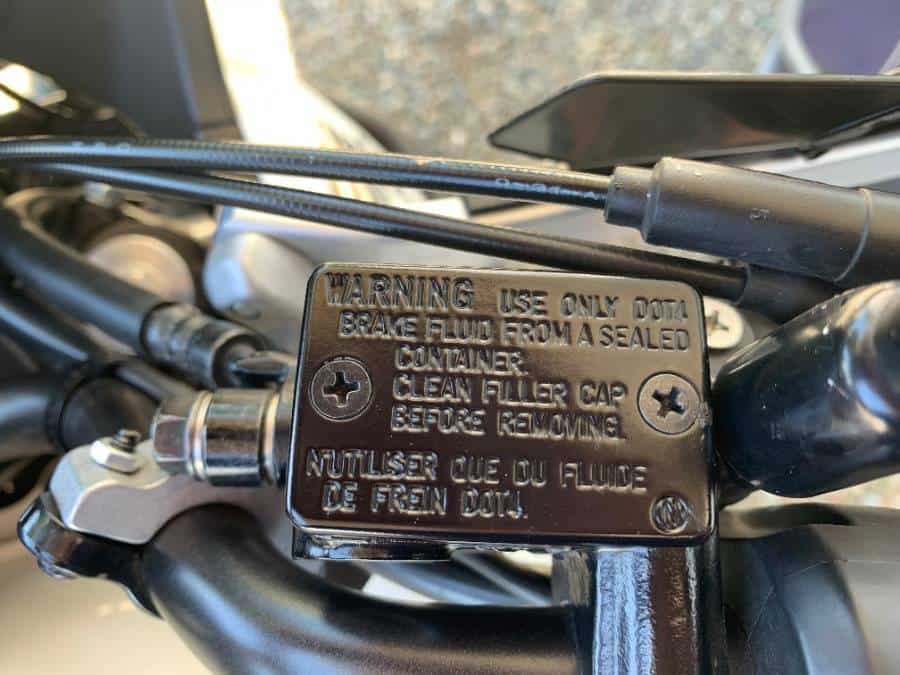
With your motorcycle level, place a towel on any painted surface to protect it from drips or spills. Remove the cap of the reservoir and set the cap on a clean, dust free surface. Some front brake reservoirs will have a lid that is secured by two screws. Simply remove the screw to get the lid off.
Next, remove the seal and inspect it for wear, cracks, or tears. Place it on a clean surface as well. Now pour a small amount of brake fluid into the reservoir until it is between the two indicator lines, closer to the top line, but do not fill it above the top line.
It’s important that you DO NOT compress the brake system when the reservoir cover is off and the bleeder valve is closed. The compression of the brake calipers could cause the brake fluid to overflow out of the reservoir. Messy. Brake fluid is very corrosive and flammable.
Once the reservoir is topped off to the proper level, carefully replace the seal and the lid, and you’re done. It’s as simple as that, and only takes a couple of minutes.
What Type of Brake Fluid Should You Use?
DOT 3, DOT 4, DOT 5, DOT 5.1? Which one should you use? The main difference between these brake fluids is their boiling points. Motorcycle brakes function at high temperatures and you want to reduce the risk of boiling the brake fluid as much as possible.
Usually, riders who demand high performance from their motorcycles will use a brake fluid with a higher boiling point. Those who race, or push their limits during a track day, will use their brakes heavily causing more heat. However, for a common or conservative street rider, the high boiling point is not as much of a factor.
Here’s a quick reference of boiling points for all four fluids.
| Dry boiling point | Wet boiling point | |
| DOT 3 | 205 °C (401 °F) | 140 °C (284 °F) |
| DOT 4 | 230 °C (446 °F) | 155 °C (311 °F) |
| DOT 5 | 260 °C (500 °F) | 180 °C (356 °F) |
| DOT 5.1 | 260 °C (500 °F) | 180 °C (356 °F) |
You can see that the boiling point for 5 and 5.1 are the same. What’s the difference? DOT 5 is a silicone based fluid while DOT 5.1, and all the others, are glycol based. People weren’t happy with the silicone base fluid because it was susceptible to creating more condensation in the lines. Glycol based fluids are hygroscopic (water absorbing) so, that’s why DOT 5.1 was developed.
In my opinion, based on the research I’ve done, use either DOT 4 or DOT 5.1. I personally keep it consistent and always use DOT 4 as I don’t need the high performance capabilities of the DOT 5.1.
A few precautions to take:
- Don’t use DOT 3 brake fluid in your motorcycle. The boiling point is too low which could result in brake failure.
- Never mix DOT 5 with ANY other brake fluid. It is silicone based while all other brake fluids are glycol based.
- Dispose of used brake fluid properly based on the waste and disposal regulations in your town or county. Do not dump it down the drain or on the ground. That’s just nasty.
How to Flush your Motorcycle Brake Fluid
Flushing your brake fluid is not a difficult or complicated job and can usually be done by most home mechanics. Bleeding kits like this one on Amazon are handy, but you really don’t need any fancy equipment to get the job done.
Tools and parts needed:
- Silicone tubing to fit over the bleed valve
- Bottle of Dot 4 Brake Fluid
- Container to hold old brake fluid
- Ring spanner wrenches to fit your bleed valves, usually 8mm
Steps for Front Brake
- Use the spanner to loosen the bleed valve but keep it tight enough so the fluid doesn’t come out. Leave your wrench on the valve nut.
- Attach the tubing to end of the bleed valve and make sure you have a good seal.
- Place the other end of the tube and place it in a container for draining.
- Remove the cover from the brake fluid reservoir and inspect the seal for wear. If there are holes or cracks allowing air or contaminants to get in, you’ll need to replace it.
- With a bottle of fresh brake fluid ready to pour into the reservoir.
- Next, you’ll pump the old fluid through the system while replacing it with new fluid. Do it exactly like this: Open the bleed valve with the spanner; squeeze the brake lever and hold it; close the bleed valve; release the brake lever. Do it just like that several times while keeping an eye on the reservoir. DO NOT LET THE FLUID GET TOO LOW.
- Top off the reservoir with new fluid.
- Repeat step 6 and 7 until you start to see the new fluid coming out of the bleed valve.
- Final step is to close off the valve, remove the tubing, do a final top-off of the brake fluid and place the seal and cap back on to the reservoir making sure there is no excess air.
Steps for the Rear Brake
The steps for bleeding the rear brake fluid are exactly the same procedure as for the front brakes. The only difference, depending on your make or model of motorcycle, is the accessibility of the rear bleed valve, the reservoir, and the ability to press the rear brake lever.
Sometimes it helps to get some help from a friend or grab one of your kids to come and push the lever for you. Also, the rear brake reservoir is often smaller than the front one, so make sure you keep a close eye on the level and top it off before air gets into the system.
Inspecting and Flushing your motorcycle brake fluid should be a part of your regular pre-ride inspection and a part of your annual, or 2 year maintenance plan. It’s a good idea to keep a supply of brake fluid in your garage if you ever need to top it off.
You can also find related products on Amazon. Follow the affiliate links below.