A thorough study was once conducted by the National Highway Traffic Safety Administration regarding the failure of braking systems on Harley Davidson motorcycles.
Out of the 43 cases that were studied, it was found that barring a few exceptions, the most common reason for the failure of the brake system is the riders’ negligence in changing the brake fluid every two years, as recommended by Harley Davidson.
The reason we started this guide on, “How to Change Motorcycle Brake Fluid”, with a small excerpt from the study is because most riders overlook this basic maintenance task on their motorcycles. When it comes to changing the motorcycle brake fluid, riders have the attitude, which goes like, “Why fix it when it’s not broken?
But this is quite dangerous as the soft and spongy brakes of your motorcycle could put you at serious risk when you need to stop suddenly, using firm brakes due to an emergency!
In this comprehensive guide, we will provide you with all the steps by which you can successfully and safely change your motorcycle brake fluid.
How to Change Motorcycle Brake Fluid
- Check Your Braking System First
- Get the Recommended Brake Fluid
- Get Your Equipment Ready
- Prepare Your Motorcycle
- Access the Master Cylinder Reservoir
- Attach Collecting Container
- Bleed the Brake Fluid
- Replace the Master Cylinder Reservoir Cap
Check Your Braking System First
Before you get into the crux of the matter, which is changing the motorcycle brake fluid, first and foremost you need to inspect the overall braking system of your bike to see whether the retainers, brake pads, brake lever, or brake-pad springs need any replacement or repair work.
This is important because if the pad’s material corrodes or is worn out, then it would be very unsafe to ride on that motorcycle in this condition.
This is because when you apply the brakes, their metal-on-metal contact creates a lot of heat and friction, which could damage your brake disc/drum or even cause an accident!
By doing these simple checks on the brake system with your eyes before getting down to changing the brake fluid on your two-wheeler, you can save yourself from facing serious problems later on. So, always start by inspecting your brakes first.
Get the Recommended Brake Fluid
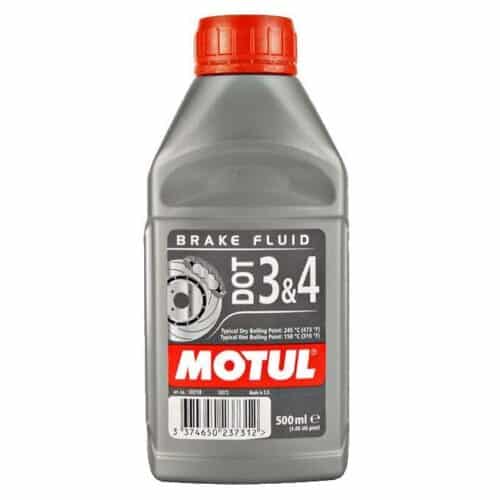
This is quite important as different braking fluids come in different chemical compositions. And you do not want to mix one type with another for you will be putting your bike’s braking mechanism at risk, with a mixture of different chemicals.
So, be very careful about the type of brake fluid you choose and if there is any confusion, fall back on the manual of your bike or consult the dealer as they will have the right answers. Also, you can find the recommended type of brake fluid stamped on the reservoir cap of your motorcycle.
There are usually 4 different types of brake fluids namely DOT 3, DOT 4, DOT 5, and DOT 5.1. The DOT stands for US Department of Transport.
Therefore, only settle for the type of brake fluid that is printed on your reservoir cap or recommended in your bike’s manual.
The boiling point of different brake fluids is different. As a rule of thumb, the higher the boiling point of brake fluid, the more resistant it will be in vaporizing.
So, settle for brake fluid types that have a higher boiling point, as choosing the right brake fluid is extremely important.
Get Your Equipment Ready
Now that you have given the overall condition of your brakes a check, let’s move ahead and get your equipment ready for there are some specific things that you will be needing to change your motorcycle’s brake fluid.
For the operation to proceed, you will need a jacking stand, wheels chocks, a collecting container, a rubber hose, freshwater, shop rags, a bleeding kit, which is basically a container with a clear hosing attached to it, different spanners (8 mm, 9mm, and 10mm), and some towels.
Prepare Your Motorcycle
Since you’ll be putting in new brake fluid in your motorcycle, it is advised that you place a few rags under the motorcycle so that any accidental spillage doesn’t do too much damage to the parts of the motorcycle beneath it.
Brake fluids are highly corrosive and inflammable chemical substances. Therefore, a few drops or small spillage can cause some serious damage to the body of your motorcycle, especially on its paint.
So, to be safe, you can also cover up parts and components of your motorcycle with additional rags and cloths just to reduce the risk of any drops of brake fluid falling on them.
It would also be helpful if you put some chocks on both wheels to prevent the motorbike from accidentally moving even by an inch while you work.
Access the Master Cylinder Reservoir
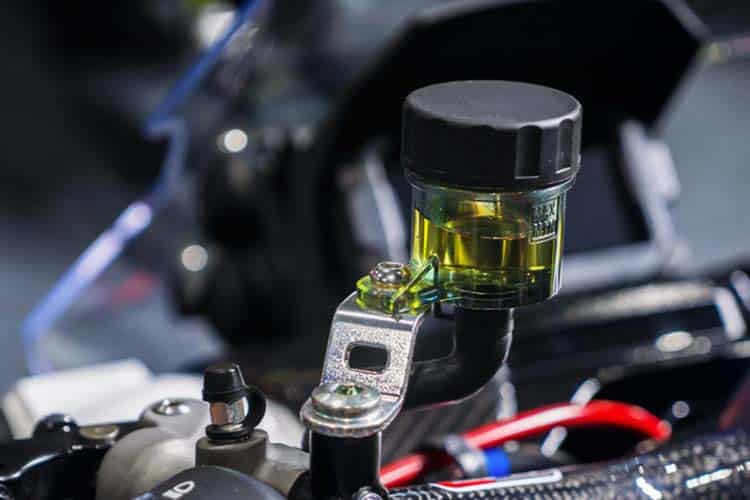
After preparing your motorcycle and taking the necessary protection, the first thing you’ll need to do is find the reservoir cap of your motorcycle, which generally has a specific location.
On some modern motorcycles, this reservoir can either be found on the top of the fuel tank or under it, near the belly of the bike.
This will let you gain access to where your brake fluid comes out from, without any hassle or fuss. However, if you are trying to change the brake fluid on older models that still have their reservoirs made up of metal tubes, then this step might prove a bit difficult for you because these metal tubes are very rigid and strong and their threaded caps can be hard to open.
Nevertheless, once you find yourself directly above where your brake fluid comes out from (e.g. on top of the metal tube), then remove this cap.
This will let you see into the reservoir and easily access your brake fluid level so that you can find out whether or not it is time to flush out what’s in there and replace it with new brake fluid.
In addition, if you have a transparent reservoir, you can also check how dirty your old brake fluid has become after being used for some time by simply inspecting its color.
However, do be careful and avoid any unnecessary contact with the parts of your bike that might get contaminated by touching them while working around your bike’s master cylinder reservoir because they contain toxic chemicals like lead and copper which are harmful to humans.
Attach Collecting Container
Now you need to attach a collecting container with the reservoir using a rubber hose. The next step would be to attach your collecting container to the clear hose that is attached to the bleeding kit.
This will let you drain out all of the old or contaminated brake fluid in your motorcycle’s master cylinder reservoir into the collecting container, where it can then be disposed of properly without any harm done to anyone or anything.
With this attached, you also need to make sure that both the end of the rubber hose and attached clear tubing are submerged in freshwater (or preferably distilled water), which is basically just one more safety measure put in place in order to avoid exposure to brake fluids’ harmful effects on humans and other living organisms.
Bleed the Brake Fluid
Now that your motorcycle’s reservoir is already filled up to its maximum capacity with fresh water, the next step would be to attach the end of the clear tubing, which is already attached to your collecting container into the bleeder valve.
You need to tighten this bleeder bolt down until you feel a firm resistance, then stop tightening it further because over-tightening will let out all the air from inside the master cylinder.
So, just make sure that any slack is removed from around these two components before you start bleeding brake fluid through them by opening up the master cylinder’s bleed screw.
Once done correctly, you should see some air bubbles coming out of both ends of the clear tubing as it passes through your master cylinder reservoir and into your collecting container.
Be sure to keep this entire setup in a completely vertical position because the first drop of fresh brake fluid draining from your motorcycle’s master cylinder will be contaminated and filthy with residual air bubbles inside it.
Therefore, if you spill even a single drop of this dirty new brake fluid on some other part of your bike or on yourself, then it would definitely end up being dangerous for you.
However, once you have successfully bled out all of that old or contaminated brake fluid from your motorcycle’s reservoir and replaced it with nothing but a clean and fresh one, you can go ahead and remove the clear tubing from the bleeder valve and attach its free end to the closed screw hole on your original collecting container.
Now just close the bleeder valve and remove the rubber hose from your cylinder reservoir.
Replace the Master Cylinder Reservoir Cap
Now that you have completely emptied out all of your old brake fluid and replaced it with a fresh one, it is time to make sure that no other contaminants find their way into this reservoir while you are driving around on your motorcycle.
So just replace its cap and take care not to open it again until such time when you need to bleed out some existing brake fluid from your master cylinder in order to top-up or check its levels.
Conclusion
To sum it all up, changing brake fluid is one of the most basic maintenance tasks that you need to do at least once every two years.
Being safe is not only about wearing the right gear and practicing proper riding skills but also about keeping your ride fit and healthy by giving it some good care.
Follow all the steps chronologically as mentioned in this article and you will find that changing your motorcycle’s brake fluid is a simple DIY job that you previously had no idea about.
Stay Safe and Always Take Care of Your Bike!