Every once in a while I will take a friend out riding with me on the motorcycle, however, my friend, whomever it may be, doesn’t always have a helmet. So, I have to sometimes carry the helmet with me. My motorcycle has a top case which makes it easy to store a spare helmet. But, I started thinking about all the other ways you can carry a spare helmet and I came up with 12 of them.
Cargo Net
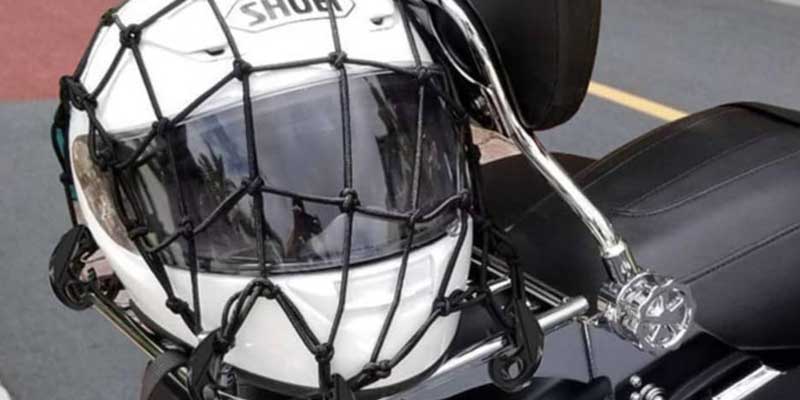
A cargo net is a woven net made of elastic cords with multiple hooks around the edges. They come in a variety of sizes with different style hooks, either plastic or metal with plastic coating; like a bungee cord. They are easy to use. You simply set the helmet on the pillion seat, throw the cargo net over it, and secure it to the motorcycle using the hooks. For a helmet, it’s best to get a smaller size net with smaller weave so it holds the helmet nice and tight. Make sure the strings of the net are placed evenly over the helmet so it doesn’t slip out. I’ve been pretty happy with this one from Amazon.
Modified Cargo Net
Some riders are not too crazy about placing hooks on their motorcycles and risking their paint or chrome getting scratched. One solution for this is to take the hooks off the cargo net. Remove the seat and hook one side of the cargo net under the rear seat and secure the seat back on the bike. Next, place helmet on seat and stretch the net over the helmet. Hook the other sides of the net at various points on the bike such as, around the rear foot peg, or under tail subframes spools. Potential problems with this method would be finding something to secure each point and will depend on what your motorcycle is equipped with.
Hook Under Passenger Seat
A lot of motorcycles come with helmet hooks under the passenger seat. There are a couple of ways to use this hook, but the best way is to hook the D-ring on your helmet strap over the hook, rest your helmet on the side of your bike, then secure the seat. A couple pro tips: the pull tab on one of the D rings will make it easier to get the ring on the hook. Also, be aware of where the helmet rests. If you’re riding, the helmet will likely move around and scratch your paint, so, consider placing a cloth underneath if necessary.
Strap it to a Back Rest
If you’re motorcycle has a back rest or sissy bar then you have a great place to secure an extra helmet. The easiest way is to simply secure the strap around a back rest post, however, the helmet is likely to move around alot while riding if you can’t get it tight enough. So, consider the additional security of a bungee cord or two.
Strap to Grab Bar
If your motorcycle has rear grab bars or hand holds, you could attach the helmet strap around it. Try and get it as tight as possible to reduce movement while the bike is motion. Also be aware that it could be resting on your bikes body work and you run the risk of scratching your paint. Of course, this all depends on how your motorcycle is designed. One last thing, make sure it’s not hanging so low that it touches your exhaust pipe.
Helmet Carrier Strap
Caddystrap, available on Amazon, is a nylon strap with two D-rings at one end. To use it, remove your rear seat, lay the strap across the bike, and secure your seat on top of it. Now, place the helmet on top of the rear seat with the chin strap together and tight. You can run the Caddystrap around the helmet’s chin strap, then pull it tight using the two D-rings.
Elastic Helmet Strap
This strap is similar to a cargo net, but it only has two hooks. Four strong elastic straps are gathered together and attached to a hook at each end. Secure the hooks to whatever is available on your motorcycle, such as grab handles or rear foot pegs. The four individual straps can be arranged to secure the helmet. The position of the straps is adjustable so you can arrange the straps to secure different helmet styles. You can pick them up on Amazon here.
Carry it on Your Arm
If you have absolutely no other place to carry a spare helmet while you ride, you could always slide it up on your arm. Hook the chin strap together, and slide the hemet up to about your elbow, like a giant elbow pad. This method would be ok for short distances, but I can’t imagine it’s the safest option. While it probably won’t impede your ability to control the bike, if you were to crash and land on that arm, I’d hate to imagine the bruises you’d have, if not worse. So, use this method at your own risk.
Backpack
Some motorcycle backpacks come equipped with a special pocket to carry a helmet. It’s a good thing that today’s helmets only way a few pounds so weight would not be an issue, however, the bulky size of a full face helmet seems a little awkward. But, I’ve never carried a helmet in a backpack while riding so I really can’t say. But, it’s definitely a viable method for transporting a spare helmet.
Oxford Lidlash Helmet Bag
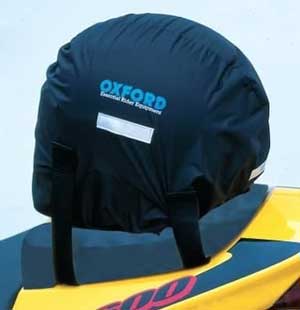
The Lidlash helmet bag is made by Oxford Products, a UK company that sells a huge variety of outdoor gadgets including cool motorcycle stuff. Basically, the product is a bag with straps. You place your helmet in the bag and the straps fit under the rear seat, securing the helmet to the top of the seat. They can be found in the US at lockitt.com, or, if you live in the UK, go straight to the Oxford products website.
Saddle Bags
This one’s easy. If you have saddle bags large enough to fit a helmet, you’re problem is solved. Whether your bags are hard panniers, leather, or canvas saddle bags, as long as it’s a big enough space, you’re good to go. However, if you have smaller saddle bags and you are carrying a full-face helmet, this might not be the best solution. I use the SWMotech Blaze saddlebag system and, unfortunately, the opening on the top is not nearly enough to fit a full-face helmet.
Tail Bag
When I bought my Honda CB500X used it came with a Givi hard tail case. I’m not too crazy about the way it looks so I leave it home if I don’t need it. But, I have to admit, it’s the perfect place to stow away a full face helmet. Plus, if I’m carrying a passenger, it serves as a nice back rest. So, a tail bag or hard shell top case is a great way to carry an extra helmet. The added benefit of a hard shell case is security, as it can be locked.
So, there you have it. There are plenty of ways you can carry a spare helmet if you need to. So, unfortunately, if you don’t want to ride with a passenger, you can’t use the helmet excuse.
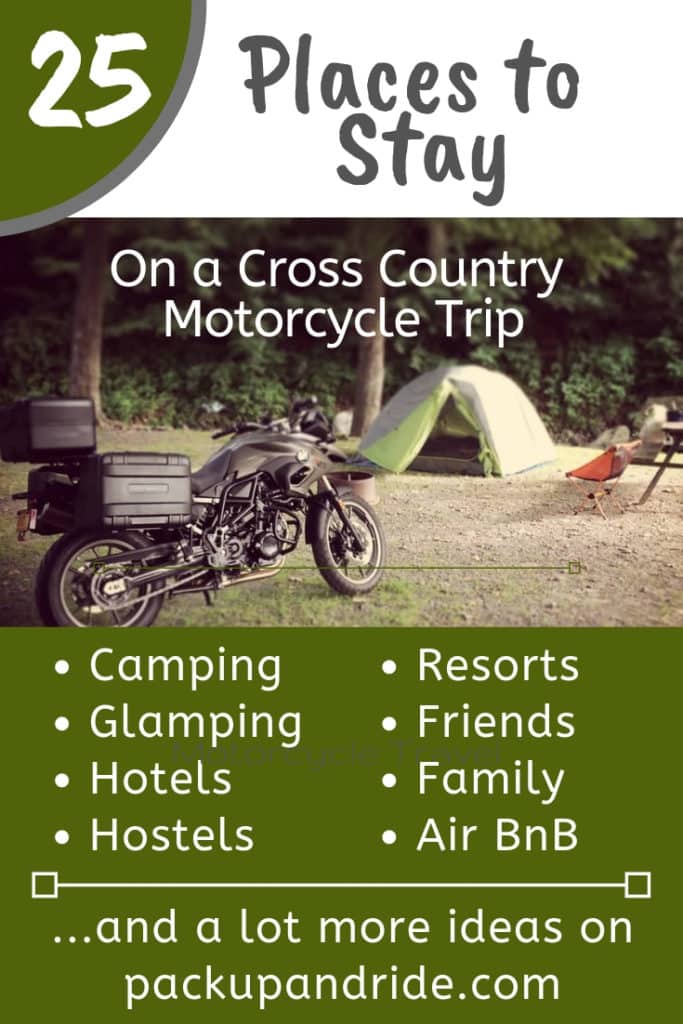
Riding your motorcycle across the country is going to include a lot of nights away from your own, comfortable bed. So, how do you decide where to sleep on a motorcycle trip? There is a wide variety of choices with varying levels of comfort and cost. Cross country motorcycle trip offers choices like camping, boondocking, fancy hotels, cheap motels, couch surfing, hostels, and a lot more.
A cross country trip on a touring bike is a great deal for riders. Aid kit, rain gear, tire repair kit and other essentials are necessary for traveling cross country on touring bikes. Save money on a road trip to the grand canyon or a glacier national park. Drive away from rush hour traffic into unlimited options for cruise control on two wheels. There are appropriate tools to guide riders to new places of camping across the countryside. Riders need to wear protective gear at all times during riding. Popular destinations include Southern California, Las Vegas, Washington State Park, Canadian provinces, New Jersey and more. Always carry granola bars in case of emergency and hunger. Bad weather can create a dangerous situation for a cross country motorcycle ride. Extra gear should always be packed for long stretches. There are many hotels throughout small towns. A cross country motorcycle ride or a motorcycle road trip is incomplete without a local gas station. There are fun roads in Salt Lake City and incredible locations for skyline drive in New Mexico, New Orleans and other places. Always carry bottled water, extra t shirt and remember to stay hydrated.
A cross country motorcycle trip or a motorcycle road trip is highly economical. It is important to keep a check for gas stations at all possible junctions to refill in case of emergency.
Where to sleep When Riding Motorcycle Cross Country Trip
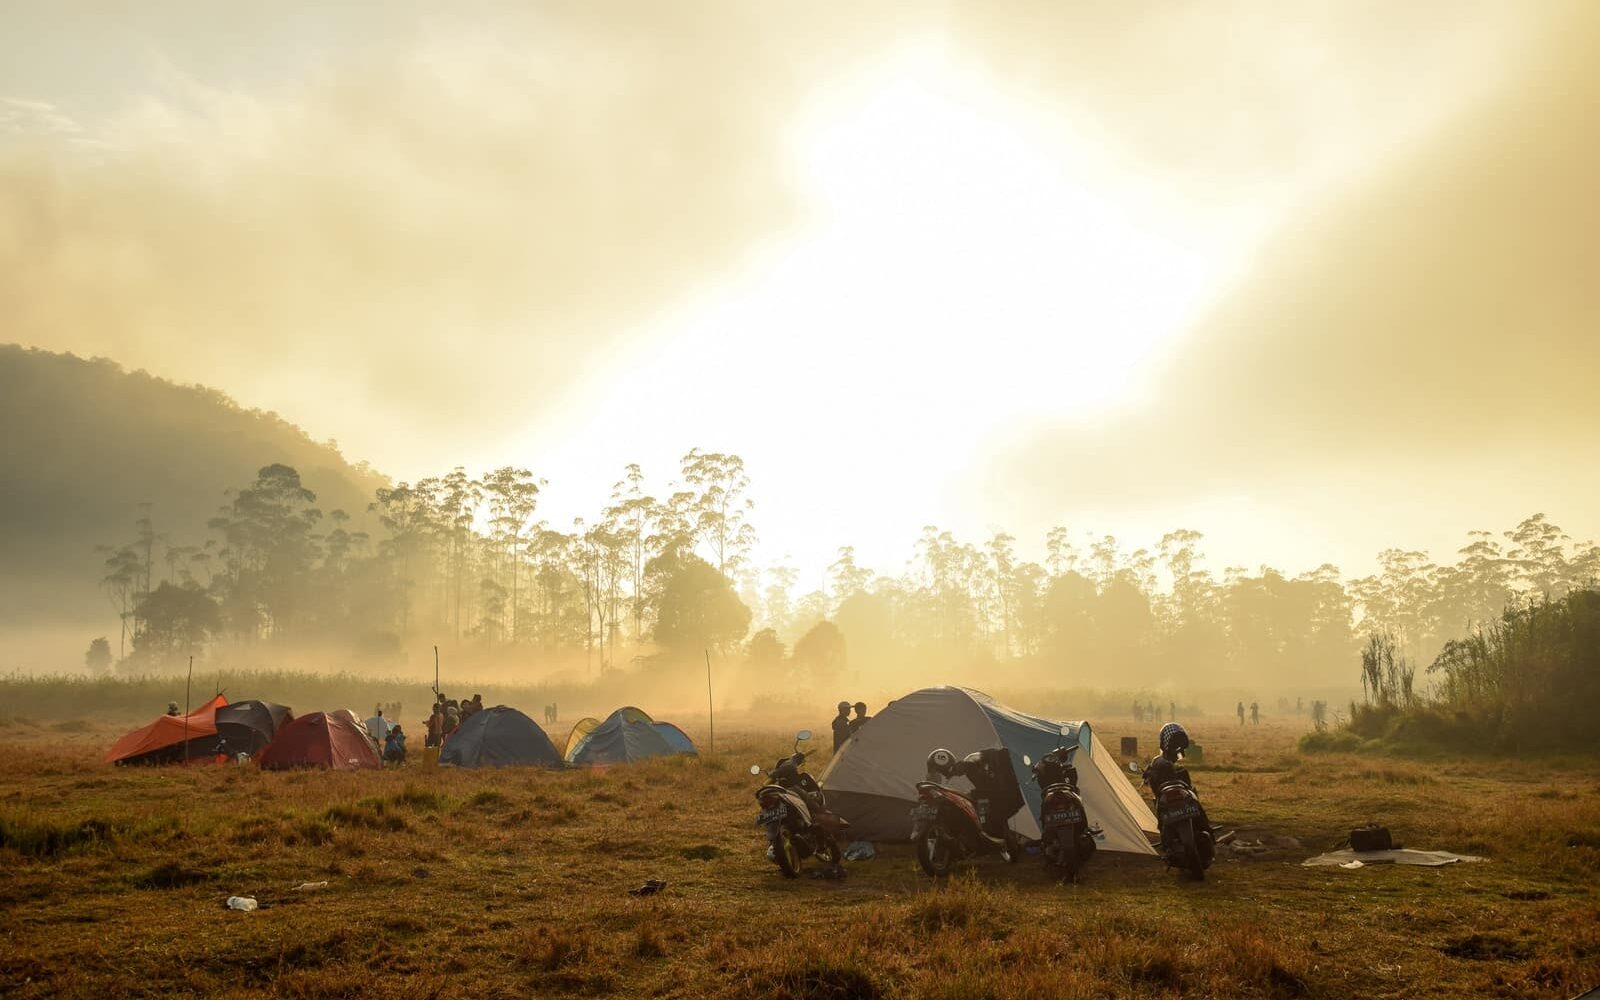
1. Camping in National Parks
A national park is a land set aside and protected by the federal government so that we all can enjoy them for generations. The US has some incredibly beautiful landscapes in the world and most are in a national or state park. These are places where you can enjoy mountains, deserts, towering forests, and grasslands. Entering national forests requires payment of an entrance fee and in some, more popular parks such as The Grand Canyon, the entrance fees can be up to $30 per vehicle. Luckily, fees for motorcycles are usually discounted and a pass is good for up to 7 days. If you plan to visit a lot of parks, consider purchasing an annual pass. Riding cross country is a thrilling experience.
National parks are more protected than other places and the rules for camping are a little more strict. You will be staying in an assigned, designated campsite with a picnic table, food storage locker, fire ring, and often a platform for a tent. You’ll find a designated area next to your campsite to part your motorcycle and it’s probably against park rules to park your motorcycle inside your campsite.
Campgrounds are patrolled by park rangers who are there to make sure your stay is safe and enjoyable but also to make sure the rules are being followed. They are authorized to give citations, so, make sure you know and follow the rules of the park. Most campgrounds require reservations well in advance, especially in peak seasons, and some may be closed for winter. So, if you want to camp, be sure to plan ahead. However, parks often have first-come-first-serve campsites as well. They are easily found on any map, digital or printed.
2. State Parks
Campgrounds within state parks are similar to a national park but on a smaller scale and they are funded and maintained by the state government. Each state will have its own regulations for its campgrounds as well their own process for making reservations. Again, depending on the popularity of the location, reservations may have to be made well in advance.
State parks also have first-come-first-serve campgrounds. Often these campgrounds can be a good bet if you didn’t plan ahead with reservations. On weekdays you will have much better luck finding a spot when you ride up. Check with the state’s park website to find all the information you need, where to go, entrance fees, and vehicle fees. Sometimes you can actually find these on google maps.
3. Privately Owned Campgrounds
Privately owned campgrounds can be found all over the country and can greatly range in size as well as in amenities offered. Some of these campgrounds can be found tucked away in a grove of trees close to a small town, while others can be found smack dab in the middle of a large suburban area. Many of them cater to the RV crowd but they often have sections set aside for tent only camping with no hookups and at a lower price.
You will often find a camp host that is either the owner of the campground or is employed by the owner. The camp host lives on-site and can help you if you have any issues or questions about camping there. They are often the ones you will go to for firewood. Because private campgrounds can be so different, you’ll find a wide variety of services for each one. Some will have flush toilets and free showers. Many have coin-operated showers.
You might find a small camp store which is great when you’re camping. There you can pick up snacks and often a cold beer. Most private campsites will be motorcycle friendly, but, if you don’t enjoy being surrounded by families in big RV’s, try for a tent site instead. The price for these campgrounds will depend on what kind of services they offer. The more services, generally the higher the price. But, most seem to range between $20 to $35 per night.
4. Dispersed Camping
Also known as boondocking, dry camping, or wilderness camping, dispersed camping is when you find a spot on public land such as a national forest, park your motorcycle, and camp. Keep in mind that you can’t just park anywhere and there are common rules that must be followed when camping. Check the local national forest information center to find out the rules and regulations regarding taking motorcycles off the main road in order to camp.
In some states, like California, you will need a permit to have a campfire and will be required to pass a short fire safety test to obtain that permit. This is common in dry states where the threat of forest fire is imminent, and I can’t stress enough how important it is to follow fire safety rules in drought-ridden areas. But, permits are free, easy to get, and can be found online.
There will be no services when wilderness camping. You will have to bring in your own food and water, you’ll have to dig a cat hole for your waste, and you will be expected to pack everything out, including all your trash. As a motorcycle camping enthusiast myself, this is the type of camping I love. Away from the crowds and noise, out in nature, and disconnected from the daily grind.
5. Roadside Camping
Camping by the roadside is similar to dispersed camping. You won’t find any services, picnic tables, bathrooms or camp host, and, like dispersed camping, it’s free. But, be aware that roadside camping doesn’t mean you can pull over at any point and set up your tent. That would be illegal as most roadsides are private property or owned by the city or county. Even in designated rest stops, you will find signs that specifically say “No camping”. And if you ever see a No Trespassing sign, don’t camp there unless you want a rude awakening and possibly dangerous situation.
If you are on public land, however, you can camp just about anywhere you like. Land that is managed by the Bureau of Land Management (BLM) or a national forest, or any federally owned land, is fair game for camping up to 14 days at a time. A good example of this is a section of BLM land off highway 10 just outside Joshua Tree National park. There’s literally nothing there, but you are allowed to camp there.
Follow the same rules as you would for dispersed camping. Bury your waste, pack out your trash, control your fires and put them out completely. Try to look for an area that has been used before and avoid trampling on nearby vegetation. Keep your campsite clean and store your food and toiletries away from your tent in a place where critters can’t get them. Also, practice common sense personal safety. These areas won’t be patrolled by park rangers.
6. Beach Camping
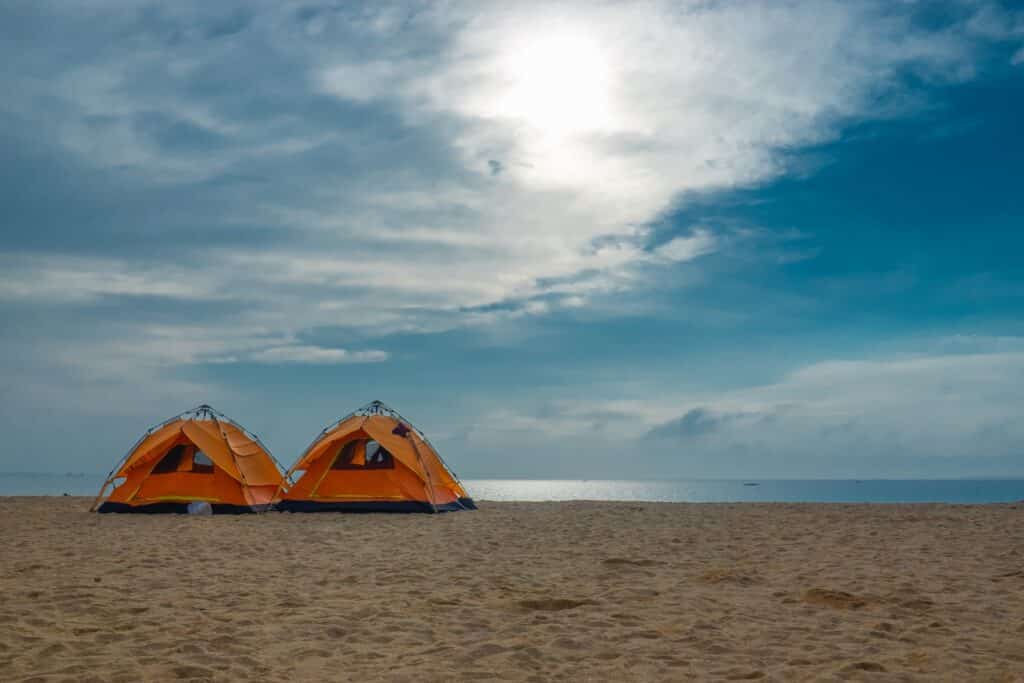
Beach camping can fit into all other categories like national and state parks, or private campgrounds. But camping on the beach is a whole different experience and everyone should try it at least once. There’s nothing better than watching the sun rise or set, depending on what coast you’re on, over the ocean and listening to the sound of the waves while you sleep.
Beach camping comes with its own set of problems, the main one being sand. You will get sand pretty much everywhere, in your tent, your shoes, your boots, your sleeping bag. Sand seems to show up in the oddest places. So, be prepared to shake everything out when you leave. Even if you don’t take your motorcycle on the sand, you might consider cleaning and lubing your chain after your beach stay.
Beaches can also be very windy especially in the late afternoon and you can expect fog or a lot of moisture in the morning. Make sure you use a rain fly and that your gear is covered and protected and that your tent is secured to the ground. Check with the local authorities to see if fires are allowed on the beach. A beach bonfire is an incredible way to enjoy the evening.
Beach weather can vary greatly depending on where you are and what season it is. All of my experience with beach camping is on the northern coast of California. It’s usually pretty chilly at night and summer brings morning fog. But, southern beaches are warm and sunny for most of the year. And it’s so nice to have a coast trip or if you’re in a group of touring bikes riding up the east coast.
7. Resort Camping
Resort camping could be considered the same as a private campground, but on a more upscale level, we’re talking luxury campsites at their best. I suppose KOA could be considered a resort-style campground, but there are others that are more luxurious. Resorts have extra goodies like swimming pools, spas, upscale cabins, often a restaurant on-site, private showers, and concierge services to take care of your needs. For long trips, resort camping is a cruisy way to spend the night after being on two wheels all day.
Keep in mind that resorts are more popular with RVers and some require a membership. This is where rich old people go with their million-dollar motor homes. Some can be expensive and not all of them will be motorcycle friendly. So, if you want to be pampered for a night or two, do some research for resort camping in the area you want to stay. Check all the fine print to make sure they allow motorcycles.
8. Glamping
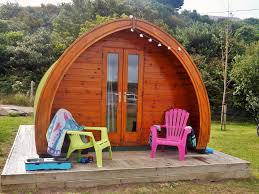
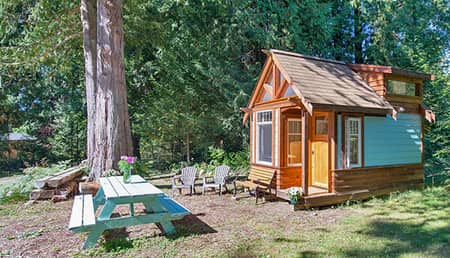
Glamping has become a buzzword in the travel world over the last few years. Glamping is glamorous camping or luxury camping. You will find them on privately owned properties and some of them will be tucked away in a beautiful forest, on the coast looking over the ocean, or in a desert valley. Glamping is for people who love the outdoors and would like to camp but don’t want the hassle of setting up, sleeping on the ground, and roughing it.
These campsites can come it a variety of themes and levels, of luxury. You could be sleeping in a large canvas tent, a yurt, a teepee, or a treehouse. In any case, you will be sure to have a comfortable bed and nice linens, sitting areas, maybe a deck, along with other perks such as continental breakfast, or even room service (or yurt service). Most glamping campsites will be motorcycle friendly, but always double-check when you make a reservation.
Like resort camping, this luxury comes at a price. The simplest glamping experience will probably cost around $150 per night and can go as high as $1500 a night and anywhere in between. But, hey, if you have the money and you want the experience, go for it.
9. Urban Camping
It’s possible that while on a long trip cross country, you find yourself in a town with absolutely no place to stay. Hotels are full, there’s no camping available, no rentals available, etc. This is a time when you could consider urban camping, also known as squatting. Whilst it might not be the most glorious cross country ride experience you’ll have, it’ll give you a memory for sure!
Keep in mind that it is illegal to camp in a non-designated camping area without a permit. But, a lot of people do it, and homeless people are forced into this lifestyle of squatting due to their situation. You could probably get away with one night of urban camping on private property as long as you are respectful of the area, quiet, and have no fire.
Some of the more acceptable places to camp in an urban area would be on the property of a church, or on the property of a business that allows boondocking, like Walmart. Often you can tuck yourself into a hidden area alongside a park, creek, a greenbelt, or by a river. Once you find a spot, be aware that you could, at any time, be asked to leave by local authorities. Even at 3:00 in the morning. If this happens, be respectful and comply with their requests, pack up and move on.
Urban camping can also be more dangerous since you are in an area that has more night time activity. You are more susceptible to criminal activity. As a woman on a solo trip (just you), I would only urban camp if there were absolutely no other option and I probably wouldn’t sleep very well.
10. Vacation Rentals
A vacation rental is a privately owned home, managed by a rental company, and offered to anyone who would like to stay there. They can be houses, cottages, cabins, condos, large or small and come equipped with dishes, cook wear and linens so you can make yourself at home. Owners of vacation rentals rely on the property management company to take care of the logistics of renting, maintenance, cleaning, etc. When staying at one, you deal with the management company and not the property owner.
If you’re interested in staying at one of these homes, your best bet is to turn to a website that manages reservations. Vacationrentals.com is a great start. The rental prices will vary widely depending on location and size. for instance, a studio apartment in downtown Chicago will cost more than a 4 bedroom house in the Sierra mountains. But, if you want a few days off while on your cross country motorcycle trip, you can feel like you’re at home again at least for a while.
11. Air BnB
Air BnB has become a very popular way for people to find a place to stay. They are similar to vacation rentals because they are privately owned homes, condos or apartments that are offered for short-term rental. There is no property management company and you will deal directly with the owner of the property for pricing, keys, maintenance requests, etc. The Air BnB website is simply a way to connect you with the owner and find a great place to stay.
It’s a good idea to read the reviews carefully. One important thing to know about these rentals is that the owner of the property or house is often present and living there. Some deals are for a single room in an occupied house. Some are for small cottages or pool houses in the backyard of an occupied home. Owners have the right to enter at any time and check up on the rental whenever they like. This is the number one downside I’ve heard from people I know who’ve used Air BnB. So, if you’re ok with that, you could have a great experience. Make sure you ask about the parking situation and if there is a safe place to park your motorcycle.
12. Motorcycle Festivals
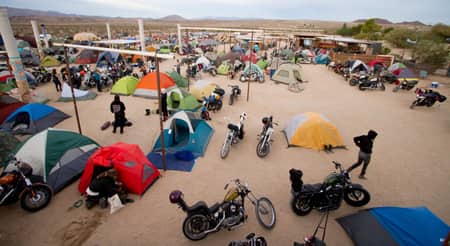
Babes Ride Out Women‘s motorcycle festival – Joshua Tree, CA
Wouldn’t it be great to coordinate your trip around the country to include Stergis, or Daytona bike week? Or how about women’s only festivals like Babes Ride out or The Dream Roll. There are small motorcycle festivals happening all over the country. Find one to join and camp with 1,000 motorcycles nearby. It’s a great way to make friends, share stories, party and listen to music and each festival brings its own special flair.
13. Home Sharing
Motostays.com is a home-sharing service that is designed strictly for motorcyclists. This membership website allows motorcyclists to offer up their home and their hospitality to other motorcyclists who are looking for a place to stay. The website is a vehicle to connect the homeowner with the rider who needs a place to stay.
Membership to Motostays is free and, get this, there is no charge for staying with a host. It’s based on sharing and hospitality and a common love of motorcycle travel. The website allows the guests to leave reviews about the experience and hosts can earn badges and a reputation for being great hosts. Also, staying with a local host give you the chance to meet other motorcycle enthusiasts and learn about some of the great roads in the area.
14. Couch Surfing
Couch surfing is another way to stay with a local host. You’ll share their home and it’s a great way to get to know the area in which you’re staying. Often people who are hosts really enjoy having out-of-town guests and are often open to showing their guests the sights and local attractions.
If you want to meet some great people and are willing to stay in a shared home, couch surfing might be for you. The couch surfing website provides a platform for hosts and guests to connect. It allows the guest an opportunity to leave reviews and report negative experiences, so, as a guest, you can feel more confident that you’ll have a safe experience and it’ll be more fun.
15. Upscale Hotel
Another option when you’re on a cross country motorcycle trip is to stay in a nice, upscale hotel. After a long stretch of camping and roughing it each night, it might be nice to spoil yourself and have a good night’s sleep. One of the perks of staying in an upscale hotel is the services you’ll receive. Nicer hotels have laundry services, not just washers and dryers. Stuff your dirty clothes in a bag and have them returned to you washed and folded.
Pools, jacuzzis, and spas are commonplace in nice hotels as well as fully equipped gyms so you can get a good workout in or a massage during your stay. They also have perks like room service and complimentary snacks. Depending on your travel budget, consider a night or two in a really nice hotel.
16. Budget Hotel
An inexpensive budget hotel will give you a decent place to stay on the cheap. These are places such as Motel 6, Econo Lodge, or Holiday Inn. Often these rooms go for less than $100 per night, often as little a $50. Stay at a budget hotel when you just want a place to sleep and don’t expect too many perks, although you might get a free continental breakfast out of the deal.
Accommodations can be hit and miss and towels and linens are generally lower quality, aka, scratchy. That’s why I usually pack my own, don’t get me wrong I pack light but my luggage rack always has a few things like a first aid kit, towel, rain gear, and a motorcycle maintenance kit. Because it’s zero fun getting stuck out without these things of a road trip.
When looking for a budget hotel for your road trip it’s recommended that you look at reviews on websites like Yelp to get a good idea of what you’ll get for your money. It’s often easier to find a room in a budget hotel without a reservation so it is an option when you roll into town that’s not on your itinerary.
17. Motorcycle friendly hotels
Some hotels, motels, and travel lodges recognize the potential for catering to the motorcycle community. These will be places where you won’t get dirty looks when you roll in loud, tired, and grimy from a long day of riding. Many mainstream hotels have adopted a new attitude towards motorcycle guests and now offer designated motorcycle parking and other perks like, wipe down towels or a space to do maintenance or clean your bike during your stay after your road trip.
Often motorcycle friendly hotels will allow you to park your motorcycle under the carport directly at the main entrance give you peace of mind that your bike will be safe at night. So, at any hotel, be sure to ask if you can do that.
18. Youth Hostels
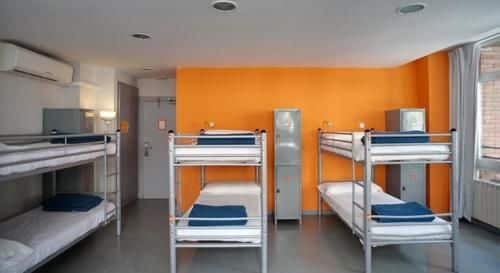
Youth Hostels are a unique and cheap way to find a place to sleep while you travel. Hostels can be found all over the world and they are most popular in big cities like Manhattan, Chico, or San Francisco. Hostels offer dormitory style shared rooms with bunk beds and shared bathrooms. These are usually used by younger tourists when on a road trip around the USA.
Or they offer private rooms at higher prices. Depending on the location, you can get a bed in a shared room starting at around $30 a night. In a shared room, if you’re traveling solo, you will most likely be sharing your room with strangers. You’ll claim a bunk and a locker, and ALWAYS lock up your belongings, and call the place home for a night.
A good hostel will offer gender specific dorm rooms or co-ed rooms so you have a choice. While accommodations are minimal, they offer other perks such as a communal kitchen, shared refrigerator, coffee bars, live bands, movies, and game rooms. And, you’re always bound to meet someone interesting from another country.
Because hostels are usually found in major cities, they may or may not have on-site parking. That may be a concern for some riders and can be a little expensive. I know for a fact that parking a motorcycle overnight in a San Francisco garage costs around $45 per night. So, keep that in mind if you choose a place to stay. Hostelling International is a great place to start.
19. Stay on a Farm
Consider staying a day or two on a working farm, ranch, or vineyard. Farmstayus.com is a website that connects guests with farm and ranch owners for a unique experience. You could relax and enjoy the sights, sounds and probably smells of a farm too. Do some fishing or horseback riding and if you want to really get involved, you can participate in the daily chores like, feeding the animals or milking the cows, or how about harvesting grapes on a vineyard.
Prices will range quite a bit depending on where you stay, but the experience might be worth it to work into your budget. Seems like it would be a great way to experience country life while on a tour of the USA.
20. Motorcycle Trailer
If you’ve got the right kind of motorcycle, you could consider hitching up a pull-behind trailer so you always have a place to sleep wherever you go. These things come in plenty of different sizes and layouts and some with tents that give you a surprising amount of sleeping and living space. It’s also a great way to pack your gear and belongings while you travel.
You will need to have a bigger motorcycle like a Harley Davidson Road King or Honda Goldwing or a larger touring bike to pull a trailer big enough to sleep in or convert to a tent camper. This takes motorbike camping after a long ride to another level.
21. Family and distant relatives
Do you have family scattered across the country? Personally, I have cousins and second cousins all over the place that I’ve never met. But, knowing my family, all I’d have to do is put the word out that I’ll be in town, tell them I’m so-and-so’s grandkid, and I know I’ll have a place to sleep, a home-cooked meal, and a chance to learn a little bit about my ancestry. Most riders I know going on a long ride at least two weeks will stay with some family along the way. But be careful, chances are you won’t be going to bed early!
And this works for more than just distant relatives. Maybe you’ve got an old college friend or military buddy that you haven’t seen in a long time. Get in touch and let them know you’ll be in town. Try not to impose too much and let them invite you to stay rather than you ask. Some will just want to have a visit, while others will open up their home. Don’t be insulted either way.
22. Stay with Church Family
Do you belong to a church community? My grandfather and uncle were both ministers in the Nazarene church and they knew a lot of other preachers around the country. I always felt that if I stepped into any Nazarene church around the country and dropped Grandpa’s name, I would have an instant family. So, consider contacting a local church in a town you’ll be visiting to see if someone would like to be a host family for a fellow church member.
23. Stay with internet friends met on forums
Motorcycle forums are very popular and a great way to make internet friends with a common interest; riding. Post up on a forum that you’ll be taking a long, cross country motorcycle trip. You’ll probably be surprised with the number of offers you get from your forum friend to stay at their place, or at least meet up while you’re in their town. They might even join you for a leg of the cross country trip. Make sure they have their own bike though, I would never pillion a cross country trip.
24. Apartment Hotels – Extended Stay
There are other types of hotels that accommodate people who will be staying for longer periods of time. If you plan on taking a week-long break in one place, consider looking into an apartment hotel. It’s similar to renting a condo, but you will have hotel services like housekeeping, on a daily basis just as if you were in a hotel.
Some hotel chains are designed for this type of travel. They’ll include kitchenettes so you can prepare meals and are often set up more like an apartment with a separate living area. These types of hotels may offer weekly rates that might be less expensive than a daily rate. Perfect for your next cross country motorcycle trip.
25. University Dormitory
This last suggestion is limited to the summer months. Some colleges and universities will allow the general public to rent a dorm room while the students are away on summer break. You can often get a room for as little as $25 per night. You’ll most likely have a room with a shared bathroom, but some of the newer dormitories have really nice accommodations. So, it’s certainly something to look into.
So, there you have it. 25 different places to sleep while on a cross country, or around the USA, motorcycle tour. Mix them up to fit them into your budget and get the best experiences during your journey. If you need help prepping for a camping trip on a motorcycle, be sure to check out our article by clicking here!
One of my dream trips that I’ve wanted to do for years is a solo motorcycle tour around the United States, and I plan to make that happen very soon. But the question is, how does one begin to plan for such a trip? Not everyone is brave or crazy enough to just pack up and ride without figuring out where they will go and where they will stay ahead of time. Also, if your time is limited, careful planning is necessary so you can see the sights and still make it back home on time and on schedule. Also, it’s better to arrange all of your riding maps, hotel confirmations, directions etc. with your free online itinerary.
In this article, we’ll look at 10 steps you might want to take to map out your route, calculate your miles and figure out where you will stop for lodging, gas, and sightseeing. Keep in mind that this is only one way of mapping out a cross-country ride. It’s how I have approached it, and hopefully, it will work for you.
1. Determine the Length of your Trip
This is an important first step because it will determine the length of your route and may limit the number of attractions or towns you can visit. If you are considering a tour of the entire country, from coast to coast and back, you will probably want to give yourself at least a couple of months to do it right. Just to give you an idea, it takes about 5 to 6 days to drive from New York to Los Angeles if you drive 8 to 10 hours a day or 800 to 1,000 miles per day, and that’s without stopping to see the sights. So, just the fact that you’ll be on a motorcycle will cut those hours in half. In addition, if you want to see any landmarks or get to know the towns you’ll be visiting, this will increase your travel time even more.
If you don’t have 2 or 3 months to dedicate to your ride, you can consider taking a shorter trip and enjoying a shorter route, one that covers a particular region of the country. A grand tour of the Pacific Northwest, or a tour of canyon lands and deserts of Utah and Arizona.
At this point, it’s also a good idea to consider what type of roads you’d like to ride. Do you want to limit it all to the freeway or interstate highway riding? Or, would you like to brake away from the highway and tour some of the less travelled roads? The type of road you select will also determine how many total miles you’ll be able to ride. Riding at highway speeds makes going from point A to point B a quicker journey. While riding through winding forest roads or narrow country roads will slow you down significantly.
The last thing to consider is the time of year you want to ride. Some parts of the country are limited by season. So, if you want to see the northeastern part of the country, don’t plan your ride in winter. If you want to see Death Valley and surrounding deserts, don’t do it in the summer, you’ll hate it. In fact, Death Valley campgrounds and hotels or accomodations are closed during the summer months because the valley floor in July regularly reaches temperatures of close to 120°F. The best time to visit the desert is in March and April when the wildflowers are in bloom. So, summer in the north and winter in the south.
One last tip is to always add a couple of days to your expected time, up to a week depending on your full trip length. This will allow you to relax and not feel in such a rush. It will also keep you prepared for unexpected downtime in case your motorcycle needs repairs or if you realize you just need an extra day of rest before getting back on the motorcycle.
At this point, set a date. Get all the approvals you need from your boss, spouse, kids, dogs and cats.
2. Decide How Many Riding Miles Per Day?
Not that you know how long your total trip will take, it’s time to break it down into average daily mileage. Determine how many miles you have ridden in the past. What’s been your longest day so far? How did you feel during the ride and after? You will want to avoid riding so many miles in one day that you begin to compromise your safety. Also, when trying to figure this out, you need to look beyond mileage only and look at how many hours you will be on the motorcycle, and how much energy you’ll be spending while riding. Twisty, technical roads will wear you out faster than cruising on the freeway.
When plotting out your route you’ll find that some days will be shorter than others due to the towns or sights you want to visit. This makes a long riding day easier to handle knowing that you’ll have a shorter ride the next day. But, too many long days in a row will take its toll, so keep this in mind when mapping out your ride.
3. Decide What you Want to See
This is a great time to get out a bag map, lay it out on the kitchen table and start a motorcycle trip planning. I like to use paper maps at this point rather than staring at a computer screen. A big map gives you a visualization of the big picture. A laminated map like this one on Amazon, along with a set of colored dry erase pens is the perfect tool for this step. This is your brainstorming session. At this point, don’t worry about mileage, just start marking all the points you’ve always wanted to visit. If you have friends or family that you want to see, mark it down on your map.
You can use different colors to determine “must see” sights vs. sights you’d like to see if you have time. If some towns will require more than one day’s stay, write down a number alongside that town on the map. Right now, you’re starting to build your route and it is soon going to take shape. This is the fun part. And at this point, you can mark down anything you want, any natural or man-made wonder you’ve ever dreamed of seeing, even the giant ball of twine in Cawker City, Kansas. Seriously.
4. Choose What Kind of Roads you Want To Ride
All right. Now you have a map with a bunch of stopping points on it. Now it’s time to string all those stops together. This is the point where you will start to determine what kinds of roads you want to ride on. A motorcycle trip is not just about the stopping points, it’s also about the scenery along the way. The beauty of the road, connecting with nature and not letting the world zoom past you is what these kinds of trips are all about. In my opinion, the freeways and highways should be ditched as much as possible. An open road journey or freeways won’t take you through quaint little towns or through great national parks. Although they may be necessary on some days, try to find a more exciting path. Determining the kinds of paths before going on a trip can help you to plan the most scenic motorcycle rides.
At this step, you can add some online research to your planning. Motorcycle rider forums are a great resource for finding amazing roads. The United States is full of legendary roads such as The Tail of the Dragon in North Carolina, or Highway 36 in Northern California, 140 miles of twisties, or Pikes Peak in Colorado. If you’re looking for some of these great riding experiences, it’s time to add them to your brainstorming map. Trace out these “must ride” roads in their own special color. (I know, this color coding thing may sound a little hokey but if you love maps and you love the planning process like I do, you’ll have a lot of fun doing it).
5. Plot Out a Preliminary Route
Now that you have points of interest and special roads you want to ride, go to your laminated map and start tracing routes between the sights you’ve circled. Keep in mind that this is just a preliminary route and you’ll be nailing down actual roads later in the planning process. So, don’t worry too much about accuracy. You can trace out the main highways, then look a little closer on the map to see if there’s an alternate route that will take you off the highway. Do this for every single sight or stopping point you circled on your map, even the ones that aren’t that important.
During this process of tracing a logical route, you’ll probably find a few stops that are going to be impossible to see without doing a bunch of backtracking and zig-zagging. This is where you’ll start eliminating those sights. Hopefully, that giant ball of twine won’t be out of the picture. That would be tragic. At this point, you’ve probably noticed why the laminated map and dry erase pens are so perfect for this step. Erase, re-draw, erase, re-draw. On a large map you won’t be able to see some of the more narrow roads, but at least you’ll get a good idea of which roads you’ll take to get from one point to the next.
6. Estimate your Daily Mileage
At this next stepyou will get your first opportunity to calculate your daily mileage. Using your map’s distance ratios scale, make a rough estimate of how many miles you will have to ride between each of your stopping points. Don’t be surprised if you’ve plotted so many attractions on your map that you will have to ride for a year to get them all in. This step is another point in which you will start eliminating some things and changing your preliminary route to match what you’ve determined to be your average daily riding time and mileage. If your average is 350 miles, then at every 350 miles on your route, make a mark on the map. On some spots on the map, you will determine that you can ride more or you can ride less in a day.
This step of the process is going to take a little more time than previous steps and will take a lot more thought along with some trial and error. Again, you’ll probably find yourself erasing and re-drawing, erase, re-draw, erase, re-draw. What you have now, standing back and looking at your giant map, is the rough route, rough mileage and roughly the number of days you will be on your trip. Count up the days and be sure to include the non-riding, sight-seeing, or motorcycle maintenance days that you’ve marked on your map.
7. Plot your Route on GPS
Motorcycle GPS ride maps can be handy while you plan for most scenic motorcycle rides. Now it’s time to get more detailed and start plotting your actual route using electronic maps, or GPS systems. A lot of people will automatically turn to satellite Maps for this step, which is a good resource for this step. But, there are other web based trip planners that do a good job in providing regional and road maps. Below are a few of the better route planning websites I’ve found.
Roadtrippers Trip Planner – It’s a great motorcycle trip planner for finding attractions, camping, hotels, lodging in a specific area
Trip Maker by Rand McNally – Services like customize a route and get calculated miles, total driving time and estimated gas prices make it a good motorcycle trip planner.
Harley Davidson’s Ride Planner – This is the leading online resource for planning a trip on your motorcycles. You can customize your route and decide to avoid highways. You can also download your route to a GPX file, which means GPS Exchange Format, for your navigation system. The map also shows you where the HD dealerships are located. For road planning and assistance while you are on a motorcycle road trip, download the mobile app as it aids in allowing you to utilize other options and route a longer ride.
The Open Road Journey Planner – A source of information for motorcycle riders looking for a motorcycle road trip planning, great roads, or routes. This ride planner will provide both long and short distance riders with plenty of alternatives and inspiration. Take a look at the reviews and the scenic photos from fellow bikers to pick the best route needed for your next road trip. Once you’ve made a choice, download directions to your GPS. Additionally, to let people know who the top dog is, the website awards motorcyclists as they complete rides and challenging tasks. In short, this motorcycle trip planner can help you by all means along the way.
Additionally, there are plenty of websites where you may find regional and road maps, GPS files, and other great resources for your long ride or a road trip planning. You can also find people who can help you to make your travel planning at ease. They can help you with data driven insights on accommodation trends. You can also check out outlets such as The New York Times, USA Today, LA Times and so on to learn about the motorcycle road trip planning and a perfect ride.
Use your big, paper map that you’ve marked up as a reference and start plotting out a route for each section. You can split it up day by day or route out a few days at a time. I find that it’s easier to build a route from one major city to another, then determine what the total is. From there you can divide the route up by mileage and day.
This is the point where you can zoom into the map and find the fun, scenic roads, off the main highways. Most maps start with giving you the quickest route even if you choose the “avoid highways” options. This is a good starting point. You can tweak the route to hit the roads and points of interest that you want to see.
At this point in your planning you want to take the time to map out each day’s mileage based on how many miles your are comfortable riding and based on what sights you want to see. Be careful that you don’t schedule too many long riding days in a row. Often when people plan out each day, they want to see so many things that they become over-ambitious. For every two long mileage days, schedule a short day or even a non-riding day in places where you want to spend some time seeing the sights.
Once you have each day, or each section mapped out, be sure to save each section of the route that you build. You’ve put in a lot of work so far and you don’t want to lose it. If you’re using Google maps, go to their website called My Maps, where you can save your own custom maps. If you use other route planning websites you will likely have to create an account to safe your routes.
8. Choose Lodging and Gas Stops
In the last step you chose a fairly detailed route with every road and turn. You’ve split up the route into days depending on how many miles you want to ride each day. Now you need to figure out where you’re going to stay each night and determine where your gas stops will be.
There is a wide variety of lodging and accommodations to pick from when you’re traveling with a wider variety of costs. This step will be determined by how much money you have to invest in the most scenic motorcycle rides. Hotels, motels, Air B-n-B’s are the more expensive accommodations, even if you prefer to stay at the less expensive ones. This can be easily done using a mobile app. Camping is a very affordable option depending on where you are and you can often find BLM land that you can camp on for free. Another option is couch surfing, something I’ve never tried, but people seem to have good luck with it. Whichever option you select, do plenty of research and read reviews of fellow bikers who have stayed at a particular hotel or campground. You can take a look at newspapers like The New York Times, USA Today and LA Times to find more information about motorcycle trip planning and a perfect ride.
A month or two before your big motorcycle tour, you may want to consider making reservations at places where you know it will be difficult to find lodging on the fly. I certainly wouldn’t do this for every stop or every night, especially if you’re on an epic month long trip, or longer. But, if you do make reservations will ahead of time, make sure you understand cancellation policies.
You will be making adjustments to your daily rides due to the availability of lodging. You may have to extend a day’s ride to get to a certain campground, or you may shorten your ride for the day. Again, be careful not to schedule too many miles in one day.
It’s a smart idea to mark now gas stops based on how many miles you can travel between fill ups. It’s nice to have a general idea of how far the next fuel station is so you know whether or not to top-off before leaving a town. If you will be riding on some out-of-the-way roads with few gas stops, you may want to consider carrying extra fuel. For tips on carry extra gas, read this article. Come to think of it, even if your planned route has a gas stop in a small town, it’s entirely possible that the gas station will be closed or no longer in service. This has happened to me in a few tiny Northern California mining towns. One station, closed on Sundays.
9. Research the Final Route
This is the point where you want to do some final research on your route and be ready to make a few adjustments. GPS navigation systems, satellite maps like Google maps are never 100% accurate. They don’t take into account things like rush hour traffic, dangerous neighborhoods, construction or road closures. So, don’t rely totally on GPS.
If your route takes you through some larger cities, take some time to do some research on those cities and consider traffic, rush hour, etc. Is it making you ride in a notoriously bad neighborhood? GPS map systems can lead you into places you might not want to go. Use the mobile app as a guideline and then do some research especially if your GPS takes you through a city. Keep working on the traffic patterns and the neighborhoods and check to see if there are any major construction projects going on that will create a delay.
While on your ride, you should take time daily to study the next day’s route. Look up information such as traffic, weather, road closures and construction. Make a note of the season and the probable weather in the locations you’ll be riding through. Watch the local news for local information that might affect your ride.
10. Be Open to Changes
Your route and daily itinerary should always remain flexible. Even though you’ve put a lot of work into planning each day of you ride, you have to be willing to change it on the fly. You never know what you’re going to encounter when on the road. You will face obstacles such as road closures, detours, traffic, or a sudden urge to take a side trip to see the giant ball of twine. So, always be willing to make impromptu changes to your journey and don’t stress over the fact that you didn’t stick to your plan 100%.
If you make sudden changes to your itinerary, be sure to notify someone of your changes, especially if you are traveling alone and riding solo. Maybe this should have been mentioned earlier in this article, but you should always give your ride itinerary to your spouse, a family member or a close friend before you leave, and update your itinerary with that person whenever you make changes. Also, sharing motorcycle GPS ride maps through the mobile app is a good idea when you are on a motorcycle tour. Always consider riding bikes with registered trademarks.
There are more factors to take into account if you plan to camp along the way than if you are staying in motels or any other accommodations every night. In case you face issues or adverse situations, there are a few products that can keep you protected. It’s better to pack products like a set of rain gear in case you find yourself in a storm. A tiny tool roll, some zip ties, can easily be packed and can be very helpful. Additionally, a modest tire-repair kit can come handy. Consider carrying water bottles and healthy snacks with less added sugar and a combination of dried fruit, and nuts as it can be very useful while you are on a road trip. After you’ve done all this planning, you can look forward to getting your motorcycle in peak travel condition, to deciding what equipment to bring, what clothes to pack. Also, consider riding bikes with registered trademarks and arranging all of your riding maps, hotel confirmations, directions, and more with your free online itinerary.
I hope this list of 10 things to do to map out the most scenic motorcycle rides has helped you in making your epic vacation a reality. Remember to always stay safe, trust your intuition, relax and enjoy the road.