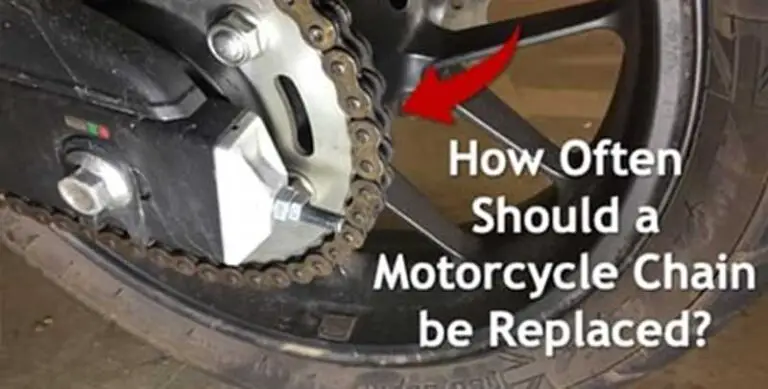
Chain maintenance is one of the first things you should learn about when you own a motorcycle. Without a well-fitted and properly lubricated chain, there’s no way to transfer power from the engine to the wheels. But chains wear out over time and need replacing.
So, how often should a motorcycle chain be replaced? In general, a properly maintained motorcycle can last 20,000 to 30,000 miles, sometimes more. But, some last as little as 5,000 to 10,000 miles. This difference is due to the type of chain, how and where you ride, and how well you maintain it.
Type of chain
Older style chains that do not have O-ring or X seals will not last as long as modern chains with seals. They are more difficult to keep clean because dirt and moisture can get inside the pins and rollers. If they are not constantly kept clean and properly lubed, they will not last the 30,000 plus miles that a sealed chain will last.
O-ring and X seal chains are designed to keep dirt and moisture away from the pins and rollers and to keep a special lubricant inside. As long as you use cleaners and lubricants that do not deteriorate those seals, your chain will last a long time.
Type of Riding
Riding in rough conditions, such as off-road, doing water crossings, or riding in mud or sand, will make it more difficult to clean and maintain the chain and possibly lessen the life of your chain.
Also, excess stress on the chain and sprockets due to racing, track days, constant high speeds, will cause the average chain to wear more quickly. It’s recommended to upgrade to a high-performance chain and sprocket set if you do a lot of track riding or racing.
Chain Maintenance
It goes without saying that improper chain maintenance will cause your chain to deteriorate much sooner. Regular cleaning and lubricating of your chain are probably one of the most important maintenance items you can do, so, clean, lube, inspect your chain on a frequent basis.
Signs that Your Chain Needs Replacing
Chain inspection should be a part of your pre-ride check inspection. It’s just as important as tire pressure and oil level. There are a few things to look for that will tell you when your chain needs replacing.
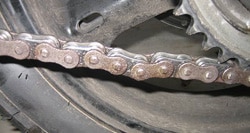
Rust
Rust can form fairly quickly if your motorcycle gets wet and the chain is not properly lubed. A little surface rust does not always mean your chain is completely ruined, but if the pins and rollers are also rusted, it likely means the seals are bad. In that case, it’s time to replace the chain.
Kinks
Look for links that are stuck causing kinks in the chain. Kinks indicate a weak point where the seals are no longer keeping dust and dirt out of the pins. This weak point is at greater risk of breaking and can cause excess wear on your sprockets.
Noise
A normal chain will make a little noise, but it’s smooth, not clunky. If your chain is making a rattling noise or squeaking, it’s a sign that it needs your attention. If normal cleaning and lubrication don’t get rid of the noises, then replacement is recommended.
Over-Stretched
Chain stretch is normal over time, but there is only so far a chain can stretch before the links are weakened. In fact, the word “stretch” is sort of a misnomer. Your motorcycle isn’t actually pulling a chain hard enough to physically stretch the metal. Instead, the holes where the links attach to each other wear and get slightly larger over time, so the chain appears to expand. In any case, if you find that you can no longer adjust your chain to the proper tension, it’s time for a replacement.
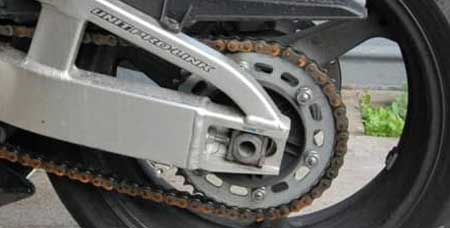
Here’s a good method for checking to see if your chain is stretched too far. For safety, make sure the motorcycle is OFF! With one hand, press down on the top of the chain to add tension. Then check the chain tension around the rear sprocket. The chain should be tight equally, all the way around the sprocket. If portions of it are loose, that means the chain is stretched.
Here’s another way to check to see if your chain is stretched. When your chain is new you should measure the distance between 100 links. Write it down and whenever you take the chain off to clean it measure again. When you can only fit 99 links in the same space you need to change out your chain and sprockets.
How Dangerous is a Worn Out Chain?
Does it really matter if you ride on a worn chain and sprockets? The honest answer is yes, it matters a great deal. A broken chain while riding can be extremely dangerous.
The best case scenario is when the chain breaks, you lose power, and simply pull over to the side of the road and call for a tow.
In the worst-case scenario, a broken chain can be potentially lethal, especially if it causes you to crash at a high speed. Imagine cruising at 70mph, your chain breaks and gets tangled in the rear wheel, ceasing it up.
Another possibility if for the chain to whip around your legs, ankles, and feet, potentially causing injury. Proper riding boots will help, but, any unprotected ankles or feet could end up cut or broken. Ouch.
A broken chain can be flung from the motorcycle into traffic, causing a hazard to other drivers. It’s easy to see why a broken chain is the last thing you want on your ride.
Replace the Sprockets Too? Yes, or No?
A common rule is to replace both front and rear sprockets every time you replace your chain. This is a good rule to follow if your chain has lasted for its full life of, say, 15,000 miles.
But, sometimes a sprocket replacement can wait in cases where you’re replacing a prematurely worn chain. Nevertheless, you should inspect your rear sprocket for signs of wear during normal motorcycle maintenance days.
If you were to replace your chain and keep your old, worn-down sprockets, it will wear out your new chain faster. Likewise, if you replace your sprockets, without replacing your chain, both will wear out prematurely.
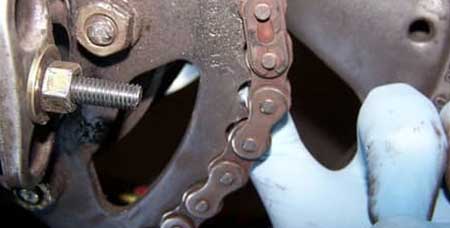
Check for Wear in the Sprockets
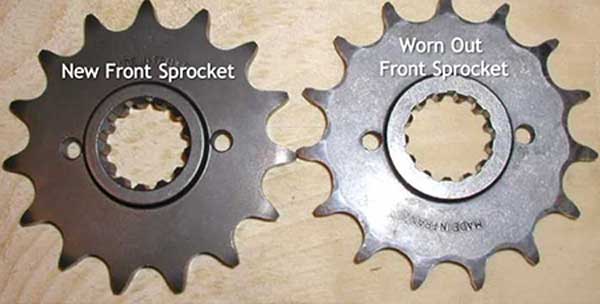
So, how can you tell if your sprockets need replacement? Sprockets have three really obvious clues to tell you it’s time for a change. You should replace your sprocket:
- If your sprocket is bent or warped.
- If some of the teeth are broken off.
- If the tips of the teeth look sharp and come to a point.
- If the teeth are more curved in one direction, causing a wave like shape.
The teeth of a good sprocket should be evenly shaped, with equal space in between each tooth, and should have a flat spot at the tip, not a point. In the image below, notice how the worn sprocket teeth have a wave-like shape to them.
It would be more accurate to say it’s gaining unwanted flexibility, but you don’t need to get technical as long as you understand why a ‘stretched’ chain is bad and how to spot it. When your chain is new you should measure the distance between 100 links. Write it down and whenever you take the chain off to clean it measure again. When you can only fit 99 links in the same space you need to change out your chain and sprockets.
New chains can often be purchased in kits that include both sprockets and you can often upgrade to a better quality chain than the original OEM chain/sprocket set.
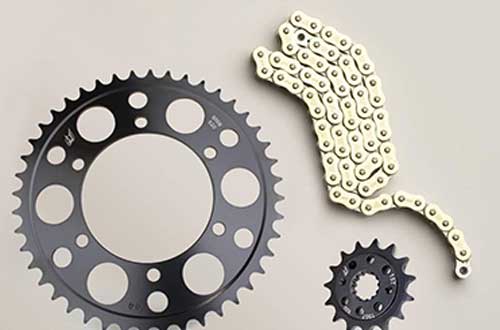
If you purchase your chain and sprocket set on Amazon, like this Driven Racing Gold RK 520MAXX set, be sure you are purchasing the correct size for your year, make, and model of motorcycle.
Proper Chain Maintenance
Keeping your chain clean, properly lubed, and adjusted will extend the life of a chain by thousands of miles. It’s good practice to quickly wipe down your chain after a long day of riding, (more than 100 miles) then give it a quick spray of chain lube.
In general, you want to lube after riding while the chain is still warm. This gives the lubricant time to set into every crevice and lets any excess fluid evaporation happen before your next ride.
You will want to do a thorough cleaning of the chain and sprockets every 500 to 600 miles, or when it just looks nasty and dirty, even if you haven’t ridden that far.
Additionally, you should always wipe down and lube your chain after riding in the rain. Don’t let it sit in the garage wet, as rust will start forming before you know it.
For a complete walk-through and video on how to properly clean and lube your chain, check out this post: Can I Use WD-40 on My Motorcycle Chain?
How to Replace the Chain and Sprockets
Changing out your own chain and sprockets is a fairly easy job, but there are a few things about it that can be tricky and require some specialty tools and maybe help from a friend.
If you’re new to motorcycles, or if you usually take it to the shop, you’ll find that doing the maintenance yourself is incredibly satisfying. Not to mention, you never know when you’re going to need DIY skills.
Below is a list of tools needed, with links on where you can get them.
- Rear Wheel Stand like this PitBull Stand, or put your bike on its center stand
- A Motorcycle Chain Breaker set
- Spare Cotter Pins if your rear axle requires them
- Socket that fits your front sprocket nut
- Impact wrench, or, if you don’t have an impact wrench, get a breaker bar for the socket and an friend to help with this step.
- Motorcycle chain lube or chain wax, whichever you prefer – Like this stuff
- A piece of wood that fits through the rear wheel
- Having your phone camera on hand helps when you need to note exact positions.
Below is a very quick and simple walkthrough of the steps. If it’s your first time, keep your service manual on hand in case you need a quick reference.
- Set your bike up on a paddock stand or it’s center stand. This will allow you to remove the back wheel.
- You’ll need to remove the front sprocket cover. If your gear lever needs to be moved then do this and make sure you know where the position of the splined boss that bolts to the shaft is. If you have trouble with remembering these details use a cell phone camera or another digital camera snap a fast shot for later reference.
- Remove the nut, which is either a tabbed locking washer or self-locking. If it is tabbed you’ll need to use a punch and hammer or screwdriver to push the tab back.
- A piece of wood inserted through the back wheel will keep the wheel from rotating. You can wrap it in a soft cloth and make sure it rests against the rear swingarm. If you have a helper, you won’t have to use the wood to keep the wheel from rotating. Instead, have them press on the rear break while you remove the front sprocket nut.
- Use an impact wrench or breaker bar to remove the nut on your front sprocket but leave the sprocket in place for now.
- Take off the back wheel. Note: when you lay the wheel on the floor, place it on top of two pieces of wood to keep the brake disk off the ground. This well prevent accidental bending of the brake disk.
- Undo and remove rear sprocket nuts and the sprocket.
- Replace rear sprocket.
- Replace the front sprocket and wrap the OLD chain around it.
- Loosen the chain adjusters at the swing arms.
- Refit the wheel and old chain without tightening your spindle nut.
- Using the chain breaker tool, split the old chain now, but do not remove it from the bike yet. Instead, connect it to one end of the new chain.
- Use the old chain to pull the new one around your new sprockets and then dispose of the old chain.
- Connect the new chain with your riveting tool. This is part of your chain breaker tool.
- Place the front sprocket nut back on and tighten it with the wood back in place on the rear wheel, or with your partner pressing the rear break. Tighten the nut to the required torque settings for your motorcycle.
- Finally, adjust the tension on the chain and tighten down the rear axle.
Your final steps include a quick inspection to make sure you didn’t miss anything. Re-install the front sprocket cover and chain cover. Take the motorcycle out for a short, slow test drive and inspect the chain once again to make sure everything is working properly.
To wrap it up, keep in mind that proper maintenance of your motorcycle chain will make it last a long time, and means your motorcycle will run smoother and be safer. If you’re interested in reading more articles about motorcycle maintenance you might want to check out our article How Often Should Motorcycle Brake Fluid be Changed?