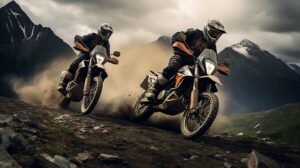
Many young riders are deterred from wearing helmets because they do not look cool. This is an extremely unwise decision to make because the looks of a helmet have nothing to do with its protecting capabilities.
If you are riding your bike without wearing a sturdy helmet, you are endangering your life and compromising your safety with each and every second you spend riding on your two-wheeler.
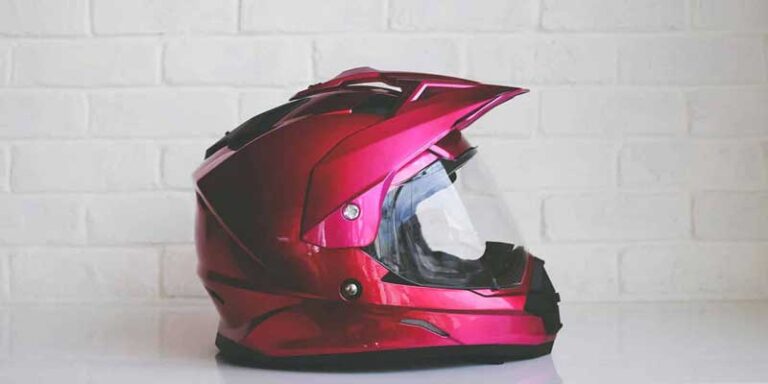
However, for the wise ones who want to ride their motorcycles safely by wearing their helmets we’ve got good news for you. If your helmet has gone old and you want to do a paint job on it, this guide is what you need.
We are providing you with all the steps that you can undertake to give your helmet a new stylish look so that it can complement your bike along with your dashing personality.
Step by Step Guide to Paint a Motorcycle Helmet
- Get all the Tools & Disposables
- Disassemble the Helmet
- Prepare the Helmet for Painting
- Mask the Pattern (if needed)
- Apply Primer/Undercoats
- Add a Guide Coat
- Apply the Paint Colour
- Paint the Visor to Improve Vision (if needed)
- Add Multiple Colours (if needed)
- Add a Clear Coat
- Unmask Carefully
- Reassemble the Helmet
Get all the Tools & Disposables
In order to paint a helmet, you will have to gather some tools and disposables. The list of these items is as follows –
Self-explanatory Disposables: Gloves – Latex/Rubber Solvents/Sealers – Mineral Spirits Newspaper Masking Tape – 3/4″ or 1″ Rags – For masking tape
Tools: Hacksaw Zip Tie Drills – Screwdrivers Punches – Paintbrushes – Foam Roller Tray – Squeegee Brush Applicator – Sponge Sandpaper – Coarse & Fine Scotch-Brite Pad Putty Knife Face Shield Pliers- Masking Paper (Optional)
Disassemble the Helmet
The first thing that you need to do is to disassemble the helmet. This process may vary according to the type of helmet that you are working with. However, generally speaking, most helmets have a simple design that can easily be dismantled in order to paint it.
Take off all the decals and stickers on your helmet because once you paint them they will not look good anymore.
You will need to get rid of all the things like strap clips, vents, etc which are present on your helmet before painting it.
Prepare the Helmet for Painting
Now you need to prepare your helmet for painting by removing small parts like screws or nuts if any parts are still attached to your motorcycle helmet after disassembly.
You can use drills or punches even screwdrivers for this purpose depending on what type of bolts your helmet has.
Next, you should sand the surface of your helmet to get an even finish before painting it. You can use sandpaper that is coarse or fine depending on how smooth you want your helmet to be after painting it.
Also, note that if there are some areas on your helmet which need to be smoothened more than others, make sure to give them extra sanding time while working on other parts as well.
Mask the Pattern (if needed)
This step is only necessary in case you are looking for a custom paint job with unique patterns and designs over the entire surface of your helmet instead of just applying one single colour all over it.
If this is not the case with your helmet, then you can skip this step.
First, use a grease remover or basic cleaning detergent to remove all dust particles and the existing paint. Add a clear coat of base paint to cover the entire helmet surface.
If you do need to mask the pattern of your helmet, make sure to use masking paper for this purpose because it is a very difficult process and will take a lot of time. This is why we recommend that only professional painters should try this technique.
Apply Primer Undercoat
Primers are used for preparing a surface before painting it by filling up all the small holes and crevices in it so that paint can be applied evenly.
Always wear latex gloves for protection. You can use spray paint, wet paint or fresh paint to design your helmet’s base material. Two or three coats for the whole helmet will give you a finished product.
In order to prime your motorcycle helmet properly, just add some primer or undercoat on the areas which have been sanded previously and then let them dry before moving on to the next step.
Add a Guide Coat
The next step is to apply a guide coat so that you can easily paint your motorcycle helmet later on.
For this step, first, dip some foam brush into some white spirit or mineral spirits and then spread it evenly on some newspaper using the brush. Once done, lay this coated paper onto the surface of your helmet and let it dry for about an hour.
This will make sure that primer or undercoat remains on the surface instead of getting absorbed by the spray inside your helmet.
Apply the Paint Color
Now you are ready to use paint for the motorcycle helmets.
Simply follow all safety procedures while doing this like wearing gloves and applying masking tape around areas where you don’t want to apply paint.
Also, remember that if you are using spray paint it would be better to apply multiple light coats of colour instead of applying one thick coat.
Paint the Visor to Improve Vision (if needed)
If you are painting your helmet visor, make sure that you use a primer for this purpose, or else it will not stick on properly with the paint.
However, if possible try keeping the original colour of your visor intact because changing its colour can actually reduce visibility while riding at night.
Once done, apply some protective lens over it to avoid any damage in the future due to sunlight effects on the newly painted visor.
Add Multiple Colours (if needed)
If you want to add multiple colours to the helmet, then the best technique is to use a basic coat of colour as an undercoat and then add other colours on top of it later.
In order to do this, first, apply a base paint all over the surface including visible vents and screws or nuts. After it dries up, simply follow the same steps as mentioned above for applying paint to make sure that there are no bubbles in between coats.
Add a Clear Coat
Finally, use a clear coat to protect your helmet paint job.
Clear coats are highly recommended for this purpose because they not only make the surface look sleek but also provide extra protection against dust, sunlight, wind, and other factors which can damage your painting over time.
But make sure that you are using a UV-resistant type of clear coat in order to avoid any problems with exposure to ultraviolet rays.
Unmask Carefully
After letting the helmet dry up for about a whole day, carefully remove all masking tapes and papers from your motorcycle helmet.
Use a heat gun if possible or a hair dryer to dry the painted surface of the helmet.
Then inspect your helmet carefully to see if you have done a good job or not.
Reassemble the Helmet
Finally, reassemble your motorcycle helmet by adding all the nuts and bolts back in their respective places working from inner to outer.
But make sure you tighten all these screws before using them because if they are lost during riding it can cause discomfort while wearing the helmet.
And that’s it!
Conclusion
Now you know how to paint a motorcycle helmet step by step guide.
The next time you want to repaint a helmet, follow this article and if any confusion arises, you can also watch YouTube videos of other people who have done it themselves first. The process may vary depending on the type of helmet but the overall method will always be the same as described in this comprehensive guide.
So, have fun painting your helmet!