The sun is out, the weather is warm, and you’re ready to ride. But, is your motorcycle ready for riding season? This guide will help you get your bike ready to be safe on the road whether it’s been sitting for a couple of months, or for a couple of years.
There are some basic checks that you should do every time you ride, and those are listed first in this article. Then, we will go into a more thorough inspection list for motorcycles that have been sitting unused for a few months, and, an even more thorough check list for bikes that have been in storage for a year or more.
Pre-Ride Checklist
Let’s start with a pre-ride checklist. This is a quick inspection that you should do often during riding season. A pre-ride check only takes a few minutes and can save you a lot of hassles on the road. It’s best to do this inspection a day or two prior to a planned ride so, if anything needs maintenance or repairs, you have time to do so.
Pro Tip: Pre-Ride check may be all you need to do if you have a new motorcycle, or if it’s only been a few months since your last ride.
- Tire pressure: Adjust the PSI to match the type of riding you do. Lower PSI for dirt riding, higher if you’re riding fully loaded with gear.
- Tire Condition – check the tread wear, look for cracks in sidewalls.
- Chain tension – there should be about 1.2 to 1.6 inches in slack.
- Chain condition – inspect the chain for excessive wear, kinks, rust, dirt and grit. The chain should be lubricated every 300 to 500 miles.
- Oil level – hold the motorcycle level, off the kickstand, and check the oil through the sight window. Make sure it is between the full and low lines. Top off if necessary.
- Turn signals – test front and rear sets of turn signals to make sure they all come on.
- Brake light – Apply the front brake and the back brake individually to make sure the brake light comes on for both.
- Headlight, low and high beam – Make sure both beams are working
- Give the horn a quick blast. You never know when it will come in handy.
Post Winter Storage Checklist
If you live in a part of the world where riding becomes close to impossible during the winter months, you’re likely to let your motorcycle sit in the garage waiting for spring.
Or, if you’ve had your motorcycle sitting in the barn, left alone and forgotten, maybe it’s time to get it up and running again. This thorough checklist will help you keep track of everything that you should inspect, repair and/or replace.
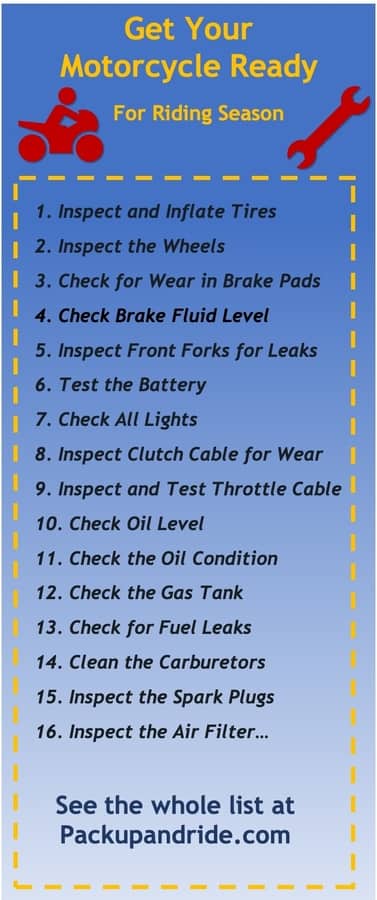
1. Inspect and Inflate Tires
Check the tire’s age. Check the four digit date code on the sidewall. The first number is the week, the second number is the year. For example, if you see the number 1419, the tire was made in the 14th week of 2019. Tires are generally rated to last 5 years.
Check the tread wear. You can do this two ways.
- Stick a penny with Lincoln’s head inside the tread. If you can see the top of Lincoln’s head, your tires are worn and should be replaced.
- Within the grooves of your tires you will find tread wear indicators, or tiny bars. If they are flush with the surface or your tire, your tires need replacing.
Tire pressure. Check the owner’s manual for the recommended pressure. Take into consideration what type of riding you do. If you do basic street riding, the recommended PSI should be sufficient. However, if your motorcycle will be loaded with luggage, you should increase the pressure by 1 or 2 PSI.
Pro Tip: The PSI printed on the sidewall is actually the maximum the tire will hold, but it is not the correct PSI for riding.
If you have tires with tubes, be sure to replace the tubes at the same time you replace the tires.
2. Inspect the Wheels
If you have alloy wheels, inspect them for cracks. Especially if you just acquired a previously owned motorcycle. A cracked wheel may also mean the wheel is bent. You can get a cracked or bent wheel welded and repaired by a specialty shop in lieu of buying a new wheel.
Also check the bead of the rim for dents. Hitting a pothole while riding can often bend the rim and we don’t always realize it. A minor dent is usually not a problem, but, a larger dent could cause a surprise blowout. It’s best to have dents inspected and repaired by a professional.
If you have spoked wheels, inspect the wheel for broken spokes. Then, using a spoke torque wrench (found here on Amazon), tighten each spoke to the recommended amount of torque. A tip to keeping your wheel true and prevent wobble, is to tighten every 4th spoked as you go around the wheel.
3. Check for Wear in Brake Pads
Visually inspect the brake pads on both front and rear brakes. If there is less than 3mm thickness, replace them. Sometimes this is difficult to see when the brakes are still on the bike, even with a flashlight. If you suspect that they are close to worn, it would be a good idea to quickly remove the brake caliper from the wheel and measure the brake pad to be sure.
If you ride your motorcycle with worn brake pads, there is a chance of metal grinding against metal, causing damage to the rotors. Unlike a car’s brake rotors, motorcycle rotors can’t be turned and trued, and will have to be replaced if damaged.
4. Check Brake Fluid Level and Clarity
Check the level of brake fluid in the reservoir located on the handlebars, usually near the front brake lever. Most of them have a sight window. Make sure the motorcycle is level and cold. The fluid line should be between the full and low indicators.
If it is low, you can carefully add a minimal amount of brake fluid to top it off. It usually only takes a couple of tablespoons. Do not overfill. Also, use only the recommended DOT brake fluid. While most cars use DOT3, motorcycles almost always use DOT4 which is designed to withstand the high head motorcycle brakes can often produce. Check your owner’s manual for the correct type of fluid for your bike.
Tips for adding brake fluid:
- Keep everything clean
- Prevent dust or debris from getting into the reservoir
- Make sure your hands and tools are clean
- Always clean the surface of the reservoir before removing the cap
- Lay towels over your motorcycle’s tank and plastics to protect it from accidental spills or splashes. Brake fluid can easily damage the paint.
Pro Tip: NEVER squeeze the brake levers with the reservoir top removed. Doing so can cause air to enter the brake lines and require you to completely bleed the lines and ad new fluid.
If the brake fluid appears dark and cloudy, or if the bike has been sitting idle for more than a couple of years, you should bleed the brakes lines and add fresh brake fluid to the system. Follow this link to read about how to bleed your brakes.
5. Inspect Front Forks for Leaks
Visually inspect the fork seals and look for any signs of fork oil leaking around the seals or dripping down the fork onto the brakes. Sometimes leaky seals will collect dirt in the fork seal area. Check for cracks at the edges of the seals. If your forks have dust covers, inspect them for cracks, rips or holes.
Most motorcycles require that the fork oil be replaced every two years, but, if they are not leaking, and your front suspension is still performing well, the oil can last much longer. Most forks only need maintenance every 12,000 miles, but, check your motorcycle owner’s manual for the recommended replacement intervals.
6. Test the Battery
If you own a motorcycle, you’re certain to be familiar with a battery tender. If not, you can purchase one on Amazon. Keeping your motorcycle plugged in to a trickle charger like that is one of the best ways to keep your battery fully charged when you’re not riding. But, you should still do a check on your battery depending on a few factors.
When was the last time the battery was replaced? If you’re not sure, test it to see how much charge is left on your current battery. If the battery is dead, try giving a start with a portable charger, or use these other jump starting methods found in this article. Or, you can place it on a trickle charger over night, then test it to see if it’s holding a charge. If not, time to replace it.
Visibly inspect the battery terminals for signs of corrosion and clean the terminals if necessary. If you do not have a sealed, maintenance-free battery, check the fluid level in each cell and top it off with distilled water.
7. Check All Lights
Do a visual inspection of all lights on your motorcycle. The headlight and tail lights should be on when you turn on the ignition. Test the high beams on your headlight. If they don’t come on, it’s time to replace the bulb.
Test the brake lights with both the front brake lever and rear brake pedal separately. Test all turn signals, left and right, front and rear.
If you have any auxiliary lights, or other lighted safety features, such as a flashing license plate frame, test them all to make sure all bulbs are functioning properly, and they turn on when they are supposed to.
8. Inspect Clutch Cable for Wear
Do a visual inspection of clutch cable at the point where it connects to the lever as you pull the lever in. This is the most common area where they start to fray. If even one of the cable wires is broken, the cable should be replaced.
If the cable looks blackened and dirty, or if the clutch lever seems stiff, lubricate the cable. You don’t always have to take the cable completely off the motorcycle to do this.
Disconnect both ends of the cable, and spray lubricant down the cable until it comes out the other side. Slide the cable back and forth inside the housing to distribute the lube. Reinstall each end and tighten the adjuster to get just the right friction zone in the clutch lever.
9. Inspect and Test Throttle Cable
A motorcycle throttle will have two cables, a push cable, and a return cable. To test the throttle cables, Roll the throttle back, then let it go. It should immediately snap back into place. If it sticks, it’s time to lube the cables.
Use the same method as lubing the clutch cable: remove the cables at the throttle end and squirt cable lubricant down the cable. When you reinstall the cables to the throttle, adjust the free-play according to your motorcycle’s specifications, usually only a few millimeters.
If you find any rust on the cables, or any broken strands, then replace the cables with new ones. A broken throttle cable can leave you stranded.
10. Check Oil Level
- Start the engine and let it warm up to normal operating temperature
- Turn it off and let it sit for about 5 minutes
- Place the bike on a level surface and stand it up straight with both wheels on the ground
- Inspect the oil by looking at the sight window located on the right side of the bike, near the bottom of the engine casing.
- The oil level should be in between the two lines located next to the window
- Top off the oil a little at a time if it is below the bottom line.
- Be careful not to over fill, which can damage the seals on the engine casing. If the oil is higher than the top fill line, it is recommended that you change the oil and fill it to the correct level.
Note: Some motorcycles have dip-sticks to check the oil, but the same rules apply regarding oil level.
11. Check the Oil Condition
Generally, the oil should be changed about every 5,000 miles. But, if you don’t know the last time it was changed, you can tell by inspecting the color and clarity of the oil.
The oil should be a golden color and it should be translucent. If the oil is dark brown, grey, or foggy, it’s probably time for an oil change.
Open the oil fill cap and check for any unusual odors. The smell of gas inside the oil can be an indication of a problem with the fuel system, or the carburetors.
Check the engine casing for any oil leaks. Works better if you wash the bike first, then let it sit for a few days. If you see anything leaking, look for the source and resolve the issue.
Depending on how long the motorcycle has been sitting idle, you may have to do some work on the fuel system, which includes the gas tank, fuel lines, fuel filters, petcock, and carburetors. The next section addresses everything related to fuel system.
12. Check the Gas Tank
- Inspect the inside of the gas tank for rust. When a motorcycle is stored, it should have a full tank of gas with a fuel stabilizer additive. This will prevent rust from developing.
- If the tank is rusted on the inside, it needs to be properly cleaned before it can be used again. But, the good news is, rust usually doesn’t form unless a bike has been sitting in a barn for a few years.
- If the gas inside the tank is more than 6 months old, it should be drained and replaced with new fuel.
13. Check for Fuel Leaks
Once you get fuel running through the engine, check all the areas that fuel runs through.
- Check all fuel lines for leaks or cracks, especially at the ends where they connect.
- Check the fuel switch, or petcock, for leaks.
14. Do the Carburetors Need Cleaning?
Often, if a bike has been sitting for a long time, the carburetor jets can become clogged and the engine will run rough, or will run only with the clutch open. There are a lot of different symptoms that indicate dirty carbs, so, if it makes sense for you, take the time to clean the carbs.
- Start by running some Seafoam through the carbs to remove varnish or residue created by old gasoline. This may be all you need to do.
- Next step is to remove the carbs and clean, clean the jets, and inspect the needles.
- If cleaning doesn’t work, you can purchase a carburetor rebuild kit for your make and model, and replace the jets and needles.
15. Inspect the Spark Plugs and Gap
When was the last time the spark plugs were inspected or changed? If it’s been over 5,000 miles, you should inspect them. The condition of the plugs can tell you a lot about how the engine is running. Check out this article on when to replace spark plugs.
Changing the spark plugs often involves removing the gas tank, but, it’s a very basic DIY repair job that is inexpensive and doesn’t take long to do. Lastly, use a gap tool to measure and adjust the spark plug gap.
Pro Tip: Install spark plugs that are designed to withstand high heat. NGK is an excellent brand for motorcycles.
16. Inspect the Air Filter
When was the last time the air filter was changed? Motorcycle air filters come in a wide range of styles, sizes and shapes, and a visual inspection on some filters can be difficult.
However, some motorcycle allow easy access to the air filter and are a style that allows you to view how much dust and dirt has accumulated.
Some air filters are washable, allowing you to clean them with water, let them dry completely, then place it back in the motorcycle.
It’s best to check your motorcycle owner’s manual for the filter replacement interval and use that information to make your decision.
17. Clean, Lube and Adjust the Chain
While chain maintenance is part of a pre-ride check list, if the bike has been sitting for a while, now is the time to do a little extra maintenance work.
- Clean the chain with a cleaner designed specifically for chains with seals. Or, use Kerosine to remove grease and dirt. Kerosine won’t corrode the seals and has a fairly low ignition point making it safe to use in a ventilated area. Never use engine degreaser or gasoline to clean a chain.
- Once clean, lubricate the chain with your favorite style of chain lube or chain wax.
- Inspect the chain for signs of rust, kinks, or too much stretch.
- Adjust the tension on the chain so that there is approximately 1 inch of slack.
Related Article: Should You Use WD-40 on Your Motorcycle Chain?
18. Inspect Wiring Harnesses
Grab a flashlight and visually inspect all wire housings for wear. Look under the instrument panel or behind any front fairings for wires that have slipped out of their ties, or are dangling loose.
Make sure none of the wiring is pinched or touching the engine or exhaust; or anything that can melt the housing. If you see any exposed wires, secure them with zip ties, or wrap them with electrical tape to avoid a short.
19. Check the Coolant Level
Check your motorcycle owner’s manual to see where your bike’s coolant overflow tank is located. Most will have indicator lines to tell you if more coolant is needed. Top it off if necessary.
When was the last time the coolant was flushed? Check your owner’s manual for the recommended interval, and do a flush and replace if necessary.
Inspect all the hoses coming from the radiator to make sure they are free from cracks and that the clips are secure.
20. Inspect the Frame for Cracks or Rust
Do a quick inspection of the frame. It’s better to do this step if you have removed the gas tank as you’ll have better access to the entire frame. You are looking for hairline cracks which most often occur at the weld points.
Also inspect the frame or any other metal portions for rust. This is usually not a problem for most motorcycles unless it’s been sitting in a barn for years.
21. Check for any missing clips, cotter pins, zip ties.
Little bits of hardware like clips on hoses, a cotter pin on the rear axle bolt, or zip ties holding everything secure and in place, are important details to keep your motorcycle running properly and keep you safe.
Go around the motorcycle and make sure all these pieces are in good condition and are tightened and secure.
The mechanics of your motorcycle are not the only things you should check when you’re getting ready for riding season. There are other little details that will make your life a lot easier when you’re out on the road.
22. Assemble an On-Board Tool Kit
Most motorcycles will come new with a tool kit. A very minimal tool kit. An on-board tool kit is a compact set of basic tools that you can store under your seat. It should contain tools needed to do the most basic repairs on the road.
Take some time to gather tools that are specific to your motorcycle. Include things like zip ties, spare fuses, a bit of duct tape and electrical tape.
Check out this article about on-board tool kits.
23. Updated Paperwork
One of the items you need to carry with you at all times is your registration and proof of insurance paperwork. Make sure you have the most current printouts on board with you. Most riders will carry a copy protected in a zip-lock plastic bag, stored under the seat.
If you’re motorcycle camping, and you have luggage or a duffle bag packed on top of your seat, it’s a good idea to store your paperwork somewhere that is easily accessible.
Pro Tip: I always keep some cash stored in a plastic bag under my seat. You never know when some extra cash could come in handy.
24. Keys
Where did you put the keys? This is the time to make sure you know where your spare key is. Make sure you have all the keys to your locking side cases, or top case. Find a place to keep your motorcycle key so you always know where it is if you get the urge to ride.
25. Clean and Polish the Motorcycle
Your last step is to give your motorcycle a good bath and polish up all the chrome bits and shiny pieces.
26. Bonus Step: Get Your Riding Gear Ready
Make sure all your gear is in good condition. Keep your helmet, gloves, boots, everything handy where you need it when you get the riding bug. Saddle bags, tank bag, should be stored in their designated garage area so they are easy to find and grab.
Keep a few necessities in your tank bag at all times. Things like chapstick, phone charger, hair brush for riders with long hair, hat, bandana, or whatever you might need on the ride.
Taking the time to go through this pre-season checklist will insure that you’ll have a smooth, trouble free riding season.