
Author: Joel Hathaway

  • Jumping Motorcycle Battery: How to Jump Start Motorcycle Battery

    Jumping Motorcycle Battery: How to Jump Start Motorcycle Battery

    Reading Time: 8 minutes

    It’s happened to me, it’s happened to one or two of my riding buddies. You roll out of your hotel room, get the bike all loaded up for another amazing day of riding. You hit the start button and hear nothing but the sad attempt of a dying battery trying to turn over the engine. Click, click, click.

    If you’re with a group or in town, a dead battery may be an inconvenience, but, it’s not the end of your trip. Aside from replacing your battery with a new one, there are ways to get your bike going again and keep it going for the rest of your trip and that’s being able to jump start your bike with someone else’s bike.

    To jump start a bike can come across as daunting. Dealing with batteries, cables, and potential sparks can make some people a little nervous, especially if you’ve never worked with a battery before. Maybe you’ve heard stories of exploding batteries, but, in reality, when done properly, jump starting your bike’s battery is very safe.

    In fact, being able to jump start a motorcycle is a very useful tool that can get you out of a lot of tough situations.

    Jump Starting A Motorcycle With Another Motorcycle
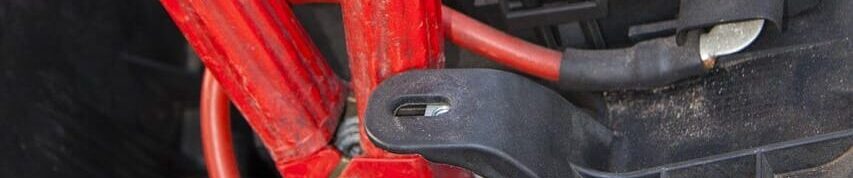
    jump start

    If you’re riding with a group then this will be a viable solution to your flat battery problem.

    1. Locate Both Batteries

    The first step to jump start a motorcycle is to locate the batteries on both motorcycles, remove any panels, seats, or covers to gain access, then park the motorcycle together so that a set of compact jumper cables can fit between them.

    2. Inspect The Terminals

    Next, inspect the terminals on the flat battery. If you find a bunch of corrosion, clean it off with a brush or a rag. Do Not use your bare hands to clean this off as this will irritate your skin. Then you rub your dirty hands around your eyes and then you have real problems.

    Often, corroded terminals can cause a battery to not make good contact with the cables and this could be causing your battery issue in the first place. Now that the terminals are clean, make sure you can identify which terminal is positive (+) or red, and which is negative(-) or black.

    3. Connect the Two Batteries
    black and brown handle hand tool

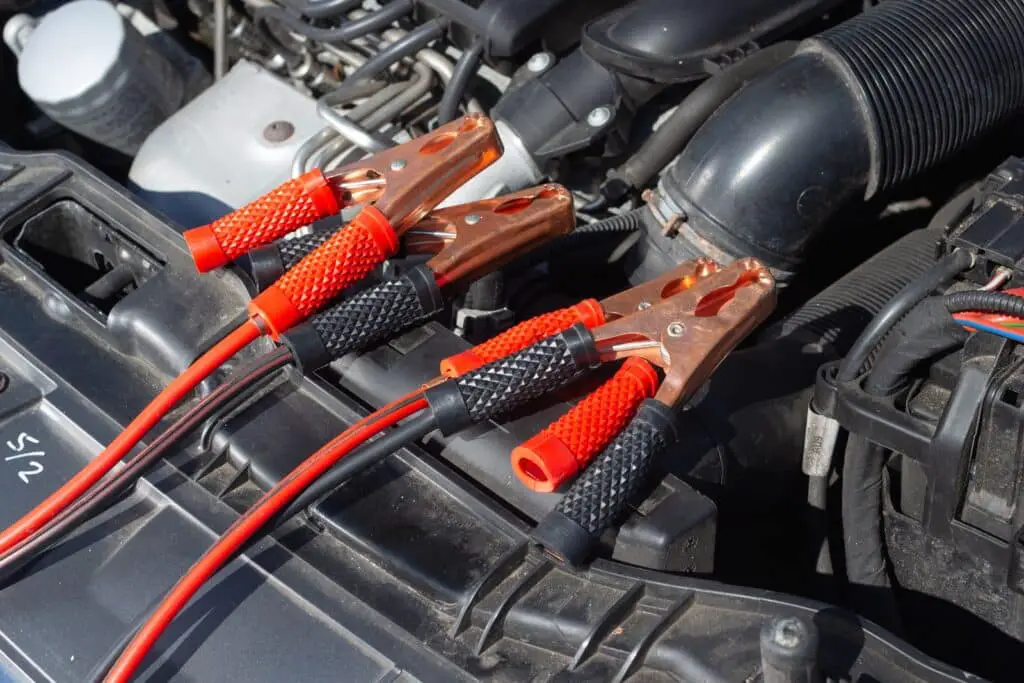
    Your next step to jump start a motorcycle is to connect the two batteries together using jumper cables. Motorcycle jumper cables come with smaller clamps making it easier to fit them into the small spaces that manufacturers like to hide batteries.

    Start with the good battery, not the dead one. Connect a red clamp to the positive terminal of the good battery. Once you have one clamp connected to the positive terminal, never let the red and black cables touch each other or other random metal objects. This can lead to a short circuit and fry both batteries, and possibly cause problems in the electrical systems of both motorcycles.

    Always go positive terminal to positive terminal and negative terminal to negative terminal.

    Next, using the jumper cables connect the other red cable clamp to the positive terminal of the flat battery. Now, it’s time to connect the negative cable clamps, the black ones.

    Connect the one black clamp to the negative terminal of the good battery first. Lastly, you are going to take the last black cable clamp and connect it to a piece of bare metal somewhere on the frame of your motorcycle away from the battery. No, you do not connect it to the negative terminal of the dead battery.

    The reason for this is because, when you connect that last jumper cable, there will likely be a spark. Keeping that final spark away from the battery is safer in case there is the presence of hydrogen, a flammable gas, leaking from the bad battery. This is not very common, but, why take chances on an explosion.

    4. Starting The Engine

    Now you’re ready to fire up the engine. There’s no need to start up the motorcycle with a good battery just yet. First, try to start the dead bike. If it fires right up, then you’re done. If it doesn’t start, or if it sounds like the battery is still dead, then start up the other motorcycle and let it run for a minute before you try again. Once the dead bike is running, let it sit and run for another couple of minutes before disconnecting the cables.

    5. Disconnect the Cables
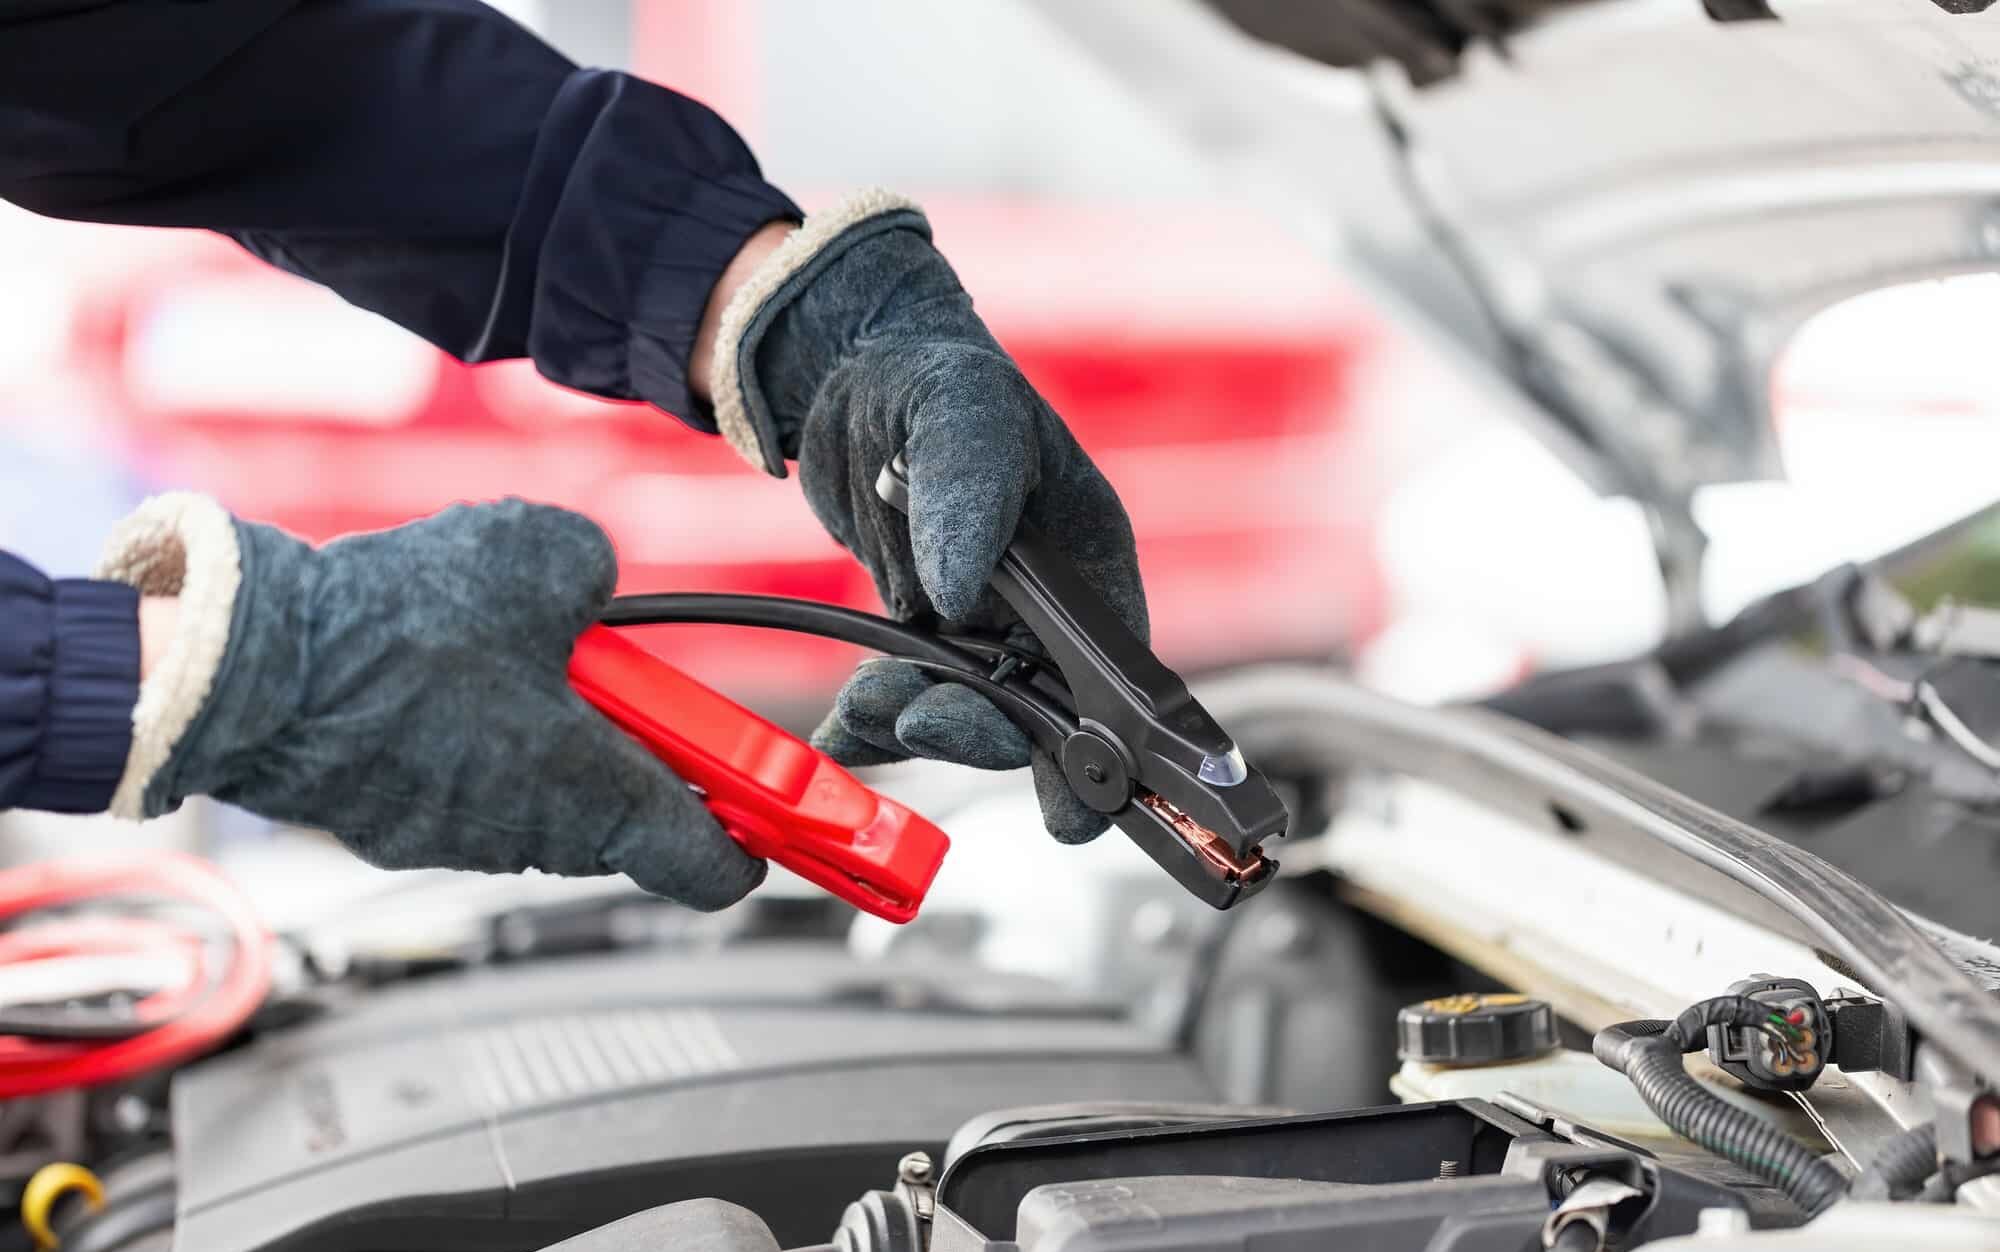
    Human trying to start engine with jumper cables in close up

    Disconnect the cable in the reverse order that you installed them. Negative, negative, positive, positive. Install any covers that were removed to access the batter, but remember to keep that bike running to let it charge up. You should be on your way. There you have it, how to jump start your bike!

    Jump Starting from Car to Bike

    You can also jump start your motorcycle from car batteries. If you can find someone willing to lend a hand using jumper cables you can get a jump from anyone with a car. The procedure is exactly the same except for one very important safety step. DO NOT START THE ENGINE ON THE CAR! A car battery holds too strong a charge and can damage a bike’s battery if the engine is running. You will get sufficient power from a car battery without the engine running.

    So, follow the same procedures outlined above, and once your motorcycle is running again, remove the cables and you can be on your way.
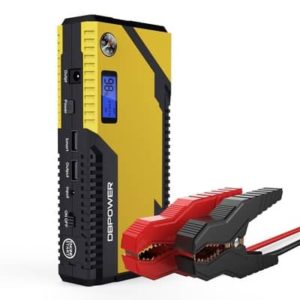
    Using a Jump Starter

    This is by far the best way to get yourself out of a dead battery jam, especially if you travel alone. Portable jump starters have been around for some time, but now they are getting smaller and some come as small as a cell phone.

    Read my review of recommended charger here. Most chargers are super simple to use and are less stressful than having to connect your battery to another bikes battery. They are also handy for charging up other things like your cell phone. But, remember to keep the jump starter fully charged or it won’t be ready to go when you need it the most.

    Bottom line is to keep your motorcycle battery properly maintained when you’re not riding, be diligent about not using it to charge your electronic gadgets, invest in a portable jump starter, and keep a pair of motorcycle battery cables handy just in case. This is a far more helpful tool than jumper cables.

    Avoid a Dead Battery

    Of course, the best thing to do is to avoid a dead battery in the first place and you can do this in a number of ways. It’s significantly better than needing to jump start your bike. Most brand new batteries will last around 48 months according to manufacturers. But, there are certain conditions that will shorten battery life.

    • When a battery sits for an extended period of time without a float charger to keep the charge maintained, it will slowly lose power.
    • If you use your motorcycle to charge up your electronics without the engine running, you are pulling power directly from the battery and can drain a battery over night.
    • If you run a lot of electronics such as GPS, Heated Gear, and stereo, and your regulator/rectifier can’t keep up with the output, your battery will drain faster than usual.

    So, your first step in avoiding a dead battery is to keep it charged on a Battery Tender, or other chargers, when not in use. Avoid using your motorcycle to charge your electronics, and don’t use your onboard electronics without the motorcycle engine running, therefore returning the chargeback to your battery.

    Signs of a Dying Battery

    Another way to avoid a dead battery on the road is to recognize when it’s time to replace your battery. Keep a record of when you last installed a new battery and after a couple of years of use, keep your eyes and ears open for tell-tale signs. When you start your motorcycle, you may notice that the headlights and dash lights will dim while the engine is cranking.

    This is normal and you should be familiar with how it looks. However, you can detect a worn battery depending on how much the lights dim. If they slump to a barely visible, dull yellow, it is a sign of a dying battery.

    Another clue is when your engine seems harder to start, and the starter sounds lethargic. This can be particularly nerve-wracking during a cold start in colder weather. That’s usually the time you start talking to the engine saying things like “Come on, come on, come on. You can do it.”

    But a so-called, dead battery doesn’t necessarily mean the battery has no more charge. This is usually not the case. It simply means it doesn’t have enough charge to run the electronics necessary to get your motorcycle started. That being said, it is possible to breathe life back into a battery that won’t cooperate. Here are a few ways to jump start a battery and how to do it safely and effectively.
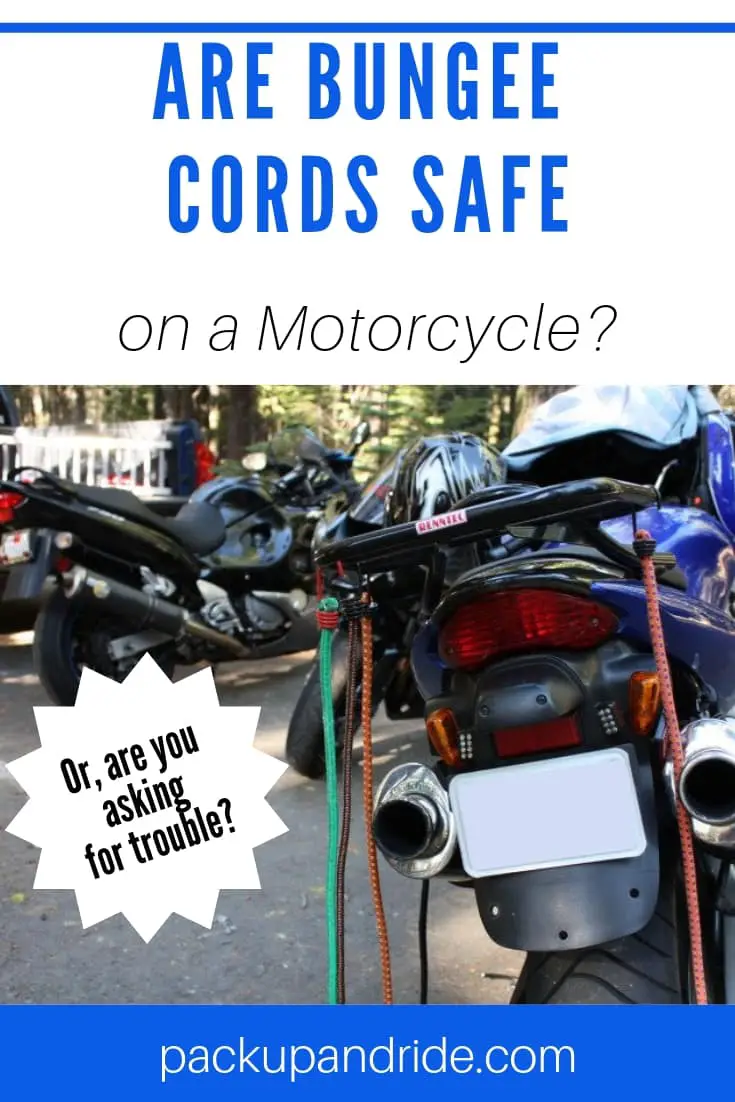
  • Bungee Cords For Motorcycles: Are Bungee Cords Safe on a Motorcycle?

    Bungee Cords For Motorcycles: Are Bungee Cords Safe on a Motorcycle?

    Reading Time: 8 minutes

    In most households, you will find one, two, or several bungee cords for various uses. Things like, keeping the ice chest lid secure; keeping an overloaded trunk closed, or simply securing household items. There is a lot of bungee cord hacks out there.

    But, when it comes to securing heavier objects, or things that are in motion, it might not be the best thing to use. So the question gets asked, are bungee cords safe a motorcycle?

    No, bungee cords are not safe for securing items on a motorcycle. Bungee cords, made of numerous strands of elastic materials, come in a variety of strengths but will lose their elasticity over time. There is no way to determine the exact strength, and bungee can weaken or break if a portion of it is frayed.

    When you stretch a bungee cord tight enough to secure a duffel bag, it can spring back unexpectedly, sending bungee hooks flying straight at you. In fact, Bungee cords are one of the leading causes of eye injury.

    My Near-Miss Story

    There are dozens of stories on the web about bungee cord disasters or near-disasters, and I have one of my own. I was riding in death valley and planned on a full day of riding on some dirt roads. Knowing that gas is scarce, I bungee’d a 2.5-gallon plastic gas can to my rear rack. I was very careful to make sure it was secure. The bungees were tight and there was no way the can would fall of. I was confident the can was secure.

    I pulled into the parking area at my second stop, my first, being about 1/4 mile down a washboard dirt road. When I got off my bike, I noticed my 3 bungee cords were dangling loosely from the rack, with no gas can.

    Huh?

    I considered myself very lucky since one of the cords was long enough to snag in my wheel or chain. Thankfully it didn’t. Disaster averted. I packed them back up and went in search of my gas can. I never found it, but I did notice a large area on the road where someone spilled some gasoline.

    Hmm, wonder how that happened?

    I found out that day that bungee cords were not the best solution for strapping something to your bike and were not the best way to carry extra gas.

    So, if you can’t use bungee cords, what can you use to secure your bags, or other things, to your motorcycle?

    Cargo Net

    cargo net

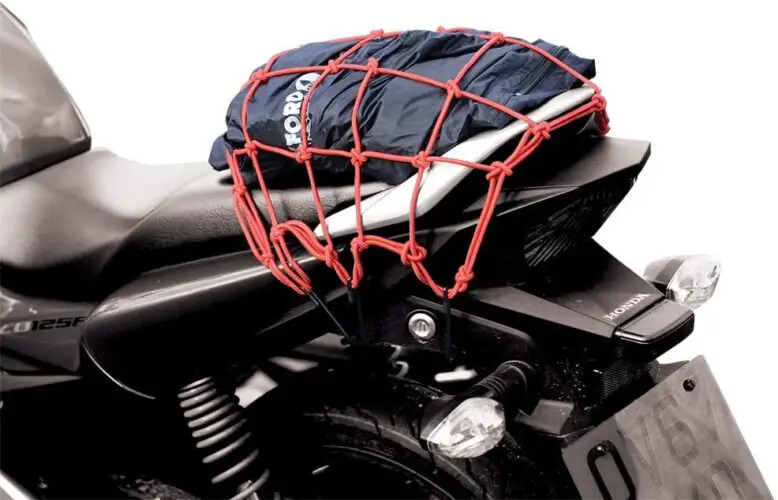
    Cargo nets are made of a webbing of elastic cords with 6 or 8 hooks on the corners and edges. It’s designed to be thrown over your bag, stretched tight, then secured with the hooks.  Basically, it’s a bungee cord with more hooks. Cargo nets are better for securing bags that are not designed to go on a motorcycle, or something that is an odd shape.

    What to look for in a cargo net.

    • Strong, tight elastic cords
    • Small weave, under 3 inch squares
    • Plastic hooks instead of plastic coated metal hooks
    • Adjustable hooks such as those found on the PowerTye.

    The PowerTye has done a pretty good job at making improvements to the basic cargo net. They are available here on Amazon if you want to check out the prices. Cargo nets work pretty well for lightweight luggage or bags and short trips to work or the store.

    Just like bungee cords, the net won’t fully secure heavy luggage and the elasticity will deteriorate over time. So, if you’re going to use a cargo net, make sure you use a size that fits the bag you’re trying to secure. Smaller nets, designed for motorcycles, are best.

    But, there are better options if you’re trying to secure a duffel bag or dry bag to your bike.

    Metal Cam Buckle and Strap

    Flat, nylon straps with a metal cam buckle are a great way to secure your camping gear or a duffel bag to your rear seat. These straps are made of heavy-duty polypropylene with one single cam buckle at one end.

    A cam buckle is designed to allow the strap to move through the buckle easily in one direction, but when you pull the other direction, the cam with its tiny teeth will clamp down on the strap keeping it secure. A good, strong pull will cinch it up pretty tight.

    How tight? If you find it hard to get your fingers under the strap, then you’ve got it good and tight. As with the rope, always wind up and secure the excess strap.

    One complaint people have regarding metal cam buckles is the risk of the buckle damaging your bag or scratching your bike. This is a legitimate complaint, but it’s a matter of personal preference and due diligence.

    To avoid scratches, don’t place the buckle side of the strap against your motorcycle. Don’t let the buckle dangle down while your loading and unload your gear.

    Ladder Lock Buckle and Strap

    This method is very similar to the metal cam straps, but the buckle is a little different. Ladder lock buckles are generally made of plastic. This will be a little more gentle on your gear than a metal buckle, but plastic runs a slightly larger risk of breaking.

    You’ll use the same kind of polypropylene strap with the buckle at one end, feeding the strap through the buckle allowing the teeth to grip the strap when it’s pulled tight.

    When using straps with a buckle at one end, you need to always make sure the strap is secured to at least two objects on the bike. For example, loop it through a grab handle and a part of the frame.

    Of course, this depends on what’s available on your motorcycle. If you were to loop it through only one part, the duffle bag will not be adequately secure.

    Rope

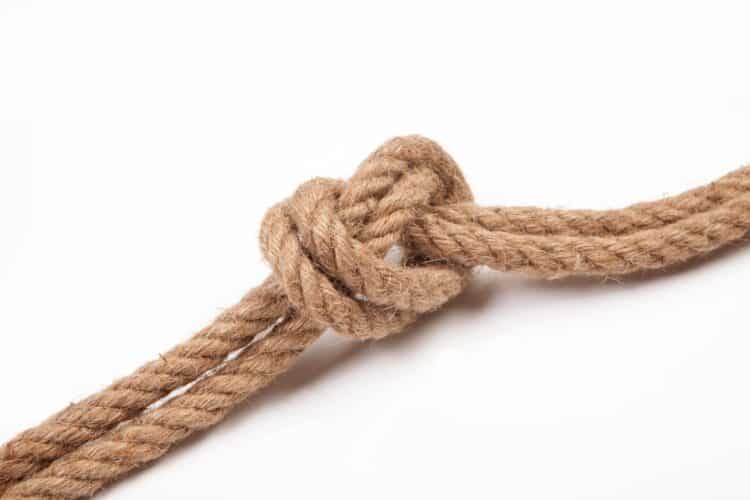
    brown rope tied on white background

    A length of parachute cord looped through grab bars or motorcycle frame, depending on your bike, would be a good alternative although there are better alternatives further in this post. If you use rope, make sure you know how to tie a good trucker’s hitch so you can get the rope cinched uptight before tying the final half hitch.

    Trucker’s hitch? Half hitch?

    Yep, if you’re going to use a rope, you’re going to have to know the good knots. A simple square knot or granny knot will slip over time, causing slack.

    Even if you get your luggage good and tight with a rope or cord, it’s still not the best option. Cheaper ropes can stretch over time and you will need to check the tightness of your rope periodically throughout your ride. Also, if you’re a little weak with your grip, you could have some trouble getting the final knot tight enough.

    One last tip to use a rope. Wind up the excess ends of the rope and tuck them away so that they WILL NOT come loose while riding. A dangling rope can end your ride in a heartbeat, just like a dangling bungee cord.

    Ratchet Straps

    Ratchet straps come in a variety of sizes from small, to big heavy-duty straps that hold cargo on trucks. They do come small enough to use on a motorcycle especially if you have a large and heavy bag to tie down.

    They are bigger and heavier than a strap with cam buckles and care should be given when taking them on and off your bike. Be careful where you place them so that you don’t scratch your bike, and when removing them, be careful so they don’t fall and bang against your bike and put a ding in your exhaust. Nobody likes it when that happens.

    Ratchet straps come with either a hook or a loop on either end. For tying down a bag, the loops on the ends of the strap would be most helpful rather than a hook. You can loop the end of the strap around a foot peg bracket and the other end around the frame or grab bar, depending on your bike, then attach the ratchet together on top of your bag.

    In my opinion, the most ideal strap would come in two pieces. Each piece would have a loop on one end. Then, you’d connect the two together with a cam buckle. There is a similar strap on the market called the Rok Strap and people seem to really like them.

    They use a clip in combination with a ladder lock buckle making the strap adjustable. They also include a small section of heavy-duty elastic material like a bungee to give the strap some flexibility.

    So, as you can see there are a lot of alternatives to using bungee cords to tie down a duffel bag on your motorcycle. They are safe when used properly and they won’t spring back and take out your eye if they slip out of your hands. In any case, always secure your gear carefully and check it periodically during your ride.

  • Headphones on a Motorcycle: A Safe Riding Guide

    Headphones on a Motorcycle: A Safe Riding Guide

    Reading Time: 8 minutes

    This question has come up a lot in my conversations with fellow riders. Some riders I know will always put their earbuds in and crank up the tunes before putting their helmet on. Some don’t listen to music at all.

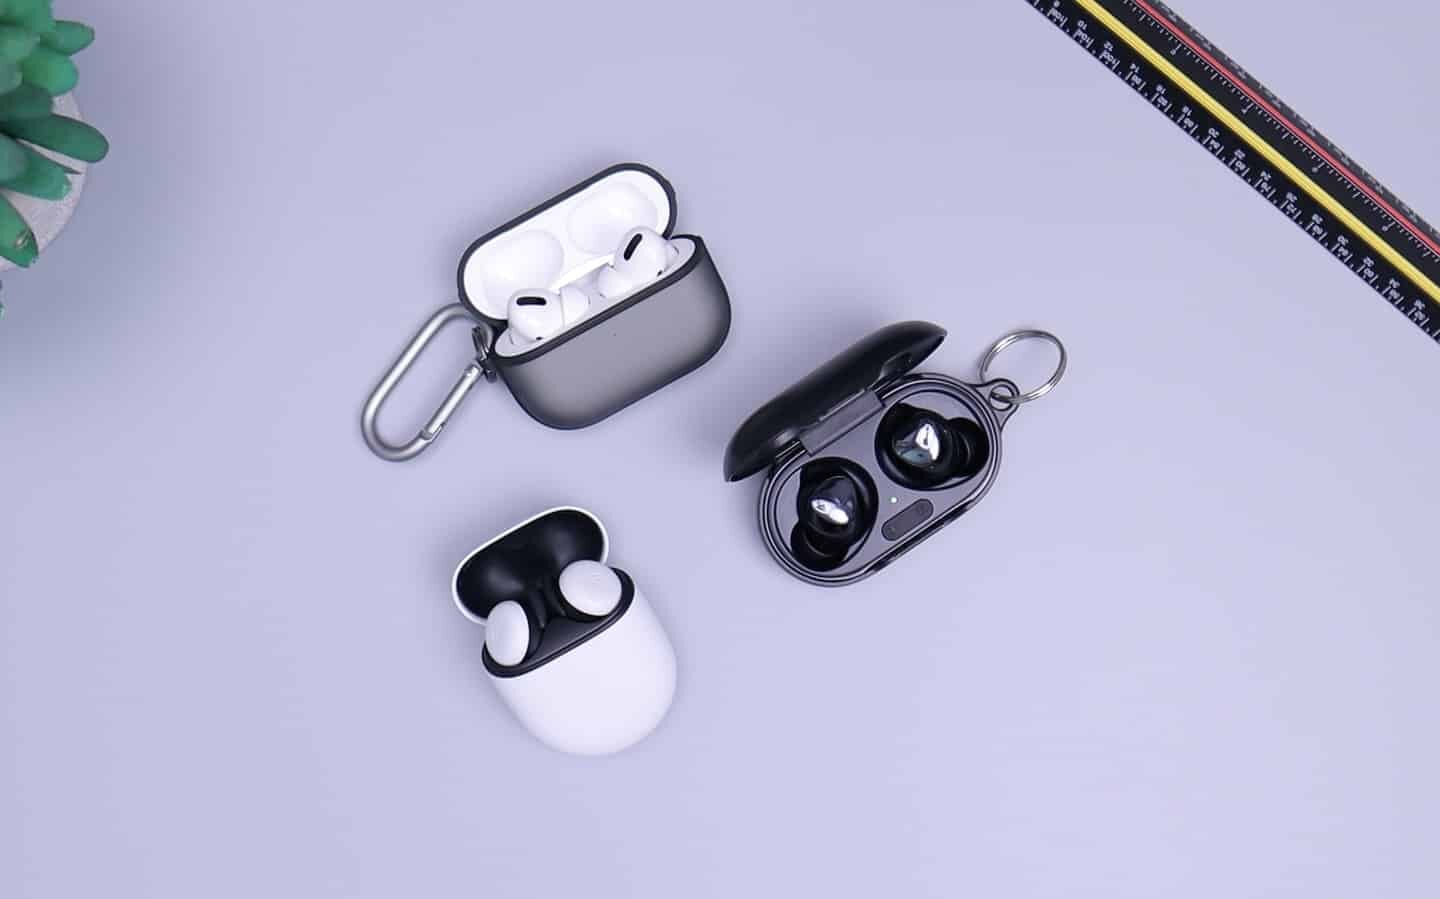
    But, is it safe to ride a motorcycle while listening to music? It is safer to ride without the distraction of music. In California, and in many other states, it is illegal to drive or ride a bicycle with headphones in BOTH ears. However, it is legal to use a headphone, or earbud, in one ear. This includes motorcycles. Riding with headphones on a motorcycle is illegal in many places. The easiest way for motorcycle riders to wear headphones are wireless earbuds. Wearing headphones and hearing aids should help to adjust the outside noise and there are special motorcycle earbuds with excellent audio quality and sound quality. Bluetooth headphones are a great option to take phone calls while riding. A half helmet is better to wear earbuds and motorcycle helmets that are fully covered require in ear headphones. It helps to create an ambient noise, hear car horns and noise cancellation at the same time. Riders need to abide by local laws while wearing headphones. Wear helmets at all costs to protect yourself and the built in headphones from damage. Wearing headphones and hearing aids have its own benefits and cons while riding motorcycles. Motorcycle headphones have special ear buds with high battery life to create ambient sounds and adjust volume effectively while riding. Foam earplugs are good because they pose no threat to the ear canal.

    Riding a motorcycle is noisy. You have to deal with wind noise and the noise from your engine especially if you have loud pipes. Adding music, or any other kind of audible entertainment, is only going to add to the cacophony.

    How Music Creates a Distraction

    headphones on a motorcycle

    There have been numerous studies on whether or not listening to music impairs your ability to concentrate, perform a task at work, or study for an exam. There have also been some studies on your ability to drive a car safely while listening to music. Here are a few ways that music can be unsafe.

    The Music is Too Loud and Aggressive

    Several studies have come to the conclusion that when you listen to extremely loud music (above 95 decibels) your reaction time is slower. Also, aggressive music, such as punk or heavy metal, can cause you to be more tense preventing you from relaxing. Tension on the motorcycle can be a major problem especially if you’re riding twisty, technical roads.

    You’re Listening to Music you Like

    This one may sound odd, but when you’re listening to music that you really like, you are more likely to make mistakes, miss a turn, forget to signal, and you may even drive more aggressively. You are so in tune with the music that you are more likely to tune out the things going on around you.
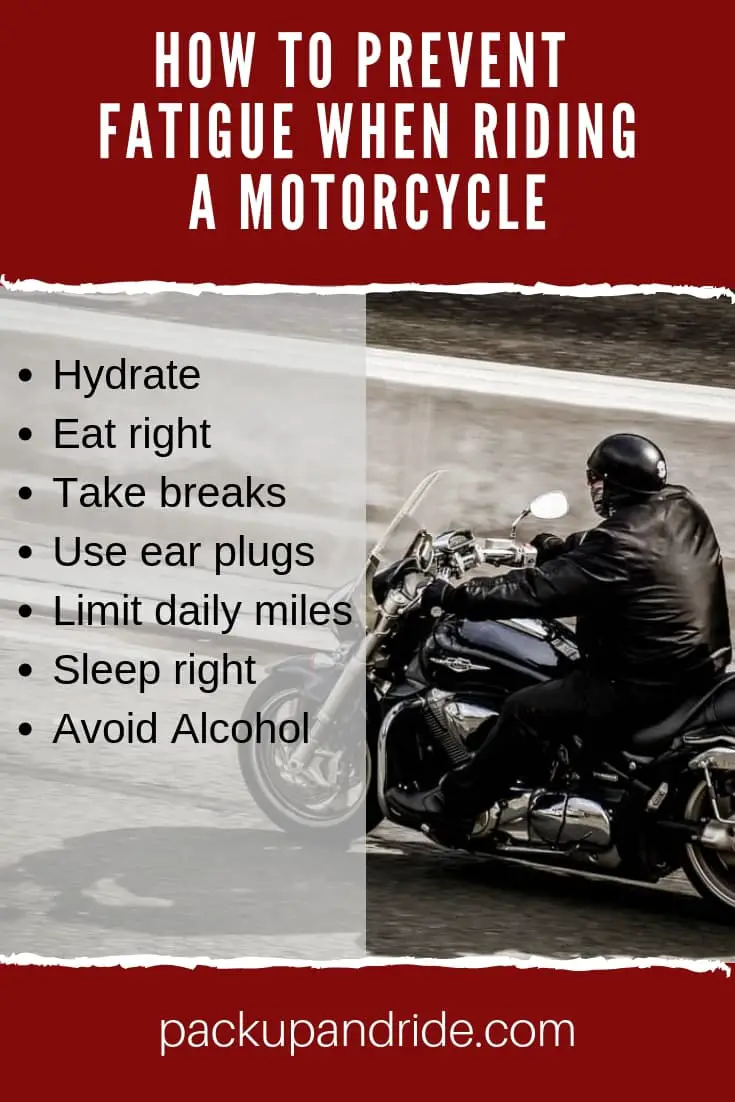
    The Music Tempo is Too Fast or Too Slow

    If the music you’re listening to have a fast beat, your brain, for some reason, wants to match that tempo. People have been known to drive faster without realizing it when they listen to music with a fast tempo. On the opposite end of that is music that is too slow. This kind of music is too relaxing and a driver will have the tendency to zone out and reaction time is slowed. But, there is a sweet spot. Music with a tempo of between 60 and 80 beats per minute keeps drivers from being too aggressive or too relaxed. How fast is 60 to 80 bpm? It’s about as fast as your average heartbeat.

    But, it’s not all bad news. There are times when music can help make you a better rider.

    Avoiding Boredom with Music

    Let’s say you’re on a nice long motorcycle trip and you have a lot of miles to cover on any particular day. Let’s add to that a long, straight slab of highway that you have to ride. It’s gonna get boring and you’re probably gonna space out. This is a good time to listen to music or your favourite podcast.

    Choose music that is in that sweet spot of being not too fast, not too slow, not too loud and not too aggressive. Choose something that makes you feel good, that you can sing along to, but not so much that you are tempted to close your eyes and bust out an air guitar solo.

    There are times when music can actually enhance your concentration. People who do a repetitive task, one that they know inside and out, or have done a million times, find that music can actually help them concentrate and perform at a higher level. So, if you are an experienced rider doing the repetitive task of riding down a straight highway, the right kind of music may actually help you concentrate on the road and your surroundings.

    So, as riders, should we avoid listening to music completely? What are some safe ways to listen to music when you’re riding a motorcycle?  We’ve already learned that listening to moderate music at a moderate tempo and volume is a safe thing to do. That’s easy to do in a car. But, on a motorcycle, there are more challenges that should be addressed.

    External Speakers vs. Headphones

    There are basically only two ways to listen to music on your motorcycle; external speakers, or headphones. Or, helmet speakers. Ok, that’s three ways.

    A lot of bigger bikes, cruisers and touring models alike, come with a stereo system. This is probably the most effective and convenient way to get your music on. Bikes with built-in stereos often come with controls that are easy and safe for the rider to operate while moving. There are a number of aftermarket speaker systems that can be installed on nearly any motorcycle, some with Bluetooth capabilities.

    The speakers you choose will have to be loud enough to be heard in heavy traffic and noise from loud pipes. Generally, if the speakers are aligned properly, and the tonality and volume of the music are adjusted properly, hearing the music while riding is not usually a problem. Keep in mind that everyone around you can also hear your music, and at a stoplight, everyone…I mean everyone, will know you’re there. Honestly, riders who have external speakers really don’t care what other people think, but it is definitely a personal choice.

    Headphones

    The other option is to keep your music to yourself, inside your helmet. Personally, I prefer this method. A lot of riders will use a standard pair of wired earbuds and try to gingerly slide their helmet on without popping one out (that’s so annoying). Then there’s the trick of stringing the wires down your jacket and into the pocket that holds your phone or iPod Shuffle. Then, you need to start your playlist, sometimes before you can put on your gloves.

    This takes us to one more reason why listening to music while riding a motorcycle is dangerous. Our constant desire to fiddle with our gadgets. Trying to adjust the volume, skip a song, or change a playlist can be extremely distracting. If you listen to music, this is just going to take some self-control. If you don’t like the song that’s playing, don’t worry, it will be over in 3 1/2 minutes.

    Back to the earbuds. Often you will have to turn up the volume pretty high to hear your music over the wind noise. This adds more noise to the mix and can cause more damage to your hearing over time. An alternative is to use noise-cancelling earbuds. These will seal out most external noises, just like a pair of foam earplugs, allowing you to hear your music better.

    However, consider this. When you ride with earplugs, the wind and engine noise is greatly reduced, but you are still able to hear some things around you, such as a siren or horn. Add music to that mix and it’s going to impair your ability to hear those important warnings.

    In-Helmet Speakers

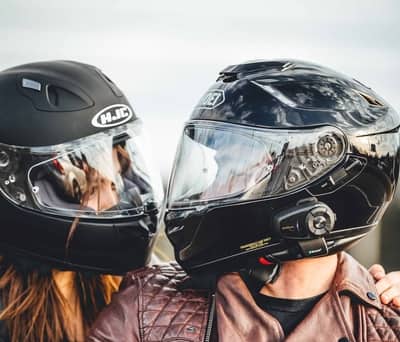
    Ok, let’s explore one more option. I’ve ridden many times while listening to music through my headset. I have an older Cardo System with two flat speakers that velcro to the inside of my helmet. But, here’s what I don’t like about my current system. The speakers can be very tinny and at freeway speeds, I can never hear the music while riding in the wind no matter how high I turn up the volume. Also, I miss all the good bass sounds and I don’t get a good, full music experience. Granted, helmet speakers are getting better, and it’s probably time for me to upgrade.

    This leads us to one more possible way to safely listen to music while riding a motorcycle.

    Noise Cancelling Earplugs

    The term “noise cancelling” is a bit of a misnomer, as they don’t actually cancel out all sound. Also known as acoustic earplugs, they are fitted with an attenuation filter which will cancel out any sound louder than around 75db while allowing a normal range of sounds to get through. These are common for people who work with loud machinery, musicians or people at shooting ranges where it’s important to be able to hear, but still, have protection from loud noises.

    A lot of riders have expressed that these types of earplugs work well on a motorcycle in combination with helmet speakers. They block the wind sound but allow you to hear your surroundings including the music you’re playing. Check these out on Amazon.

    When to Play Music and When to Turn it Off

    Now that we know how music can distract us, and the different ways we can listen to music, now it’s time to decide when to listen and when to turn off the music.

    Use music to enhance your concentration when you’re feeling bored, or have a long stretch of highway to get through. Use it to keep yourself alert in moderate traffic. But, when it comes time to concentrate on the road and your surroundings, like in heavy traffic, turn off the music. If you’re riding on a technical, twisty, curvy fun canyon road, give the music a break.

    Above all, be aware of how music affects you personally and don’t take unnecessary risks just to hear that one song.

  • Motorcycle Tire Repair: Can You Plug A Motorcycle Tire And Is It Safe To Ride On?

    Motorcycle Tire Repair: Can You Plug A Motorcycle Tire And Is It Safe To Ride On?

    Reading Time: 10 minutes

    Flat tire! It hasn’t happened to me yet, but give it time, I’m sure it will. I started wondering what I would do if I was on a motorcycle trip and found myself with a screw or nail in my tire.

    I often travel alone and even though I have a motorcycle repair kit, I’m not sure I know how to use it. It was a hand-me-down from a friend. Also, I’m not sure how long I can ride the bike after I plug the hole? Can I finish my trip? Do I need to find a motorcycle shop or gas station ASAP? So, I did a little research, and here’s what I learned.

    Is it safe to ride on a plugged motorcycle tire?

    Riding your motorcycle on a plugged tire is safe but only for a limited distance. Tire plugs are designed to be a temporary solution rather than a permanent repair. They will enable you to ride to the next available motorcycle repair shop and either replace the tire or get it properly patched and plugged.

    Well, wait a second.

    There’s actually a lot more to it than a simple yes, it’s safe, or no, it’s not safe.

    Motorcycle riders all have their own opinions about the topic. Some say it depends on the type of plug you use, how well it was installed, how far gone are the motorcycle tires anyway, what kind of riding are you doing, do you worry too much, etc. In my car, I’ve driven on a plugged tire for years with no issue whatsoever.

    So, why wouldn’t this be true for a motorcycle tire?

    I can see where there would be a difference in how the plug holds up considering the shape of a motorcycle tire. Going through a turn and putting stress on the side of the tire, may affect the way the plug holds or flexes. Personally, I consider a plug-in car tire as a “fix it and forget it” solution. But, I’m not sure I would forget it on my motorcycle tire.

    Let’s look at some more details.

    Types of Tire Plugs

    In my research, I found that there are a few types of tire plugs available. They are all designed to be used in a similar fashion; plug up the puncture hole. All types of tire plugs can be used on your rear tire or front tire. But, they are not all equally effective.

    Self Vulcanizing

    Self Vulcanizing tire plugs are also known as strings, sticky strings, snot strings or worms. They are a strip of rubber material coated with sticky glue that will create a chemical reaction when placed in the puncture hole.

    Vulcanization is a process in which the two rubber materials create chains or crosslinks on the molecular level, that binds the two together. It’s almost like the rubber plug and the rubber of the tire become one material. This is a very effective material to use for tire plugs.

    String with Rubber Cement

    Tire plugs made of rubber are not always self vulcanizing and kits with this type of plug will come with a tube of rubber cement. You will need to apply the cement to the rubber strip before inserting it into the tire. You will also need to wait until the cement dries completely before riding on the repaired tire.

    This should only be about 15 minutes. These strips in combination with the rubber cement create a similar chemical reaction as vulcanization. It is an effective method for plugging a tire. It doesn’t matter if it’s the rear tire or front tire.

    Mushroom Plugs

    A mushroom plug is a bit of a rubber shaft with a mushroom shape at one end (no dirty jokes please). Many riders refer to them as Stop and Go plugs, which is a popular brand for this type of plug. The end with the…errr…mushroom tip, goes on the inside of the tire creating a better seal around the puncture hole from the inside. This reduces the chances of the steel wall fraying at the site of the puncture. 

    Mushroom plugs are good enough to get you off the road, but they should not be considered a permanent fix. If you use these, I would recommend having your tire professionally repaired or replaced as soon as possible. Stop and Go manufacturers recommend you do not exceed a speed of 50 mph, or 100 miles of travel.

    How to Install a Tire Plug

    Tools Needed For Installing a Tire Plug

    You can purchase a motorcycle tire repair kit that comes with everything you need and they are not very expensive. You can go with minimalist repair kits, or you can get a more elaborate kit with extra gadgets and a handy carrying case. But, since we are talking about motorcycle travel, it’s probably a good idea to keep your tire repair kit to a minimum.

    Here’s a list of items that you will need to plug a tire:

    • Plugs – strings, sticky strings, whichever you choose
    • Insertion tool – An Insertion tool is pretty standard in most kits.
    • T-Handle tire reamer – a T-handle is much easier to work with than a standard straight handle
    • T-Handle plugger
    • Small tube of rubber cement (if you don’t use sticky strings)
    • Multitool or pliers to pull out whatever stuck in your tire
    • Inflation method – either CO2 cartridge system or an air compressor

    My recommendation on what to use to inflate your motorcycle tires is an air compressor. There are some great compact and portable compressors on the market that will plug into your battery pre-wire lead. They are small enough to fit in your panniers and don’t add too much extra weight and are so important to make sure air pressure is correct.

    Having that peace of mind is a good compromise for the extra gear. CO2 cartridges work fine, but you will have to use several cartridges to inflate your tire fully. If your tire has a slow leak after your repair, you will need more cartridges to keep it properly inflated. These are not a reliable option if you are miles and miles from services. So, in my opinion, a portable air compressor is the way to go.

    DO NOT use a spray type tire filler like fix-a-flat on a motorcycle. Don’t do it. It may be ok for a quick fix on a car tire, but it will cause your motorcycle tire to become out of balance. Your wheel will wobble at high speeds and we all know, that’s a bad thing. An Insertion tool on a pocket tire plugger is something worth investing in as you don’t need to really replace this item.

    Best motorcycle tire repair kit

    Here are my recommendations when it comes to the best motorcycle tire repair kits:

    Best Tire Repair Kit – BikeMaster Tire And Tube Flat Repair Kit

    Replacement Tire Plugs – BikeMaster Replacement Plugs

    A pocket tire plugger is also a fantastic tool to have on hand as well as your motorcycle tire repair kits!

    Now that you have the tools and materials needed for a puncture repair, let’s look at how it’s done.

    Plugging A Motorcycle Tire – Step By Step

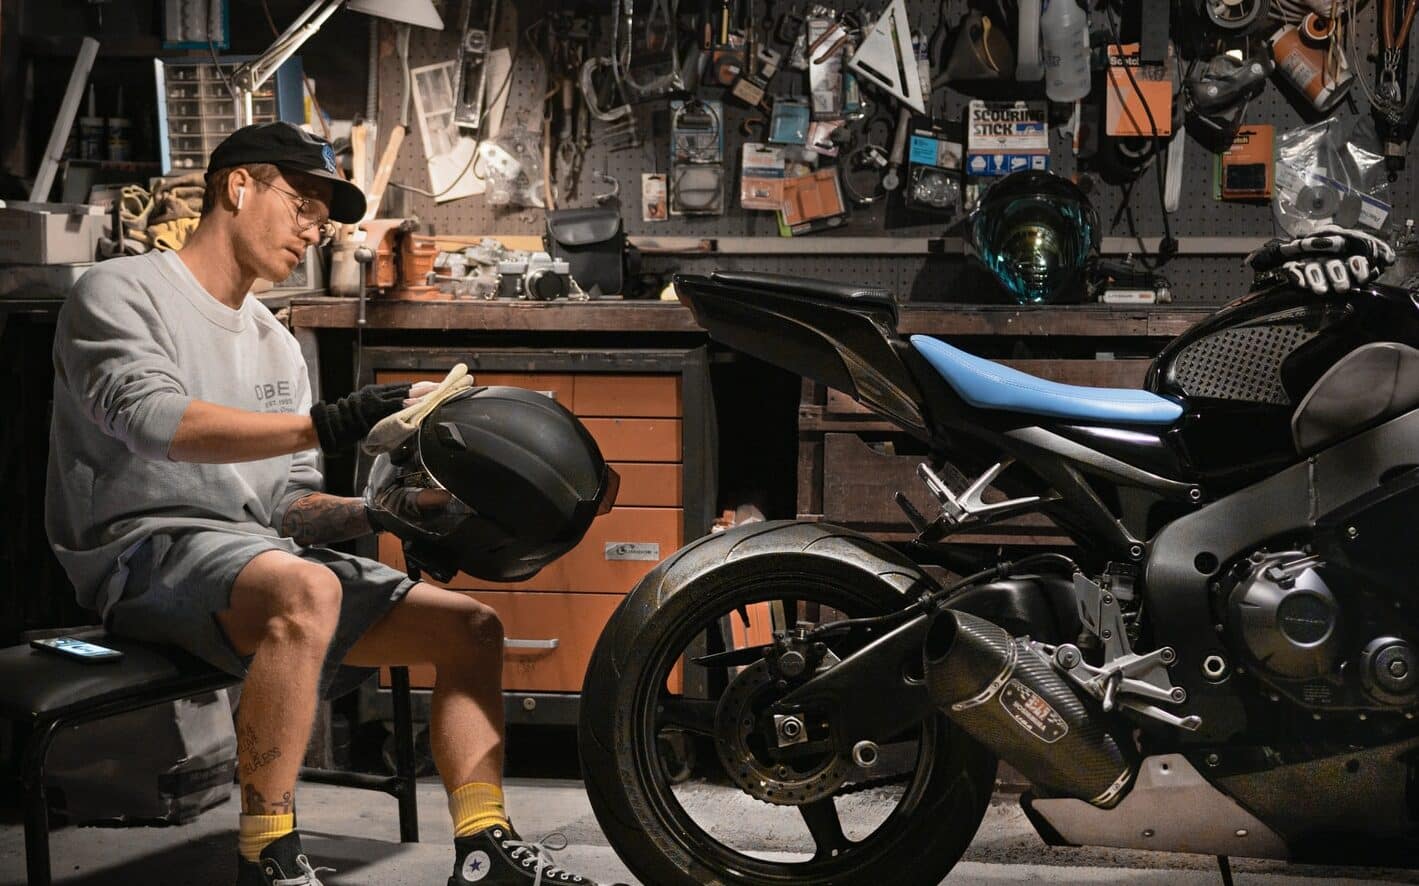
    man wiping motorcycle helmet by motorcycle
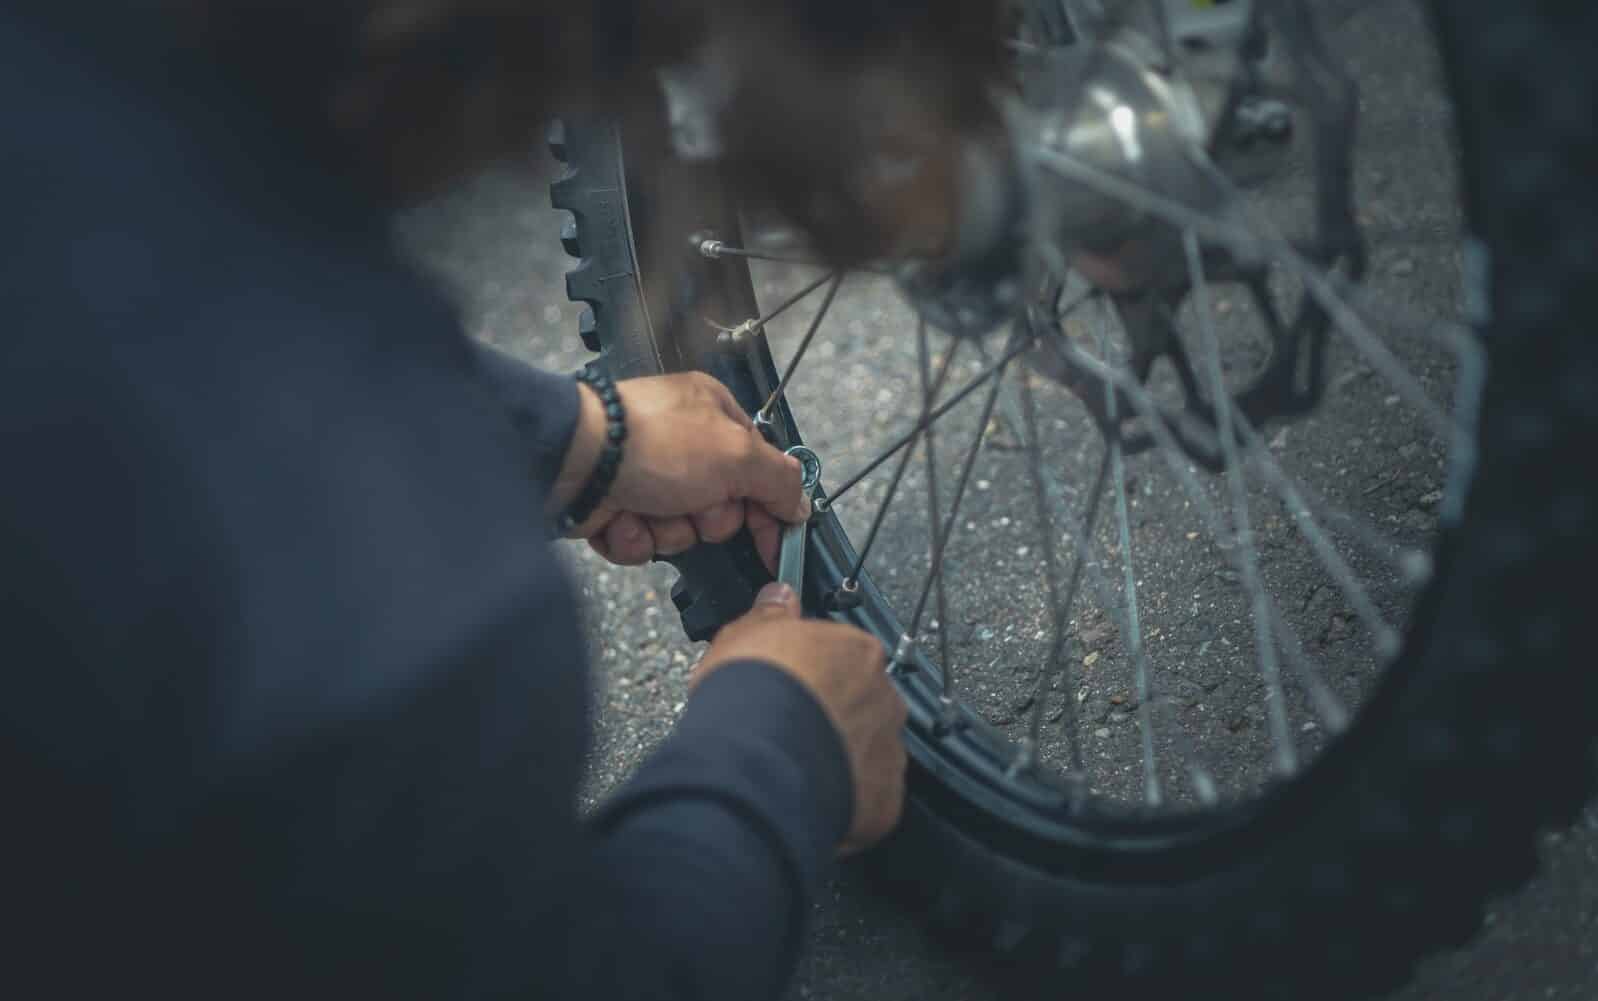
    person in black jacket holding bicycle wheel

    1. Get all of your tools out and ready to go before you remove the offending object.
    2. Place a rubber plug through the opening at the end of the plugger, like threading a needle.
    3. Remove the screw or nail with your multi-tool or pliers.
    4. Insert the tire reamer into the puncture and move it back and forth 5 or 6 times. This will smooth out the rubber and the steel belt inside the tire.
    5. Apply rubber cement to the plug if you’re not using self vulcanizing plugs.
    6. Push the plugger with the plug into the puncture hole until the ends of the plug are almost all the way in. They should be sticking out slightly.
    7. Pull the plugger out of the puncture hole quickly and do not twist. The rubber plug will remain in the hole.
    8. Use a knife to trim off the excess rubber. Get it as even to the surface of the tire as possible. It’s doesn’t have to be neat.
    9. After trimming, check for leaks with soapy water and a good mouthful of spit.
    10. Wait 15 minutes for the glue to set and check for leaks one more time before riding.

    It’s a fairly straightforward process and although I’ve never had to do it myself (yet), I’ve heard it takes some good effort to insert the reamer and the plugger into the tire. This is the reason why having tools with a T-handle is better than the straight handle like a screwdriver. You’ll be able to apply more force to the tool. And, let’s hope you don’t have to fix a tire in the middle of the desert on a 100 degree day.

    Monitoring Your Fix

    tire burnout
    man riding cruiser motorcycle

    man riding motorcycle on road during daytime

    Since tire plugs are always considered a temporary fix, they should be monitored closely.

    Check your tire after 10 miles of riding.

    Check it again after 50 miles, then again after 100 miles.

    Then, check it again the next morning to see if it held overnight. If you get past 400 or 500 miles and the plug is showing no signs of movement around the edges, or no leaks, then you can make the decision on whether or not to ride it for the life of the tire or get it replaced at the next opportunity.

    This is a personal decision based on how much risk you want to take. I am in no way telling you that you should ride that tire until it’s worn or that the plug is going to hold for the life of the tire. You need to decide that for yourself if you want to keep riding on them or get a new tire.

    If you decide to keep the tire with the plug, make sure you check that tire on a regular basis and be diligent about doing so. At the first sign of it losing air, or showing strange signs of wear or anything suspicious around the plug, replace the tire. Err on the side of caution.

    Also, remember that whatever you use out of your repair kits will need to be re-stocked. A motorcycle tire repair kit is a lifesaver on a long trip.

    Conclusion

    I hope this article has helped you with understanding the safe way to fix your flat tire while on the road and how to stay safe after the repair. I know it’s helped me in writing it. I plan to upgrade my tire repair kit by getting some tools with t-handles and self vulcanizing plugs.

    Ultimately, anyone going some distance with a motorcycle, getting a good plug kit is just smart. And with the information above, hopefully, you feel a little more informed as to how much riding you’ll do on a plugged tire. I would always opt for just buying a new tire as soon as the opportunity arises, but that’s me playing it safe.

    If you perform a motorcycle service often then ask your mechanic about the plug.

    Just remember, at all times your front or back tire is the only rubber that’s connecting you to the road!

  • Should I Carry a Motorcycle Backpack While Riding?

    Should I Carry a Motorcycle Backpack While Riding?

    Reading Time: 10 minutes

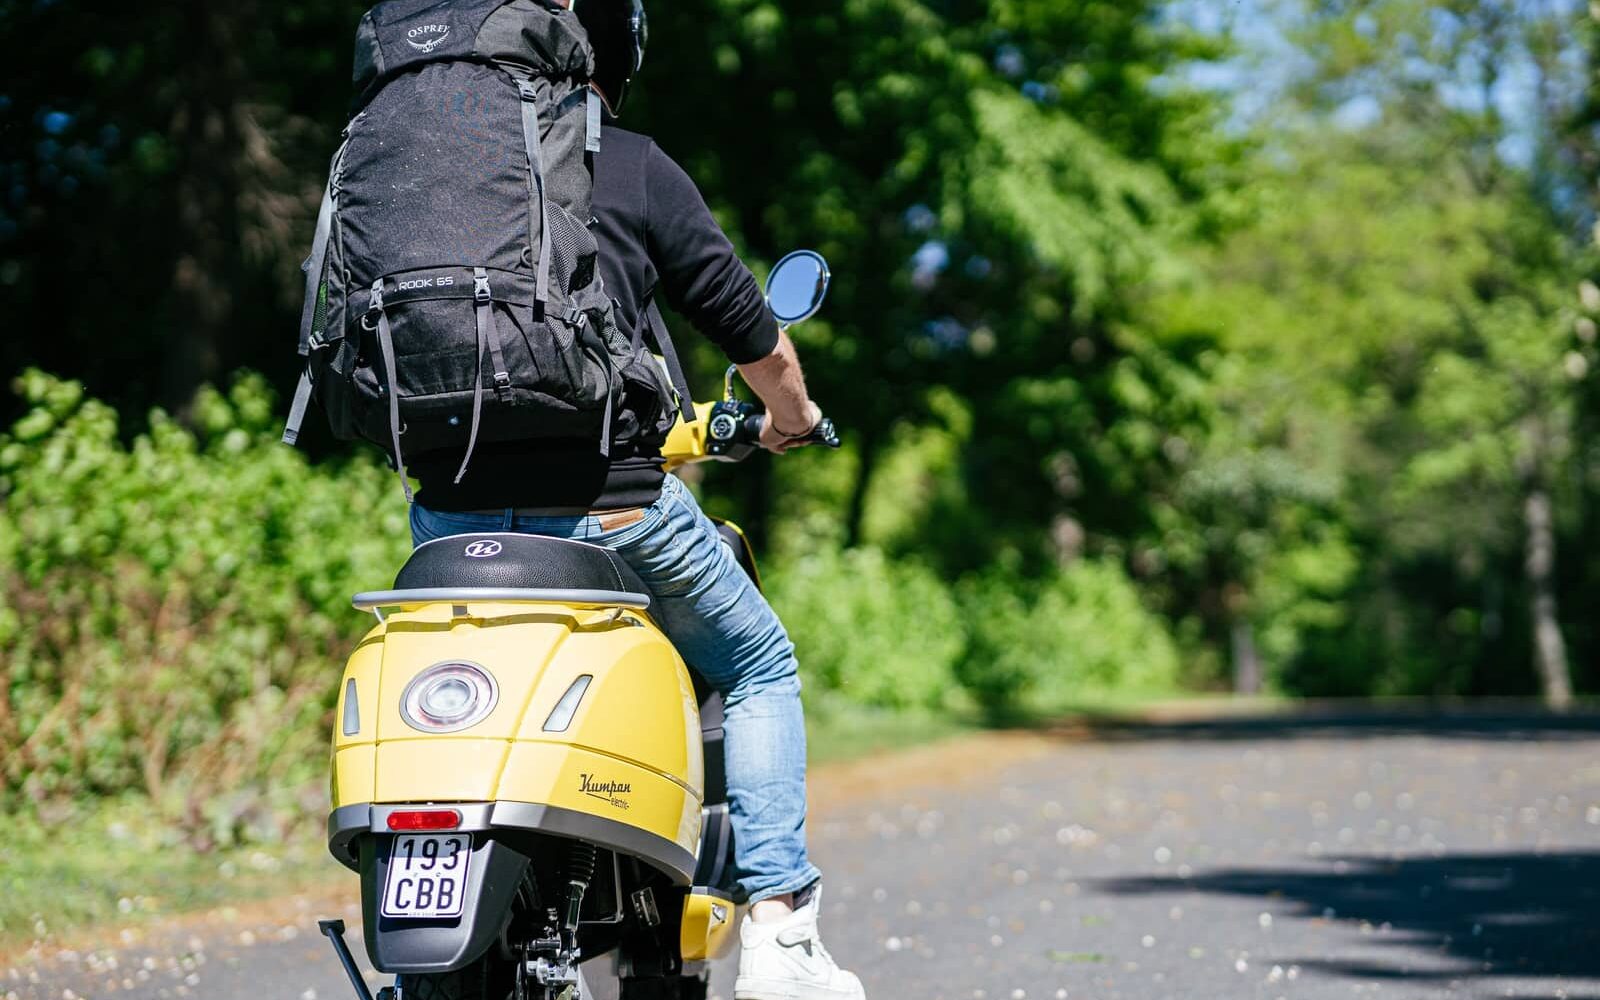
    Most people know that backpacks are an easy way to carry your “stuff” whatever stuff you have. If you’re a student or if you commute to work on a motorcycle, a backpack is simple; throw it on and go.

    Do not ride a motorcycle with a backpack unless it is specifically a motorcycle backpack. Wearing a normal backpack can increase the risk of spinal injury. A heavy pack can affect a rider’s balance during a ride or during a fall. 

    Let’s take a look at some of the dangers of wearing a backpack while riding a motorcycle and look at some solutions to how you can do it safely.

    Backpacks are convenient. Most people own a basic backpack and, if you use one on a regular basis, your pack is probably ready to go most of the time. This makes it so easy to grab it and go. If you’re a student, it’s a necessity, and if you’re a student who commutes on a motorcycle, well, you’re going to wear it. I don’t think it’s fair to expect all riders to avoid wearing a backpack just because some say it might be dangerous. I personally wear one when I commute on the bike and I’ve never had any problems with it.

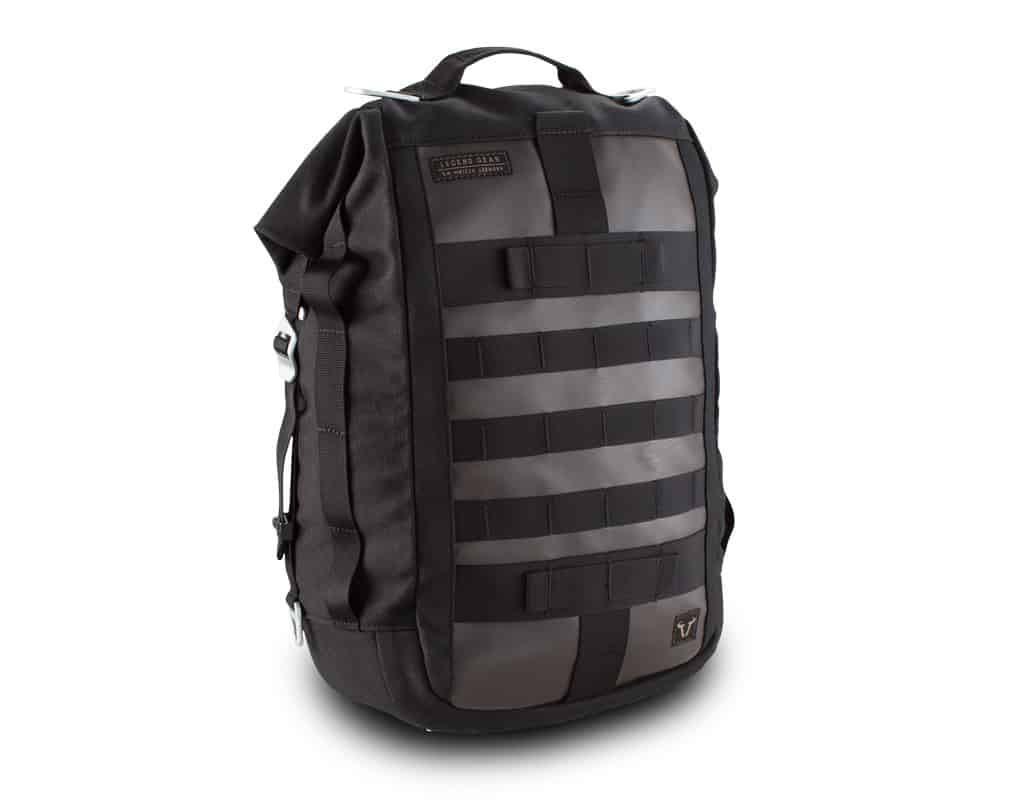
    A motorcycle backpack has shoulder straps, waist straps and an additional padded laptop sleeve for optimal safety of your contents while riding. The best motorcycle backpacks have padded shoulder straps for superior grip and a removal waist strap for comfort. Alpinestars City Hunter backpack is one of the best motorcycle backpack for professional riders with a sternum strap and additional tail bag. The right motorcycle backpack will have padded straps for shoulders and waists alike. A motorcycle backpack with a magnetic roll top closure, exterior pockets, waist belt, aid kid, compression straps and laptop sleeve is the best a rider can ask for. Adjustable straps for a motorcycle backpack allows you to carry your belongings and transform them into a multipurpose bag when you are not riding. So, let’s look at some ways you can make riding with a backpack safer.

    The Dangers, The Solutions

    motorcycle backpack

    Before we can change our habits, we need to be familiar with the dangers of wearing a backpack while riding.

    Straps that dangle freely

    Danger:

    Straps. Most packs have adjustable shoulder straps and some may have other straps that can dangle freely. While it’s not likely that the extra strap length will get caught up in the chain or wheels, they can be annoying while riding. But in the event of a crash, there it is plausible that a strap could hang up or get caught in something during the fall.

    Solution:

    Use a small Velcro strap, like you would use on cables, to roll up and secure any excess straps that are flying in the wind. Choose a backpack that has these strap holders built-in, or has a place specifically to tuck away excess straps. Avoid backpacks that have a lot of straps for other gadgets such as skateboards, tents, or camping gear.

    Extra weight on Shoulder Straps

    Danger:

    Added stress on the shoulders and back. Even a pack that is only moderately heavy will have an impact on how your shoulders feel. If your ride is short, under an hour, you probably won’t notice much. But if you have a long commute, or you’re riding for more than a few hours, the stress on your shoulders will build up and start to bother you. This increases fatigue and just makes for a crapy ride.

    Solution:

    Rest and get stronger in the shoulders will help here. Limit your riding time when using a backpack to relieve stress. Consider other luggage options if you know you have a long ride ahead or ride long commutes on a regular basis. Also, choose a backpack that has a chest clip or waist support straps. This simple solution will take much of the weight off your shoulders and distribute the weight evenly across your chest.

    A strap at the waist will also pull some of the weight off your shoulders. Backpackers can carry 30 pounds for hours and hours because most of the pack weight rests on the hips rather than the shoulders. Some smaller backpacks will come with hip support, so this may be a good option for you. If so, make sure the pack is riding on top of your hip bones, otherwise, it is ineffective.

    Zipper can Vibrate Open

    Danger:

    Zippers can work their way open leaving all your stuff on the highway. Seriously, this can happen. Have you ever seen someone walking along with their pack slightly open from the stress of its contents? It can happen on the road too.

    Solution:

    This one is easy. Don’t close the zippers to the middle of the pocket. Instead, both zipper pulls should be at one side of a zipped-up pocket. In fact, you should be in the habit of doing this all the time, not just when riding with your pack. It keeps your belongings much more secure.

    What happens with a Backpack on a Crash

    Danger:

    So, what happens in a crash? A lot of people might think that the backpack will save your back from road rash or impact. But let’s look at the logistics of that. A pack will extend out from your back probably by a foot or more. If you were to land flat on your back, your body would bend backwards around the pack. Also, your head will be an additional foot off the ground. Think about the stress this could cause to your spine and neck.

    Landing option number 2. Your backpack strap snags on the mirror, or handlebar, as you go down. This could cause a major shoulder or neck injury.

    Landing option number 3. Your pack will slide sideways and you land on your ribs, crack! This can be a problem depending on what you’re carrying. Are you carrying tools or small solid objects? Even a laptop, if you land on it just right, can do a lot of damage.

    Solution:

    Wear a back protector in addition to a specifically designed motorcycle backpack, and that back protector should be on YOU, or included in your riding jacket, and not included in the backpack. Why? If the protector is inside the backpack, and it shifts or comes off in a crash, it’s worthless.

    Purchase a backpack that is specifically designed for motorcycles. Many of these packs are designed with a hard shell on the exterior. These hard shells can help with drag. Although a drag-free pack won’t eliminate drag completely, it will keep the drag evenly distributed along your back no matter what you put in your pack.

    Choose a pack that includes chest or waist straps. Make sure all these straps are nice and snug when you wear the backpack. You actually want it to be an extension of your body, rather than something hanging or dangling off your body.

    Poor Weight Distribution on Backpacks

    motorcycle backpack

    Danger:

    You’re thrown off balance in turns due to poor weight distribution or objects shifting in your pack.

    Solution:

    There is a method to packing a backpack that is better than throwing your stuff in blindly. If you have to carry tools or small objects, put those things in a smaller bag or a tool roll to prevent them from rattling around freely. Make use of those little zippered compartments or pen pockets.

    Heavy objects should be placed closest to your back and right at the center of the pack, if possible. Lighter weight items, such as clothing, jacket or shoes, should be placed farthest away from your back. If you don’t have enough stuff to fill up your backpack, increasing the risk of items shifting around, consider using a light jacket to take up that extra space.

    What to Consider When Choosing a Motorcycle Backpack

    This topic could be an entire blog post in itself, and maybe I’ll take the time to do that. But for now, here are a few things to consider when selecting a backpack that’s right for you.

    General Features to Look For

    • No way sharp objects would go through the backpack
    • Look for Hard Shell motorcycle backpacks
    • Built from tough materials, such as Cordura fabric
    • Can attach a back protector
    • Waterproofing is essential for your backpack on motorcycle
    • Avoid roll-top closure, these are just annoying to use.
    • A helmet carrier component on a motorcycle backpack can be a quick and easy way to store your helmet off the bike.

    Sport Bike

    If you ride a sport bike, you’re going to want something that sits comfortably when you’re in that forward riding position. Consider a smaller bag that is drag resistant. One that fits nice and snug to your back. Keep your pack weight to a minimum since a lot of the weight distribution will be on your lower back, in addition to your shoulders. Also, with that forward position, your arms are going to be carrying some of that pack weight.

    Standard Motorcycle

    If you ride a standard bike, where you’re in an upright position, the weight of the pack is going to stress your shoulders more. Consider a pack that includes a waist strap and chest strap to distribute the weight to your hips and chest. Again, choose a pack that will fit you nice and snug.

    Adventure Bike

    If you ride an ADV or want to use a daypack with a hydration system, make sure the hydration bladder sits close to your back as it will be the heaviest. Choosing a pack with a lot of zippered compartments is fine, but make sure items can fit in each pocket securely and that they don’t shift around when riding.

    Best Motorcycle Backpacks

    My Recommended Motorcycle Backpacks

    Best Tail Bag/Backpack Hybrid (click for current price)

    Best Hard Shell Backpack (click for current price)

    Some Alternatives to Motorcycle Backpacks

    Tank Bag

    Tank bags are usually located right on the gas tank, which is located at the front of your motorcycle, on top of the tank. They usually come with multiple compartments and offer more space than a backpack. A benefit of tank bags is that you can access them while riding. But their downside is that when you get to your location a backpack will be easier to carry than a tank bag.

    Tail Bag

    Tail bags are located on the pillion seat are fantastic for carrying your everyday essentials. The great thing about tail bags is that they can be removed and placed on the ground, making them easier to carry around and store than a backpack or tank bag. But a tail bag is usually small, more so than backpacks.

    Saddle Bag

    A benefit of saddlebags is that you can also access your belongings while riding, but they usually have fewer compartments than a backpack. Usually with 1 or maybe two large openings. This main compartment is almost always larger than your backpack.

    Top Box

    The top box is another luggage option that you cannot access while riding, but it’s usually located further back. Top boxes also aren’t easily taken off once you’ve arrived at your destination.

    To Sum Up

    So, as you can see, there are a lot of considerations when choosing to take a backpack on the bike for motorcycle riders. And there are a gazillion choices out there for carrying a backpack on your motorcycle. Yes, a gazillion trillion. But, I hope this article has helped you think about the cautions you can take when you ride with a backpack and hopefully given you some solutions to help mitigate the risk. Whatever you do, buy specific motorcycle backpacks.

  • How Does a Motorcycle Disk Lock Work? (What To Know Before Buying)

    How Does a Motorcycle Disk Lock Work? (What To Know Before Buying)

    Reading Time: 7 minutes

    When you’re out on a motorcycle trip, no matter how short or long, the last thing you want is a stolen bike. There are several ways to secure your motorcycle, one of them being the disk lock.

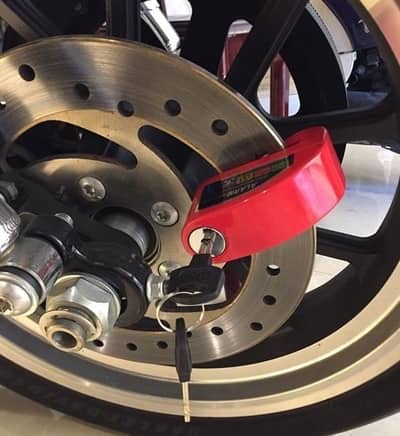
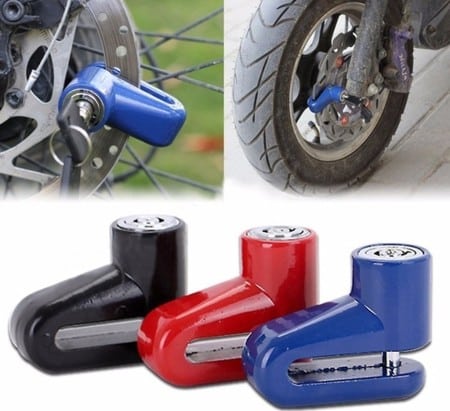
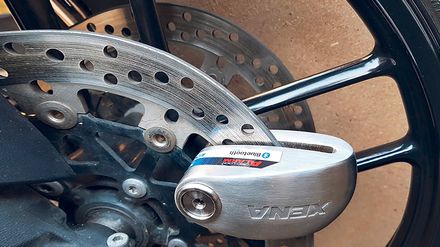
    So, How do motorcycle disk locks work? Motorcycle disk locks are small but sturdy locks that attached to your motorcycle’s disk brakes rotor. The U-shaped lock will slip over the disk and the pin will be inserted into a rotor vent hole and locked into place. The lock will prevent the wheel from turning by hitting the brake caliper or wheel forks. But, will a disk lock really keep your bike from being stolen?

    No type of motorcycle lock or theft prevention system is a 100% guarantee that your bike will never be stolen. Thieves are smart and tricky. If they really want your bike and they have the resources to snatch it, they will find a way, even if it has a motorcycle lock. But, there are things you can do to make it more difficult, especially for the opportunistic thief who’s looking for an easy score.

    What is a Disk Lock?

    A motorcycle disk lock is a motorcycle lock that prevents theft by attaching to the wheel of your bike.

    All disk locks look very similar. A disk lock is made of heavy, solid steel and generally have a long, thin opening that will slide onto your brake disk with just a little wiggle room. Disk locks will include some kind of disc lock that opens and closes with a key. This lock moves the pin in and out allowing you to install the disk lock and remove the disk lock from the brake disk rotor. To install a disk lock on the bike:

    • Unlock the pin
    • Slide the lock onto the brake disk
    • Align the pin with one of the  vent holes
    • Turn the key to insert the pin through the hole and secure the lock

    Disk locks usually come with a brightly colored coiled plastic cable. This is really important for all motorcycle locks. This cable is not used as part of theft prevention. It’s used to remind you to remove the lock before trying to ride away. Yep. Enough people do it to necessitate this feature on motorcycle locks. You’ll string the cable from the disk lock to your handle bars, or some place where you’re sure to see it.

    Personally, I’ve been lucky so far. I haven’t used the reminder cable in a long time, and, I’m not even sure where it went. But, there have been a couple of times where I’ve sat on the bike, ready to start it up, and I suddenly remember to remove the disc lock. Maybe I should find that cable and keep it with me.

    Anywho, I think the pros of motorcycle locks outweigh any chance you might ride away with it on.

    Will a Disk Lock Prevent Theft?

    A disk lock will only prevent roll theft. A disk lock creates no more than a deterrent for most criminals, but there’s nothing preventing a few guys with a van from lifting your bike away. Actually, the van method is a lot less common than you might think.

    Look at it this way, if a bear is chasing you, you don’t have to run faster than the bear, you only have to run faster than your friend. (That’s awful, I know). If your bike is parked along side another bike, your’s has the disk lock and the other doesn’t, which bike do you think the thief is going to take?

    He’s going to take the path of least resistance. And seeing a brightly color disc lock on your wheel and a bright reminder cable on your handle bars, might be just enough to make him move to the next opportunity.

    Nonetheless, there are a few things you can do to make it harder for them.

    Best Ways to Use a Disk Lock

    If you are able, always use the disc lock on your rear wheel. Why? Because a bike thief can quickly remove a front wheel, replace it, and ride away, leaving you with your disk lock and your wheel, but no bike. Rear wheels take more time to remove, so, this will give you a little bit of an edge if the thief is in a hurry. And it’s safe to say most are.

    For some bikes, typically scooters or older bikes with rear drum brakes, you should probably find an additional form of security, such as a chain and padlock, rather than relying solely on the disk lock.

    Types of Disk Locks

    brown padlock on brown wooden fence

    There are two common types of disk locks; the kind described above, which is good for only one type of application; on the brake rotor. Or, you can get a padlock style that can be used as a disk lock, or used with a heavy duty chain to lock your bike to a secure object. The padlock style may give you more options on how it can be installed on your rear brake disk depending on the type of bike you have.

    The padlock style can also be used in conjunction with a heavy duty chain enabling you to disc lock your bike to an object like a pole, or a strong hold anchor. This creates the best motorcycle disc locks system.

    Disk locks come with different lock styles; tubular or a basic, straight key. It’s best to avoid a tubular disc lock as they can be easily picked with a ball point pen. Ne’er do wells have figured it out. Although manufacturers have made improvements to the tubular lock, a cheap brand may be easy to pick.

    So, it’s better to use a disc lock that is not tubular, rather, one that used a straight key. A key retaining lock is one in which the key will remain in the lock and can only be removed once the disc lock is secure.

    Disk locks come in a lot of brands and some can be made of less expensive materials. It’s best to pick a disc lock (no pun intended) that is made of hardened steel. If a magnet sticks to it, then it’s steel. Other materials may seem good, they are heavy, but, if the metal is soft it is easy to cut or saw through. A good quality disc lock made of hardened steel will cost you more, but it’s worth it.

    Disk Locks with Alarms

    An added level of security is a disk lock with an alarm.

    A Motorcycle disk lock with an alarm function just like any other disk lock, but comes with the added feature of a motion sensitive alarm. A motorcycle disk lock with an alarm takes only a small amount of motion to trigger the alarm which will give out a few short warning beeps the first time it is disturbed.

    If it’s moved again within 5 or 10 seconds, a high pitched alarm will sound at about 90 to 100 decibels. Hopefully, that’s loud enough the cause a thief to give up. The alarm will ring for 10 seconds, then stop.

    But, we all know how annoying car alarms can be. They go off in the middle of the night and go on and on and on, and everyone ignores it.  So, is a disk lock with an alarm effective? Again, it’s not a guarantee, but any extra deterrent helps. For example, if you’re staying in a hotel and your bike is parked near your room, you can have an ear out for your alarm.

    Wrap up

    So, to summarize, a motorcycle disk lock is a decent deterrent that will help prevent roll-away theft of your motorcycle. The best motorcycle disc locks are made of hardened steel with a quality lock and key. Consider the added protection of a disk lock with an alarm and install it on the rear wheel, these disk locks really work to fend off thieves.

    And finally, don’t forget to use the reminder cable so you don’t try to ride away with the disc lock still attached. You. Will. Fall. Over. A reminder cable will save you and your bike!

    I hope this quick article helps you decide whether or not a disk lock is a good option for you. And, if you’re after another level of protection, check out what a grip lock can do to help protect your bike a little more. A grip lock is a handlebar lock for your motorcycle.

  • How Long to Charge a Motorcycle Battery?

    How Long to Charge a Motorcycle Battery?

    Reading Time: 9 minutes

    How Long to Charge a Motorcycle Battery?

    When a motorcycle battery is not in use, it will lose its charge leaving you with a dead battery if you don’t maintain it properly. If you find yourself with a dead battery, you can get it back to operating condition by connecting it to a charger. Then wait. But how long does it take to charge a motorcycle battery?

    A motorcycle battery will take between 4 hours and up to 24 hours. The speed at which your battery charges depends on the amperage of your charger and the condition of your motorcycle’s battery.

    A brand new lead-acid, 12-volt battery under a constant-current charge, will take 5 – 8 hours to charge up to 70%. The remaining 30% will require another 7 – 10 hours before it is ready to install on the motorcycle. A new, sealed, pre-charged battery is generally charged to 80% when you buy it and should be connected to a charger for 4 – 6 hours to reach maximum charge before putting it in the bike.

    Now, you might be thinking, that’s great for a new battery, but how long does it take to charge a motorcycle battery that’s already on my bike? That depends on several factors. So, let’s dig into the basics of motorcycle batteries, how to charge them and how to keep them charged.

    Common Types of Motorcycle Batteries

    In keeping with the main topic of this article, I don’t want to get too deep into the nitty-gritty of battery technology. But, I would like to mention a couple of basics.

    Lead Acid Motorcycle Batteries

    These are probably the most common type of motorcycle batteries. They consist of Lead plates in each cell and are filled with a mixture of sulfuric acid and water. The chemical reaction between the two creates an electrical charge. When you buy a new lead-acid battery you will have to fill each cell with acid that is provided when you purchase the kit. Don’t worry, it’s not as hard as it sounds. You will then connect your trickle charger to your battery and let it sit for about 24 hours to get a full charge. Install it into your bike and you’re ready to go.

    Lead acid batteries require regular maintenance, and this is something that a lot of people neglect. The fluid in the battery cells will evaporate and the cells can dry out. This is the quickest way to destroy the battery. So, it is smart to include a battery check along with your regular maintenance routine. If a battery cell is running low of fluid, top it off with distilled water. DISTILLED water. Not beer.

    One important thing to note: this type of battery must be installed upright or you risk leaking battery acid all over your bike. And that would be a disaster.

    Gel Cell and AGM Motorycle Batteries

    These are both a type of sealed lead-acid motorcycle batteries. When you buy one new, it will already be charge about 80%. These are by far the easiest battery to own. They require no maintenance other than keeping them connected to the tender when the bike is parked. Because they are sealed, you don’t have to install them upright, giving you more options for placement on a bike. One tip, however, is to connect a new battery to a float charger for at least 4 to 6 hours to bring it up to 100% before you install it on the bike.

    Lithium Ion Motorcycle Batteries

    The Lithium-Ion motorcycle battery is newer technology. It is incredibly lightweight, 1/3 the weight of a lead-acid battery, and requires very little maintenance. They tend to last longer than other motorcycle batteries when properly maintained but this does not mean the battery capacity is necessarily higher. But, there are a couple of things to be aware of when considering a Lithium-Ion battery, such as its higher price tag.

    Lithium-Ion motorcycle batteries are known for giving you much more power in a cold start, making them perfect for larger bikes or for starting your bike in freezing weather. However, you need to follow a specific procedure when doing a cold start.

    • Crank the engine for about 5 seconds. you’ll notice it cranks very slow and won’t start.
    • Let the bike sit with the power on for 30 seconds. This will warm up the battery.
    • Now, crank it again and your bike should start right up.

    One word of warning; with a lead-acid battery, if you accidentally leave your headlight on and drain the battery, you’ll still have the ability to recharge it. However, if you do that with a lithium-ion battery, you will cause permanent damage to the battery. It will be toast.

    What is a Trickle Charger?

    A Trickle charger is another name for a battery tender. Trickle chargers are attached to your battery and plugged into a wall outlet. When the bike is turned off, the charge in the battery slowly diminishes.

    The charger will keep drawing power from the wall to recharge it until you start up your bike again. This means that when you go out for a ride, you usually have at least some charge left in the battery.

    Once you get home, just connect your charger and let it do its thing while you sit back and relax.

    You can leave a trickle charge hooked up to your motorcycle overnight or for months on end during winter. You can buy these trickle chargers at any local automotive store or order one online. Every motorcyclist should own a trickle charge device.

    What is a Smart Charger?

    A smart charger is a type of trickle charger that includes some intelligence. This means it will stop charging your battery once it has reached full capacity, so you don’t have to worry about overcharging. There are both automatic and manual models available on the market today.

    I would suggest you going out and purchasing a smart charger version of a trickle charger.

    How to Keep Your Battery Charged

    To get the most life from your battery you need to keep it optimally charged with a smart charger and not allow it to get too drained. There are some easy steps you can take to keep your battery ready to go.

    Keep it on a charger

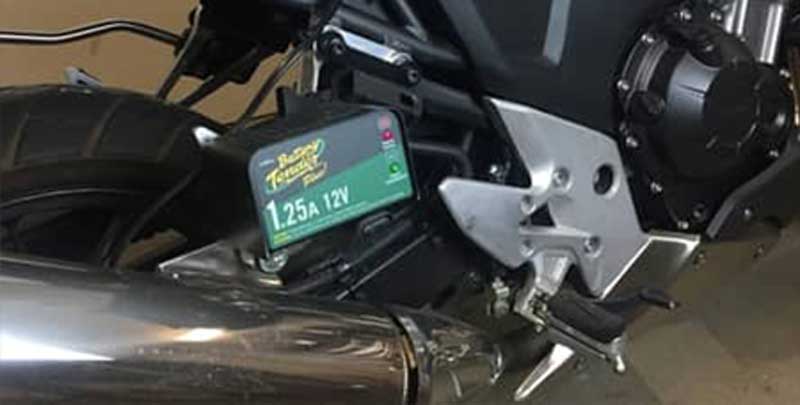
    A Battery Tender should be a staple in any motorcycle owner’s garage. See the current prices on Amazon. It is the easiest way to keep your battery fully charge in between rides and during the off season. The Battery Tender is a trickle charger that feeds a consistent current flowing to your battery and will switch to float mode once your battery reaches 12 volts.

    Battery Tender isn’t the only brand of charger on the market. There are plenty to choose from. You can charge your motorcycle battery with any charger, but, it is highly recommended that you use a charger that has an automatic mode that will switch off or switch to float mode before charging it higher than 2 amps. An unattended battery that’s allowed to charge more than 2 amps will bulge or even explode, spewing battery acid everywhere. Yikes!

    Check for Parasitic Draw

    Do a parasitic draw test. The purpose of this test is to see if there is a leak, so to speak, where your battery power is being drained. Some small amount of battery drain is normal, say, if you have a clock or alarm on your bike that is always on. But these leaks can also be caused by short or poor ground wiring. Any drain more than an amp should be investigated and repaired. Checking for a parasitic draw is simple.

    1. Check your bike’s manual to see how to access your battery
    2. Disconnect the negative cable from the terminal
    3. Take a basic voltage/Ohm meter and set it to amps
    4. Place one meter lead on the negative terminal, and the other meter lead on the negative cable.
    5. The meter should read Zero amps.

    If it reads anything more than zero, and you don’t have any accessories on your bike to draw that power, then you need to investigate further and correct the issue. Before you know it, your battery will be drained one amp at a time.

    Keep your Electronics to a Minimum

    Riding with a lot of electronic accessories can stress a battery and drain it faster than normal. If you have a lot of accessories such as a stereo, GPS, or heated gear, be sure to purchase a battery that is designed to accommodate all those gadgets. And, be aware that your battery will be stressed during long rides. Plan accordingly if you’re going on a multi-day ride and bring a Battery Tender Jr. with you. You will need an electrical outlet to plug it in, so, that may take a little imagination depending on where your staying.

    When Should You Replace Your Battery?

    It’s a good idea to include a battery check to your usual maintenance routine. Every time you change your oil, why not check your battery charge. Physically inspect your battery for leaks, bulging, corroded terminals and connectors.

    Check the voltage. Connect a multimeter to the positive and negative terminals and set the meter to volts. Your meter should read between 12.7 volts to 13.2 volts. This is a fully charged battery. If it reads 12 volts or less, its time to replace it.

    Check the voltage output under load. To do this test, you’ll connect the meter as described above. Startup the motorcycle and rev the engine up to 3,000 rpm and check the meter. A good battery will read about 9 to 11 volts consistently for 30 seconds. Anything less, and it’s probably time to replace it.

    In summary, motorcycle batteries are close to maintenance-free, but they cannot be ignored completely. Be diligent about keeping your motorcycle connected to a trickle charger like the Battery Tender. Keep your lead acid battery topped off with distilled water. Incorporate a physical battery check and a voltage check into your regular maintenance routine.

    These good habits will keep your bike ready to pack up and ride at a moment’s notice and will prevent you from getting stranded in a motel parking lot with no power.

    How long to charge a motorcycle battery by riding?

    Your motorcycle battery will be fully charged in 30 minutes from being ridden.

    That’s right, you can charge a motorcycle but just letting it run! Your motorcycle has a component called an alternator, this is the component that recharges your battery when you are riding. An alternator is actually part of your engine that converts combustion energy into electricity which is stored in the motorcycle’s battery.

    Motorcycle and Scooter Batteries

    When it comes to motorcycles and scooter batteries, there is very little difference in how long it takes to charge them. The main difference is that scooter batteries are typically long-lived and low maintenance, whereas motorcycle batteries are designed to deliver high starting currents.

    Another difference between the two batteries is that motorcycle batteries have exposed posts so you can attach jumper cables directly to the battery terminals. Whilst Scooters have clamps built in so they cannot be attached using jumper cables.

    Best Motorcycle Battery Chargers

    Noco GB40 1000amp Genius Boost

    • Higher price range
    • More available power 1000 peak amps means more starts per charge.
    • 2.4 pounds
    • Dimensions: 8.3 x 4.1 x 4.6 inches
    • See the latest price on Amazon

    GooLoo 800amp

    DBPower 500Amp

    • Lower price range.
    • 500 peak amps, general output will be less
    • 1.32 pounds
    • Dimensions: 9.7 x 3.9 x 4.9 inches

    To see our full & up-to-date most recommended motorcycle battery charges click here.

  • Kevlar Pants Vs. Leather Pants: Do Kevlar Jeans Actually Protect You?

    Kevlar Pants Vs. Leather Pants: Do Kevlar Jeans Actually Protect You?

    Reading Time: 8 minutes

    We all want to stay safe when we ride, but comfort and style are also valid concerns when it comes to motorcycle gear. Sometimes wearing full leathers is just not practical, especially if you’re commuting. Many riders are forced to make a choice between safety and work attire. I mean, you can’t show up for work in racing leathers when the dress code is business casual. That’s where Kevlar comes in.

    The best motorcycle jeans have hip armour, knee armor, mesh lining, aramid fibres and have triple stitching. It is the ultimate protective gear for motorcycle riding. Other jeans that are slim fit do not offer impact protection and are not fully lined. A regular pair of aramid fibre motorcycle wear of the correct size is best suited for riders.

    Can Kevlar pants protect you as well as leather riding pants can?

    motorcycle safety wear

    Kevlar pants do not perform as well as leather. Leather provides superior protection against abrasion. That’s why professional motorcycle racers wear them. But, Kevlar riding jeans can still be a viable option for riders looking for style, comfort, and protection.

    Kevlar is a product developed and patented in 1966 by a Polish-American chemist named Stephanie Kwolek while working for DuPont. Yes, a woman (girls rule). The scientific name for the material is Poly-paraphenylene terephthalamide, and was branded Kevlar.

    It was originally developed to make a better, stronger tire, and, while it is used in tires to this day, it also has many, other applications. Kevlar can even be found on your iPhone. Its most commonly known use is in body armor. Kevlar has been protecting our law enforcement and military personnel for many years.

    Kevlar is not the only protective fiber out there, but it has been wildly adopted into motorcycle gear. Technically Kevlar is an aramid fiber and there are several other types in existence; para-aramids and meta-aramids. Brands such as Norex or Technora manufacture meta-aramid fabrics which are not quite as strong, durable, or lightweight as Kevlar which is a para-aramid fabric.

    It’s important to know this distinction because some jean manufacturers will use Norex, providing a cheaper alternative to the, sometimes expensive Kevlar lined jeans.

    Because of its anti-abrasion properties and its lightweight, it makes sense that Kevlar would be used in protective clothing such as riding pants. Kevlar jeans have gained popularity over the years as riders have been looking for alternatives to bulky riding pants, or riding with no extra protection other than a thin layer of denim.

    Riders want the style and comfort of motorcycle riding jeans, but they also want protective jeans.

    Abrasion Protection

    motorcycle safety wear

    Hands down, leather provides the best protection against abrasion. Good leathers can often still be worn and effective even after a crash or slide on the pavement. They are incredibly durable and will hold up for years and years.

    Kevlar jeans, still provide good protection against abrasion, once or twice depending on the severity of the slide. Of course, single layer jeans will never be as good as multilayered for a slide. They are incredibly heat resistant and will not melt under the friction of a slide.

    There have been a lot of unscientific tests on kevlar jeans to see how they hold up to being dragged on the pavement. You can conclude from some of these tests that Kevlar jeans will not guarantee 100% protection against road rash. They do have a breaking point where they will eventually wear through, but, they are much more abrasion resistant than plain denim.

    Impact Protection

    motorcycle wear

    A simple pair of motorcycle riding jeans, or leather pants for that matter, is not sufficient impact protection. All good riding pants will include armor and the knees and hips, the most common impact points. Good riding jeans will include a set of knee and hip armor with pockets to place them in. What’s great about this is that you can remove the armor and leave it in your gear bag while you’re not riding.

    Different manufacturers will have different style armor pockets, some requiring you to drop your drawers to remove them. Others may provide an outside zipper at the knee allowing you to remove the armor quickly and easily right there at your bike. No ducking behind a bush is needed.

    So, compared to leather riding pants, Kevlar motorcycle riding jeans can provide just as much impact protection on your knees and hips depending on the durability of the armor plates used. One thing to consider when purchasing jeans, is whether or not they come with the armor or if you have to provide your own. Jeans that come with armor are more likely to have pockets that are custom sewn to fit the shape of the armor, preventing it from moving around. Other brands may or may not ensure a good fit.

    Rain protection

    Both leather and Kevlar jeans are going to get wet in the rain, however, leather will offer protection depending on how heavy the rain is. On the downside, leather takes a long, long time to dry and if you find yourself soaked, there’s no guarantee your leathers will be 100% dry by the next morning, even if you hang them out overnight. Kevlar jeans, however, can be thrown in the dryer and will be ready to go the next day.

    So, in short, neither of them can be considered protection against rain, and neither of them will be comfortable once they are soaked. But, at least Kevlar jeans will be ready to go when you need them. Holy heck, you could even stop at a laundry mat and toss them in the dryer if push comes to shove.

    Style

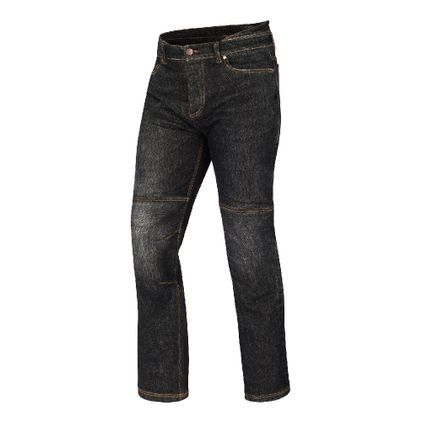
    Motorcycle riding jeans are getting more and more popular with motorcycle enthusiasts and clothing manufacturers are listening. Riding jeans come in a number of styles from grunge to work appropriate chinos. You can find them in styles that are similar to Levi’s 501’s or 550’s.

    They will come in a variety of colors like black denim, dark blue, acid wash, or stone wash. Some include features such as a strip of reflective material across the back, or elastic gathers above the knees to allow more flexibility when you ride. If you need to dress up a little more, you’ll find Kevlar lined pants that look like Khaki’s making them perfect when commuting to work.

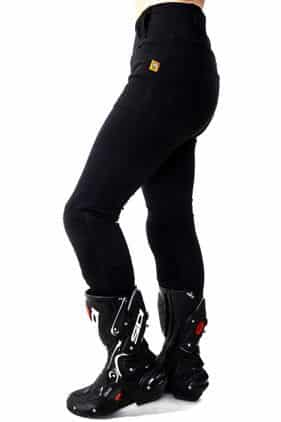
    Women‘s styles are becoming more popular as well. It’s nice that us women have the option to choose something that looks stylish but without compromising safety. While other riding pants are suitable for all riding, it’s nice to be able to jump off the bike and walk into a restaurant without having to strip off your gear or run to the ladies’ room for a quick change.

    Motorcycle Pants vs Leather

    When comparing motorcycle riding jeans, typically made of denim with leather motorcycle pants, the first thing you notice is weight. The leather motorcycle pants are significantly heavier than the motorcycle riding jeans. To combat this, manufacturers have begun using Kevlar in denim to provide abrasion resistance while keeping the weight down.

    Kevlar seems like a good choice for protecting against abrasions because it can stretch with your body which should increase comfort and performance. But, Kevlar is also sensitive to heat & still does not perform as well as leather for pants.

    Kevlar Lining for Jeans

    Many motorcycle jeans actually include a Kevlar lining around the knees and hips to provide some abrasion resistance. While this may help, for true protection you still need a layer of leather over the Kevlar. Also, if you do go down on the road with just a Kevlar lining, you’ll notice that it will damage rather easily as opposed to real motorcycle armor. When looking for a pair of kevlar lined pants remember to see if they are single layer jeans or multi-layered.

    Buying Kevlar Jeans

    motorcycle jeans
    jeans
    motorcycle jeans black

    With so many styles of riding jeans on the market, it’s hard to choose which one will be best for you. Look for features that you think you might like or that works for your situation. Do you prefer to have armor that is easy to install and remove, look for zippered knee pockets?

    Do you want jeans that don’t ride up your boot when you sit on the bike or a waist that doesn’t slide down your butt exposing crack like Joe the plumber? Then, you could consider jeans with expandable elastic above the knees and at the waistband. Do you commute to work in a business office that requires you to step it up a knotch from casual Fridays? Then choose a Kevlar lined chino in black or khaki.

    There are plenty of choices.

    As mentioned earlier, we are aware that there are a lot of companies making motorcycle riding jeans, but they don’t include Kevlar. Instead, they will manufacture these jeans with heavy denim and reinforced knees. This is not the same a Kevlar or other aramid fabrics and will not provide you with the protection Kevlar will give. So, be sure to check the materials listed.

    So, we’ve answered the original question; Are Kevlar jeans as good as leather? As far as protection goes, no, they are not. However, Kevlar jeans are a great option if you’re looking for more style and more protection than a basic pair of denim jeans.

  • Motorcycle Fatigue: How to Prevent Fatigue When Riding a Motorcycle

    Motorcycle Fatigue: How to Prevent Fatigue When Riding a Motorcycle

    Reading Time: 10 minutes

    You may someday find yourself riding home from an incredible weekend motorcycle trip, trying your best to make it home in one day when in reality you should have given yourself an extra day to make the trip. Suddenly fatigue sets in.

    You’re tired, sluggish, sleepy. I’m guilty of it, and the last few hours of those kinds of days are torture as fatigue sets it. Not only is it uncomfortable, but it is also dangerous! Getting adequate sleep is so important to fighting fatigue and reducing motorcycle accidents.

    So, how can you prevent fatigue when riding a motorcycle? Fatigue, one of the top 5 causes of fatal motorcycle accidents, can be caused by lack of sleep, dehydration, extreme hot or cold weather, eating the wrong foods or drinking sugary or alcoholic beverages.

    These, and a combination of other factors can cause a rider to become sluggish and sleepy, creating a very unpleasant and unsafe riding experience.

    In this article, we’ll talk about how you can recognize fatigue and give you some tips on how to prevent it.

    The first thing you need to know is how to recognize if you’re getting dangerously tired on the bike. Falling asleep in the saddle doesn’t just suddenly happen as if someone passes out and falls over. Nope, it happens gradually.

    In fact, our brains have an amazing way of shutting down when it’s sleep-deprived, while our bodies just, kind of, keep doing their thing. So, you need to know how to recognize the signs BEFORE you are in a dangerous situation.

    The National Sleep Foundation has put out a set of warning signs for you to look for, that will tell you that maybe it’s time to get off the road and take a break or get some sleep.

    Look for these warning signs of motorcycle fatigue:

    • Difficulty focusing – blurry vision, frequent blinking, or that feeling of heavy eyelids
    • Daydreaming – your mind wanders and your thoughts are disconnected
    • Trouble remembering the last few miles driven – you miss an exit or miss a traffic sign
    • Yawning repeatedly or you feel like rubbing your eyes
    • Slouching – riding with bad body position or having a hard time keeping your head up
    • Drifting from your lane, tailgating, or hitting a shoulder rumble strip
    • Feeling restless and irritable

    If you’re feeling any of those symptoms, or a combination of them, then you need to make a decision on whether to stop for the night, stop for a power nap, or keep on going and risk getting into what could be a serious accident.

    Below you’ll find some great tips for preventing fatigue while riding your motorcycle. It starts long before you put on your gear and get on the bike. In fact, it starts at least 8 hours before you start your ride.

    7 Ways to Beat Motorcycle Fatigue

    1. Get a good night’s sleep
    2. Hydrate
    3. Eat Right
    4. Take Breaks
    5. Wear Ear Plugs
    6. Avoid the Highway
    7. Limit the miles you ride in a day

    1. Get a good night’s sleep

    The importance of a good night’s sleep cannot be underestimated. Sleep studies have shown that driving while drowsy is similar to driving while under the influence of alcohol or drugs.

    Two consecutive nights with 6 hours of sleep or less, can reduce a driver’s ability to stay focused and reduce reaction time. Most of the sleep studies involve cars, so it’s fair to assume that the effects are amplified when riding a motorcycle. To fall asleep early on a multi-day ride is a habit worth keeping.

    Because riding requires a higher level of concentration and requires you to stay even more alert than the average cager, sleep is a must. I know it’s tempting to stay up late and hang out with your riding buddies and talk about the day’s ride, but if you hit the sack early, you’ll enjoy tomorrow’s ride that much more. So, lights out at 11 PM guys!

    2. Hydrate

    man drinking water at top of mountain

    This is another tip that starts before you get on the bike. Don’t over-do it on the alcohol the night before. You don’t want to start your morning with a hang over and already dehydrated. So, enjoy yourself, but don’t over-indulge. While on your ride there are certain drinks you should avoid. Alcohol is one of them.

    And, while I’ve been riding with people who may have a beer during lunch, I have a hard and fast rule for myself: save the beer for after you park it for the day. It’s also a good idea to avoid sugary drinks like soda and energy drinks as these can give you an initial boost, but cause your energy level to plummet later in the day.

    A sugar low doesn’t happen when you don’t have enough sugar, it happens from having too much sugar and then feeling the consequences afterward.

    To drink alcohol and not go to sleep at a reasonable hour and then expect to be doing something as physically demanding as riding a motorcycle for hours on end is just asking for trouble and will ultimately lead to a crash.

    So, what should you drink?

    Water. Just drink plain old water. This seems like a pretty simple concept but you would be surprised at how many people forget to drink water. The amount of water you drink is going to depend on things like the outside temperature, how in shape you are, and the humidity.

    There are a lot of opinions on how much water you should drink in a day, but the most commonly agreed-upon amount is about 2 liters or a half-gallon per day. When you’re active, as you are when you’re riding, you will need to drink more. And even more, if it is hot or humid. I personally like to carry my 2 liters CamelBak when I ride. That makes it simple to drink often. No need to remove the helmet.

    One way to make sure you’re drinking enough is to make sure you are urinating throughout the day. If you’re drinking water, but you’re not peeing, then you’re not drinking enough. Also, if it’s a really hot day, or if it’s humid, chug down an electrolyte drink to replenish the sodium and potassium that you’re sweating away.

    3. Eat Right

    grilled meat with vegetable and sliced lemon

    Before you ride, eat a good breakfast; one that will keep your energy level consistent for the morning. No, that doesn’t mean donuts and coffee.

    It means a good balance of proteins, carbs, fruit…and coffee. Also, don’t chow down on a huge lunch only to find yourself in a food coma an hour later. And here’s a big one, avoid carbohydrate-heavy foods. carb-loading is really good at putting you in a food coma.

    Eat light, and snack often. Carry some healthy snacks with you to keep your energy level up. Trail mix, a protein bar, or even a Snickers if you have a sweet tooth. The trick is to eat small portions more often, rather than eating one big meal.

    4. Take Breaks

    Sitting on the motorcycle for long periods of time can cause you to zone out and get sleepy. So, it’s a good idea to plan plenty of breaks throughout your ride. A good rule of thumb is to take a break every 1 to 2 hours. While you’re on that break, walk around, stretch, get the blood flowing again.

    Also, if you can stand up on your motorcycle while riding, this is a great way to get the blood flowing in between breaks.

    Taking breaks is a lifesaver when fighting fatigue. These can include regular toilet breaks or light exercise breaks, especially on extended rides when you become a more vulnerable rider

    5. Wear Ear Plugs

    Wearing earplugs will not only save your hearing but, reduce the stress of listening to the loud wind and engine noise will reduce fatigue and help keep you alert and awake. Some might speculate that earplugs will make you less safe. How can you hear your engine, or a siren, or horn?

    Actually, when you reduce those louder noises, your ears are able to concentrate more on the subtle noises, like sirens or horns. Wear earplugs to block out wind noise and loud pipes and keep you mentally alert.

    Earplugs have evolved quite a bit over the years. You could still use the basic, disposable foam earplugs that you squish between your finger then cram them in your ear canal.

    Those work just fine, they are easy to find and they cost next to nothing. But you can also use acoustic earplugs or musician’s earplugs. These will filter out the loudest noises, but let the more subtle noises in. These are great if you’re using an intercom system or listening to music through helmet speakers.

    6. Avoid the Highway

    highway at night

    Take a more interesting route instead of slabbing it on a long, boring freeway full of other sleepy drivers and big trucks. Riding on more technical roads will keep your senses alive and your mind and body alert. Besides, this is why we ride.

    We want to see the off-beaten path, that beautiful winding canyon road. But, if you can’t avoid a ride on the highway, make sure you’re not stuck behind the same car for a long time. Don’t tailgate. Don’t zone out. Go ahead and hit the throttle and pass up those slow drivers and give yourself a little boost of adrenaline at the same time.

    The worse thing you can do to yourself is to put yourself in a situation where if you fall asleep even for a second you’ll have a crash!

    Another little tip is to avoid cruise control on highways. I know cruise control is a luxury most of us don’t have, but even if you do, avoid it when you haven’t had adequate sleep. Driver aids like cruise control might seem nice but are the worst for losing concentration.

    This leads us to the last tip:

    7. Limit the miles you ride in a day

    This is great advice especially if you are riding twisty roads or technical terrain. 10 miles of dirt roads will wear you out a lot faster than 10 miles of smooth pavement. And 10 miles of mountain switchbacks that require a lot of concentration will also take their toll. Get adequate rest on days that are mentally more taxing.

    So, plan your route ahead of timekeeping that in mind. If you’re riding with a group, be prepared to shorten your route based on the speed and ability of the slowest rider in your group.

    Lastly, if you need to be home from your trip in time to clock in for work the next morning, consider reducing your miles for that last day. Plan your route accordingly. If you’re on a longer trip, consider adding a rest day to the end of your ride.

    This will give you some wiggle room. If you find yourself getting dangerously fatigued, you have the option of stopping for the night. To fall asleep while riding is the scariest feeling out there.

    Summery

    I hope you found these tips helpful. Remember to practice these tips, stay awake and stay safe. Getting adequate rest on a long ride is better protection than a full-face helmet (in my opinion). wind noise, physical fatigue, and even what you eat can cause slower body motor skills.