Author: Joel Hathaway

  • How to Measure Your Motorcycle Saddlebag Fitting Accuracy

    How to Measure Your Motorcycle Saddlebag Fitting Accuracy

    Reading Time: 12 minutes

    So, you’re looking for some saddle bags to install on your motorcycle, but with hundreds of options to choose from, how are you going to decide which to buy? There are so many things to consider such as, what type of motorcycle you ride, how much carrying capacity do you need, and whether or not you’ll be carrying a passenger. Even more important, how do you know they will fit your bike? In this article, we’ll talk about how to measure your bike for bags and other obstacles that should be addressed before you invest in saddle bags.

    Some common motorcycle saddlebag options include soft saddlebags, lockable saddlebags, leather bags, hard bags, rear tire mounting hardware and other components.

    Different motorcycle styles require different types of saddle bags, so we can’t just make a sweeping claim that if you measure from A to B, then buy this style or that style. Instead, let’s approach this based on motorcycle type: sport bike vs. cruiser vs. standard, exhaust placement, rear shock style, seat style, etc. My goal for this article is to help you determine what type of throw-over hard bags to purchase without having to install a mounting system, brackets or stays. While this may not be possible on every bike in every travel situation, there are plenty of saddlebags that will fit your needs without spending more money on a complicated mounting system.

    Sport Bikes
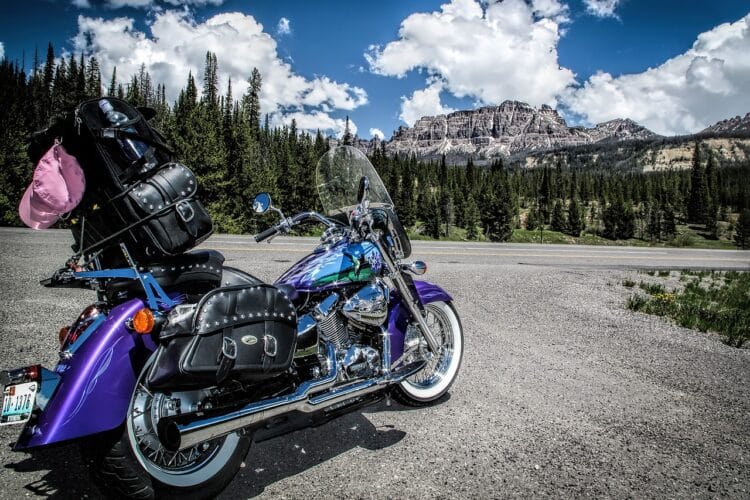
    Leather Motorcycle Saddlebags

    The rear end of a sports bike is usually very minimal and leaves the rear wheel somewhat exposed. The most common problem with saddle bags on a sports bike is preventing them from folding under, or sagging, thereby getting caught up in the rear wheel. Buying a set that is too large contributes to this problem. So, here are some things to consider and where you should measure.

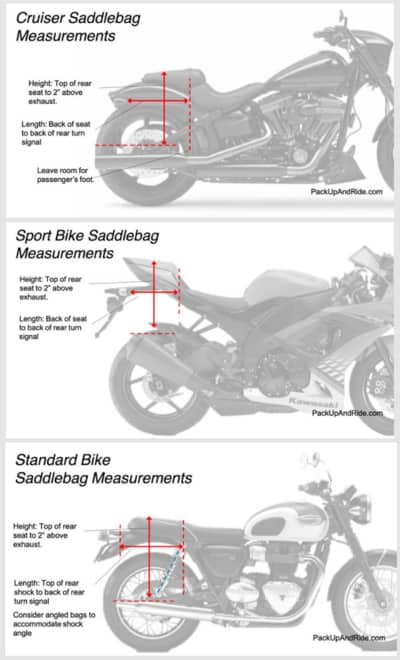
    To determine what size you should buy, measurements should be taken from the front of the rear turn signal to the back of the rider’s seat. Some sport bikes have rider’s seats that are separate from the passenger seat or cowl cover. But other sports bikes have a one-piece seat. In this case, find the point in the seat that transitions to the passenger portion and use that for your measurement point. Also, if you will be carrying a passenger, you will need to measure that width from the turn indicator light to the rear of the passenger foot peg. Honestly, the way rear pegs are set on a sports bike doesn’t leave much room for saddle bags and your passenger’s boots. If you plan to do two up trips on your sport bike often, I’d consider a sport touring motorcycle instead, for your passenger’s sake. A happy passenger is a happy rider. Back to the measurements.
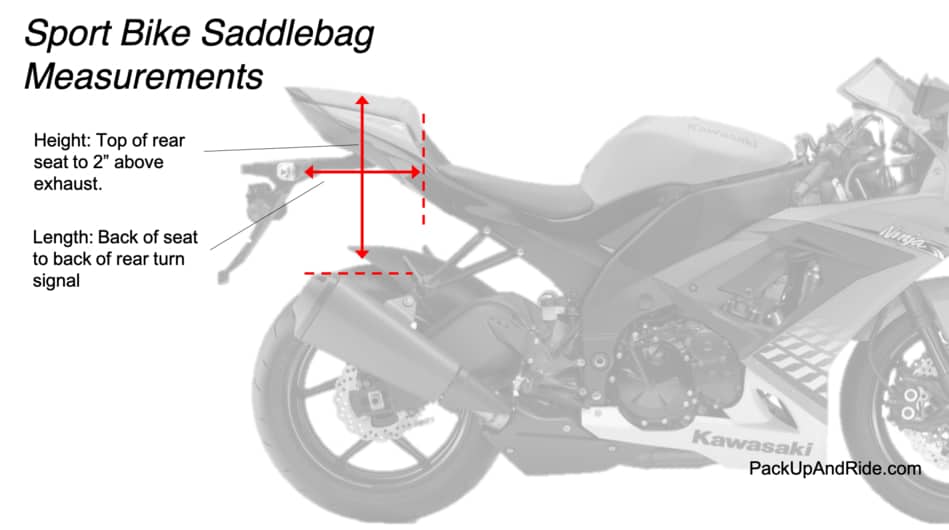
    The second measurement should be taken on the side of the exhaust pipe since the pipe placement is going to determine how tall your bags can be. measure from the top of the seat, down to two inches from the pipe. You want to keep the bottom of the bag a minimum of 1 inch away from a hot pipe, and 2 inches is ideal. Sportbike saddle bags are tear drop shaped so they fit the angles of the sloping exhaust. The narrow end of the bag should go towards the rear giving the pipe more room. This is not the case with every sports bike, but, in general, this is the case.

    One last measurement to consider is the bike’s rear width, not just the rear seat width, but the width of the plastics or grab bars as well. You want to know the measurement at its widest point. This measurement will determine the maximum width between the bags.

    Now that you have the measurements, you need to transfer those measurements to a set of throw-over bags. On a sports bike, the saddle bags need to sit up high so they don’t sag down and under the rear of the bike. So use that width measurement to make sure the bags can be adjusted to accommodate that maximum width. With the bags sitting up high, you can incorporate the height measurement to make sure they are clear of your pipes. Lastly, check the length to make sure the bag will fit without interfering with the rear turn indicators, or with your riding position, or your passenger’s ability to use the foot pegs.

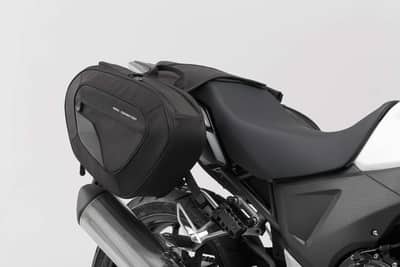
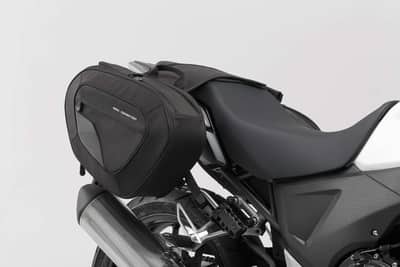
    If you need a larger set of bags than what’s available without hardware, you may have to consider installing some kind of stay brackets to support larger bags and prevent them from sagging into the rear wheel. Check to see what’s available from your bike manufacturer or from the bag manufacturer as many will have bike-specific brackets and stays. If you need something with brackets, I highly recommend the SW-Motech Blaze saddlebag system. It’s great for smaller bikes and the mounting brackets are easily removable and don’t spoil the lines of your sports bike.

    One more consideration with a sports bike is a tail-ed exhaust. This presents a set of problems that you’ll have to consider. Depending on the placement of your exhaust, you may have to consider bags with some kind of heat-resistant layer on the exterior portion that comes close to the pipes. Also, this will determine how you will secure the bags. Under tail exhaust prevents you from running a strap under the seat, so you will have to consider how your bags will stay secure on your specific motorcycle.

    Cruisers
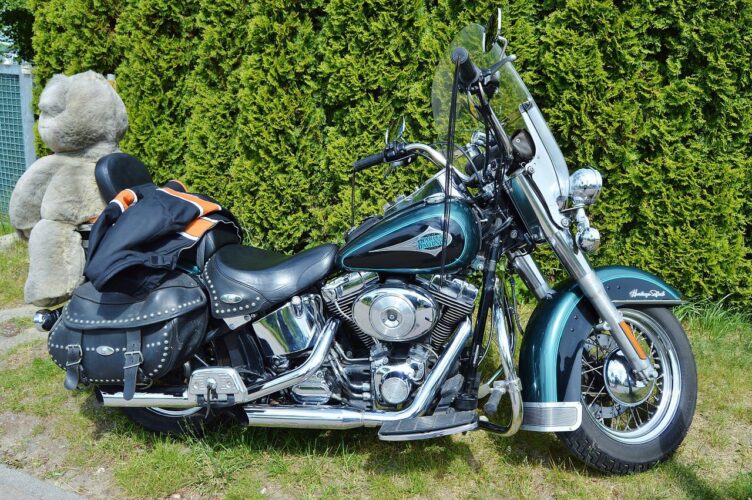
    If you ride a cruiser, your choices greatly increase, which could make your job of choosing a bag system a lot more confusing. But let’s start with the measurements to eliminate bags that won’t fit your bike. The measurements will be very similar to the sports bike measurements but there are a couple of things to determine before you take measurements.

    Will you be carrying a passenger? If so, you need to determine how much room your passenger will need for their boot on the rear foot peg. Your length should be measured from that point to the front of the rear turn indicator light. This will be the maximum length of the bag you choose.

    Another factor is the placement of your rear shock. If you have an internal mono-shock, then you don’t have to worry about it, however, if you have exposed rear shocks, you need to measure from the top of the rear shock to the turn indicator light. Also, you will need to select an angled bag that will leave room for, and sit behind the shock.

    For the bag’s height, measure from the top of the rear seat, down to two inches above the exhaust pipes. This will be the maximum height of the bags you choose.
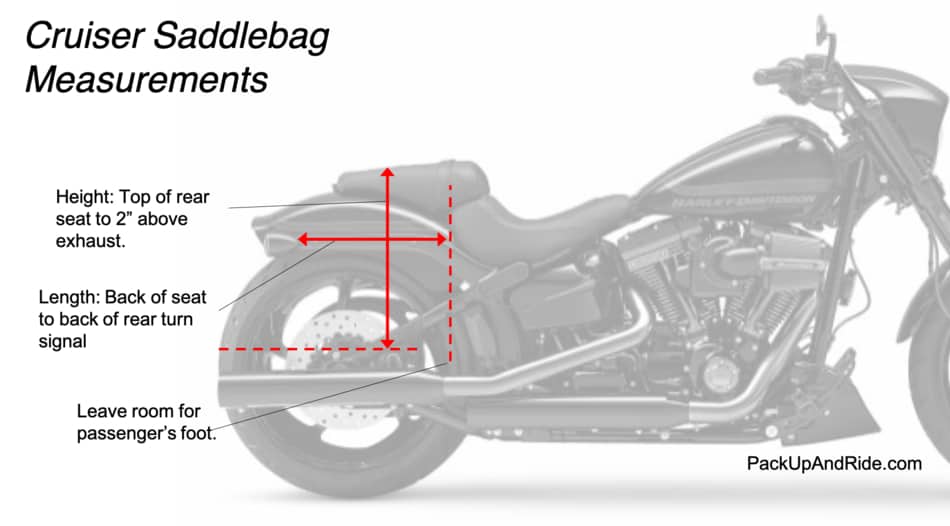
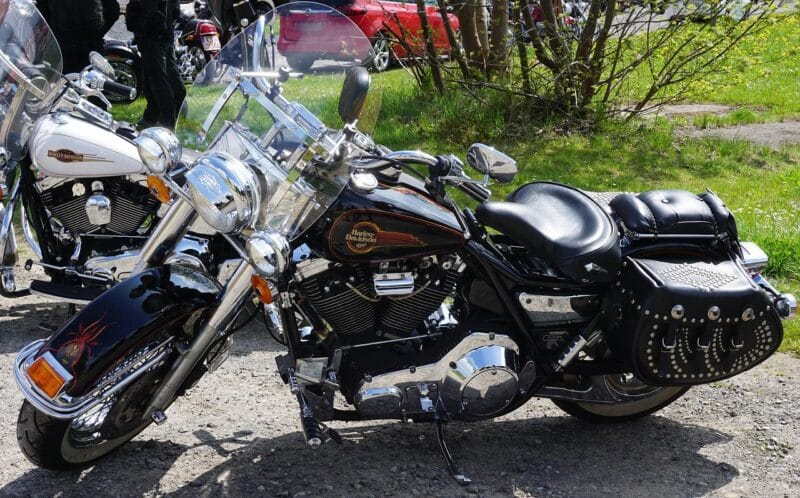
    If throw-over saddle bags simply won’t work for your needs, then check to see what kind of mounting hardware your motorcycle already has. Many cruisers are manufactured with the perfect place to easily mount brackets. Consider the quick release, or quick removal mounting system. This system consists of a couple of mounting bolts on your motorcycle, a set of bags with a hard exterior and mounting holes that fit on the mounting bolts. They are easy to remove when you get to your destination, and they have the convenience of a lock to keep them secure from theft. Also, if you want to go sporty, you can leave the bags at home and you still retain the sporty look of your motorcycle; no bulky, unsightly brackets.

    Standard Retro-Style Motorcycles
    Lockable Saddlebags

    There is some speculation out there as to what a standard motorcycle is. For the sake of this article, a standard motorcycle is one in which the rider is in an upright position, handlebars at a comfortable level, and feet in a neutral sitting position on the pegs. Think of something like the Triumph Bonneville, Ducati Scrambler, or the BMW 1200R.

    The same basic measurements will apply as well as the same considerations for external rear shocks, location of the exhaust pipes, rear turn signals, and passenger foot pegs. Retro-style motorcycles often have external rear shocks and a saddle bag thrown over the seat can interfere with those spring shocks or wear out your bags faster than usual. This may limit your selection of saddlebags that will fit with those measurement constraints and you might consider bags that sit up high. If this doesn’t work, you’re more likely to have to find a mounting system that will keep the bags away from the shocks. However, that doesn’t mean you have to install big, ugly, bulky brackets. All you need is something to give the bag support and keep it away from the shocks and wheels. Triumph makes simple brackets for many of their retro-style models and SW-Motech also makes removable brackets for many of these bikes.
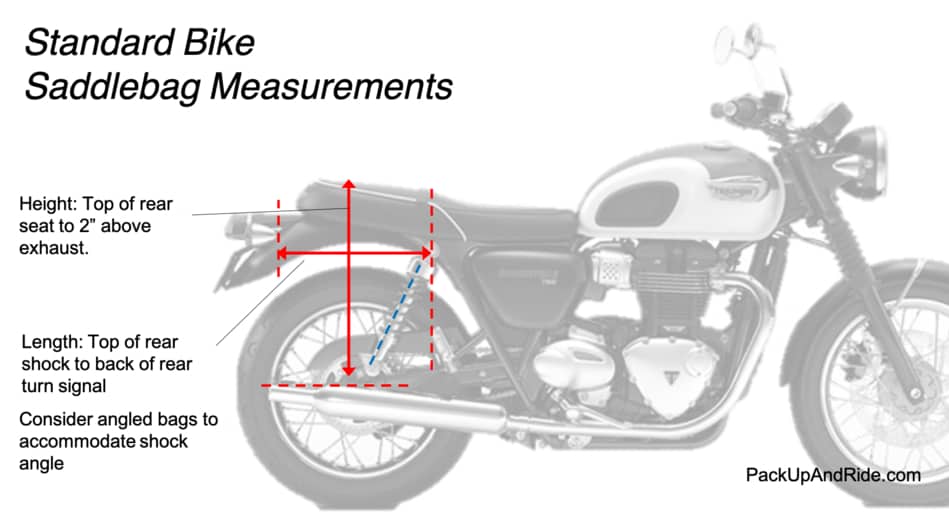
    Some of the newer standard-style motorcycles have rear ends that look a lot like sport bikes, for example, the Yamaha FZ9, Yamaha XSR900, or the Triumph Street Triple. For these bikes, you could consider the same style of bags that would fit on a sports bike. Again, measure the length from the rear turn signal to the back of the rider seat; the height from the top of the rear seat to two inches from the exhaust; and the width at the widest part of the rear seat, including fender and/or grab bars.  One of the most important things to look out for is how the bag hangs and if it is at risk of rubbing against the rear wheel.

    Modifications

    On any style bike, there are a number of modifications that you can make to your motorcycle to accommodate a set of throw-over saddle bags. First, consider a rear turn signal relocation kit. Often bag manufacturers will provide a kit so that a certain type of saddle bag will fit with your bike. A good kit should come with everything you need to relocate your existing stock turn signals.

    There is a wide variety of after-market, low-profile turn signals available. LED light technology provides a brighter, longer-lasting light in smaller sizes than conventional motorcycle turn signals. They can be mounted in a variety of locations or can be integrated into the tail light, eliminating external turn signals completely. Installing these modifications will require some mechanical know-how, and some re-wiring, but who doesn’t love a good Sunday morning project anyway. Installation instructions will most likely come with the turn signals that fit with your motorcycle, and YouTube is a great resource for installation instructions.

    If you find your bags sitting dangerously close to your exhaust pipe, and this can happen more often with under tail exhausts, you could consider installing a heat shield to the portion of the bags that sit close to the pipes. Thermaflect Tape, or heat shield tape, provides a layer that will reflect most of the heat away from your bags. However, for the tape to be effective, it needs to have at least 1-inch clearance from the heat source to provide sufficient airflow to keep the tape from overheating. So, this will not protect your bag if it is actually touching the exhaust. Frankly, if it is touching, you need to adjust the bag’s installation or use a bracket.

    Another modification to consider when using throw-over saddle bags is something to protect your paint from scratches. Often a bag system will sit directly on rear fenders or side plastics and, over time, the bags will scratch the paint. Many bag manufacturers provide a thin, clear plastic barrier that sticks directly to the bike. If you’re not comfortable putting this sticker permanently on your bike, like me, then consider a saddle bag system that includes an extra soft barrier to place under the yoke to protect the paint. For a DYI fix, a clean, soft towel under the yoke will do the trick.

    If you’re riding a cruiser and you spend your hard-earned money on easy lock bags, some have found that the OEM mounting bolts aren’t perfectly designed. In some instances, the bags may not sit in the ideal spot, and you’ll figure this out as you ride with loaded bags. If you find that your bags should sit farther away from the back of the motorcycle, you can install spacers to the mounting bolts. Sometimes it can be as little as a couple of washers, other times it may require 1/2 inch or more. This is a simple DIY fix and washers and spacers can be found at any hardware store.

    Often times a rider simply isn’t happy with the mounting brackets or stays that a bag or bike manufacturer provides, or the chosen bag system simply doesn’t come with mounting brackets. In this case, a lot of riders will design and build their own custom mounting brackets. The perfect excuse to spend time in the garage and break out those metal working tools. This gives you all the freedom in the world to build the perfect, removable brackets that will give you the option to go sporty when the bags are not in use, and then convert to a touring bike when you’re ready.

    So, as you can see there are a lot of things to consider when selecting a set of throw-over saddlebags and with all the choices out there you can easily get overwhelmed. So, start with the measurements first to eliminate the ones that won’t fit. Then pick your style and storage capacity. After that, you can determine if any modifications need to be made. Lastly, after your first trip with your saddlebags, you’ll get a good idea of ways you can improve the fit, where they can be tightened, and how they should be tied down to prevent wiggle or slipping. Also look for any unusual wear that might indicate they are rubbing on the wheel or sitting too close to the exhaust, then make adjustments as needed.

    I hope this quick article has helped you determine what kind of saddlebags to buy for your motorcycle. Riding on a trip without having to worry about your gear makes for a much nicer, stress-free journey.
    Conclusion

    Soft saddlebags are great riding gear for short motorcycle trips. The storage space for motorcycle saddlebags varies. You can get all types of motorcycle saddlebags and other motorcycle luggage Mon-Fri on all motorcycle shop outlets or online.

  • How To Perform Motorcycle Shifting Without Clutch

    How To Perform Motorcycle Shifting Without Clutch

    Reading Time: 7 minutes

    I recently wrote an article on this website about how to replace a broken clutch cable on the roadside, and how to be prepared if you ever find yourself stranded without a clutch. Then I began to wonder if you would be completely stranded, or if you could somehow ride without using a clutch. So I did a little research and here’s what I found out.

    So, can you shift gears on a motorcycle without using the clutch? Yes, you can. Motorcycle shifting without clutch is a technique used by many riders who want to minimize the time wasted between gears. It’s often used by riders who race motorcycles or those who want smoother, faster shifting. When done properly, it does no damage to your motorcycle’s transmission. However, the technique doesn’t work as well when downshifting, when shifting from first to second, or with certain types of motorcycles.

    For clutchless shifting to the next gear, the shift lever can be used. The clutch lever does not have to be used for changing from first to second gear. A clutchless shift uses the gear teeth for engine braking. A functional clutch lever is exactly what you need for shifting gear. All the gears on a motorcycle can still work if the clutch cable snapped. To shift positions to second gear, use the clutch for a transmission slide.

    How to Shift Without the Clutch

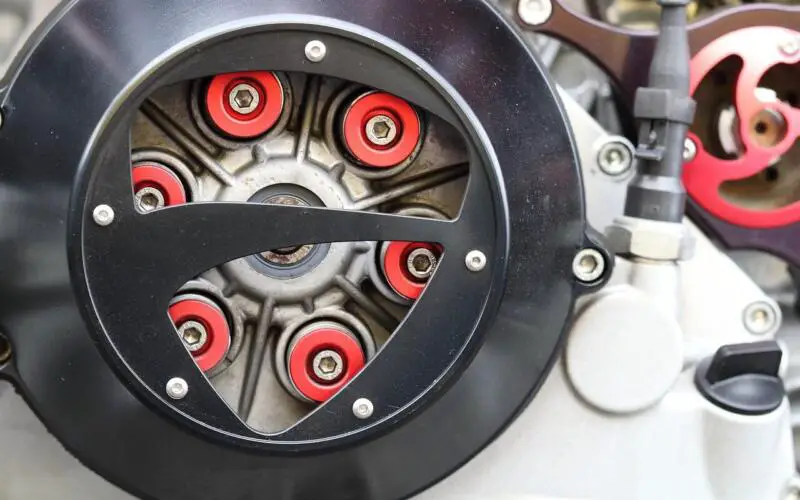
    motorcycle clutch

    Clutchless shifting has everything to do with timing. There are only a couple of steps involved and with a little practice, you’ll become more and more smooth at it. Anytime there is load on the transmission, it’s not going to want to shift gears, so the trick is to eliminate that load on the gear sprockets. Once the load is gone, you can shift. Here’s how.

    When you’re ready to shift, place your toe under the shifter lever and apply a slight amount of pressure. Not so much that it tries to shift gears; just take the slack out. Next, you will quickly roll off the throttle. When the throttle is all the way off, this will take pressure off the gear sprockets and allow your bike to shift into the next gear. The pressure you’re putting on the lever should be enough to make it shift. Lastly, roll back on the throttle and go.

    Keep in mind that these steps take place in less than a second. Apply pressure to the lever, roll off the throttle, up shift, go. With a little bit of practice, you’ll begin to feel that sweet spot, and your foot will know exactly when to lift the lever. This technique works best if you are up shifting to any gear higher than 2nd gear, so it’s going to be much more difficult to shift from 1st to 2nd because you will have to bypass neutral. So, would this be a good method to use if you’re stranded with a broken clutch cable? Possibly. If you can get your bike into neutral and start out in 2nd gear – and pop it into 2nd gear without the clutch, then you have a fighting chance. It would be tricky, but not impossible.

    How to Do a Clutchless Downshift

    Downshifting without a clutch is much trickier, requires perfect timing and will take a little more practice to get it right. To downshift, you will need to blip the throttle just prior to stepping on the shifter lever. For those of you who don’t know, blipping the throttle means giving it a very short, rapid twist. This blip will increase the rpm of your engine so that it will match the rpm of the lower gear you’re about to shift into. Blip the throttle, change gears, all in one, quick, perfectly timed motion. If you get it wrong, your bike won’t shift and you’ll simply have to try again.

    You will also need to practice the technique of blipping your throttle while squeezing the front brake lever smoothly and in a controlled fashion. This can be done by holding the throttle with the thumb and index fingers, while your other three fingers squeeze the brake lever. Another option, and one I prefer, is to apply the break with your first two fingers and blip the throttle with your thumb and other two fingers. The first few times I blipped the throttle while braking, I kept grabbing a handful of brake, but over time, my control got a lot better.

    Will Clutchless Shifting Damage my Motorcycle?

    motorcycle clutch

    Here’s where you will find differences of opinion. Some will tell you not to do it as there is no real reason for it unless you’re riding the track or drag racing and that you’re only inviting trouble if you do it. Trouble in the form of unnecessary wear and tear on your transmission. So, what’s the truth? Shifting without the clutch can damage your transmission if you do it wrong on a consistent basis. To make sure you’re doing it right, there are certain noises you should listen to. If you hear any kind of hard clunking while you shift, you’re not quite hitting the timing right. It means you’re probably shifting a bit soon. You need to shift right when the engine is at no throttle. If you hear any kind of grinding noises when you shift, you’re doing it wrong and this can really damage your gears.

    Downshifting without the clutch creates a greater risk of damaging your transmission, this is true, and it takes a lot more practice to get it to spot on. Again, if you hear any kind of hard clunking, or gears grinding, you’re not doing it correctly and need to make some adjustment in your throttle timing or just go back to shifting with the clutch.

    Clutchless shifting doesn’t work well with all motorcycles. They work best with sport bike and dirt bikes because these bikes run at a higher RPM and they have shorter gear boxes. This means there is a very short distance between gears in the transmission. The technique is more commonly used by sport bike riders who are taking their motorcycles to the track and want to shave a few tenths of a second off their lap times.

    However, bikes with larger gear boxes and lower RPM’s, will have a hard time cooperating with you if you try to shift without the clutch and you run a higher risk of damaging your transmission.

    Install a Quick Shifter

    quickshifter

    A quick shifter is an aftermarket kit that integrates with the ignition system on your motorcycle or with the fuel system depending on what type you get. In short, when you move the shifter lever, it will momentarily cut off the ignition or cut off the fuel supply. This will reduce the load on your gear box, allowing your bike to change gears when you lift the shifter. So, with a quick shifter, there is no need to roll off the throttle or use the clutch. All you need to do is stay on the throttle and shift.

    Quick shifters are popular with riders who do track days and, while it will not make your bike faster or give you more horsepower, it will make shifting through the gears on a wide open straightaway much faster and smoother. Imagine riding at full throttle and not having to worry about releasing the throttle every time you want to shift. The quick shifter will do that for you. They are not just for riders who do track days or drag racing. Anyone who wants to accelerate quickly and smoothly when entering the freeway, or taking off on a clear, straight street would probably like it.

    You can downshift with the quick shifter installed, but you will be using the same technique mentioned earlier, blip the throttle to match the rpm of the motorcycle gear. The quick shifter will not do that for you.

    So, going back to my original question. Would I be able to ride to the nearest town, or home, if my clutch cable snaps? Yes, I think I can. Although it would be a real pain in the neck to get it started from a dead stop, and I sure hope I don’t hit any red lights.

  • Essential 20 Motorcycle Tools For Every Motorcycle Trip

    Essential 20 Motorcycle Tools For Every Motorcycle Trip

    Reading Time: 12 minutes

    A couple of years ago at a big women’s motorcycle festival, a friend of mine laid down her bike and broke off the shifter lever. Bummer. She was fine but her motorcycle was not. The on-site mechanic at the festival tried his best to find a shifter that would work for her bike but to no avail. So, she and a couple of others spent the rest of the day trying to find a motorcycle shop that could fix it. She finally got it fixed, but, she missed an entire day of riding :-(.

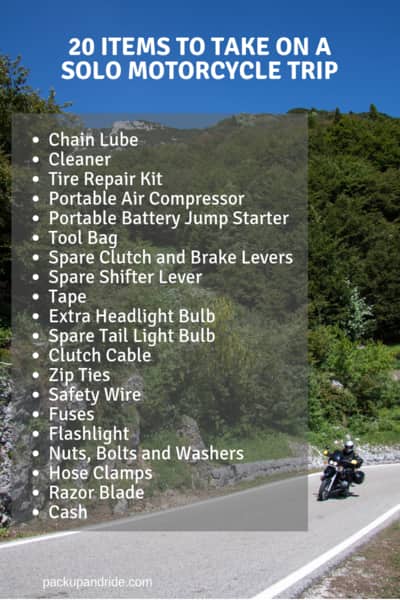
    Replacing a broken shifter lever is a simple repair job if you have the part. The incident made me think about how we can be more prepared for things like this. So I made a list of some common parts, tools and supplies we can carry on our motorcycles so we can keep our bikes in top riding condition and make simple repairs to get us back on the road.

    1. Chain Lube

    Keeping your chain clean and properly lubed on a multi-day trip will help prevent a roadside breakdown and one that can be dangerous too. So, carry a small can of your favourite chain lube with you. The rule of thumb is to clean and lube your motorcycle chain every 500 – 600 miles. For a typical rider, this would be every other day.

    If you’re riding in a dry, dusty environment, give your chain a quick wipe down and lubricate it at the end of each day, even if you don’t cover a lot of miles. The same goes with rainy weather or other wet conditions like water crossings. Water will break down the lubricant faster than usual, so give your wet chain a quick wipe and a lube at the end of the day.  Needless to say, a chain cleaning brush and a rag are nice to have items for this job.

    2. Cleaner

    Carry a small can of all-purpose cleaner that you can use on your plastics, your windscreen and on your helmet visor. Use it nightly to wash the bug guts off your headlight to keep it bright and easy to see. Keep excess dirt off your turn signals and tail lights too. Also, use it to clean your instrument panel and clean your visor often. This will make your ride much safer. I like to carry a micro-fibre towel that I can use on my helmet visor and windscreen, and a separate towel to use on other parts of the bike.

    3. Tire Repair Kit

    Harley Davidson Motorcycles Compact Tools

    Don’t let a flat tire keep you stranded. If you’re riding on tubeless tires, invest in a good tire puncture repair kit and learn how to use it. Some tire repair kits will include CO2 cartridges used to inflate your tire enough to get you to a gas station or somewhere to properly inflate your tire. You can read my article about riding on a plugged tire here.

    4. Portable Air Compressor

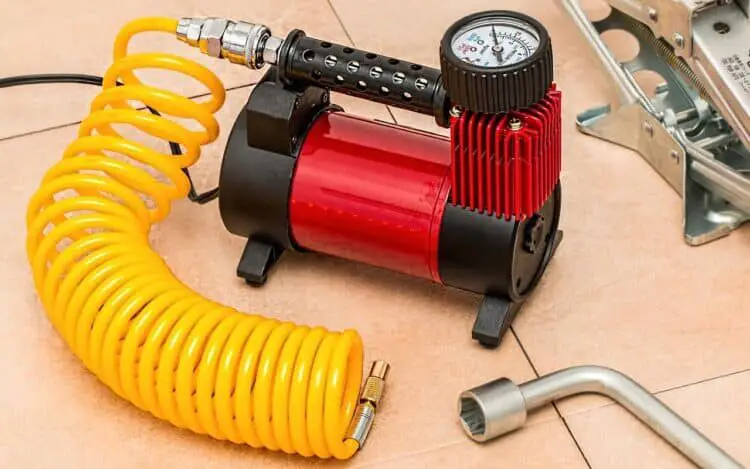
    Instead of relying on CO2 cartridges to inflate your tire, it’s a good idea to pack a portable air compressor like this one (check the Amazon price). It is strong enough to inflate your tire to 40 psi. With an air compressor, you’ll be sure to have air whenever you need it. If you rely on cartridges, you could use them all, then you’re stuck with nothing. A compressor is also handy for inflating your tire back up when transitioning from dirt riding, back to pavement.

    Oh, by the way, do not use a can of tire inflating fluid, like fix-a-flat, in your motorcycle tire. The liquid will throw off the tire’s balance causing it to wobble at high speeds.

    5. Jump Starter or Battery Cables

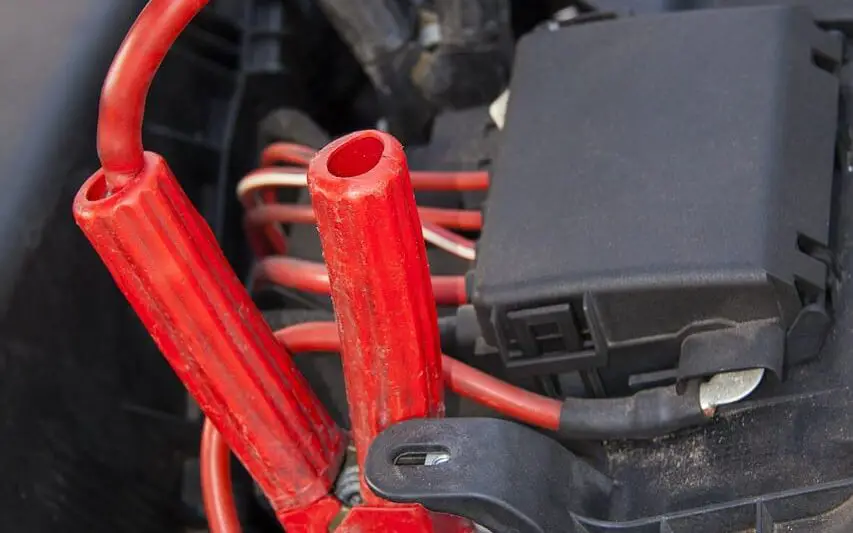
    Motorcycle Battery Cables

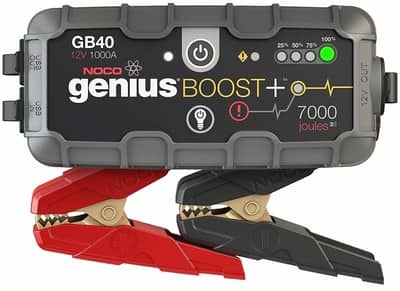
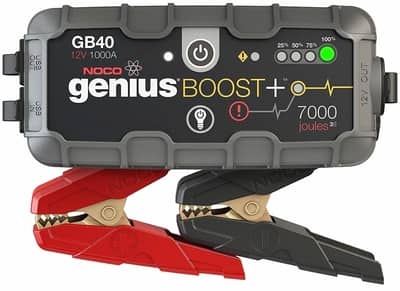
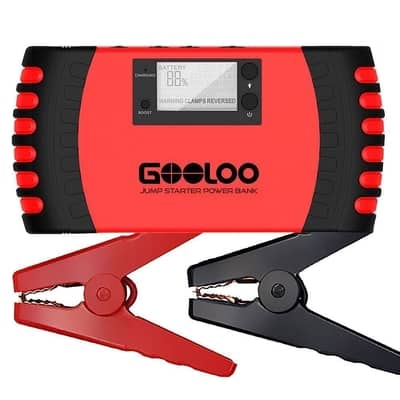
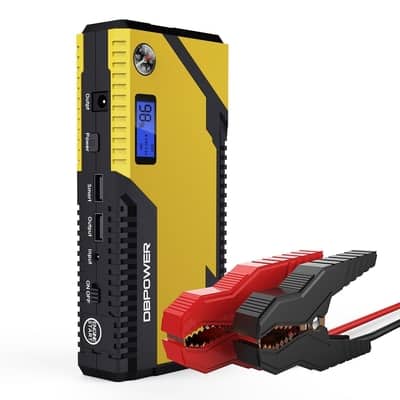
    A portable battery jump starter is a very smart roadside repair gadget to pack in your saddle bags. Granted, they can be a bit heavy being a battery, but they can certainly get you out of a pinch if your battery dies. They make handy chargers for your electronics too, like your cell phone, GPS unit or tablet computer. Make sure you keep it fully charged throughout your trip so it will be ready when you need it. Read my review on Portable Jump Starters here.

    If you don’t carry a jump starter, consider keeping a small set of jumper cables with you. One of your riding buddies or a good samaritan may be able to provide you with a jump.

    6. Tool Roll or Bag

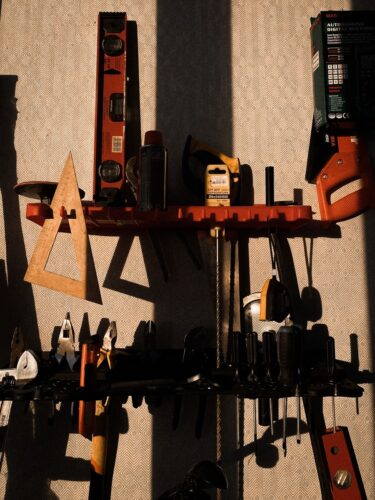
    To do minor maintenance and repairs while on a trip will require a thoughtfully put-together set of tools specific to your bike. A lot of motorcycles will come with a few tools like spanners or wrenches, but it’s a good idea to piece together a good set of tools like pliers, Allen wrenches or hex keys, screwdrivers, or any specialty tools that your bike requires. As you read through this list of spare parts, consider what tools you will need to make the repairs on your specific bike. Those are the tools you need in your bag.

    7. Spare Levers

    Clutch levers and front brake levers are in a vulnerable spot and can be easily bent or broken if you lay down your bike. Carry an extra set of levers that you know will fit on your bike. For these spare parts, you don’t need to go fancy, you just need something that will get you back on the road. I recently put a set of shorty levers on my Honda CB500X, so now I keep my stock levers in my kit as a backup set.

    Levers are easy to replace on the roadside and only require a small wrench or two. When you’re putting together your onboard toolkit, make sure you include it.

    8. Spare Shifter Lever

    Depending on what kind of motorcycle your ride, your shifter lever may be in a vulnerable spot and is a risk of breaking if you dump your motorcycle.

    Side note: When I say “dump” your bike, or “laid down” it doesn’t necessarily refer to a crash. Inexperienced riders can get caught by surprise when riding super slow through gravel, or you could have a foot slip out from under you. Sometimes bikes fall over for no apparent reason. It happens to every rider at least once.

    Back to the shifter lever. They can break. So, go out and buy a replacement shifter to include in your tool kit. If your shifter includes a tie rod, consider including that too in case it gets damaged or bent. Make sure you know how to install it and include the necessary wrench size or hex key in your tool roll.

    9. Tape

    It’s a good idea to carry several different types of tape with you. Duct tape, electrical tape and self-sealing tape. A roll of electrical tape usually isn’t very large so a regular roll will fit in your tool kit without a problem. Duct tape rolls are generally too large to carry so, take a few feet of tape and re-roll it onto a pencil, remove the pencil when you’re done. Now you have a decent length of duct tape handy.

    Another good tape to carry is self-sealing tape. This is a silicone tape that does not stick to anything except itself. It’s the perfect tape for repairing a leaking hose. When you apply the tape around the hose, you’ll stretch it tight. The tape will form a seal and will stick to itself. This stuff works great. It can be wound down into a smaller role if you don’t want to carry an entire roll with you.

    10. Battery Jump Starter

    These days there is no excuse for being stuck with a dead battery. With Lithium Ion battery technology getting better and better, battery jump starters are coming in more compact sizes. Some of them are just larger than cell phones. They usually come with jumper cable clips and hold enough power to start your motorcycle even in cold weather. Some also have features such as USB charging ports to keep your electronics charged. Read my full review of jump starters here.

    Make sure you know how to access your battery and that you included the necessary tools in your onboard tool kit.

    11. Extra Bulbs

    It’s pretty obvious that driving at night without a headlight is a bad idea. But, even in the daytime a burned-out headlight or tail light is a safety issue. Light bulbs can go dead at any time and they don’t give you any warning. That’s why it is a good idea to include bulbs in your repair kit. The type of bulb you use will, of course, depend on your motorcycle, so make sure you purchase bulbs that will fit. It’s a good idea to bring headlight bulbs, tail light and brake lights, and turn indicator bulbs.

    For those of you who use low profile, led turn signals, consider including a replacement in your maintenance kit. While they are a little more difficult to replace than a bulb, at least you’ll be safe and on the road again. Like always, know what tools you will need to do the repair. Will you need a small Phillips screwdriver or a hex key? How about a small standard screwdriver to use on the connectors. Pack them with you.

    12. Clutch and Throttle Cables

    A broken throttle cable equals a dead bike. A broken clutch cable also means you’re not going anywhere. While these types of repairs can be prevented with proper maintenance and pre-ride inspection, sometimes they can take you by surprise. If you have a suspicion that your cables are worn or if they are old and have never been lubed or replaced, consider packing replacements with you.

    Cable replacement as a roadside repair is a bit more complicated than, say, changing a bulb, but it can be done. Do some research on your specific motorcycle to learn the steps. Figure out what covers need to be removed to access the cable brackets. Determine what tools you will need to remove those covers. New cables don’t usually come pre-lubricated, so you will need to determine how you will lube the cable before installing it. All of these factors should be considered before your trip.

    13. Zip Ties

    I have seen the most ingenious repairs done with zip ties or cable ties, and no onboard tool kit should be without them. You don’t need to bring a lot of them, but you do want to carry a variety of different sizes.  There are probably a million different ways you can use cable ties, from holding cracked plastics together, to replacing a missing pull tab on your jacket’s zipper. When you’re in the moment and trying to find a solution to a problem, cable ties may give you the perfect temporary solution to get you back on the road.

    14. Safety Wire

    A foot or two lengths of safety wire can come in handy for a lot of roadside repairs. Safety wire is usually used for securing bolts to a motorcycle so that nothing falls off if it comes loose. This safety feature is mostly used on the track as a loose nut or bolt on the race track presents a hazard for other riders. But, there are a lot of other uses for a bit of safety wire. Use your imagination when in the moment and a small length of wire may be just what you need. Better to have it than to not have it.

    15. Fuses

    Carry at least one type of fuse for each type used on your motorcycle. Check your owner’s manual to see what size and what amps are needed. Replacement fuses are available at your local motorcycle shop or auto parts store and often come in a set in a handy little carrying case.

    But, having the fuses with you is only part of this repair solution. Make sure you know where the fuse box is located on your motorcycle. Check the owner’s manual or shop manual to locate other fuses that aren’t at the fuse box. If you have after-market auxiliary lights or plugs installed on your bike, make sure you bring fuses rated for those items as well.

    16. Flashlight

    Doing maintenance or repairs on your bike, even during the light of day, will sometimes be much easier if you have a light to shine in those little small spaces. If you’re camping, then you probably already have a headlamp for a flashlight that you can use. But, you might not always have your camping gear with you on a day ride. Keep a small flashlight in your tool kit and make sure the batteries are fresh before you leave on your trip.

    17. Nuts, Bolts and Washers

    Keeping a couple of extra common bolts and nuts that fit various parts of your motorcycle would make a great addition to your tool kit. When doing roadside repair or maintenance during your trip, nuts and bolts can get lost, broken and, if not properly torqued, some bolts could work their way loose during a ride.

    18. Hose Clamps

    A variety of hose clamp sizes will be a good addition to your maintenance kit. Pack the stainless steel variety that screws tight and the smaller variety that is self-tensioning. A spare hose clamp will save you a lot of headaches if you need to repair a fuel line or radiator hose (if you have one).

    19. Razor Blade

    Consider keeping a small razor-sharp blade in your tool kit. A compact retractable box cutter will do. They are perfect for cutting bits of tape, hose, tubing or a package of freeze-dried beef stroganoff for your dinner. Whatever you use it for, it’s a handy item to have around. They are inexpensive and readily available at any dollar store.

    20. Cash

    Right now, I could go out to the garage, take the seat off my motorcycle, get into the little zip lock baggie where I keep my registration and find a $20 bill. I put it in there a long time ago and forgot about it. But, having it there could get me out of a pinch someday. Even in this day of ATMs and credit cards, there are still out-of-the-way places, little mom-and-pop shops that only take cash.

    While some of the items on this list will help you keep your motorcycle well maintained during your trip, other items will help you make roadside repairs so that you can keep riding. Remember, if your repair is an emergency fix for a bigger problem, take your bike to the nearest repair shop and get a permanent fix before you continue on your journey. I hope this list has helped you determine what to include in your roadside motorcycle repair kit.

    Conclusion

    Other than professional mechanics, you can also use tool kits for regular maintenance of your Harley Davidson or any other bikes in less time. Motorcycle tools help to extend the long life of a bike for smooth and safe rides.

    Glance through a wide range of tool kits for your for all types of vehicles and get the appropriate tool chest for your Harley Davidson motorcycles.

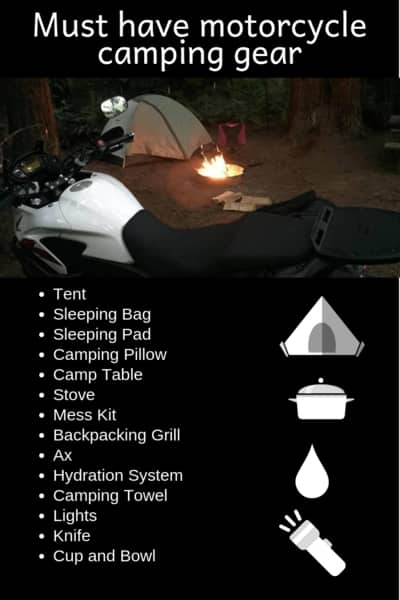
  • 15 Must-Have Motorcycle Camping Gear Items

    15 Must-Have Motorcycle Camping Gear Items

    Reading Time: 19 minutes

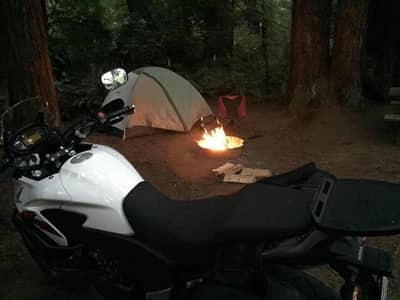
    There’s nothing better than loading up your motorcycle and heading out into the woods for a camping trip, sleeping under the stars, cooking over an open fire, and enjoying nature. But, motorcycle camping is not the same as packing up the car or truck and heading out. Nope, there’s no room for the Webber grill or the cast iron skillet. There’s no space for the giant 5 person family tent, or an ice chest, or a beer cooler.

    I’ve been going on a motorcycle camping trip every summer for about 5 years and in the beginning, I used to overload my bike with a lot of unnecessary stuff and oversized camping gear. I would bring big, thick sleeping bags, a heavy blow-up mattress, a nice clean outfit for every day, and plenty of stuff that I never even used. Over the years I’ve learned what camping gear I need and what I can leave at home and I’ve whittled down my gear list to the point where I only carry the basics, but I still have the things I like to keep me comfortable.

    Obviously, there is some motorcycle gear that you should also take for overnight motorcycle camping trips but in this article, we just focus on motorcycle camping gear. Motorcycle camping gear is pocket-friendly and easily available. Some of the most compact motorcycle sleeping gear includes a camping stove, coffee gear, sleeping pads, bike jacket, pocket stove and additional small fuel bottle in the store. Pack small for a small camping trip. A two person tent does not take too much space for a wild camping trip. Foam pad materials, cooking fuel, basic tools and a repair kit is appropriate for a camping trip.

    When choosing gear for motorcycle camping you need to think like a backpacker. You want to pack small and light, although the lightweight is not as much of an issue. So, I’ve put together a list of gear that works great for motorcycle camping. I am not including things like luggage, saddlebags or top cases in this list. This is a list of gear that you will pack inside those bags. So, let’s dive into what you need for the perfect motorcycle camping trip.

    1. Tent

    camp tent

    Your tent is your portable shelter. It’s your tiny house in the woods. It will keep you dry and protect you from pesky insects and basic woodland creatures. There are a few things you need to consider when selecting a tent. Will it be just you sleeping in it? Do you want to keep your bike covered? Do you want a room to sit up, or stand up in your tent? Here are two tents to consider. The first is my favorite and works great for me. The second is a tent I’d love to get for extended trips.

    My recommended tent is the REI Passage 2.  It’s a two-person tent, but I prefer to use it as a one-person tent plus my gear. I love the fact that it’s roomy inside. Although it’s not tall enough for me to fully stand up, there is plenty of room to sit up and move around. The tent, with the REI footprint, weighs about 5 pounds and packs down to a length of 18 inches, which fits perfectly in a duffle bag or fits nicely across the back seat of the bike.

    It sets up easy and usually takes me about 10 minutes total to get it up, with the footprint and rain fly, and secured with the included aluminium tent stakes. If it’s a warm night and I’m not concerned with privacy, I will often leave the rain fly off so I can see the stars and the trees.

    If you want a tent that gives you more room, including a way to keep your motorcycle out of the elements, you might consider a Motorcycle Tent (check the current price on Amazon). This tent has a very roomy sleeping area that is big enough for 3 people if you don’t need to store your gear. It has an extended area that is equally as large that will accommodate your motorcycle and your gear.

    The reason I would choose this tent over the RedVerz Expedition tent is that the Vuz Moto tent is a dome tent that stands on its own without the use of tie-downs and tent stakes. The RedVerz tent requires tent stakes just to keep it upright and this limits the places it can be used.

    When I can justify a need for such a tent, I will be purchasing it, and at that time I’ll do a full review. But, I love the idea of having my motorcycle close by and protected during the night. Having it out of sight from other people will be a deterrent for motorcycle thieves, and having it out of the elements means it will be dry and ready to ride in the morning.

    2. Sleeping Bag

    sleeping bag

    Now that you have the perfect tent, you will need good sleeping gear to keep you warm and comfortable at night. There are usually two types of sleeping bag people; the mummy bag people and the rectangular bag people. I’ve found that the people who like a rectangular sleeping bag absolutely hate mummy bags.

    The mummy bag shape is designed to keep your body heat contained, therefore keeping you warmer in cold weather. And, if you’re a side sleeper, you can curl up with the sleeping bag curled up around you. But, on the downside, if you like to spread out when you sleep, you’ll probably find the mummy bag a bit confining and frustrating. So, what kind of sleeping bag person are you? Here are two recommended sleeping bags, one of each shape, that would be great for 3 season moto camping.

    Currently, I use the L.L. Bean Ultralight 20 degree mummy sleeping bag. I chose this bag because of its lightweight and compact size when in its stuff sack. It is incredibly warm and I find that I don’t need to bulk up on a lot of extra clothing when sleeping in cold weather, which makes it so much more comfortable. It comes with a stuff sack and packs down small enough to fit in my saddle bag. Since I occasionally go backpacking, it was a very smart purchase.

    If you want something roomier, I recommend the Northface Dolomite 20 Degree Down Sleeping Bag. This is a reasonably priced, rectangular sleeping bag made of breathable nylon materials and synthetic down filling. Most down sleeping bags these days are synthetic, but are still as effective as true goose or duck down. Synthetic material is also good if you have allergies to real down feathers. This bag is rated for 20 degrees Fahrenheit or higher, making it perfect for cool weather camping. It packs down into its stuff sack nicely, but will not pack quite as small as the mummy bag due to its wider size. Still, an excellent choice that won’t take up much room on your bike.

    3. Sleeping Pad

    Now that you have your tent and a bag, you’re probably not going to want to sleep straight on the ground. So, the next thing you will need as part of your sleeping gear is a sleeping pad or air mattress. People sleep a lot of different ways, on their sides, back or stomach, so you want to choose a sleeping pad that will fit your sleeping style. If you’re a side sleeper, it’s best to get a pad that will support the pressure points like your hips and shoulders.  A thicker, firmer pad would work better. If you sleep on your back, those pressure points are not as much of a concern but you will still need something that will support you.

    You should also consider your size and purchase a pad that is appropriate. You want to make sure that the length and width of your pad is big enough so that part of you is not hanging off the edge while you sleep.

    Currently, I use the Therm-a-Rest ProLite Ultralight Self-Inflating Backpacking Pad. I chose this pad because it packs down small to 11″ x 4″ bundle and weighs only 18 ounces. It also fits in my saddle bag along with my sleeping bag. The honey comb design of the pad traps the air in little pockets so the entire sleeping pad stays firm. I like that I can adjust the firmness by blowing it up tight, or letting a little air out to soften it up.

    If you are not as concerned about size and weight, and you’re looking for a little more luxury, then this is the pad for you. The Therm-a-Rest MondoKing 3D Self-Inflating Foam Camping Mattress. This foam mattress inflates to a full 4 inches thick and can be blown up to fit whatever level of firmness you like. It’s great for people of a larger stature, or for those who have back problems. It weighs in at a hefty 8 pounds and will take up more room on your bike, but it does compress down nicely and fits in its own stuff sack.

    4. Pillow

    For years I would use my clothes bundled up in a stuff sack for my pillow, but I finally got tired of the neck pain and decided to invest in a good inflatable pillow. Best decision I ever made. This piece of sleeping gear has become clutch to me having a goodnight sleep. A nice feature to look for in a good quality pillow is a layer of fill between you and the inner bladder. Without that soft layer, you’ll feel like you’re resting your head on a balloon, bouncing you around. Another great feature to have is a soft brushed polyester layer to lay your head on.

    I use the Cocoon Ultralight Air-Core Hood Camp Pillow. I like the shape of this pillow because it’s designed to fit in the hood of my sleeping bag and it stays put all night. Because it’s inflatable, it can be adjusted to whatever firmness you like. It weighs only ounces and is about the size of a folded up pair of hiking socks, so I can stuff it anywhere I have a little extra room.

    If you want something a little larger, the Sea to Summit Aeros Premium travel pillow is a great choice. It is slightly larger than the Cocoon pillow but still packs small enough to fit in the palm of your hand. Its square shape gives you a little more surface room and would be a good pillow for use with a rectangular sleeping bag.

    5. Camping Chair

    Most campgrounds come with picnic tables that you can sit at, but it’s nice to be able to kick back in a chair by the campfire too. That’s where a camping chair comes in. I’m sure you’re familiar with the folding chairs that are sold just about everywhere; the ones that we take to our kids’ soccer games or throw into the car for bar-b-q’s at the park. But these chairs are heavy and take up a lot of space. That’s where a good, compact camping chair comes in.

    Small, lightweight, super durable and surprisingly comfortable, the TrekUltra chair (check Amazon’s price) is the one I take with me on every motorcycle camping trip. These chairs, and others like it, are so easy to assemble. When you take it out of the small carrying bag, the legs almost snap into place on their own. The design is intuitive, and putting the seat cover over the frame takes very little effort. The TrekUltra is said to support up to 300 pounds and while they may seem a little wobbly when you first use one, I have no doubt they would support the heavier than average person.

    6. Table

    As stated above, most campsites will come with a picnic table so you have a place to prepare your food and sit and eat it too. But, that’s not always the case, especially if you are doing some adventure riding or camping on public or BLM land. While cooking with your stove on the ground or a rock or tree stump is rugged and cool, there’s no shame in having a table when you need it or when you just want one. When relaxing by the campfire, it’s nice to have a small table to set your drinks or anything else you want at arms reach. When considering which table to buy, again, you need to think small, compact and lightweight.

    There are two types of camping tables to consider; one with a cloth top and one with an aluminium slat top. One difference between the two is packability. The cloth top tables will pack down quite a bit smaller than the aluminium top table. The downside to the cloth top table is that it has a bit of a bounce to it and it lacks stability. So, a simple can of soda could end up tipping over, and it’s a bit more difficult, or unsafe, to cook on the unstable surface. This is the main reason I don’t want to recommend a table with a cloth top.

    So, after careful consideration, I present to you two ultra light tables.

    My first choice is the Trekology Portable Side Table (3 sizes here on Amazon). There are a number of reasons why I would pick this one over other tables, but one of them is because of its height. If you’re using a camping chair as I mentioned previously, this table matches that height perfectly. Making it the perfect companion for preparing a meal or as a side table while sitting by the campfire. It is easy to assemble, as it only comes in two sections. The legs fold out and snap into place. Then, the top folds out and snaps on top of the leg assembly. There are no complicated parts or pieces that can get lost.

    The Trekology table comes in three sizes; small, medium, and large. The smallest table is 13 x 16 inches, about 12 inches tall and weighs only 2.2 pounds. For me, someone who does a lot of solo camping, this is a perfect size. However, if you need something larger, it’s available too.

    If you’re looking for something that is ultra lightweight and more compact in size, then I recommend the GSI Outdoors Micro Table (also found on Amazon). This little table weighs just under a pound at 14 ounces and stands at 6 inches tall. The surface is 15 x 11 inches which are just slightly smaller than the Trekology. So, if you’re not concerned with height, and want something that is super lightweight, the GSI might be the table for you. It also comes in a larger model, the GHI Macro Table, with more height and a larger surface area.

    7. Stove

    If I only carry one stove with me while motorcycle camping, I always take my JetBoil (see the latest sizes and prices on Amazon). It heats things up super fast and doubles as a drinking container or serving container. In the mornings, I generally use it to heat up water to make my instant coffee, because I have my priorities. I’ll drink my coffee out of a separate insulated cup, leaving the Jet Boil free to make my food. The Jet Boil is great for heating up pre-packaged food, freeze dried foods, or things like oatmeal, soup or pasta. It’s a quick, uncomplicated, one-pot solution to cooking outdoors.

    Sometimes I’ll bring a second stove to use with a mess kit. This is usually when I want to fry something up in a pan like, eggs or bacon or a burger. Although I enjoy prepping a lot of my food over an open fire, sometimes it’s not possible depending on where you’re camping. For this type of outdoor cooking, I carry the Etekcity Ultralight Camping Stove with Piezo Ignition. This thing is super small but really does a great job. It screws right on top of a fuel canister and will accommodate smaller pans. No, you’re not going to heat up a big skillet with this thing but it works great with smaller cooking kits. The built-in ignition is a nice touch, although I generally use a lighter, it’s nice to know it’s there. 

    8. Mess Kit

    A good mess kit, or a cooking kit, will come with a few different goodies. At a minimum, it should include a pot with a lid, a frying pan, and it should also include utensils to cook and eat with. Drinking cups and a small plate or bowl is also a nice touch. There are a lot of good mess kits on Amazon and a lot of them look alike. The kit I use is the Kemp Travel Camping Cookware set (you can find it on Amazon). It’s perfect if you’re only cooking for yourself. My favorite part of this kit is the little bamboo wooden spatula. I never knew how bad I needed one until I got one.

    If you’re looking for something with more, you might want to consider the Wealers 11 Piece Mess Kit. More pots, more lids, compact design. It comes with cooking a wooden spatula and a serving spoon but doesn’t come with eating utensils, so you’ll have to get those separately. Still, it’s a really good, all around mess kit.

    9. Grill

    Taking a portable grill on your trip will depend on what kind of cooking you plan on doing. If you’re just boiling water to hydrate your meals, then you really don’t need a grill, you just need the Jet Boil or tiny stove mentioned above. But, if campfires are permitted where you’re camping, and if you love grilling on an open fire, then I recommend packing some kind of grill that you can put over your campfire and use for cooking.

    There are several packable, lightweight portable grills on the market, but I’m only going to recommend one because it’s the most amazing grill I’ve ever used. It’s the Bison Rolling BBQ Grill. It’s made of aluminium and Teflon coated so it’s easy to clean.

    10. Hatchet or Ax

    I like to bring a hatchet with me when camping mostly for chopping kindling if I need it. In order to be able to pack it in my saddle bags, I use a hatchet with a short handle. You really don’t need a long-handled axe since you’re not likely to be splitting your own firewood. The one I use is nothing fancy and I purchased it at a local sporting goods store.

    When you’re looking for a hatchet it’s a good idea to find one that’s compact in size, but you don’t need to skimp on the weight. A little heft in the blade will work in your favor. If the hatchet is too light, it’s harder to get a good chop. Also, forged steel blades will be a bit more durable, and stainless steel may form pits on the blade edge and will need more frequent sharpening.

    11. Hydration System

    Whenever I take long trips on the motorcycle I always wear my 2 liter CamelBak hydration system. And, yes, I wear the bright yellow one for better visibility. It’s smart to use your camping gear as well as your motorcycle gear for visibility. It’s not only convenient while I’m riding, but while at camp, I’ll remove the bladder from the backpack and hang it from a low tree branch. It functions as a faucet and is very handy. I also bring a refillable water bottle for drinking while at camp.

    If you need more water, it’s a bit of a hassle to pack a gallon. It’s heavy and takes up a lot of space. A great solution to this problem is a collapsible water jug. Carry an extra 4 liters with the Hydrapak Seeker. It’s durable, easy to fill and pour from, is BPA free and folds up to a nice packable size.

    12. Camping Towel

    Staying in a campground with showers is a nice luxury when you’re out on the road a roughing it. But, packing a bath towel from home is bulky. Since we have a limited amount of space on the motorcycle, we need a way to pack a good towel without compromising that space. So, a camping towel is the best solution.

    Camping towels are small microfiber towels that are super absorbent. Consider it as a chamois for your body; you dry off a section, then wring the excess water out. That’s how a camping towel works. They don’t cost a whole lot and come in several sizes. Also, a good outdoor towel will include a clip so you can clip it to your tent and let it air dry.

    I recommend the Wise Owl Outfitters Camping Towel when it comes to camping gear towels. This towel comes with everything we are looking for. It is large, so it will double as a beach towel, which is one of the reasons I prefer this towel over others. It has a clip that allows you to hang it out to dry. It is made of a quick-drying microfiber, and, it’s soft and absorbent, which is exactly what you’re looking for in a motorcycle camping towel.

    13. Lights

    Unless you want to feel your way around the woods at after dark, you’re going to need a light source. I’m a firm believer in headlamps. They are very popular among outdoorsy people such as backpackers, hikers and campers and there are plenty to choose from. So, here are a few features to look for when selecting a headlamp.

    • A wide, comfortable, adjustable band
    • Adjustable angle so you can tilt it down when needed.
    • Adjustable brightness. You don’t always need a super bright light.
    • A flashing feature for safety or a SOS distress signal.
    • A red  light feature. The low, red light allows your eyes to adjust to night vision and gives you better peripheral vision than white lights.

    If you’re looking for a good, packable lantern, I recommend the Suoaki Led Camping Lantern. This lantern serves as an adequate flashlight and a soft table lantern. The soft light makes it easy on the eyes. When not in use it folds down small so it’s easy to pack away. The company makes a solar powered version, as well as a battery, operated one.

    14. A Good Knife

    A good camping knife will come in handy for a lot of different uses from chopping small tree branches to slicing meat to carving a little fox out of a knot of wood. I feel like buying a knife is a very personal choice. I’m not an expert on knives and with so many to choose from, I’m really not comfortable recommending something specific.

    With that in mind, I always thought it would be cool to carry a big, Crocodile Dundee type knife tucked in my boot. But, for me, that’s not too practical. Besides, I’m not going to skin a dear or anything like that. I’ve purchased a couple of folding knives that are very good quality, but I always come back to my small, lightweight and simple 2 inch Gerber knife. It serves me well for my simple motorcycle camping needs, and miraculously always stays sharp.

    15. Bowl and Cup

    The last thing I want to recommend on my list of 15 best camping gear items is the Sea to Summit X Series 2 piece set of collapsable bowl and cup (here on Amazon). They are made of BPA free food-grade silicon and smash down flat when not in use. I find that they can fit along with my mess kit and they nest among the pots and the whole kit still fits in the mess kit bag. The cup is large and is great for enjoying a cup of coffee, tea or hot chocolate.

    I hope this extensive list of camping gear has helped you figure out how to put together your camping gear kit. Remember, it’s ideal to choose items that are compact and lightweight. While we’re not scrutinizing ounces like backpackers do keep in mind that keeping your motorcycle light will make your trip easier on your bike.

  • Road Trip Safety: 15 Ways to Stay Safe on a Solo Motorcycle Trip

    Road Trip Safety: 15 Ways to Stay Safe on a Solo Motorcycle Trip

    Reading Time: 14 minutes

    When travelling alone on a motorcycle, road trip safety is an issue that shouldn’t be ignored, even more so if you’re a woman. There are so many rewards and adventures out there when you choose to travel solo, and they are very different from travelling with a group. But, being alone means you are vulnerable to many different threats, and you should be prepared.

    Some pandemic precautions to consider for your road trip if you are going on a long drive include drunk driving and drowsy driving prevention. Remember to check the seat belt of every car seats. Visit a gas station in between your road trip and inspect the wiper blades, check for a flat tire, tire pressure, and another aid kit to reach your destination safely.

    Here are 15 different road trip essential tips that you can stay safe when you’re on a solo motorcycle trip, in no particular order.

    1. Email your Itinerary to Family or Close Friends

    Letting people know where you are and where you’re going to be each day can be the difference between going missing and being found. Sending your travel plans to people that you trust is one way to keep safe. When on a long trip, you may have an initial plan, but things can change along the way. If you realize that your route will be changing significantly, or if you know you will be staying the next night in an unplanned location, drop a quick email, or even a text to let someone know.

    The reason you want to use email or text is to keep your location as private as possible. Your closest friends or family should know where you are, but not everyone has to know. That brings us to the next tip.

    2. Don’t Post your Travel Plans on Social Media

    That’s right. No Facebook posts about “Hey, I’m travelling alone and I’ll be in Timbuktu tomorrow night staying at the Motel 6 on Main St”. We may consider all of our Facebook followers as friends, but, if you have a large number of people who follow your Facebook, Instagram or Twitter accounts, you can never be too sure about who you’re “friends” with. There are some crazy’s out there and advertising your location may embolden one of them to pay an unwanted visit. On the bright side, there’s nothing wrong with sharing information and pictures of where you’ve already been.

    3. Don’t Share too Much Information with Strangers

    Admittedly, some of these safe travel tips are far more useful for female travellers, and that’s an unfortunate truth. But, these common-sense tips really are just as beneficial for everyone. One of those tips is, don’t share too much information with strangers. One of the great things about travelling solo, as opposed to travelling with a group of riders, is that it makes you more approachable to friendly people who are intrigued about your adventure. It’s really a pleasure to meet the locals of a small town, and you can have some great conversations. But, when it comes down to sharing personal details about your life, it’s best to keep it to yourself. Avoid heated conversations that can get emotions riled up, like politics or religion. Avoid sharing your weaknesses or vulnerabilities with someone you just met. Avoid telling people where you’re staying, especially if you’re getting any stranger danger vibes from someone.

    4. Follow your Intuition

    If something doesn’t feel right, if you have that strange feeling in your gut, or if you get a weird vibe from someone you encounter, don’t ignore it. Your intuition is trying to keep you safe and out of harm’s reach. Sometimes these little inside warnings are unfounded, but, better safe than sorry. Does this mean you can never talk to strangers while out on a solo trip? Of course not. In fact, that’s one of the pleasures of travel, meeting new people. But, trust your instincts on who to talk to and who to avoid.

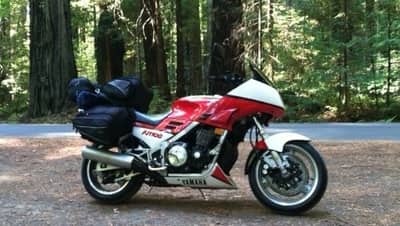
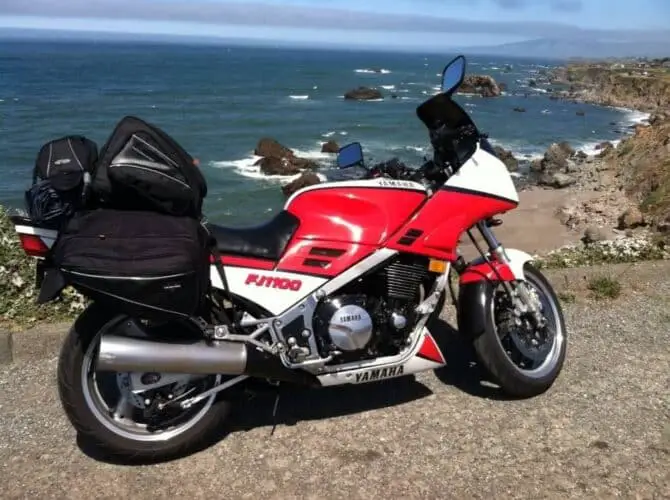
    As a female on a fully loaded motorcycle, I usually get plenty of attention. In fact, when I owned my 1985 Yamaha FJ1100, I had middle-aged men striking up conversations with me at almost every stop. Mind you, they weren’t interested in me, they wanted to talk about the bike. I knew guys like this were perfectly harmless and I had some great conversations. But, I’ve also had guys come up to me and say stupid stuff like “You ride that all by yourself?”. Those are the ones to avoid, and my gut always told me so.

    So, trust those feelings and your instincts. If someone seems like a creeper, don’t talk to them. Be nice, but don’t engage in conversation. And if a place doesn’t feel right, such as a campsite, don’t stay.

    5. Wear a Road ID Bracelet

    A Road ID bracelet is a personalized identification bracelet that you wear on your wrist. I have a nice, black leather wristband that I wear every time I ride my motorcycle, my bicycle, or when I go hiking or backpacking. It has a metal plate that is engraved with my emergency contact names and phone numbers, the medication I take, and my blood type. In the event of an accident where I am not able to communicate this information, emergency personnel will have it available. Road IDs (found here) can be purchased for a one-time fee, but they also come with additional subscription-based services. A personal identification number on your ID will allow emergency personnel to look up additional information that won’t fit on the bracelet itself. The Road ID is a great addition to your riding gear and will give you and your loved ones peace of mind.

    6. Carry a Paper Map and Compass

    Road Maps for a Road Trip

    Let’s face it. GPS units, or anything that runs on electrical power, can go dead. Carrying a paper map of the location you will be travelling, to will help you find your way if your phone or GPS fails you. It’s also a good idea to carry a good orienteering compass and learn how to use it. This is your fail-safe, especially if you are travelling off paved roads and on forest roads or dirt trails.

    7. Finish your Day’s Ride Before Dark

    Rolling up into an unknown town, a big city, or a campground after dark is not nearly as safe as getting there when it’s still light out. First of all, it’s easier to find your way around when it’s light so you can find your hotel or campground. Arriving in daylight allows you to get to know your surroundings and get a sense of any dangers that may be close by.

    Off-loading your motorcycle luggage in a dark hotel parking lot puts you more at risk. And, setting up camp after dark is not only a pain in the rear but can also make you more prone to injury. Yep, I admit, I’ve tripped over rocks that I couldn’t see in the dark.

    8. Consider Carrying a Fire Arm

    Carrying a firearm, whether concealed or open carry, is a personal decision and the writers and owners of packupandride.com are not here to influence your decision on whether or not to do so. Obviously, carrying a firearm comes with its risks and should only be used as an extreme last measure in self-defence or for your protection against wild animals.

    If you choose to carry, always make sure you check the laws of the cities, counties, states and/or countries in which you will be travelling. Always make sure you have taken safety classes and have learned how to use your weapon properly. And, exercise extreme caution for your safety and for the safety of those around you.

    9. Carry Bear Spray

    If you’re going to be camping in bear country, which is almost anywhere in North America, you should carry a can of bear spray just in case of an encounter. For the most part, bear encounters or rare. If a bear sees you first, you probably won’t even know it’s there, as the bear will try to avoid you. But encounters still happen, and on very rare occasions, a bear will attack, and bear spray has been proven to be very effective in deterring aggressive bears. A can of spray is not very expensive and you can find them here on Amazon.

    The effective ingredient in bear spray is Capsaicin and related capsaicinoids. While this is the same ingredient found in pepper sprays used for personal defence, it is not the same. The Capsaicin level in bear spray is much lower, at 1% to 2%. When used, the spray is released in a wide fog and is most effective when a is within 25 feet of you. It should be sprayed in short bursts of 2 to 3 seconds, using a slight sweeping motion to spread the fog in front of the bear’s path. Often, the sound of the spray and the appearance of a large red fog will be enough to make a bear back off.  Bear spray has also been known to deter other animals such as mountain lions, even though sightings of cougars are even rarer than bears.

    While carrying bear spray will help deter a bear, your best defence against a bear attack is to be diligent with your campsite. Keep your site clean from trash and food. Keep your food and toiletries in a bear canister or hang your food and any other scented items on a large tree branch away from your campsite. Never eat in your tent and always clean up after cooking and eating.

    10. Carry Pepper Spray

    Talk to just about any young woman and you’ll find that many of them carry a small canister of pepper spray for personal defence against attackers. It’s smart for anyone, male or female, to carry pepper spray when they are active and alone. Travelling, hiking, backpacking, cycling, or solo motorcycle camping, are situations where it is good to have an extra layer of protection.

    Pepper spray contains the same active ingredient as bear spray, but at a much higher concentration. It is designed to be used on humans rather than animals, although some people carry it as protection from aggressive dogs when running or cycling. When used properly, it can incapacitate a human attacker long enough to give you time to escape. Pepper spray should be directed at the attacker’s face at close range either in a stream, spray or mist. It should be used in a short burst of 2 to 3 seconds, sprayed at arm’s length.

    Pepper spray is not legal in all 50 US states and might not be legal in all countries. There are different strengths, some for personal use and some for law enforcement’s use. Be sure to check the laws in your state or country to avoid citations. Also, it’s important that you learn how to use it properly. Check with your local law enforcement to see if they have information or training on the proper use of pepper spray.

    11. Carry a Whistle

    Survival whistles, like the Fox 40 Sonic Blast (on Amazon) are an excellent way to signal out to someone should you find yourself stranded or injured in a remote location. If you find yourself in this situation, having the ability to signal for help is the most important factor for being rescued. Whistles are also useful for personal protection and safety on city streets, in a crowd, or alone in a parking lot at night. Drawing attention to yourself can ward off an attacker in a lot of situations.

    One thing to look for in a whistle is that it has to be loud, very loud. It must be able to produce a high-pitched, penetrating sound so that it can be heard over a great distance. The whistle needs to be resistant to the weather, such as a cold. You don’t want a whistle that will be difficult to blow if it’s cold out. It also needs to be easy to find. Whistles with lanyards that clip to your riding jacket or backpack, or those that go around your neck, will keep your whistle close at hand when you need it. Also, a brightly coloured whistle will be easy to find in your tent or in your bag.

    12. Carry a Neck Knife

    A neck knife is a small, fixed blade knife that fits into a sheath that is designed to be worn around the neck, so it is easy to reach in a self-defence situation. They generally have handles that are designed to help you grab them quickly to impale or slash your attacker, be it human or animal. They are also very handy for slicing salami or spreading mayonnaise on your sandwich.

    Not everyone is a fan of wearing a knife around their neck as they can be a little clunky if they are too large. And, if they hang too low, they would be hard to reach in some emergency situations. It may be better to wear a very small, minimalist blade that is lightweight and on a short cord. A neck knife like the one I carry is light, small, makes a very useful tool and is a good last mode of self-defence. And, if you don’t like wearing anything around your neck, it can be worn on the belt, or clipped to a pocket.

    13. Personal Locator Beacon

    Satellite technology and GPS make it easy for the average traveller to use the same location beacon system that has been used for decades in boats and other marine vehicles. A Personal Locator Beacon, or PLB, is a hand-held device that uses a satellite to send a unique personal identification signal to a continually monitored distress network. In other words, the PLB sends out a powerful signal when activated. This signal, which is set to a certain frequency, will be received by search and rescue organizations. Rescue teams will use the signal to pinpoint your location usually within 500 meters. PLBs do not require a subscription service, but you are required to have your registered to obtain a Unique Identifying Number or UIN.

    NOTE: A Personal Locator Beacon should be activated only in situations of grave and imminent danger, and only as a last resort when all means of self-rescue have been exhausted.

    Satellite Messengers are different from PLBs, the more popular being the SPOT (check the current prices here). These devices require a monthly subscription plan, but they care more about features than a PLB. With a messenger, you can send a signal to the host website and record your location as you travel. You can send pre-written messages via text to your family or friends letting them know you’re ok. They also have an SOS feature that functions like a PLB in the event of an emergency. These devices are based on a satellite signal and don’t rely on cell phone service to function properly.

    One important thing to note is to always place a beacon on your person, not on your motorcycle. In the event of a crash or injury, you won’t always be near your motorcycle. You want rescuers to find YOU, not your broken bike.

    14. Consider Carrying a Taser

    Personal tasers have become more popular as a means of personal protection. But, the handheld contact type of taser is not the best method of personal defence. This is the type that does not shoot the electric probes at your assailant, but instead, you must hold it directly against the skin of your attacker. They are weaker and take up to 5 seconds or more to be effective. So, the downside of these defence devices is that you must be in close contact with the person or animal attacking you. This is the opposite of what you want to do.

    Instead, if you choose to carry one of these devices, consider a stun gun that will make contact from a distance. As with a firearm, always make sure you have the proper training and know how to use one. Also, check the local and state laws regarding these self-defence methods.

    15. Learn Self-Defence Techniques

    Consider taking a course in self-defence and learn some good techniques that will put distance between you and your attacker or give you just enough of a break to get away. There are courses designed specifically to get yourself out of dangerous situations. They are not the same as taking boxing classes or martial arts, instead, they teach you how to fight back just enough to get free and run.

    But remember, the most effective method of self-defence is to avoid a physical altercation in the first place. If a conversation or argument with a fellow bar patron gets too heated, know when to walk away from it. If a situation gets out of hand, swallow your pride and call it a night. And, ladies, if your creeper alarm goes off when some guy wants to buy you a drink, say no thank you and walk away.

    Conclusion

    Carry an emergency kit or a first aid kid regardless of two-wheeled or four-wheeled vehicles. Always have a backup plan for weather conditions and carry extra masks in public spaces. Vehicle manufacturers provide an owner’s manual that shares more tips on the importance of regular maintenance and tune ups for your motorcycles. Always give top priority to the vehicle identification number, windshield wiper, fluid levels, air conditioning and tire pressure for your cars or motorcycles. Do not forget your cell phone, jumper cables, cell phone charger, nonperishable food and extra oil for your road trip.

  • Best Sport Bike Saddle Bags: SW-Motech Blaze Review

    Best Sport Bike Saddle Bags: SW-Motech Blaze Review

    Reading Time: 10 minutes

    Let’s assume you’ve purchased a sexy sport bike with sleek lines and a slim tail, but  you need some saddle bags so you can take your sexy bike to more than just the local bike night at Hooters. You want to do some multi-day rides and you need a place to pack your PJs. The problem is, finding saddlebags that safely fit a sport bike is not an easy task, and the last thing you want to do is mess up those clean lines with bulky pannier brackets. Lame.

    So, what’s the best saddle bags for a sport bike? SW-Motech has designed a saddlebag system specifically for sport bikes and smaller bikes called the Blaze saddlebag system. It includes and ingenious removable mounting system that won’t spoil the look of your bike when the bags are not in use and it’s incredibly easy to install and secure the bags whenever you’re ready to use them.

    I ran into the problem of finding a saddle bag solution when I purchased my 2014 Honda CB500X. There are several pannier systems on the market for this bike, one designed by Honda and very over priced. But, I didn’t like the idea of having mounting brackets permanently installed on the bike. I didn’t want it to look like an adventure bike. So, I found the SW-Motech Blaze system for the CB500X and I’ve loved them ever since day one.

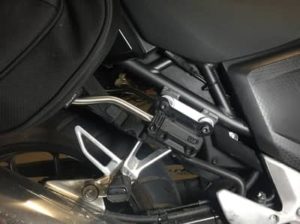
    The secret to this saddle bag system is the low profile mounting brackets and the removable support arms unique to your model of motorcycle. These brackets solve the dangerous problem that a lot of smaller bikes have. Throw over, soft saddlebags have a tendency to sag too low, and sag inward coming dangerously close to the tail pipe and rear wheel. A bag tangled up the the rear wheel could spell disaster, and contact with the pipes will destroy your bags and whatever is in it. The support arms prevent this from happening.

    The saddle bags themselves have a sleeve that slips right over the support arm to prevent them from bouncing or swinging outward while riding. A quick release clip on each bag snaps into place at the support arm bracket to prevent the bags from sliding backwards and possible off the bike. With this system, no additional tie-down straps are necessary.

    What Motorcycles do they Fit?

    SW-Motech has developed unique support arms and mounting brackets designed for over 150 different motorcycles. They make brackets that will fit numerous models from Honda, Ducati, Triumph, KTM, Kawasaki, BMW, Yamaha, and I’m probably forgetting some. Every kit is unique to the bike as far as the mounting brackets and where they fit as well as the curve and bend of the support arms. They are designed to fit around pipes, external shocks, rear foot pegs and any other obstacle that your bike might present.

    What you won’t find are saddle bag system that fit cruisers. Generally there are so many other ways to fit a saddle bag on cruisers and they don’t tend to have the same luggage issues as sport bikes or smaller sporty bikes.

    What’s Included?

    In the kit you will receive everything you need to install and use the saddle bag system. The kit will include:

    • All necessary bolts, washers, spacers and hardware to mount the brackets.
    • Two support arms with plastic end caps.
    • 2 male and female mounting brackets.
    • 2 semi-rigid panniers.
    • 2 waterproof dry bags that fit inside the panniers.
    • two sheets of clear plastic protective adhesive.
    • Installation instructions.

    This kit does not include rain covers for the saddle bags, and instead provides the two dry bags. I actually prefer this because I’ve used saddlebags that come with rain covers, but I’ve actually lost a couple while riding due to the wind pulling them off. Since then, I’ve always packed my gear in dry bags if rain is expected.

    The Support Arms and Brackets

    The support arms at first glance don’t look like much but are surprisingly sturdy. They are light weight and smooth yet rugged enough to hold your fully loaded saddle bag.

    When you put the support arms on the bike, you slide the male end of the brackets into the female on the bike. Each arm is labeled Left or Right and they will lock into place with a noticeable and satisfying click, letting you know that they are secure in place. And they are indeed secure. The bars are easily removed by pressing on the spring loaded clip, giving it a little wiggle, and pulling the bar out. You do have to depress the clip fairly hard to get them off, but that’s a sign that they are secure when in place and they aren’t going to come loose on the road. One complaint I have is that I always manage to pinch my thumb somehow, but maybe that’s just me, or I have a low tolerance for pain.

    Once the support arms are in place, the bags slide on to the arms via the sleeve. Next, you’ll secure the bag by connecting the quick release clips at the bracket. Pull the strap tight and it will pull the bags forward, preventing it from sliding around. Once you pull the straps tight you can wind up the excess and tuck it under the elastic strap holders. It’s a great mechanism for securing the bags.

    Installation

    Installation of the mounting hardware and brackets doesn’t require any specialty tools nor does it require any drastic modifications to your motorcycle. By this I mean, you don’t have to relocate your turn indicators and you don’t have to drill, cut or slice anything. It will probably take you about an hour to do.

    The only tools you will need are a hex key, a small wrench or two, and possible a phillips screw driver. That’s it. Follow the mounting instructions provided in the kit. The placement of the mounting brackets will be unique to your model of motorcycle. Often the female end of the bracket will be integrated into the rear foot peg bracket. In this case you will be required to remove that bracket to install the kit. The kit will include spacers and longer bolts to make this possible.

    One thing to watch out for when assembling everything, is the remember to install one end of the quick release clip between the bracket and the mounting hardware. When you tighten the screws, make sure the clip end is pointing towards the rear of the bike and lined up nicely so you can easily clip in the other side when you put the bags on the bike.

    Bag Design and Capacity

    The bags themselves are very sturdy and are made from high quality 1680 ballistic nylon. The seams are strong and they don’t look like they’re on the brink of tearing when the bag is stuffed full like some other cheaper bags. The zippers are smooth and don’t snag on anything when used. The bags have a really nice, sleek look. They don’t look bulky or strange. They look like they belong on the bike and I reckon they make your motorcycle look pretty cool. 

    There is a side zippered pocket that’s great for small items that you need quick access to, however, when your bags are stuffed, these pockets can get a little tight. They are better suited for something flat, like maps or paperwork. The inside compartment is a bit small, but this depends on how much stuff you need to carry. They are big enough to fit a pair of sneakers along with clothing and other over-night items. The bags are a good size if you’re going on one or two night trips.

    If you need more room, they will expand with the expansion zipper to 21 liters. This gives you a surprisingly large amount of additional space. Because of the curved bag shape, you can stuff small items, such as socks, into every available space. If you pack smart, you’d be surprised at how much you can fit in these bags when they’re expanded.

    The main compartment is top loading and has a sturdy flap and zipper with two pulls so you can easily pull it open. It zips toward the back so the wind will not catch the edge of the cover in the wind. The zipper pulls are metal and include two holes so that you can install a small lock if you want to deter an opportunist thief while you’re away from the bike. Like all soft sided saddle bags, these are not theft proof, but, they are so easy to take off, there’s no reason why you would leave them on the bike overnight when you get to your hotel. However, it would be nice if there was some way to secure the bags to the motorcycle. While you can secure the opening, it would take a thief no more than a few seconds to run off with your bags. So, it’s best to keep them with you.

    What Doesn’t Work?

    Complaint #1: One concern I had was that the support arm or the brackets would bend or break if I dropped my bike. Luckily (?) I had the opportunity to test this theory when I laid down my motorcycle in the sand going about 20 miles and hour. The mounting brackets stayed solid and did not break or crack; the support arms stayed in place and did not bend at all. However, the quick release clip snapped in two and broke. It wasn’t surprised since these plastic quick release clips are usually the first thing to break on anything. To get past this, I tie the strap around my rear foot peg bracket to secure the bag. Currently, SW-Motech or their distributors don’t offer a replacement clip that you can purchase separately.

    Complaint #2: The bags, whether expanded or not, are not big enough to carry a laptop, not even a 13″. That can be a problem if you want to use these bags to commute to work and you need to transport your laptop. You’d have to find a different way to carry your computer. They will, however carry a tablet computer such as an iPad.

    Complaint #3: The top opening is a bit small. It’s not a huge problem, but if I want to store my riding jacket in the bag, it takes some doing to get it in there. And, the bag is not big enough to store a helmet.

    Modifications

    To eliminate the risk of theft, you can try to put the yoke of the bags under your seat rather than on top of it. This won’t work for every motorcycle because the yoke on these bags is one wide strap and it might interfere with your seats locking mechanism. I can say that it works on the CB500X so it will likely work on some similar bikes.

    Some owners of these bags have noticed that the bags will rub against the paint on their framework even when they use the clear acrylic stickers that are provided with the kit to prevent this problem. This won’t be a problem with all motorcycles but some have experienced wear over time. So, some have found easy to modify the bags and add some extra protection at these contact points. One suggestion is to find a thicker clear adhesive, and apply it only to the points of contact. Another modification is to install a piece of soft padding to the bag at the point where the bag contacts the bike.

    Modification to the friction points. People who own these bags have noticed that the clear tape provided with the kit does not last very long. It has a tendency to come unstuck over time and may not provide adequate protection for some motorcycle models. So, people have come up with some other ways to protect their paint when using the bags.

    All-in-all, while these bags won’t be the best choice for everyone’s needs, they are a great solution for smaller motorcycles or sport bikes and for shorter trips. They leave plenty of room for a passenger to sit comfortably with the bags installed, and they expand nicely to carry a good amount of clothes, gear and personal items. Combine these bags with a tail bag or an additional top case and you’re ready for a multi-day camping trip or tour of the countryside.

    Interested in these bags for you and your motorcycle? Follow this link to find a set for your motorcycle on Amazon.

  • How to Carry Extra Gas on Your Motorcycle (5 Clever and Safe Ways)

    How to Carry Extra Gas on Your Motorcycle (5 Clever and Safe Ways)

    Reading Time: 10 minutes

    Strapping on your helmet for a long, thrilling ride but worried about running out of fuel in the middle of nowhere? Worry no more!

    In this article, we will break down 5 different ways to carry extra gas on your motorcycle. It might be for a motorcycle camping trip or just an extra-long commute

    Whether it’s brand name motorcycle fuel cans or a motorcycle jerry can, we’ve got you covered with a range of creative yet safe solutions to ensure you never have to worry about running on empty on a ride again.

    So how do you carry extra gas on a long motorcycle ride?

    To carry extra gas on your motorcycle you will require a motorcycle gas container. These containers come in all different shapes and sizes depending on where you might be mounting on your bike, the amount of gas you’ll be carrying, and your certain use case.

    Each of these options has its own merits, so the best way to determine which one is right for you is to read through all of them.

    5 Ways to Carry Extra Gas on Your Motorcycle

    If you’re wondering how to transport additional gas on your motorcycle, we’ve got you covered. Here are 5 clever and safe ways to carry extra fuel on your bike:

    1. Stackable Liquid Storage Containers

    These containers also come designed to carry different types of liquid and the contents of the container are designated by color. Red is for fuel, white will carry water, green for diesel fuel, etc. They also make containers, blue and orange, that are used for first aid kits or tool kits. Very cool.

    Installation & Mounting Options

    These cans can be mounted just about anywhere on your bike such as on the top of a side case, or a luggage rack, or you can mount them to the sides of your hard panniers. There really are no exact instructions on where they should go. 

    The installation will require brackets and mounting plates depending on your bike and where you decide to put them. Also, the installation will require you to set aside a fair amount of time, maybe an hour or two, and some specialty tools, such as a drill.

    One thing to consider is the weight of the canister when it is full in addition to the weight of the mounting brackets. The brackets can weigh as much as 5 pounds and a single gallon of fluid weighs about 8 pounds. That’s enough of a load to make a bike feel off balance.

    If you choose to mount it on a side pannier, it’s smart to make sure you either, mount a second container (possibly for water) on the opposite side or at least load the opposite pannier so that it balances out the weight.

    Also, if you mount it on top of hard top-case luggage, you are adding weight that is up high, raising your center of gravity. This will affect your riding, especially if you’re riding off-road where technical riding skills come into play. So, it’s best to mount them as low as possible on your bike.

    The mounting brackets must be bolted to your bike either on a hard pannier or top case or on a rear rack. But, there is an L-shaped bracket that’s available giving you more options for mounting location. The spinning mounts that hold the canister in place, come in other options, regular and deluxe, the deluxe mount includes a lock to prevent theft.

    2. Aluminum Fuel Bottle

    Mounting Options

    Holsters of various sizes and materials are available on the market for mounting. These holsters can be strapped to rear racks, side panniers, engine guards, and even handlebars. The type of motorcycle you own will determine where you mount it. One of the benefits of a holster is that it will protect the bottle from damage from flying rocks or other road debris. However, you can mount the cans without a holster, using adjustable clamps.

    You’re probably safe with placing them in your saddlebags, but that’s not the most favorable location due to the risk of leaks. The last thing you want is gas leaking on your clothes or gear.

    MSR fuel bottles come in a variety of sizes, 11 oz., 20 oz., and 30 oz. and if used in pairs, you can carry enough fuel to get you out of a tough spot.

    3. Fuel Bladders

    Mounting For Fuel Bladders

    Fuel Bladders are designed specifically for use with motorcycles and off-road vehicles. They range in size from 1L to 20L with the 6L version weighing in at only 0.5kg. 

    The bladder itself & the outside is protected well and are extremely strong and is easy to mount. It is covered with heaps of steel D rings for mounting and can easily be folded up when empty. 

    The gas bag is a convenient way to carry fuel due to its flexibility. It can be tied onto the top of your luggage, on top of a panner or soft saddlebag and it doesn’t require any hardware to mount it.

    4. Auxiliary Gas Tank

    Installing an Auxilary Tank

    Aux tanks will need to be able to fit the specific bike you ride and will also need to accommodate the type of saddlebags or hard pannier system you use. Generally, an extra tank will be installed along the side, the rear of the bike inside the pannier rack mounting system. The pannier adds extra protection in case of a down bike. These tanks are equipped with a switch, usually a manual lever, that will turn the fuel from the tank on and allow it to flow to the engine when needed.

    An auxiliary tank can be made of aluminum or fuel-grade plastic. When purchasing a tank for your specific bike you will receive mounting brackets and all necessary hardware for installation. Often, some modifications to your motorcycle will need to be made to accommodate extra brackets and fuel lines, etc. Installation of these types of tanks is a bit of a lengthy process and may require some specialty tools, but it is possible to install them at home without the aid of a professional mechanic. That’s half the fun of owning a bike anyway.

    5. No-Spill Jerry Can

    Mounting Kit or DIY Solutions

    Occasionally someone will come along and build a DIY bracket to hold a gas can in place, but there’s a better solution. There are gas cans that are shaped specifically to fit inside a saddlebag, with the ends of the gas can angled to fit the angles of certain saddlebagsCheck them out here.

    This can be a viable solution if you are willing to store a gas container in your bags and you ride a cruiser or Harley Davidson with the right kind of bags.

    Risks of Using Plastic Jerry Cans While Riding

    Plastic gas cans do come with some risks. Although the plastics used to fill and construct these cans are considered anti-static, they are not 100% so. Gasoline and its vapors need some kind of spark to ignite it, and an electrostatic charge built up in the plastic can be enough to set a spark.

    Manual venting is required if you are using this method and for goodness sake, don’t use a utility jug!

    How to Decide on a Motorcycle Gas Can

    1. Know your motorcycle’s average mileage per tank of gas. Bigger tank vs. Small Tank. High gas mileage vs. Low gas mileage. Remote areas and a vehicle with no fuel is a bad combo.
    2. Plan out route & distance between each gas station. Google Maps is the only tool you need for this.
    3. Work out how much extra fuel you need. This will depend on the distance between each gas station and your motorcycle’s average mileage per tank.
    4. Determine where you will mount this extra fuel. This will depend on what kind of motorcycle you ride. There may be limitations, but with a little ingenuity, you’ll find a solution for any motorcycle.

    Related Questions, Safety & Comments

    Hazards of Fuel Containers on a Motorcycle:

    Well, the obvious risk is that they can ignite under certain circumstances. In fact we have a whole article about whether it is dangerous to carry extra gas on a motorcycle. Leaks can be caused by faulty seals at the cap or cracks in the container.

    If leaking motorcycle fuel or the vapors were to find a spark, they could ignite a fire. Also, there is a risk of puncturing the container in a crash, or if it falls off the bike. Fuel containers should be consistently inspected to prevent these risks.

    Can I Use a Plastic Soda Bottle as a gas can for motorcycle trips?

    No, this is not a good idea. You have probably read in bike forums that a lot of people have carried gas in water bottles, or Gatorade bottles among other things. But, these bottles are not designed to withstand the corrosive nature of gasoline which will cause some plastics to erode over time, and the lids are likely to leak. The last thing you want is container leaks while riding down that country highway, that’s dangerous!

    Can I put a Fuel Container in my Backpack/Other Bag:

    You can, but it is not recommended. Even if you’re using a gas-safe container, you will want to consider your safety in the event of a crash. If you’re sliding down the pavement with gasoline strapped to your back, you are likely to become a human flame thrower. It is much safer to carry it somewhere on the bike, rather than on your person.

    Do Gasolie Bottles need to be Vented? 

    No, they don’t need venting, however, it’s important to keep any gas can out of direct sunlight to prevent overheating. When the fuel heats up, the vapors will expand and the container, under enough pressure, can explode. Plastic containers pose a greater risk than metal cans. Auxiliary tanks are designed with a side vent and ventilation system to avoid this problem.

    What is the best emergency gas can for motorcycles?

    The aluminum fuel bottles made by MSR are the best emergency gas can for motorcycling. That’s because they can compact enough to fit into any bag and will get you out of a tight spot in a pinch!

    How many Miles my Gas Tank will Take me between gas stations:

    Calculating an estimate of your fuel range will vary depending on a number of factors, but there are some basic mathematical rules you can follow.

    1. Google your tank Gallon Size (let’s assume it’s 3.5 Gallons)
    2. Googe your bikes mpg (let’s assume it’s 60mpg)
    3. Multiply these numbers together to find how many miles your bike ‘should’ run on a full tank of gas (the answer here is 210 miles)

     How can I carry extra fuel on my motorcycle?

    There are several ways to carry extra fuel on a motorcycle such as getting a bigger fuel tank, investing in a fuel bladder, using fuel bottles, using stackable cans, installing auxiliary tanks, or using a traditional jerry can.

    What is a fuel bladder?

    A fuel bladder is a soft container that can hold fuel. It is available in various sizes, can be rolled up or stored flat when not in use, and is less cumbersome than traditional containers. It is also less likely to crack or suffer from vibration. Popular options include Desert Fox fuel cells and the Giant Loop Gas Bag.

    What are stackable storage cans?

    Stackable cans are containers for carrying extra fuel that can be conveniently stacked on top of each other. RotopaX storage cans are popular options that come in various sizes and have guaranteed non-leaking spouts.

    What are auxiliary tanks?

    Auxiliary tanks are dedicated additional fuel storage that can be turned on or off. They function like a second fuel tank for your bike and are usually smaller than the main tank. Popular options include Camel tanks and Acerbis tanks.

    What is a jerry can?

    A jerry can is a traditional container for storing and carrying extra fuel. It is cheap and readily available, however, it can be cumbersome to store and can crack if you have an accident.

    Is carrying extra fuel on a motorcycle safe?

    Carrying extra fuel on a motorcycle comes with its risks, so it is important to take necessary precautions such as ensuring proper ventilation and avoiding contact with the exhaust system. Additionally, it is important to use products specifically designed for carrying fuel and to properly secure and mount them on your bike.

    Of course, European countries will use liters and KM instead of gallons and miles, but the logic is the same

    Mounting Tips

    • Cargo Trailers: Integrate a fuel tank into a trailer that you tow behind your motorcycle. This will give you more storage space for additional gear as well.
    • Tank Bags: These bags will work great for short trips and have a little extra space for storing fuel on the go. They fit onto the motorcycle tank and can be easily removed.
    • Panniers: These are great for long trips. Panniers come in different sizes meaning you can customize based on your fuel needs. They can be mounted on the sides of the motorcycle for easy access.
    • Cargo Racks: Install a cargo rack onto your bike’s rear fender and use a bungee cord to tie down your gas container. This option is cheap and very practical.

    Dirt Bike Options

    Honestly, the capacity to carry fuel on a dirt bike is pretty much the same as an other motorcycle.

  • Best Portable Jump Starter for Motorcycle Battery

    Best Portable Jump Starter for Motorcycle Battery

    Reading Time: 10 minutes

    Looking for the best motorcycle jump starter? Check out a wide variety of premium-quality motorcycle jump starters for your bike battery.

    Out of all the tools that you will carry on your motorcycle, this is probably the most valuable item: a Portable Battery Jump Starter. Dead batteries happen to everyone at one point or another and when it happens on a road trip, it can be a real pain to the you-know-what. If, or when, it happens to you, there’s really no need to rely on finding a stranger with jumper cables or pushing your motorcycle to try and bump start it. Packing a portable battery jump starter is all you need to do to get yourself out of a jam, safely. A motorcycle jump starter is safe, affordable, versatile and easy to use. Using a motorcycle jump starter helps to quickly revive a dead battery. Motorcycle battery jump starters offer reverse polarity protection. A car jump starter and a car charger are also applicable for bikes. A portable battery starter is an excellent option to revive a dead motorcycle battery in emergency situations. The bike engine should use a polarity protection electrical system to charge the bike’s battery for optimal impact. For a smaller motorcycle battery, jump starting is possible with a cigarette lighter socket adapter, micro USB cable, USB ports, trickle charger and more. However, it can damage the motorcycle.

    Due to advances in lithium ion batteries, manufacturers are now making jump starters that are smaller in size, yet still capable of starting a variety of truck, car and motorcycle batteries. The best motorcycle jump starters are easily available with local suppliers or online. Go through motorcycle jump starter reviews and select the one that’s best for your bike.
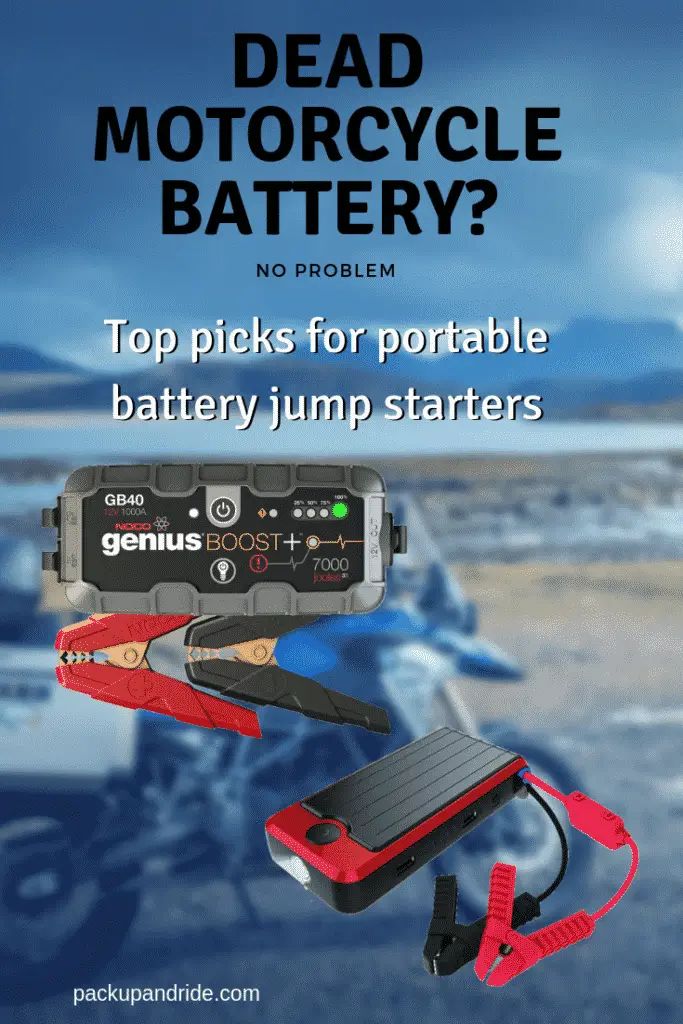
    The best portable jump starter for motorcycle batteries that I recommend:

    Noco GB40 1000amp Genius Boost

    • Higher price range
    • More available power 1000 peak amps means more starts per charge.
    • 2.4 pounds
    • Dimensions: 8.3 x 4.1 x 4.6 inches
    • See the latest price on Amazon

    More peak amps means more starting power. This is perfect if you have a larger motorcycle or you’re in colder weather. That extra power also means you will get more starts from one single charge compared to less expensive chargers. This one comes with a very bright flashlight at 1000 lumens with 7 different modes. It also comes with 1 USB charging port, which is less than other charger. Also, this one does not come with a case, extra cables for charging your electronics, but it does include a car lighter connector.

    norco charger

    GooLoo  800amp

    This charger will start up to 7-litre gas engines, so it will have no problems starting even larger motorcycles. Also, with 700 amp output, it will have no problems starting your bike in the dead of winter. It features an LCD display showing you the percentage of charge remaining as well as other information. It features a small flashlight with 3 modes; solid, flashing, or SOS mode. It also has 2 USB ports at 5 volts each to charge your electronics. Included are various connectors and a car lighter charger. The jump starter comes with a hardshell case that holds the charger and all the accessories.

    Goo Loo Charger

    DBPower 500Amp

    • Lower price range.
    • 500 peak amps, general output will be less
    • 1.32 pounds
    • Dimensions: 9.7 x 3.9 x 4.9 inches

    This jump starter is slightly less expensive, with lower amperage, which may translate into a less reliable product. Although, for a smaller motorcycle, it will easily provide you with the power you need to get up and running again. It comes with the usual features such as a flashlight, 2 USB ports as well as a small compass which is more of a gimmick than a useful tool. It also comes with multiple connectors for a variety of different electronics, as well as its own carrying case.

    DB Power Charger

    How to Use a Battery Jump Starter

    best portable jump starter for motorcycle

    Using a portable charger is easy and very safe as long as you follow these steps.

    1. Make sure you keep your battery charger at it’s peak charge whenever possible to give you the most power boost possible when you need it.
    2. Access your motorcycle battery. How you do this will depend on your motorcycle. Follow the bikes recommended steps for accessing the battery.
    3. Clamp the positive lead (RED) to the positive post of your battery.
    4. Clamp the negative (BLACK) lead to the negative post of your battery. If you can’t reach the negative post due to how your battery is installed on your bike, you can clamp the negative lead on any bare metal on your bikes frame or engine.
    5. Plug the lead cable into the battery charger. The reason you do this after you connect to the battery, is to prevent any surge of power to enter your charger.
    6. Turn the battery charger on and press the boost button. (check the instructions for your specific charger)
    7. Let it set for 15 to 30 seconds.
    8. Start your motorcycle as you normally would.

    If your battery charger has enough power stored in it, there should be little to no problems starting up your bike. At this point, without turning the motorcycle off, you can remove both positive and negative leads from the bike. Most people will find that this is surprisingly simple to start up your bike, and the most complicated part of the process is accessing your battery.

    Common Features of Jump Starters

    Most portable battery jump starters will come with similar extra features and you can choose your charger based on what features you are likely to use or would be nice to have.

    Flashlight and safety lights. Most chargers will come with a handy light that will function as a small flashlight. This makes it easier if you ever have to jump your bike after dark. Higher lumens means a brighter light. Having this on the charger means you will never have to hunt down a separate flashlight to see. Some chargers will also come with a flashing red or orange light to provide you with a little extra safety.

    Additional charging ports. Most chargers will come with additional USB charging ports and a variety of cables and connectors allowing you to charge your cell phone, tablet computer, or any other electronics that require USB.

    Reverse Polarity and Overload Protection. This feature protects your battery and the charger from damage if you were to inadvertently connect the cables wrong. Also, you will not get that familiar, yet un-nerving spark when touching the cables to the battery.

    Portable chargers also have overload protection. Once your jump starter reaches full capacity, it will monitor and reduce the charge coming in from a power outlet, keeping it at a float charge to prevent overloading it and to make sure it maintains its full charge.

    Air Compressor. While a lot of larger sized jump starters come equipped with an air compressor built-in, such as those designed for cars and trucks, the small size of the portable jump starters makes it impossible to fit an air compressor into the mix. However, there is one product, the Rugged Geek RG1000 Safety Plus charger, that comes with a separate 12v air compressor. The two items fit neatly into their own case providing you with double protection from a dead battery and a flat tire.

    Motorcycle Jump Starter Basics

    best portable jump starter for motorcycle

    How many CCA’s are needed to start a motorcycle battery?
    CCA stands for Cold Crank Amps and it will vary depending on your battery. Check your owners manual to see the exact specifications or look on the existing battery to find the information.

    In general, motorcycle batteries are 12 volts, the same as most car batteries. However, they require fewer amps. Applying too many amps to a motorcycle battery can fry it, so it’s important to apply only 2 to4 amps to the battery when jump-starting your bike. Many battery packs designed for cars and trucks will put out too much amperage and may damage your battery. One more factor to consider; the older the bike, the more amps are needed to start it, so if you have a 20-year-old motorcycle, you may need to apply up to 4 amps. Again, check your owner manual for specifics.

    Can I jump my battery in cold weather?
    The outside temperature will affect how quickly your motorcycle starts up, and cold weather will affect the charge of a battery. So, if you plan to do winter riding in areas where it is near or below freezing, then you may want to consider a charger that’s a little beefier, such as the Noco BG70 2000 amp charger. This is a larger version of the Noco BG40 listed above. It will give you more cranking power enabling you to start up a motorcycle at low temperatures.

    How safe are battery jump starters?
    They are very safe. Because they have features like reverse polarity protection, it is safer to use one of these chargers than it is to jump two car batteries together. The safety features give you room for error such as connecting the wrong cable to the wrong terminal. (Remember, red is positive, black is negative.)

    How much do they weigh?
    The weight of a charger will depend on its size, and generally, if you choose a charger with more storage capacity, it’s going to be larger and heavier. Portable chargers that would be perfect for motorcycle travel generally weigh 2 to 5 pounds and are often only slightly bigger than a large cell phone, only thicker. Again, the more power the charger carries, the larger and heavier it is. But, if you’re using it just for your motorcycle, you are safe to carry a smaller, more compact charger.

    How do you charge them?
    The chargers will come with an input port and a USB charging cable. You simply plug them into a wall outlet and allow them to charge up just as you would your cell phone or other electronics.

    How many times will they start your bike?
    Again this will depend on the capacity of the charger. But, it is safe to assume that for even smaller chargers, you can get at least 4 or 5 starts from the same charge. It’s a good idea to keep the jump starter fully charged and ready to go at all times, so, if you have to use it once, take the time to recharge it back up to capacity as soon as you can.

    Related Questions

    Can you push start a fuel injected motorcycle? Yes, you can. It is possible provided there is enough charge in the battery to run the electronics necessary to engage the fuel pump system. So, while it is possible, it’s not going to work every time. It’s easier, or more common, to push start a motorcycle with a standard fuel system. You will need to push the bike up to a speed of at least 10 mph. Depending on the size of your bike, you may want to make sure you break down at the top of a hill unless you are in incredible shape.

    Can you jumpstart a motorcycle from a car? Yes, you can. It is a little more dangerous than starting from a jump charger, but it’s easy to do. When connecting to a car battery, make sure everything is off. Connect the positive terminals on both batteries first, then both negative cables. DO NOT turn the car engine on because it will put out too many amps and can fry your motorcycle battery. Simply start your bike as you normally would as soon as you’ve connected the cables.

    What does a dead motorcycle battery sound like? When you press the start button you may hear your engine trying to turn over, but it will begin to fade into a pitiful, slow, whine as the battery loses power. Once the battery is dead and doesn’t have enough charge to turn over the engine, you will only hear the clicking sound of your starter. Your lights will also appear extremely dim, or won’t come on at all. These are all sure tale signs that your battery is dead.

  • Best Motorcycle Saddle Bags

    Best Motorcycle Saddle Bags

    Reading Time: 7 minutes

    So, you want to start traveling on your motorcycle. Maybe take a few overnight trips, weekend excursions, or a long 2 week motorcycle adventure vacation. You’re going to need some way to pack up all your stuff. That’s when it’s time to invest in some motorcycle luggage.  Harking back from the days of the cowboy traveling on his horse, the most trusted way to carry your supplies, is with saddle bags. But where do you start? There are so many different types and styles of saddle bags on the market these days.

    What kind of saddle bag should you buy? The first thing to consider is what kind of saddle bag will fit your motorcycle. Secondly, how much stuff do you need to bring with you? Lastly, you need to determine what kind of riding your going to be doing. On pavement? Off road adventure riding? or a combination of the two?

    I’ve owned several motorcycles and each required different saddle bags. The first set I owned is not even worth mentioning. I don’t remember the brand, and that’s probably a good thing. I was on a tight budget, it was cheap, and, let’s just say you get what you pay for.

    My Current Choice

    But, my absolute favorite soft saddle bag system is the one I use currently on my 2014 Honda CB500X, it’s the SW-MoTech Blaze Saddle Bag System. (find it for your bike).

    SW Motech

    The Blaze saddle bag system is designed for smaller bikes, or for bikes that are on the sporty side. If you ride a sport bike, this is a perfect way to convert your sport bike into a touring bike. The bags are durable and slick looking. They are expandable to carry plenty of gear and the fitment system, customized for your bike, keeps them steady and secure on the road and makes them so easy to install and remove. I go into a lot more detail about these bags and why I love them in a blog post found here: Gear Review – the SW-Motech Blaze Saddle Bag System.

    Two More Recommended Soft Saddle Bags

    As mentioned at the beginning of this post, the type and size of saddle bags you buy depends on the type of motorcycle you have. Not all bags will fit on all bikes.

    The motorcycle you ride and how it’s configured is going to be a big factor in selecting the right saddle bags. One of the biggest things to consider is where your exhaust is mounted. Soft sided saddle bags don’t always come with an exhaust cutout and you may need to consider a bag system that comes with mounting racks so that the bags set on your bike without interfering with the exhaust system. Also, if you own a motorcycle with exterior spring suspension, you will need to consider a bag that doesn’t interfere with those as well.

    Sport Bikes, Sport Touring and Naked Bikes

    So, what’s a good soft bag solution for sport bikes, naked bikes or sport touring bikes? My recommendation is the Nelson-Riggs CL-950 Deluxe Saddle Bags. (check the prices here)

    I used to own a 1985 Yamaha FJ1100 (shown at the top of this page) and was looking for a set of luggage that would fit it. Being a vintage bike, bag manufacturers weren’t making sets specific to that bike, so, I did a little measuring and found a set that worked well; the Nelson-Riggs. I owned these saddle bags in combination with the CL-1040-TP soft top case. These bags worked great on my bike and they held all my camping gear, clothing, tools, and had room for a lot more. They were extremely well built with durable stitching, especially in those week spots at the top where the bags get stretched. They required no racks or brackets to install and were pretty easy to put on and take off.

    One of the biggest concerns for a sporty type bike, is the risk of the bags rubbing against the rear tire, and this is a common problem.  To reduce this risk, you’ll notice that most sport bike bags are tear drop shaped, with the thicker part of the bag towards the front. The helps keep the bags higher above the rear wheel and will provide more clearance over the exhaust. Make sure you don’t install them backwards. The thinner part of the tear drop shape should always go toward the rear. One common mistake when people install saddle bags on a sport bike, is letting them angle down too far. Your first step in fixing that problem is to tighten the velcro yolk over the seat, until the bags are angled outward, instead of inward.

    Naked bikes, which simply means there are no plastic fairings or covers around the engines, have similar issues. Often this style of motorcycle will have suspension on the outside of the bike rather than under the seat. Think along the lines of the Triumph Bonneville, or the Honda CB 1100RS. Some of these bikes have a spring suspension on each side. Choosing a Saddle bag that will work around those springs will be important. Again, this is what I love about the SW-Motech Blaze system. Designed for each specific bike.

    One thing I notice about the Nelson-Riggs bags that I owned on my Yamaha, and this is a common problem with any soft saddle bag that doesn’t utilize a mounting rack. When I had the bags fully packed with the expansion bevels fully extended, this increased the weight and the bag’s tendency to camber in closer to the rear tire. I remedied this by stringing a single bungee cord from the bottom of one back to the bottom of the other bag. In a sense, angling them up more, pulling the bottoms of the bags away from the tire. So, caution should be taken with any soft saddle bag in combination with a sport bike or sport touring bike to make sure the bottom of the bags don’t rub the tires.

    Adventure Bikes and Dual Sports

    I have a good friend who also happens to own a Honda CB500X, but his bike has been converted into a full-on dual sport. He loves to pack it up and take it on long camping trips around the Northwestern United States and rarely takes it on the highway if he can help it. Each trip he is guaranteed to find a way to dump that bike in the dirt. But, he built it to withstand that kind of riding, and he chose a specific saddle bag system to accommodate his tendency to lay it down. He swears by the Giant Loop Coyote Roll Top bags.

    These Giant Loop bags are U-shaped and lay over either the rear fender or passenger seat of your bike. Cam buckle straps connect them to the rear foot peg brackets on each side, and at the top of the bags they will connect to any available hold via straps with clips. The are durable enough to withstand a minor get off without having to worry about breaking a clip, denting the sides (like hard panniers).

    These bags are waterproof and act the same way a dry bag does, with the roll top, Velcro closure so you don’t have to worry about a rain cover in bad weather.

    One tip is to keep the contents of these bags as light as possible, placing the heaviest objects down at the bottom of the bags equally balanced on each side. This will keep your center of gravity lower, making it easier to maneuver the bike on the backroads.

    Wrap Up

    So, there you have three different style soft saddle bag system. Each of them are excellent. Pick the style that will fit your bike and your riding style. I hope you found this article helpful.

  • Best Motorcycle Tank Bags

    Best Motorcycle Tank Bags

    Reading Time: 6 minutes

    When talking about motorcycle luggage, a tank bag is probably one of the most convenient ways to keep items that you need quick and easy access to. Most riders keep things like electronics, cell phone, wallet, maps, water bottle, snacks, chapstick and anything else you might need.

    Tank bags come in a big variety of sizes and styles as well as mounting methods. In this article I’ll talk about different tank bag styles and share what I look for in a tank bag for my own motorcycle.

    Before you choose a tank bag you should ask yourself a few questions. First, what are you going to use it for? Are you planning a long trip that requires the use of a map? Do you want extra space to pack extra gear? Do you want a bag that includes a hydration system? Do you want a small bag to use for quick day rides or commuting?

    The next thing to consider is the layout of your tank, the amount of surface space available, and the mounting style you’d like to use.

    I personally don’t like large, bulky tank bags. I prefer bags that aren’t too tall, that will carry only the things I will need at hand whenever I ride, and that’s it. I also like tank bags that have a large clear pocket for a paper map, and a front pocket for my phone and wallet.

    This might give you an example of what you should consider before purchasing a tank bag. Will a tall bag interfere with your ability to ride or maneuver quickly? Will a large tank bag interfere with your handlebars when turning? I once had a friend who’s tank bag would honk the horn every time she made a left hand u-turn.

    Tank Bag Mounting Styles

    • Magnetic: These tank bags have powerful magnets that adhere to your metal tank. They are the easiest to use, with parts to install. You simply place it on the tank and you’re ready to go. However, they are also easy to steal, so it’s smart to can take your valuables with you when you reach your destination. Pro tip: if you ever put your magnetic tank bag on the ground, ALWAYS check the magnets for gravel before you put it on your bike. Magnetic bags are strong enough to stay put while riding as long as all magnets are contacting the metal tank.
    • Gas Cap Mounted: Also known as quick lock. These tank bags come with a special ring that permanently attaches to the outer ring of your gas cap. The bottom of the bag has a mounting bracket that slides and locks into the ring and snaps into place. The benefits of this style is that the bag does not touch your tank, it’s super easy to take off and this is a good thing when you’re at the gas station filling up. They are extremely secure and will not come off while riding.
    • Strap mounted: Strap mounted bags will give you a more secure fit than a magnetic bag and they are a good solution for bikes with plastic tanks. One concern with strap mounted bags is the hassle that comes with removing them when you gas up. But, this task often only takes a minute or two and once you have a system, it shouldn’t be a problem.

    My Recommended Small Day Ride Tank Bag

    Sometimes you don’t need to carry much but you need to carry more than what will fit in your pockets. That’s when a smaller tank bag will come in handy.

    For years I’ve been riding with the Joe Rocket Manta magnetic tank bag. They call it the Manta because, well, I suppose it’s shaped like a manta ray with its wings spread out. The size is just right for a few necessities that I like to carry when I take the bike out for a few hours on local roads. It’s the perfect size for packing a water bottle, snacks, my hairbrush, sunglasses, ect. And, it’s just big enough to stuff a shirt in if I have to layer up or down.

    I’ve had mine for about 5 years and it shows few signs of wear, zippers work, no ripped seams. Thankfully they have updated the cell phone pocket to accommodate smart phones. So, if you’re looking for a small tank bag, check this one out. It’s available here on Amazon.

    My Recommended Touring Tank Bag

    For longer trips of a few days or more, I often take items that I want quick access to, like my cameras and camera mounts. I like keeping these in a tank bag so I can keep my valuables with me if I go in a restaurant. I also like the added feature of a map pouch.

    My recommendation for a touring tank bag is the Cortech Super 2.0 18-Liter bag. I like this one for a couple of reasons. First, it’s not too big. I’m not a fan of huge tank bags, but it is expandable if I do need the extra space. I also like the shape of the bag. It’s curved on top rather than rectangular and that makes it a little easier to lean on, at least in my opinion. The map pocket is removable and some say it’s a little on the small side, but I don’t see being too inconvenienced by it.

    One of the biggest selling point for this tank bag was the hidden backpack straps. It’s so nice to be able to take the bag off the bike and throw it on your back. The straps are pretty comfortable too. So, if you’re looking for a good mid-sized magnetic tank bag for touring or weekend trips, I recommend this one. Check out the latest prices on Amazon.

    Recommended Adventure Tank Bag

    The Giant Loop Fandango Tank Bag

    If you’re looking for a tank bag that’s a little more rugged, or one that will fit your dual sport, I recommend the Giant Loop Fandango. Giant Loop makes some great products for adventure riding and their gear is of excellent quality, so, even if you’re paying a little more, you’ll be getting a good quality product.

    What I really like about this tank bag is the large size map pocket that is also touch screen friendly. The bag mounts using the strap system and is designed so you can easily access the gas cap by un-zipping one side, and flipping the bag out of the way. Remove the second zipper to take the bag off the mounting plate completely if you want to take it with you.

    The Fandango model is 10 liters, which is not a ton of room, so keep that in mind if you’re looking for something bigger. But, if you’re out riding the trails, you don’t want something bulky or a bag that impedes your ability to ride standing up. They also make an 8 liter bag called the Diablo. You can get them on Amazon here.

  • 5 Ways to Entertain Yourself on a Solo Motorcycle Trip

    5 Ways to Entertain Yourself on a Solo Motorcycle Trip

    Reading Time: 12 minutes

    Taking a motorcycle trip by yourself is a unique and rewarding experience. It presents challenges that do not otherwise come up in a group setting. One of those challenges is keeping yourself entertained. You will have several hours of downtime each night before you turn in and often in rural locations or in the middle of nowhere.

    Solo motorcycle trips can be both exhilarating and relaxing. You can ride a bike to a lot of amazing places, which is half the fun. Solo motorcycle touring can give you the opportunity to explore new places, meet new people, and learn more about yourself. So, if you’re looking for an adventure, consider taking a solo motorcycle ride. You won’t regret it!

    But, what do you do to kill the time when solo motorcycle touring? Of course, there are obvious solutions like, reading a book, listening to music or podcast, listening to audiobooks, etc. Those are good options, but let’s look at a few more interesting ways to stay busy.

    Here are 5 ways to make the most fun out of your solo motorcycle touring.

    1. Go Fishing

    Fishing is a great way to pass the time when you ride solo, especially when traveling through the mountains. Take advantage of mountain streams, rivers, and lakes along the way and catch yourself some dinner. Here are a few tips on fishing while on a solo motorcycle ride.

    • Do some research before you leave on your trip and find out what kind of fish are biting in the areas you’ll be traveling.
    • Make sure your fishing license is up to date and valid for the state you fishing in.
    • Check with local park rangers or bait shops for regulations on size and limits, or if a certain lake is caught and released only.

    Here are a few suggestions on what to pack on your motorcycle so you can go fishing while on your trip.

    • Rod and Reel – of course, you’re going to need a fishing pole and a reel. Set up your line before your trip based on the type of fish you are most likely to catch. Consider using a telescopic rod. They pack down perfectly for a motorcycle and don’t take up much room on your bike.
    • Tackle box – again, do some research before you leave, and pack a small tackle box with hooks, lures and bait that will catch whatever fish are biting in your travel area. Some extra fishing line and some small hooks are always good to have along in case you need to make any repairs to your tackle or rod. Don’t forget to bring a small multitool with pliers to remove hooks and cut lines.
    • Bait – Live bait doesn’t take up much room and if you prefer to fish with live bait, you can purchase a small container of night crawlers along the way, just be sure to pack them in a place where they will keep cool.

    So, with a compact rod and reel, a small tackle box, and the right kind of bait, you can go out early in the morning before you pack up and leave for another day of riding solo. Fish doesn’t take long to cook, and would make a great breakfast.

    Additionally, here are a few more ideas about the tools you may consider carrying while fishing on a motorcycle trip.

    • Lure Assortment – You’ll need a variety of lures to attract the different types of fish you hope to catch. These can be easily packed in a small tackle box. So, next time you’re at the bait shop, pick up an assortment of lures for your trip.
    • Fishing Net – A small fishing net will come in handy for landing your fish. A net is useful for landing fish that are too big or too slippery to handle with your bare hands. A fishing net can also be used to help you retrieve lures that have been lost in the water.
    • Fishing Knife – A good fishing knife is essential for cleaning your catch. A sharp knife will make quick work of cleaning fish. It’s also a good idea to have a knife on hand in case you need to cut line or bait your hook.
    • Fishing Line – You may need extra fishing line in case you break your line while out fishing. It’s also a good idea to pack an assortment of different weights and sizes of line to accommodate the different types of fish you may catch.
    • Waders – If you’re planning on doing some fly fishing in mountain streams, you’ll need a good pair of waders. Waders will keep you dry while you’re standing in the water and will also help to keep you warm in cold mountain streams. Also, you can find waders that are specifically designed for motorcycle travel. They have zippered legs that make it easy to put them on and take them off while on your bike.
    • Fly Fishing Vest – A fly fishing vest is a great way to keep all your gear organized and within reach. Again, there are vests specifically designed for motorcycle travel. They have plenty of pockets for storing lures, flies, your license, etc. and often have a built-in hydration system.

    2. Bring an Instrument and Learn to Play It

    Instead of listening to someone else’s music, you could learn to make your own. Obviously, you can bring your tuba with you on your motorcycle, but there are plenty of musical instruments that are perfectly suited for such a trip, some can even fit in your pocket. Here are a few suggestions:

    • Harmonica – Inexpensive and easy to play. They are small and easy to pack. They don’t require any power except the power of your lungs. Bring an instruction book and it won’t be long before you’re playing some blues. Did you know that doctors prescribe playing the harmonica for patients with COPD (Chronic Obstructive Pulmonary Disease.) Apparently, it helps with strengthening the diaphragm. So, not only are you being entertained by your mad harp skills, you’re keeping your lungs in top shape.
    • Mandolin – A little bit bigger than a harmonica but still small enough to fit in a jacket pocket. The mandolin is a great choice for a solo trip on your motorcycle. They have a bright sound that will carry well when you’re riding solo down the road. You can find small travel mandolins that are easy to pack and won’t take up much room on your bike.
    • Tin whistle or penny whistle – This is a traditional Irish instrument that is relatively easy to learn. It’s a long, narrow whistle with 6 finger holes and a 2-octave range. It’s inexpensive and very compact so it’s easy to travel with. Bring along a lesson book and you’ll be stomping your feet to an Irish jig in no time.
    • Ukulele – A bit bigger than the other suggestions, but, a typical concert ukulele is about 24″ in length, and the soprano ukulele is even smaller. Get yourself a beginner ukulele book and start learning the basic chords and by your first night, you’ll be singing by the campfire. You’ll need to take good care to protect it from moisture and from being crushed, so pack it well. It’s a great choice for a solo trip on your motorcycle. They are portable and you can find them in a variety of price ranges. The sound of the ukulele is very mellow and soothing, perfect for when you’re relaxing around the campfire at night.
    • Backpacker’s Guitar – If you’re a guitar player there’s no need to leave home without your instrument. Backpacker’s guitars come in compact sizes and, while still larger than the ukulele, it might be a good option. They don’t sound as good as a standard guitar, but if you’re only entertaining yourself, it may not matter. Again, pack it well and protect it from rain or moisture.

    3. Draw, Paint or Write

    Riding out in the countryside or in the mountains will provide you with a lot of inspiration to create some art on paper. Drawing or painting is the perfect way to pass the time. If you see something along the way that you want to recreate, take a picture of it on your cell phone. If it’s already dark when you want to draw, fire up a headlamp and have at it.

    Drawing doesn’t have to be limited to just pencil drawings. Consider packing a small set of colored pencils or pastels. You could also carry a few sheets of pastel paper for your dry pastels. I like to carry mine in a small tin box. It’s compact and easy to pack.

    If you like to paint, watercolors are a great option. A small set of paint and a few good quality brushes will work along with your sketch pad. Sketch out a pencil drawing and make it pop with color using your paint set.

    A long solo trip can give you a lot of time to think and sometimes you want to get those thoughts down on paper. Pen and paper is all you need to chronicle your journey or create a great short story. Many people have developed the habit of daily journaling and you don’t have to give up that habit when you’re traveling.

    Also, when traveling alone, you are almost guaranteed to have uninterrupted time so you can concentrate on your writing. Why, you may even be able to finish that novel you’ve always wanted to write.

    If you would rather not write by hand, or your thoughts flow so fast your handwriting can’t keep up, considering bringing an iPad or tablet computer with a portable keyboard. Keep in mind, however, that this will require charging and should be included in your list of items that will require battery power.

    4. Visit Local Tourist Spots

    Every town, no matter how big or small, has a history. And if you love history, consider visiting a local museum to find out how the town was discovered and how it’s evolved over the years. But, in any town, your adventure starts with a visit to the local visitor center.

    The visitor center will give you an idea of what’s available to see and do. They can give you advice on the best restaurants or watering holes and nearby attractions. Consider staying for a day or two if you’re in a larger town. If you’re in a small town, find out where the locals like to hang out. You may end up having a great conversation, or make a new friend along the way. You would be surprised at how many people will want to chat with you when you ride up on your motorcycle.

    You can also visit the local farmer’s market. No matter where you are in the world, there is always a farmer’s market somewhere nearby. And what’s great about farmer’s markets is that they are typically only open on weekends. This means you can hit the road early on Friday and make it to your destination in time for the market.

    The produce at farmer’s markets is always fresh, and you’ll often find a variety of homemade goods as well. Baked goods, honey, jams, and jellies are just a few of the things you’ll find. You may even find someone selling handcrafted jewelry or pottery.

    One of the great things about riding a motorcycle is that you can go places that most people can’t get to with a car. This includes setting up camp in some of the most remote and beautiful places. If you love nature, consider packing a small tent and some camping gear.

    You don’t need a lot of gear to camp comfortably. A good-quality sleeping bag, a comfortable air mattress, and a small stove will get you started. Don’t forget the insect repellent and sunscreen!

    Geocaching is another great way to explore any town, big or small. Basically, it’s a modern-day treasure hunt where people hide small containers called “geocaches” and then post the coordinates online. Anyone can then go and find the cache.
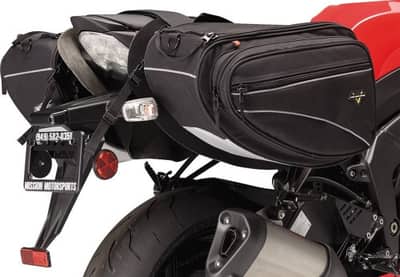
    To get started, all you need is a GPS device or a smartphone with GPS capabilities and the free Geocaching app. Once you have the app, you can search for geocaches near your location. When you find one you want to look for, the app will give you directions on how to get there.
    5. Whittle

    Can you picture an old man sitting in his rocking chair on his front porch out in the middle of the Louisiana bayou whittling a fox out of a piece of scrap wood? Well, that could be you too. Grab your favorite pocket knife and a piece of wood laying around and see what you can create.

    There are a lot of great books available to teach you some basic wood carving techniques. Take one with you or learn it at home, then practice your new skills on your trip. You can whittle without any special tools other than a good, sharp pocket knife, but it you find yourself want to do some more advanced carvings, consider adding some specialty wood carving tools to your saddle bags.

    There are a ton of specialist whittling tools available, some with special shaped handles and unique blades for different types of cuts and carving techniques. You can also get these tools in  pocket knife form, such as the Schrade Old Timer which has six folding specialty blades in one pocket knife. Check out the prices here on Amazon (affiliate link). You might also considering getting yourself a thumb guard to prevent cuts if you happen to slip. Whittling is a great pass-time that has been around for ages and you might be surprised at what you can create while on a road trip.

    As you can see there are so many ways to keep yourself entertained on a solo motorcycle trip. You simply have to pick one, or several, that you love to do. You’ll never get bored.

    Conclusion

    A solo ride can be some of the most adventurous and satisfying experiences you’ll ever have. While fun riding with friends is usually a good idea, there are also many compelling reasons to take a solo ride. Many riders prefer solo riding more than traveling in a group, and for good reason. On a solo ride, there is no one but just you. Your sole responsibility is to keep yourself happy, which is simpler than attempting to satisfy the needs of others. Such factors can also boost your excitement for your first solo motorcycle trip .

    Although exploring your surroundings and seeing where the road takes you can be interesting, having a purpose or destination can also make a solo ride more enjoyable. Therefore, it’s a great idea to take solo trips at some point in your life.

    When packing for you are riding solo, it’s better to pack light and only bring the essentials to ride safe. Also, for comfortable riding, it’s essential to get your bike serviced before a long trip. In addition to your riding skills, it’s better to learn some basic skills before going for a ride. Consider learning how to fix common motorcycle maintenance concerns, such as a flat tire, before going on a trip for solo riding. Duct tape and bungee cords are useful to have on hand since they can fix almost anything. You can get a tiny, travel-friendly tire repair kit to fix a flat tire. Apart from these, it’s a good idea to carry your emergency contact details in order to avoid any adverse situations and ride safe.

    With a little planning, you can hit the road with confidence, knowing that you’ll be prepared for anything. So what are you waiting for? Start planning your first solo trip on your motorcycle today!

    Have a fun ride!

  • Motorcycle Base Layers: Motorcycle Clothing Guide

    Motorcycle Base Layers: Motorcycle Clothing Guide

    Reading Time: 7 minutes

    As a safe and conscientious motorcycle rider, let’s assume you have purchased good quality riding gear to wear on your long-distance rides. Whether it be a textile riding suit or racing leather, you’re going to want to be as comfortable as possible on your ride. Thin layer are appropriate mid layers for all weather conditions while riding motorcycles. Your riding style plays a crucial role to determine the appropriate base layer applicable for you.

    So, what should you wear as motorcycle base layers while riding? The most important thing to strive for is comfort. You want to wear a base layer that helps regulate your body temperature under different weather conditions. Choose clothing that does not impair your movement or ability to maneuver the motorcycle; or that doesn’t bunch up, ride up, or gather over time. Wick moisture and merino wool are excellent lightweight material to wear as motorcycle base layers while riding. It helps to preserve body heat. Summer base layers for riding a motorcycle should allow warm air to flow through the layering system.

    What you choose to wear under your riding pants can depend on a lot of factors.

    • Is the weather hot and humid?
    • Is it cold?
    • Do you have sensitive skin?
    • How active will you be on the bike? (off road, paved road?)

    The market has improved greatly when it comes to base layers for all kinds of sports including motorcycle riding. And when it comes to motorcycle touring or long motorcycle trips, you should have no problem packing up the appropriate clothes to keep you safe and comfortable under your riding gear.

    Hot Weather Base Layers

    motorcycle base layers

    While riding during the summer and in hot weather, you’re going to be sweating. You want to choose a base layer made of material that will wick away sweat from your skin. You’ll want something that is lightweight that will dry quickly, so, if you’re sweating while riding, opening your jacket vents will send a nice breeze through your shirt, cooling your skin.

    In the heat, most people will naturally want to wear short sleeves thinking it will keep them cooler. Keep in mind, however, that you will be wearing a jacket over the shirt. Longs sleeves are actually more effective during summer. Long sleeves will protect your skin from the more harsh material in your jacket and will prevent irritation at some key points like inside the elbows.

    Some of the best moister wicking materials are high-tech polyester, polypropylene, Gore-Tex (but this is generally used for outerwear), and wool. Most people wouldn’t think to wear wool in hot weather, but, as a natural fiber, it is effective in drawing moisture away from the skin.

    Avoid cotton. Cotton is a great natural fiber and is very comfortable, and most people wear cotton t-shirts a lot. But, as a summer base layer, it’s not the best choice. It will hold in moisture and will become heavy and bulky when wet.

    Cold Weather Base Layers

    motorcycle base layers

    When riding in cold weather you not only have to worry about the ambient temperature but the wind chill as well. A good quality outer layer will help keep windchill from becoming an issue, but you still need to keep in mind that even your jacket will not be enough to protect you from the chill. So, a nice thermal base layer is necessary.

    When you start layering your clothing for winter riding, it’s easy for those layers to bulk up and reduce your mobility. So, it’s important to choose clothing that is effective in retaining your body heat, but that is also thin enough to keep you comfortable.

    If you want to go with a natural fiber, merino wool is an excellent material for a winter base layer. A good quality layer of wool is comfortable, wicks away moisture if you sweat under your jacket, but still will hold in your body’s natural heat. Shirts made of polyester that is designed specifically for cold condition sports like skiing make excellent base layers for motorcycle riding. Winter motorcycle base layers will be slightly thicker than warm weather layers, yet will still be pretty thin and comfortable. It’s woven in a way that creates tiny pockets of air between the fibers that trap your body’s heat, keeping you warmer.

    Select a long sleeve shirt and pants that are form fitting and somewhat tight, rather than being loose fitting. This will help keep your body’s heat from escaping. Also, consider selecting a mock turtle neck shirt that will help prevent wind from blowing around your neck.

    Long pants vs. shorts

    In cold weather, long pants are a natural choice for keeping your legs warm. Depending on the temperature, you’ll want to wear the same type of material you select for your upper body. But, while thermal shirts or warm weather shirts will still look good when you take your jacket off, not everyone will be comfortable walking into a restaurant wearing skin tight thermal pants. So, what are some other options for base layer pants?

    A lot of riders like to wear convertible pants that are made of good technical fiber. Convertible pants are hiking pants that convert in the shorts by unzipping the legs at the thigh. These are perfect if your day starts out a little bit chilly, the warms up in the afternoon. Plus, they look good if you choose to remove your riding pants on a break for lunch or dinner.

    Some motorcycle riders like to ride while wearing cycling shorts. This is a great option for comfort. The padded chamois in the shorts provides an extra layer of comfort in the saddle. They are generally free from seams that can dig into the skin when you are sitting for long periods of time. Here’s an important tip if you wear cycling shorts: DO NOT wear underwear under the cycling shorts. This completely defeats the purpose. Cycling shorts are designed to be worn against the skin and when you sweat, the moisture will keep the chamois tight against your skin preventing it from shifting, thereby preventing chaffing.

    Jeans, although very popular among motorcycle riders, are probably the least comfortable pants to wear as a base layer under your riding pants. They are bulky in all the wrong places. They have seams and rivets the dig into the skin on long rides. While jeans, especially kevlar jeans, may be an option for daily riding or commuting, they don’t make a good base layer.

    Bra or No Bra?

    Ok, this one is for the ladies. If you are a woman whose figure doesn’t require a lot of support, consider ditching the bra for your long motorcycle trips. Wearing a snug fitting base layer shirt without the bra will be that much more comfortable. If you want to go without your jacket during breaks, you can always throw on a second shirt that you keep handy when packing, if you feel uncomfortable going without a bra in public. Some women aren’t, some women are; it’s completely a personal choice.

    If you have to wear a bra for support, get yourself a few good quality sport bras. The larger, non-binding straps and bands of a sport bra are specifically designed to be comfortable and keep the girls in place without sacrificing mobility.

    The Buff or Handkerchief

    This is not really a base layer, but it is something you will find a lot of adventure riders wearing with their gear. A buff is a soft, stretchy tube of material that is pulled over the head and worn around the neck. It can be pulled up over the nose and mouth to prevent dust out of your face or to keep your chin and face warm in the cold. It can be soaked in water to help keep you cool on a hot ride. It can be used as a headband or as a bandana to keep long hair under control (again, a tip for the ladies).

    A lot of people will use a handkerchief to tie around their neck or to use as a bandana, and this works just as well. A cotton bandana soaked in water does a great job of keeping you cool when it’s hot. Also, it works just as well in keeping your neck and face warm in the cold.

    Whether you choose a buff or a handkerchief is your choice, but either one is a great addition to your base layer.

    I hope this article gives you some good ideas about what to wear and how to stay comfortable under your riding gear.