Has it been your dream to explore Florida on your motorcycle? I am sure you are not alone. There are many reasons that people love riding motorcycles. Some folks admire the open-air experience of cruising on a motorcycle, while others like the feeling of independence and relaxation it brings. Others simply like to feel young again by speeding down the highway at top speeds!
A motorcycle endorsement is a great way for a basic rider to get a learner’s license or other types of motorcycle licenses in the state of Florida. Complete a basic rider course and pass the motorcycle safety test to get a Florida motorcycle license.
So, if you would like your dreams to come true, read this article to learn about how to get a motorcycle license in Florida fast.
Is a Motorcycle Endorsement the Same as a Motorcycle License in Florida?
A motorcycle endorsement and a motorcycle license in Florida are not the same. The keyword motorcycle endorsement explained perfectly captures this distinction. In Florida, a motorcycle endorsement is an addition to your existing driver’s license, indicating that you are qualified to operate a motorcycle. In contrast, a motorcycle license is a standalone document that allows you exclusively to ride motorcycles. Hence, understanding the difference between the two is crucial for motorcyclists in Florida.
Approved Motorcycle Skills & Requirements to Get an Operator’s License in Florida
No other experience is as relaxing as cruising the highways of Florida with your friends. But for that, you need a motorcycle license like 600,000 other riders according to Florida law. A motorcycle safety course is mandatory to obtain Florida Driver’s license.
The requirements to get a motorcycle license in Florida are:
Be at least 16 years old
Have a learner’s permit for 1 year with no traffic violations
Complete the BRCu or BRC per FL322.12
Take and pass your Class-E driving license knowledge examination
Submit proof of completing the BRCu or BRC course at tax collection offices
Pay the license fee
Applying for a Motorcycle License
Obtain a Learner’s Permit
Assuming you are 16 years old, to get a motorcycle license in Florida, the first thing you need to do is to obtain a learner’s permit by passing your written Class E knowledge examination for motorcycles at any tax collector office. This permit is valid for 1 year from the date of issue. It allows you to operate on Florida roads as long as an adult riding with you has a license and follows the three laws of motorcycling: Bikes smaller than yours should keep right Motorists must not turn left in front of you Riders must yield the right-of-way
To renew your motorcycle class E license, simply go back to the same office where you took it and pay $15. If you do not practice riding, your license will expire.
Pass Introductory Motorcycle Riding Course
The next step is to complete the Basic Ridercourse updated (BRCu) or Basic Rider Course (BRC), which will teach you the skills needed to ride safely. To be eligible for the basic rider course, you need to have a Florida Class E driver’s license and pass a basic skills test as set by the Motorcycle Safety Foundation. The BRC has three options: Motorcycle Only, Motorcycle/Automobile Combo, and Automobile Driving Only.
The price for this approved motorcycle skills course is between $99 and $300, depending on the location. Once you complete this course, you will receive your certificate that can be submitted to any driver’s license office for free.
Submit Documentation and Pay The Fee
After completing your basic rider’s course, visit DMV offices to get a copy of your course completion. Pay a $48 licensing fee and submit a “completed” course certificate, along with the learner’s permit application form, which you need to get from the DMV office or online at the official website of the department. You will then receive an interim license that is valid for 90 days from issuance, during which time you must go through the motorcycle skills test with the examiner who issues your license. If you pass this test, you will be issued an official Class E license!
Tips on Passing The Knowledge Test
For those who do not want to take a rider’s course or have already taken one elsewhere, it is also possible to make a written request for a knowledge exam by submitting a Florida Rider Education Certificate (FRED) form. The examiner will give you the motorcycle knowledge exam on a touch-screen computer that is available at all driver license offices throughout Florida.
This written test has 20 questions (25 for those who took their riding class outside of Florida) and your final score depends on how many of them you answer correctly. You need to answer at least 80% or 16 out of 20 questions correctly to pass it. If not, you can retake the exam as often as you would like so long as there is more than one day before the expiration of your permit. Please note: If your course instructor gives you a certificate with “not eligible” stamped on it, bring the document back to the DMV or driver license office and let an examiner know about it; she may be able to waive the exam requirement.
Conclusion
A motorcycle license is not difficult to get in Florida: To begin, you must take and pass the knowledge test and be at least 16 years old. After that, complete a basic rider course – either Motorcycle or Motorcycle/Automobile Combo – and submit your course completion certificate to any driver’s license office.
Experienced riders can have a commercial license with motorcycle insurance to legally operate or ride a motorcycle in the sunshine state.
Finally, practice riding for a least six months then schedules your motorcycle skills test with the examiner who issues your license. And you are all set to explore Florida!
Ready to make the most of California’s beautiful weather touring around on your motorcycle? Nothing better than that. But before that, you need a motorcycle license. Sounds like a bump on the road? Not exactly.
The California Highway Patrol monitors and prevents motorcycle accidents throughout the state. You can get a motorcycle driver’s license from any California DMV outlet. The motorcycle instruction permit is essential just as much as the learner’s permit. Motorcycle drivers should carry their motorcycle driver’s license at all times when riding.
Also, you can apply for motorcycle endorsement with an application fee for the training course to practice riding on different track paths.
We are here to help you out with all the steps needed to acquire your motorcycle license in California.
Types of Motorcycle Licenses in California
There are motorcycle license classes in California:
Class M1
Class M2
Class M1 – Class M1 motorcycle training license permits you to operate any single vehicle with a seat or saddle which can be used as a driver’s seat, including mopeds and scooters under 50cc.
Class M2 – If you’d like to operate motorcycles with over 49cc of engine displacement, then Class M2 is for you! You’ll need this license to drive motorcycles with 49cc, or more.
Requirements for Obtaining a Motorcycle License in California
The basic requirements for obtaining a motorcycle license in California are:
You are 16 years old.
Or
If you are 15 ½ years old and turn 16 within 30 days of the written test, then you may take the test without turning 16. You will need to bring a permission form signed by your parent/guardian stating that they give you permission to get a motorcycle license. The permission form is on the California Department of Motor Vehicles website under “Unlicensed Minors in Driver Education.”
You must have a valid California Instruction Permit. If you are under 18, your parent/guardian’s signature is required on the permit.
Provide proof of successful completion of the Motorcycle Safety Foundation Basic Rider Course (BRC), or you can opt for the DMV Motorcycle Skills Test instead.
Pass an eye exam.
You cannot currently be suspended or revoked by any state, county, or court.
Steps To Apply For a California Motorcycle License
1. Prepare for the Written Knowledge Test
Take a look at a Motorcycle Operator’s Manual to start studying for the written test.
The most important thing that you need to do is read and understand California Driver Handbook, covering topics such as:
• Traffic signs and signals
• Sharing the road with others
• Alcohol and drugs awareness
• Defensive driving techniques
There are practice tests included in the manual so use them! Also, pay attention to all details provided in the “California Motorcycle Laws” section of the handbook. This information will come in handy when you’re on your motorcycle during your practical examination. Don’t forget to take a look at additional online resources including but not limited to:
• California Motorcycle Handbook
• DMV Motorcycle Test A to Z
• California Rider’s Training Program
2. Take a Motorcycle Training Course or Write a Knowledge Test
If you don’t have your motorcycle license then taking a Motorcycle Safety Foundation Basic RiderCourse (BRC) is an absolute must! It will teach you the basics of riding and safety, as well as familiarize you with the equipment that is required on motorcycles in order to drive them safely on public roads. If you already took the BRC course then go for the driver knowledge test at your local California DMV office. Be advised, though, that if you fail 3 times it’s time to start looking for alternate ways to obtain your motorcycle license because failing this test more than 3 times means that you are not allowed to take it again.
3. Apply for a California Motorcycle Learner’s Permit
To get your motorcycle permit in California, go to the DMV office with:
• Application for Driver License or Identification Card (Form DL 44) filled out but not signed by your parent/guardian
• Your valid California Instruction Permit
• Proof of successful completion of the BRC or an acceptable DMV Motorcycle Skills Test completion certificate. If you took the skills test, then bring your certificate and eye exam results. Also, if you passed the motorcycle safety course already, bring it too. Make sure all documents are originals! No photocopies will be accepted!
If everything is okay – pay the fees, take your vision test and you will be able to get a motorcycle learner permit. It is valid for 1 year.
4. Practice Driving A Motorcycle
Practice makes perfect! You need to have at least 50 hours of practice driving on public roads before taking the road test in order to obtain your motorcycle license. During this time you are expected
• To master basic skills including straight-line riding, turning, shifting gears, braking, etc
• To know how to handle your bike during various weather conditions (rainy/foggy days) and times of day (nighttime)
• Know California laws concerning motorcycles like speed limits, various signs, and markings on the road, signals given by motorcycle riders, etc.
5. Pass The On-Road Driving Test
To take the on-road motorcycle driving test you need to make an appointment with your local DMV office and bring:
• Your valid California Motorcycle Learner’s Permit & Driver License or your original certificate of completion for the BRC (no photocopies will be accepted!)
• A registered and insured motorcycle (it cannot be a moped)
If everything is okay – pay the fees, pass the vision test which is required to get your motorcycle license, and enjoy riding!
Conclusion
Remember, if you do fail the motorcycle driving test twice for an “unsatisfactory performance”, it’s time to look for ways how to successfully pass the knowledge test. Hundreds of students who failed their motorcycle rider training course before finally obtaining their motorcycle licenses used this proven method! Now that you know what is required to obtain your California Motorcycle License, go out there and ride with confidence!
In order to film each and every moment of your riding life, you do not have to be a professional cinematographer. The only thing that you need to know about is the best positions on your motorcycle where you can place or mount your GoPro.
In case if you have purchased a new GoPro or are looking to buy one but do not know the best position to mount it, you need not worry as we’ve got you covered on that front.
Official GoPro mount camera have included swivel mount assembly for maximum adjustability. One example of such action cameras is the GoPro Hero.
In this article, we will cover all the possible places where you can mount GoPro cameras on your beloved motorcycle so that you get the desired result from all the captured shots.
Mounting Spots for GoPro on a Motorcycle
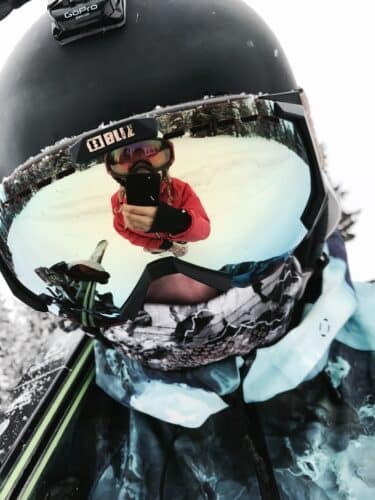
Helmet Top
Helmet Side
Helmet Chin
Motorcycle Tail
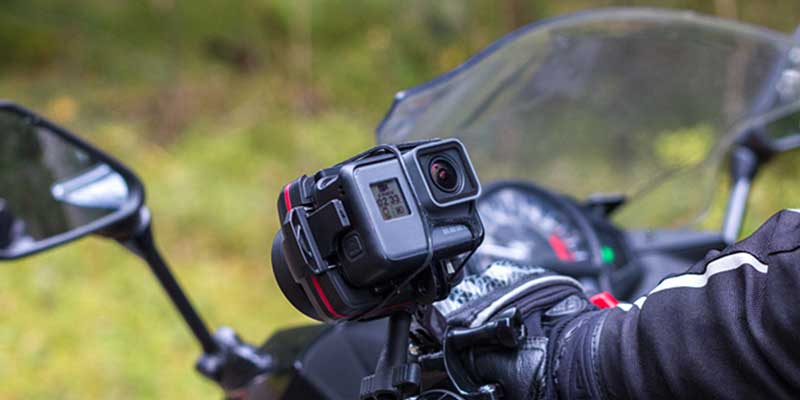
Handlebar Mount
Chest Mount
Tank Mount
Mirror Mount
Helmet Top
This is one of the most popular mounting spots for a GoPro on a motorcycle. Mounting your GoPro on top of your helmet will give you an immersive view of everything that’s happening in front of you while you’re riding.
Since the helmet is right in front of your eyes, it’ll be easier for you to capture all the actions and moments as they happen without having to worry about missing any of them.
However, do keep in mind that if you’re going to be using your GoPro at high speeds, make sure that it is securely fastened to your helmet so that it doesn’t fly off while you’re riding.
Helmet Side
Just like the helmet top spot, mounting your GoPro on the side of your helmet will give you a great view of everything that’s happening on the side while you’re riding.
This is perfect for capturing beautiful landscapes and scenes as you ride by them.
However, do keep in mind that it can be difficult to see what’s happening in front of you if you have the GoPro mounted on the side of your helmet.
Helmet Chin
If you want to get a more up-close and personal view of all the action while you’re riding, then mounting your GoPro on the chin of your helmet would be a great option.
This will give you an immersive view of everything that’s happening right in front of your eyes and is perfect for capturing scenic routes.
Just like the other helmet mounts, make sure that your GoPro is securely fastened to your helmet so that it doesn’t come off while you’re riding.
Motorcycle Tail
If you want to capture all the action that’s happening behind you while you’re riding, then mounting your GoPro on the motorcycle tail would be a great option.
This will give you a great view of all the things that are happening in your surroundings as you ride.
However, do keep in mind that this position can be quite dangerous as it can obstruct your vision while riding.
Handlebar Mount
If you want to capture all the action that’s happening in front of and around you while you’re riding, then mounting your GoPro on the handlebars will be a great option.
This will give you an immersive view of everything that’s happening in front of your eyes and is perfect for capturing scenic routes.
However, do keep in mind that it can be difficult to see what’s happening right behind you if you have the GoPro handlebar mounts.
Chest Mount
If you want to capture action shots while riding, then mounting your GoPro on your chest would be a great choice.
This will give you an up-close sneak peek into all the action that’s happening around you while you’re riding and is perfect if you want to track yourself or another biker who is riding with you while recording his actions from a different point of view.
However, do keep in mind that this position can be quite dangerous as well because it can obstruct your natural freedom of movement on the bike.
Tank Mount
If you want to capture shots of the road while riding, then mounting your GoPro on the tank of your motorcycle will be a great option.
This is perfect for capturing beautiful landscapes and scenes that you pass by while riding.
However, do keep in mind that it can be quite difficult to see what’s happening in front of you if you have the GoPro mounted on the side of your tank.
Also, since the camera will be attached to the tank, the footage will have all the vibrations of the bike’s body. Therefore, you should keep this fact into account.
Mirror Mount
If you want to mount your GoPro on a mirror while you’re riding a motorcycle, this might not be a good idea since most mirrors vibrate when going at high speeds which will mean undesirable shaking and vibration in your video footage.
But some people claim that if you attach your GoPro with the vibration-reduction feature enabled, then it might be a great idea for capturing shots while riding.
But do keep in mind that you should film using at least 60 fps while using this option otherwise, the video footage will look very shaky.
Conclusion
Now that you know about all the different mounting location where you can mount your GoPro Hero when riding a motorcycle, hopefully, choosing the perfect spot won’t be too difficult anymore.
If you are on a motorcycle trip then your focus will be on the gas tank, wind drag, and other factors to bike mount your GoPro camera for maximum clarity and records.
Some GoPro motorcycle mounting options include helmet mount, chin mount, chest mount, and more. There are different rules for helmet mounting in other countries than the US.
As long as you’re careful with every mounting detail and are aware of your surroundings before taking off on your bike, everything should go perfectly!
So, good luck with capturing some stunning footage, and have fun!
One of the most nerve-wracking things to do in a car is to overtake a motorcycle. Because they are so small and nimble it would be very easy to screw up the overtaking. You have to be very precise and decisive when doing so, or you can end up causing an accident.
There are most certainly right and wrong ways to overtake a motorcycle.
Motorcycle overtaking problems are different from those faced by drivers of other vehicles because the margin for error is so small.
People often make mistakes because they drive too fast and can’t slow down, or they don’t judge the correct speed to approach the motorcycle. Others don’t realize how much faster a bike is than their car.
Poor visibility is the key factor. If you are overtaking on a motorcycle, you must not depend on being able to see the motorcyclist in your car mirrors alone. Better judgment calls are required on the part of every driver. You need to concentrate more on what’s happening ahead of you so that you can gauge whether or not it is safe to overtake.
How to Overtake a Motorcycle
For example, when you’re following a car moving at 100 km/h, if it changes lanes you only have to travel about 10 meters before there is an opportunity to overtake. But if you follow a motorcycle traveling at the same speed and the rider moves into your lane, you will need to travel 50 meters or more before there is an opportunity for overtaking. So take care not to cut off motorcycles when changing lanes.
When passing motorcycles remember that most riders don’t have rearview mirrors so they often cannot see cars behind, even in their mirrors. Always sound your horn well in as some motorcycle riders may be wearing heavy leathers or have faulty hearing, and a passing car going through a pothole could cause the motorcyclist to fall. Wait for a good gap in the traffic before overtaking. Keep the motorcycle in your peripheral vision so you can see if it drifts left or right towards your lane as it accelerates past you.
Do not overtake at intersections unless there is no oncoming traffic, and never attempt an overtaking maneuver when approaching an intersection or traveling within the speed-limited area of a roadworks zone. A motorcyclist can see most of the cars coming towards him or her. But, if you are in a car you cannot tell whether or not the motorcycle rider has spotted your vehicle and is slowing down for you to overtake.
Things to Remember When You Overtake a Motorcycle
Here are a few things you must remember when you overtake a motorcycle:
1. Do not cut in front of a motorcycle
The motorcycle rider may be forced to brake suddenly and without warning. If you’re in a car, pull over and let the motorcycle pass by.
2. Do not accelerate to reach the next line of cars on a congested road
A motorcycle may be traveling at the same speed as the cars around it, but it is more vulnerable than they are. If you move into its path, it could be forced to break or even fall over. Wait for an opportunity to merge back in with other vehicles.
3. Be aware of motorcycles on sidewalks
Riders sometimes move onto the sidewalk when traffic is heavy. If you see a motorcycle on the footpath, move to another lane or slow down and wait for it to rejoin the flow of vehicular traffic before overtaking.
4. Check for motorcycles moving into another lane
If there is a motorcycle in the next lane, it has priority and you must wait for an opportunity to overtake.
Remember: Never make a high-risk overtaking maneuver on roads where the speed limit is 50 km/h or less. If your vehicle doesn’t have enough power to pull out safely, don’t try it.
6. Leave ample space when traveling behind them on wet roads
If it is raining, the motorcycle’s tires will have a much smaller surface area in contact with the road. This means they can lose traction more easily and will need a larger space to stop safely.
How Not to Overtake a Motorcycle
The following are all dangerous ways for cars to pass motorcycles:
1) Passing too close – There should be enough room between two vehicles that they can stop without locking their brakes, including a motorcyclist. Unless the motorcycle is traveling very slowly or parked, there should be at least a meter between the motorcycle and your vehicle.
2) Pulling out from behind a high-center line into a passing lane – This can trap the rider as oncoming vehicles approach from the opposite direction. Also, if you need to slow down suddenly for an unexpected reason, such as roadworks or another driver turning across your path, you could seriously injure the motorcyclist as your car blocks their escape route. You may not be able to see them in time to avoid them before they run into your rear window.
3) Passing on the right – This is illegal and dangerous because it forces the motorcycle into oncoming traffic, which can startle motorists who aren’t expecting to see motorcycles there. It can also force the motorcycle into your blind spot, where you may not be able to see them if they need to brake suddenly.
Conclusion
When you’re passing a motorcycle, remember to give it plenty of space and respect. Follow these guidelines for safe overtaking and enjoy the freedom that comes with sharing the road!
When it comes to changing motorcycle tires, many riders prefer to accomplish the task with a certified mechanic as opposed to doing it themselves. But situations may arise when you are stuck in the middle of nowhere with a flat tire and there is no way you can find a mechanic there.
So, how to go about the process then?
Don’t worry! In this guide, we are listing 13 simple steps which you can follow to change your motorcycle tire and related parts such as tire bead, tire levers, tire wall and tire iron without any hassle and all by yourself.
13 Steps to Change Motorcycle Tire
Take the Schrader Valve Out
Break the Bead
Prepare to Lift the Tire Off the Rim
Lift the Tire Off the Rim
Get the Tire Past the Rim
Lift the Tire Up Towards You
Pull Out the Inner Tube
Prepare the Tire to Refit
Refit the Rim Strip
Refit the Inner Tube
Refit the Tire on the Rim
Put Back on Your Wheel and Caliper
Conduct Final Checkup
Take The Schrader Valve Out
The Schrader valve which is also called the American valve by many riders is the one that has a small pin and is found at the centre of your tire. You must unscrew this first with a valve stem tool before you can go ahead with removing your motorcycle tire. A valve core tool can easily detach the tire valve.
Do not forget to put the cap back on after you have taken out the Schrader valve. If you lose this part, then you will never be able to reinstall it later and deflate your tire.
Break The Bead
The next step of how to change a motorcycle tire requires some patience from your side as well as some steady hands. If a tire bead breaks loose, it can be easily changed at home. However, when outside, carry extra for emergencies in the motorcycle stock box.
What you need to do here is get a bead breaker for the tire bead which simply means separating the inner sidewall (bead) from its outer counterpart (the body of the tire). To achieve this, all that you need is a blunt object or a bead breaker.
Some people use the edge of a hammer, others use a screwdriver or a rock. Whichever way you choose to do it, make sure that the force that you are using is steady and consistent. A bead breaker is the most helpful equipment.
Prepare To Lift The Tire Off The Rim
Once you have successfully broken the bead, the next step would be to prepare your motorcycle for lifting the tire off the rim.
To do this, you need to loosen up the bolts which are found on either side of your wheel. Do not remove them completely though; just loosen them enough so that the tire can be lifted off easily.
Lift The Tire Off The Rim
Now comes the time when you actually have to lift the tire off the rim.
This is easier said than done though since, if you are not careful enough, your tire can slip out of your hands and cause some damage to both yourself as well as your motorcycle.
To avoid this, tighten up each side independently before lifting it off completely after which you will have to tighten them again so that they are secure onto the wheel.
Get The Tire Past The Rim
Now that you have lifted the tire off the rim completely, what remains next is getting it past the rim without causing any damage. Since the brake rotor is connected to the tire spoons, you need accurate tools to change the entire tire.
If you have loosened up your bolts properly then there shouldn’t be any problem here but still, take care while doing this part just in case something goes wrong later on.
Lift The Tire Up Towards You
After you have got the tire past the rim, you will now need to lift it up towards your body while still on top of the wheel.
Then, all that you will have to do is pull out that inner tube that will be found inside the tire.
Pull Out The Inner Tube
Now that you are able to lift your motorcycle tire up without any difficulty, chances are good that it contains an inner tube inside of it.
The inner tube is the one that helps in keeping the air pressure in your motorcycle tire. Since you are now changing your motorcycle tire, you will no longer need this so it is time to pull it out.
Make sure that this does not pop out as soon as you begin lifting and keep a steady pressure with both hands so that it doesn’t slip through either.
Once you have successfully pulled out your inner tube, shake off most of the air from it if possible before removing the cap off the valve. Then you will need to flatten it out so that you can use it later on if your new tire does not come with an inner tube.
Prepare The Tire To Refit
Now that you have removed your old motorcycle tire, it is now time to prepare the wheel rim for refitting.
To do this, all that you will need is a rag or any other form of cloth that you can use to rub off all the dust and grime present there. Avoid using anything corrosive since this may damage the metal in some way or another.
If possible, then try to clean up both sides before leaving them dry for now while proceeding with the next step of how to change a motorcycle tire.
Refit The Rim Strip
The next step would be to fit the rim strip onto your wheel rim before you can proceed with refitting the new tire there.
To do this, just stretch it out over both sides of the wheel rim and fasten it back in place while ensuring that no air can pass through anywhere along its path.
Refit The Inner Tube
Now comes the time when you will have to put back in your old inner tube inside your new motorcycle tire before lowering it down towards the wheel rim again.
If you find yourself having difficulty doing things here then all that you need is practice for this part alone should take care of it eventually.
Ensure that everything is tight enough in order to avoid losing air in the next few steps.
Refit The Tire On The Rim
Now comes the time when you actually get to put back your new tire on your wheel rim.
If you have refitted it correctly then there shouldn’t be any problem here but still, do take care while doing this part to avoid damaging either yourself or the bike later on.
Put Back On Your Wheel And Caliper
Finally, all that is left for you to do is put back everything starting with the wheel and calliper and work your way down to putting everything else back where they belong before taking a test drive down the road to see how things fare now and if anything was damaged along the way.
Conduct Final Checkup
To be on the safe side, do a thorough checkup of everything just in case something was missed out along the way.
Do another test ride on your motorcycle and make sure that everything is working as intended before you can finally call it a job well done and drive off with your new tire now fully fitted onto your bike.
Can a Dirty Motorcycle Helmet Affect Tire Changes?
When it comes to tire changes, many riders overlook the importance of cleaning their motorcycle helmet. However, a dirty helmet can indirectly affect the process. Dirt and debris that accumulate on your helmet’s outer surface can fall onto the tires, potentially causing imbalance or compromising the grip. Therefore, it is crucial to prioritize cleaning your motorcycle helmet regularly to ensure a smooth and safe tire change.
Conclusion
Replacing a motorcycle tire can be a daunting task for first-timers but with the right instructions, it can be done pretty easily. Just make sure that you follow each step carefully and do not try to rush things through as this may lead to further complications.
There is a wide variety of tubeless tires and rim protectors for different motorcycle models. You can customise your own motorcycle tires with tire irons or get a new tire for the rear wheel.
Also, it is always a good idea to have someone around to help out just in case something goes wrong. All in all, changing your motorcycle tire is not as hard as it seems and can be done in a matter of minutes with the right tools and know-how.
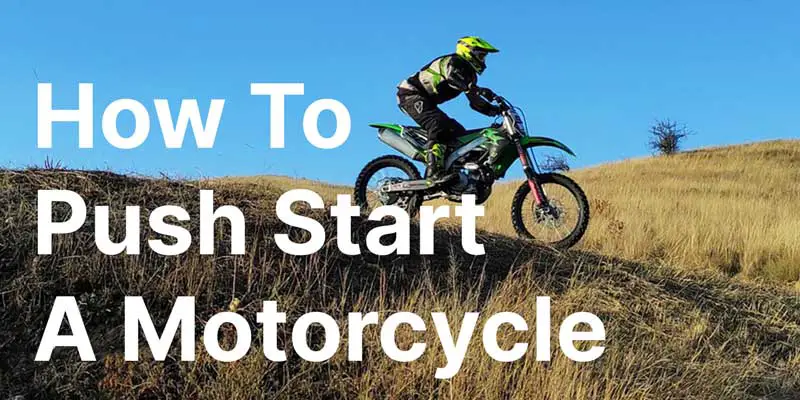
One of the genius ways to start a motorcycle is by using the push starting method if suddenly you find your motorcycle battery dead.
Many riders refer to the process of push starting a motorcycle as pop start or bump start. No matter what name you call it, the process remains the same.
In this guide, we will provide you with 4 genius methods to push starting your motorcycle if you are unable to start your bike normally.
4 Ways To Push Start Your Motorcycle
Find a Hill
Have Somebody to Push Your Motorcycle
Get Another Vehicle to Pull You Along Slowly
Run Alongside the Motorcycle Pushing it Yourself
Find a Hill
Normally, when you hit the starter button, it sends an electrical charge to the engine of your motorcycle that creates the necessary compression to get it started. But if you have faulty connections or a dead battery, then your starter is unable to start your bike normally. Bump starting features are restricted because of faulty spark plugs.
In these situations, you need to create the necessary compression by rolling your motorcycle at around 4 to 6 miles per hour. For this, a hilly area is your best bet. Keep the motorcycle in neutral gear and move the bike with your feet and rear wheel. It helps to prevent bike rolling and accidents.
This is because you can use the slope to your advantage to push start your bike without putting in much effort. And if you are lucky, you might find someone to help you out as well.
In order to successfully push start your bike with the help of a hilly incline you need to switch the ignition on and put the bike to second gear. The next step that you need to do is pull the clutch and push yourself down off the slope.
When you get to the desired speed of 4 to 6 miles per hour, then all you need to do is quickly dump the clutch. Instantly you will see that your motorcycle has got back its start.
Have Somebody to Push Your Motorcycle
If you can’t find a hill and are unable to push start your motorcycle on your own, then finding somebody to help you is the best way to go.
The helper will need to push your motorcycle from the back while you hold onto the handlebars and hit the starter button. This will create enough compression to start your engine. Keep your motorcycle in the second gear to speed up the spinning real wheel.
Just make sure that you do not end up thrown off the motorcycle because in this method when you dump the clutch, your bike will experience a hard jerk. So, hold on to your handlebars not to be thrown off the front. The kill switch helps to disconnect the fuel pump supply to the starter motor. A fuel injected motorcycle has built-in start pushing features.
Get Another Vehicle to Pull You Along Slowly
If there’s no one around to help you push start your motorcycle, you can always get another vehicle to pull you along slowly.
This process is very simple – all you need to do is find an empty space and position your motorcycle in the middle. Next, get someone to drive the other vehicle slowly and attach a tow rope to it.
Make sure that you warn the driver of the other vehicle not to speed up because if they do, it might yank your motorcycle and cause serious damage.
Lastly, hold onto the handlebars tightly and when you see that the engine has started, let go of the tow rope.
Just remember to attach the tow strap to both the front forks of your motorcycle and not just one. If you attach the strap to just one fork, a sudden pull can disbalance the handlebars of your bike and you could meet with a fatal accident due to this. So, be careful with the attachment.
Run Alongside the Motorcycle Pushing it Yourself
If you can’t find a helper or there’s no hill around, then your last resort is to run down and push your motorcycle alone.
This method is very tiring but it will work as long as you have enough strength to do it. Also, this method is only recommended if the weight of your motorcycle is on the lighter side. If you want to try this method with a heavy cruiser, it will leave you all drained and tired.
In order to successfully start the motorcycle, you need to have it in first gear and the ignition on. The next step is to hold onto the handlebars and start running.
Make sure that you time your run with the person pushing the motorcycle from behind so that they are in sync with you. When you see that the engine has started, stop running and let go of the handlebars.
Conclusion
These are the four different methods that you can use to push start your motorcycle. Whichever method you choose, make sure that you are careful and do not end up getting injured in the process. And if all these methods fail, then don’t worry – there’s always a tow truck waiting to help you out.
Do not try to jump start a dead bike. It can cost you heavily. Go to the nearest mechanic and repair it first. Experts check for the starter button, clutch lever, gear lever, fuel tap petcock, motor tuning, fuel level and other parts for maximum safety. Just make sure that you have the necessary funds to pay for the service!
Now that you know how to push start your motorcycle, what are you waiting for? Get out there and give it a try!
Just be careful and use common sense while performing this task. Remember, your safety is of utmost importance. And if you still can’t get your motorcycle started, don’t hesitate to call a tow truck for help. It’s better to be safe than sorry!
Cleaning a motorcycle gas tank that has got all the damage from rust and moisture is not a fun task to take part in. However, it is absolutely necessary if you want an extended life for your beloved bike.
Naturally forming condensation and mechanical abrasive material contribute to regular mild rusting of motorcycle tanks.
The task of cleaning a rusted motorcycle tank is not very complex and at the same time not very simple. You need the right knowledge and the information to carry on the task without causing any damage to yourself or the tank. This is important because you will be dealing with a lot of chemicals and mild acid.
Replacing fuel filters or securing an old tank with a fuel soluble sealer is a good way to start in cases of emergencies.
So, let’s get started and help you clean your motorcycle’s gas tank –
6 Steps to Clean Your Motorcycle Gas Tank
Dismount the Fuel Tank to Identify Overall Motorcycle Damage
Choose Appropriate Rust Removal Cleaning Process for the Motorcycle
Repair and Prepare the Tank
Acid Wash, Agitator, and Shake & Clean Your Motorcycle
Flush to Finish
Check for Complications
Dismount the Fuel Tank to Identify Overall Motorcycle Damage
The first thing you need to do is remove the gas chamber compartment from your bike. You can drain all the gasoline, let it remain in the tank or save it in a bottle depending on what you think will be easier for you.
Once the tank has been removed, take a good look at its exterior and see if there are any dents that could prevent proper cleaning later on. Also, inspect the welds and see if they’re sturdy enough to hold once everything is done and put back together again.
Impurities such as heavy rust deposits and moisture not only affect the appearance of your gas tank but also corrode its parts and slow down its performance. If left unattended, these effects may lead to serious damages in some cases! That’s why we recommend having a professional mechanic inspect your fuel filter and chamber to help you determine its damage and life expectancy.
If you see that the gas tank is more than 90% damaged, it’s better that you don’t waste your time and money because in that case, you will need to replace the tank as no fixing can solve the issue.
Choose Appropriate Rust Removal Cleaning Process for the Motorcycle
After you have deemed that the tank is fit to be cleaned and have assessed the damage caused by rust and moisture, it is time to remove all the rust from your rusted gas tank!
Many mechanics recommend using electrolysis for cleaning rust on gasoline tanks.
However, they do not always know that there are other ways too – Attach an agitator to a power drill and fill it with a baking soda water solution. Add vinegar or salt into warm water and then pour both solutions into another container. After you mix them together, you need to place this container inside the metal one. Then you need to turn on the drill and start scrubbing. After that, you can rinse and then repeat Steps 2 to 5 until you scavenge all of the rust.
After the rust gets abated, you can apply a coat of oil or rust paint.
This works not only for gas tanks but also for rusty bumpers and fenders. The chemical reaction between the salt, baking soda, and vinegar works exceptionally fine and removes the rust from your rusted gas tank.
Repair and Prepare the Tank
After you’ve removed all the rust from your gas tank, it is time to make sure that no moisture remains inside. You can do this by drying out your tank with compressed air.
However, if there are still some small holes in your tank, which we think there will be since most gasoline tanks have many small holes on their surfaces, then you need to seal them up too because once again moisture may reappear and corrode the metal.
Lighter gauge metal and accurate rust abatement techniques extend the life of the fuel filters, gas cap and fuel valves of the motorcycle. Abrasive material damage not only the tank but the motor oil too.
You can use a sealant, JB Weld, silicone plugs and an accurate abatement process to fix the holes until you get your gas tank repaired and sealed by a professional.
Acid Wash, Agitator, and Shake & Clean Your Motorcycle
After you have prepared the tank, it is time to start cleaning it with acid!
Many mechanics recommend using muriatic acid for this task as it is very effective in removing all the paint, grease, and dirt. However, if you’re not comfortable using this type of acid then you can replace it with phosphoric acid.
Make sure that you wear protective gear while working with these acids – safety goggles, gloves, and a mask.
Pour the acid into a plastic container and attach the agitator.
Place the container inside the tank and start shaking it for about 10 minutes. Make sure that you do this in a well-ventilated area as the fumes can be harmful.
After you have agitated the tank with the acid, remove the container and rinse it with water. Now, it is time to repeat these steps until you are satisfied with the results.
You may also use a brush to help clean those hard-to-reach areas.
Flush to Finish
The final step is to flush the tank with water and then seal it up for good.
You can use a garden hose to do this or you can take it to a professional who will use a machine to clean it for you.
After you have completed these steps, your gas tank should be looking and performing better than ever before! Just make sure that you keep an eye on it in case any new rust or moisture appears.
Check for Complications
After you have cleaned and restored your motorcycle’s gas tank, it is important to check for any possible complications that may have arisen as a result of the cleaning.
Make sure that you check for leaks and also for any damage that may have been caused by the acid or rust removal process.
If you find any problems, take your bike to the mechanic and have them take a look. It is always better to be safe than sorry when it comes to your motorcycle!
Conclusion
Cleaning your motorcycle’s gas tank can seem like a daunting task, but if you follow these simple steps, you will be able to do it yourself in no time! Make sure that you remove all the rust, prepare the tank for cleaning, and flush it with water before sealing it up. After you have completed these steps, your gas tank should be looking and performing better than ever before! Just make sure that you keep an eye on it in case any new rust or moisture appears.
Always remember, that it is very important to clean your motorcycle’s gas tank on a regular basis to prevent corrosion and other damages. If you are not comfortable doing this yourself, please take it to a professional mechanic.
Experts offer rust abatement services, install commercial tank sealers and inspect for different motorcycle components such as the fuel cap gasket, fuel tank, vacuum caps, fuel filters, gas cap and more.
After you complete cleaning your gas tank and when you will see it working fine, the level of satisfaction that you will have after working successfully on your bike is incomparable to any other joy.
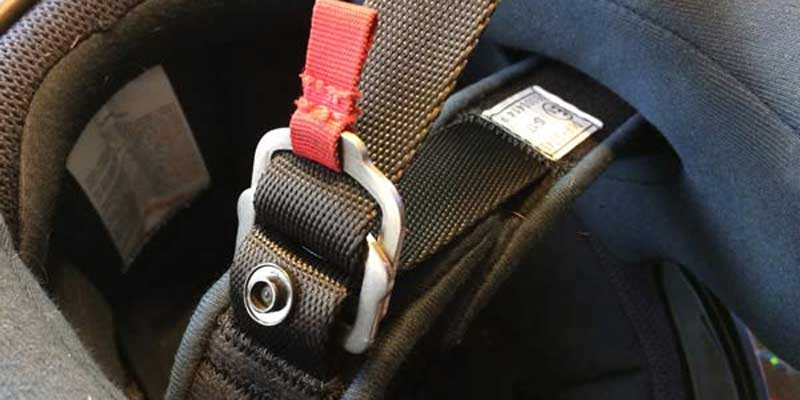
While motorcycle helmets are available in multiple styles today, the double d ring traditional fastener will never be out of fashion. Learning the art of fastening your helmet with ease and quickly is a priceless skill. Helmets are a vital part of your safety as a rider. Not only do they protect your head when you crash but properly fastened they also prevent wind noise and buffeting from compromising your ability to drive safely.
The lack of the right chin strap for your helmet does not let you strap tightly. Strap a motorcycle helmet correctly to the first d ring and the second ring of the double d ring helmet for maximum safety when riding. Pull the strap tightly for your ring helmet to prevent accidents. D rings also prevent any dangerous particle from entering your eyes. Here, we give you a glimpse into how to strap a motorcycle helmet safely.
Importance of Strapping Your Helmet
No matter how punky you consider yourself, keeping the chin strap of your helmet loose or not strapping it can have dangerous consequences. The wind pressure on your head can cause you to lose control of your motorcycle. This is especially true when you are going at high speeds. A loosely strapped helmet can also easily fall off your head in the event of a crash.
Strapping your helmet properly is inevitable when it comes to the safety of a biker. Check your helmet strap every time you step out of the house. The process of strapping a helmet is not difficult, but it is important to do it correctly.
Types of Motorcycle Helmet Strap Buckles
Primarily there are three kinds of motorcycle helmet strap buckles:
Traditional D-ring Buckle
Quick Release Helmet Buckle
Micro Metric Helmet Buckle
Traditional D-ring Buckle
The Traditional D-ring buckle is the most common type of helmet buckle. It consists of two rings that are connected by a strap. The rings are placed on either side of your head and the strap goes around your neck. The straps then attach to the rings to keep the helmet in place.
The D-ring system does not comprise a hatchet system and is much less likely to fail. However, they can be difficult to operate with gloves on. On the brighter side, this type of buckle can be retrofitted to any helmet with a DD ring.
Quick Release Helmet Buckle
The Quick Release Helmet Buckle is a two-piece system that allows the rider to take the helmet off quickly. The two pieces clip together and release by pulling a tab.
The strap length of a quick-release buckle is generally adjusted using metal adjusters on either side of the buckle. Some people prefer this system for its convenience, while others say it is dangerous to use due to the risk of catching your skin in the release mechanism.
Micro Metric Helmet Buckle
The MicroMetric Helmet Buckle is a two-piece system that uses a small ratchet to tighten the strap around your head. It is adjustable and fits most helmets. It has a plastic adjuster that can be operated with just one hand to tighten or loosen the strap by turning the knob.
These are usually lighter than metal buckles and are more difficult to open accidentally. Unfortunately, they also have higher failure rates compared to other systems so you’ll need to replace them more often.
Why is it Important for a Motorcycle Helmet to be Tight?
When it comes to motorcycle safety, a properly fitting helmet plays a crucial role. Following a motorcycle helmet fitting guide ensures that the helmet is snug on the head, preventing it from shifting during a crash. This snug fit helps reduce the risk of serious head injuries, ensuring maximum protection on the road.
How to Strap Your Motorcycle Helmet Quickly
To get the best out of your helmet when you crash, never forget to strap it properly. The chin strap is not just a mere component of a helmet. It is the part that keeps the helmet in place in case of a crash.
On that note, let us take a look at how to strap your motorcycle helmet quickly and easily:
1. Place the helmet on your head and position it so that it fits comfortably.
2. Buckle the chin strap and adjust it so that it is tight but not uncomfortable. You should be able to fit two fingers between the strap and your chin.
3. Make sure the D-rings are facing forward and that the helmet is level on your head.
4. Reach behind your head and pull up on the D-ring closest to your ear until the strap is tight.
5. Repeat on the other side.
6. Finally, adjust the strap length so that the helmet doesn’t move when you shake your head. You may need to readjust the fit from time to time, especially if you perspire a lot.
Choosing Quick Release Strap Buckle Over D-ring
Most people avoid strapping their helmets due to the complexity. This can be solved by merely switching over to a quick-release buckle. It is more advantageous to use quick-release buckles in the long term.
The strap length of a quick-release buckle is generally adjusted using metal adjusters on either side of the buckle. You can also fit it to any helmet with a D-ring system quite easily. The only downside is that it’s slightly more difficult to operate with gloves on, but this can be quickly resolved by practice.
Conclusion
It’s important to remember that a helmet will do you no good if it’s not strapped on properly. Just be sure to practice strapping your helmet on and off a few times before hitting the open road. It might take a little longer to do it the right way, but it’s worth it in the end. Remember, safety first!
You will find a lot of popular posts by most motorcyclists who talk about d rings, metal rings, the second ring, snap button and other safety factors to strap a motorcycle helmet correctly. They talk about the dangers of a loose chin strap, the best position to wear a double d ring helmet, the right way to pull the helmet and the right side to pull the strap.
So the next time you go out for a ride, remember to strap on your helmet properly for your safety. And don’t forget to check the chin strap every time before you leave home. It could save your life.
Your motorcycle helmet is a constant friend in your life, be it rain, sunshine, heat waves, hurricanes, mud pits, sand storms, or snow, well you get the picture. The padding of a helmet helps to keep you comfortable when you are riding and the outer shell protects your head from flying debris and the ever-present possibility of a collision. It has an important role to play, and thus needs that extra care.
Cleaning your motorcycle helmet is a necessary process to keep it in good condition, and ensure that it offers you the best protection while on the road. You must clean and polish your helmet regularly if you want to keep it looking new and increase its lifespan.
The steps to clean a motorcycle helmet are not very complicated. But before we move on to that, let us take a look at the list of things that you require during the process.
Can I Use the Same Cleaning Techniques for My Motorcycle Chain and Helmet?
Cleaning a motorcycle chain properly is essential for its performance and longevity. However, the same techniques cannot be used for a helmet. While a chain requires specific solvents and lubes, a helmet needs gentle cleaning with mild soap and water. Using the right cleaning techniques for each will ensure both components stay in optimal condition.
Items Needed to Clean a Motorcycle Helmet
The list of items needed to clean a helmet includes:
Bucket or sink
Mild dish soap or Baby Shampoo
Toothbrush
Warm Water
Soft Fabric or Microfiber towel
Newspaper
Petroleum jelly or baby oil
Steps to Clean Your Motorcycle Helmet
Remove the Exterior Items
Take off the exterior stickers, face shield, and any other removable parts of the helmet. Clean these parts separately with mild dish soap or baby/mild shampoo and a toothbrush. Rinse them thoroughly with warm water and let them be air-dried. To make the cleaning easier, use a wet microfiber cloth. Place the wet microfibre cloth on the face shield for a few minutes to get rid of any trapped dirt particles.
Remove accessories like microphones, speakers, and Bluetooth equipment. They can be cleaned with a soft cloth and a mild soap solution.
Remove Interior Items
Remove the padding and inner lining of the helmet. If it is removable, take it out and wash it in mild dish soap and water. You can also use a toothbrush to clean any stubborn dirt or grime. Rinse it well and leave them to be air-dried. Also, it can be washed in the washing machine on the most delicate cycle. If your helmet doesn’t have a removable liner and padding, then you will have to skip this step.
Prepare the Outer Shell of The Helmet for Cleaning
Take out the outer shell and lay it on a newspaper or any flat surface. Remove all mud, dirt, and filth from its surface with a soft or microfiber cloth.
If there is still dirt stuck in the vents of your helmet, use an old toothbrush to scrub them out. You can remove wax buildup using petroleum jelly or baby oil. If you do not have either of these items at home, then clean the outer shell with soap and water only. Allow time for drying before reattaching the inner lining and padding to the helmet.
Clean the Inside of the Helmet
Use mild dish soap or shampoo to clean the inside of the helmet. Rinse it with warm water and let it air dry. When you clean the lining of your helmet, fill the bucket with warm water and a mild soap solution. Dip the rag in it for wetting your helmet, and use another one to wipe the lining dry.
Allow your cheek pads and helmet liner to dry completely before reattaching them. If you are planning to travel the next day, it is best you clean it the night before and let it air dry.
Take Care of the Exterior of the Helmet
After you have cleaned your helmet’s lining, take care of its outer shell. Take off the face shield and stickers, and clean them with mild dish soap or shampoo. Rinse them well and when air-dried, reattach them to the helmet.
Make sure you only use warm water to clean the exterior, as other substances could leave a lasting mark on it. When cleaning the outer shell, work in small sections so that you do not miss out on any area. Wipe off all dirt and grime before moving on to the next step.
Blow Out The Vents
Blow out the vents of your helmet with a hairdryer. This will help remove any dirt or dust that may be stuck inside them. Also, a blast of air from the air compressor will keep them free of any moisture.
Clean The Faceshield
Most face shields in recent times have a protective shield over them. Thus, you need to be extra careful with them.
To clean your face shield, use mild dish soap or baby shampoo and warm water. Wet a rag with the solution and rub off all dirt and grime from it before rinsing it thoroughly with the wet cloth. Allow enough time for drying.
Wipe the Sun Shield
If your helmet has a sun shield, then you will need to clean it as well. Use a soft cloth and some baby shampoo. Wipe off all the dirt and grime from the surface and rinse it with warm water. Allow enough time for drying before reattaching it to the helmet.
Reassemble the Helmet
After cleaning all the parts of the helmet, reattach them in the reverse order. Make sure you fit everything properly and do not miss out on any step.
Your motorcycle helmet is now clean and ready for your next ride. Enjoy the wind in your hair without worrying about the dirt and grime that comes with it!
Conclusion
Maintaining your helmet is essential if you want to get the most out of it. A clean helmet will work better and be safer for use. Also, you will not have to worry about repairs or replacements any time soon! So make sure that you give your motorcycle helmets a good wash once in a while so that it is always ready.
The steps above will help you clean your motorcycle helmet in the easiest and most efficient way possible. Make sure you follow them carefully to achieve the best results. Have a safe ride!
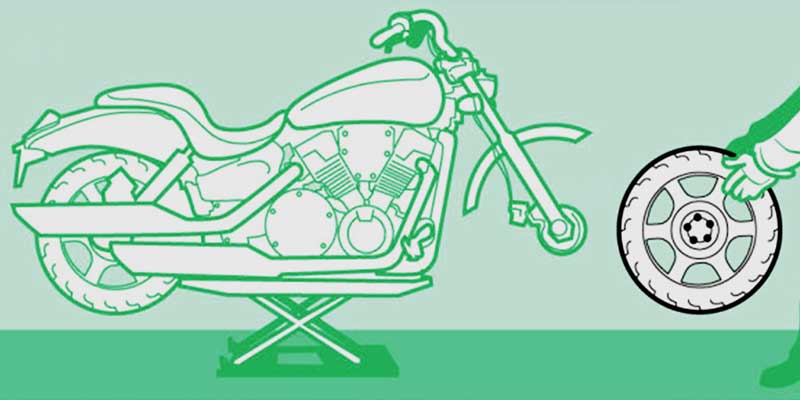
Motorcycle enthusiasts usually prefer working on their own bikes as opposed to sending them over to a repair or workshop. They like their ride fully functional at all times. This means that they must either learn or get someone to teach them how to do it on their own. One of the things that bike riders like is jacking up a motorcycle.
Jacking up a motorbike is not hard and it can be done in less than 15 minutes with the help of some tools and safety precautions. Having said that, oiling, washing, and repairing a motorcycle all by yourself can be a very taxing job, worse if you are jacking it up without the right tools.
However, if you insist, we can give you a tip or two on how to jack up a motorcycle, but not before we tell you about the jack.
Does Wrapping A Motorcycle Affect Its Lifting and Jacking Process?
Wrapping a motorcycle can indeed affect its lifting and jacking process, but it does not have a significant impact. The cost of motorcycle wrapping usually includes the material and labor required for installation. A well-installed wrap should not interfere with the lifting or jacking process, as long as proper techniques and precautions are followed.
What are Motorcycle Jacks?
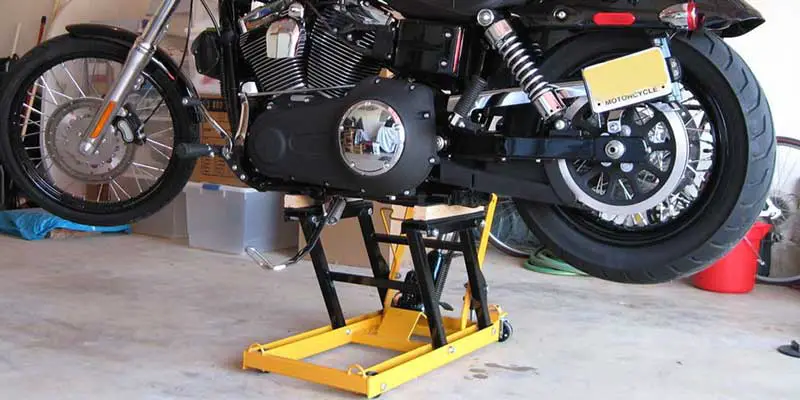
They’re specially designed for this particular task and purpose. These stands help you lift up your ride with minimum effort and maximum safety. To help you out, here are some tips on how to jack up a motorcycle by yourself using this apparatus.
First things first, it’s best to practice lifting the bike first without the stand underneath it before even putting it into action. Motorcycle jacks are very useful but they aren’t perfect so there’s still an element of risk involved when doing this type of work on most bikes. What makes them dangerous is the fact that these stands can easily slip if not used or positioned properly.
How Should You Jack Your Motorcycle Safely?
Here is a 6 step guide to jacking your motorcycle safely:
1. Prep the Surface
The first step is to find a good, solid, flat surface where you can leave your bike for several hours while you’re doing your repairs maintenance work. If you’re going to lift a motorcycle by yourself, make sure that this surface is high enough so that when the motorcycle’s front wheel is in contact with it, its front end is slightly higher than its back end so you can balance it properly.
Remember a car jack is different from a floor jack for a motorcycle. The lifting process may be similar to slowly raise the motorcycle to an upright position but the equipment is not. If you don’t have an appropriate tool, the best way is to use wood blocks with ratchet straps.
If you’re using jack stands, simply make sure that the ground’s surface is even and stable enough so that the jack stand won’t budge.
2. Identify the Bike’s Center of Gravity
Now, this is one of the trickiest parts. The centre of gravity is the point where all weight of the bike or vehicle can be supported without tilting or falling over.
This is usually found by raising the motorcycle’s front wheel slightly and then moving it back and forth to get an idea of where its exact centre is. Mark this spot using a rag, string, chalk, etc. to avoid forgetting.
Remember, a sport bike does not have a centre stand and needs to be put up on frame rails as a safety measure to protect the exhaust system and change tires without any damage.
3. Assess the Underside of Your Bike
Once you have located the centre of gravity, it is time to examine your bike’s underside. The contact surface must be flat. You need to find the jacking points, which are the contact points between the bike and the jack stands.
These are usually found near the suspension system or engine. If you’re using a jack stand, make sure that these points will fit snugly on the metal surface of center stand and won’t move.
A flat surface helps distribute the weight of the bike evenly, ensuring that the motorcycle jack won’t slip.
4. Adjust The Position of Your Bike
Make some adjustments to keep your bike standing upright. If the entire bike itself is leaning towards one side, use a wooden block or something similar to balance the rear end of the motorcycle. The side stand will be non-functional during the process.
You can ask a friend to help you place the motorcycle securely the wooden blocks in the right position if you’re having trouble doing it yourself or use ratcheting tie down straps to hold the motorcycle in position.
5. Position the Floor Jack Correctly
Once your bike is stable and upright, you can now start positioning the motorcycle jack. Make sure that it is placed directly under the centre of gravity of your bike and that it is pointing towards the right jacking point.
In most cases, this will be near the front tire area. Then, simply secure the jack stand in place using a strap or chain to avoid slipping out from underneath your bike when you’re lifting it up off the ground.
6. Lift Your Motorcycle Slowly and Safely
With everything already set in its position, slowly lift your bike until it balances properly on top of your floor jack stand or motorcycle jack stand. Ensure that there’s no slack in between and tighten any loose bolts and screws first before completely securing your ride. To protect the front brake lever and other valuable parts, put the motorcycle up on frame sliders if possible.
Take your time to do this especially if you’re lifting your bike for the first time. Make sure that everything is stable before walking away.
Conclusion
So, that was all about jacking up a motorcycle safely all by yourself. Motorcycle jacks are very useful tools when it comes to lifting, maintenance and repairing your bike. However, they can be dangerous if not used or positioned properly.
These tips can be really helpful in ensuring that your bike is safe and stable while it’s being lifted. Always remember to assess the surface where you’ll be placing your bike, identify the centre of gravity, and use a wooden block or another object to keep it upright if necessary. Lastly, make sure that the motorcycle jack is positioned correctly before slowly lifting your bike off the ground, and you are all set.
FAQ
Can you use a car jack to jack a motorcycle?
it is possible to use a car jack to lift a motorcycle, but it may not be the most ideal or safe method. Car jacks are typically designed to lift heavier vehicles and may not provide the stability or proper contact points required for lifting a motorcycle.
It is recommended to use a motorcycle lift or dedicated motorcycle jack that is specifically designed for this purpose, as they offer better stability and are designed to fit the specific needs of lifting motorcycles safely.
As a motorcycle owner, it is important to keep your bike in top-notch condition. Regular maintenance of your motorcycle’s chain is one of the essential tasks for proper motorcycle upkeep. Dirt, debris, and dust accumulate on your motorcycle chain over time, causing it to wear out quickly. Proper cleaning and lubrication of your motorcycle chain are essential to prevent its premature wear and increase its life. Here, we will guide you on how to clean a motorcycle chain the proper way.
Key Takeaways
Cleaning your motorcycle chain regularly is essential to ensure longevity and efficient working conditions.
Using the right chain cleaner and lubricant is crucial for the maintenance of your motorcycle chain.
Inspecting the chain for wear and proper adjustment after cleaning is also crucial for maintaining your motorcycle chain.
Understanding Motorcycle Chains and Chain Maintenance
The motorcycle chain is an essential part of your bike’s drivetrain, connecting the engine to the rear wheel. It’s crucial to keep it clean and lubricated to ensure proper function and prevent premature wear and tear. The most common types of motorcycle chains are standard and sealed chains, which require different cleaning and maintenance techniques.
Standard Chains
Standard chains are the most common type, and their maintenance involves cleaning and lubrication. They consist of individual links that are connected by pins and rollers, which allow them to move smoothly over the sprockets. Standard chains require frequent cleaning and lubrication to minimize friction, wear, and rust.
Sealed Chains
Sealed chains, also known as O-ring or X-ring chains, have rubber seals that keep the lubricant inside and the dirt and debris outside. They require less maintenance and are more durable than standard chains but still require periodic cleaning and lubrication. Sealed chains have become increasingly popular and are now found on most bikes.
The rear wheel is an essential part of the motorcycle chain system, as it transfers power from the chain to the road. The rear wheel must be removed to replace or clean the chain properly. Rear stands are commonly used to hold the bike up while the rear wheel is taken off, making it easier to access the chain. Sealed motorcycle chains are based on X-ring or O-ring technology and only require lubrication and cleaning.
Maintaining your motorcycle chain involves more than just cleaning and lubrication. Regular inspections are critical to identify issues such as loose or tight chains, sprocket tooth wear, and excessive chain slack. Proper chain adjustment and inspection are essential parts of proper motorcycle maintenance.
Next, we will review the required tools and materials for cleaning your motorcycle chain to ensure it will operate smoothly for years to come.
Gather the Necessary Tools and Materials
Before you begin cleaning your motorcycle chain, you need to gather a few tools and materials. The following items will be necessary:
ToolsMaterialsMotorcycle chain brushChain cleanerClean ragChain lube or lubricantOld newspapers or cardboard to cover the garage floor
A motorcycle chain brush is specifically designed to clean all parts of the chain, including the hard-to-reach areas. Make sure you have enough chain cleaner to cover the entire chain. A clean rag and chain lube or lubricant will be required for the final step of cleaning your chain. Lastly, cover the garage floor with old newspapers or cardboard to protect it from any spills or messes.
With these tools and materials, you are now ready to clean your motorcycle chain properly.
Preparing Your Motorcycle for Chain Cleaning
Proper motorcycle maintenance requires more than just cleaning the motorcycle chain. Before you start cleaning, ensure that your motorcycle is in a suitable location. Choose an area with enough space to move around your motorcycle, and protect the garage floor with a plastic cover or an oil-absorbent mat to catch any drips and spills from the chain cleaner and lubricant.
If your motorcycle is equipped with sealed motorcycle chains, you need to take extra precautions while cleaning them. Check your motorcycle manual for the type of the motorcycle chain lubricant that your motorcycle uses, and read the instructions for cleaning a sealed motorcycle chain based on the manufacturer’s recommendation. While some manufacturers may allow the use of motorcycle chain cleaner and lubricant, some may suggest using only mild soap and water. Failure to follow the manufacturer’s recommendation may damage the chain and cause failure.
Cleaning the Motorcycle Chain
Now that you have gathered the necessary tools and materials and prepared your motorcycle for chain cleaning, it’s time to clean the chain. Start by placing a piece of cardboard or an old towel on the garage floor to catch any dripping chain cleaner or lubricant.
Next, apply chain cleaner to the entire chain, making sure to cover every link. You can use a motorcycle chain cleaner specifically designed for sealed motorcycle chains or a general-purpose chain cleaner. A stiff motorcycle chain cleaning brush can also help remove any stubborn grime or dirt.
StepDescription1Spray the chain cleaner onto the chain, making sure to cover every link.2Use a stiff motorcycle chain brush to scrub the chain, focusing on any areas with built-up grime or dirt.3Let the chain cleaner sit for a few minutes to allow it to penetrate and dissolve any remaining dirt or grime.4Rinse the chain thoroughly with water to remove any remaining cleaner.5Dry the chain with a clean cloth or allow it to air dry.
It’s important to note that if you’re working with a sealed motorcycle chain, avoid getting any chain cleaner or lubricant on the rubber seal. This can cause the seal to deteriorate and lead to premature wear or damage to the chain.
Once the chain is dry, you’re ready to lubricate it.
Lubricating the Motorcycle Chain
After cleaning your motorcycle chain, it’s important to lube it properly. Using the correct motorcycle chain lube, can extend the life of your chain and sprockets.
First, make sure your chain is clean and dry. Apply the chain lube to the inside of the chain, holding the can about 6 inches away. Be careful not to apply too much lube, as excess lubricant can attract dirt and other debris, ultimately shortening the chain life.
Avoid spraying the chain lube directly onto the rear tire or garage floor.
If you have a sealed motorcycle chain, be sure to apply the lubricant to the rubber seal at the point where the chain meets the sprocket. This will help keep the seal soft and supple, preventing cracking and wear.
Remember to wipe off any excess lubricant with a clean rag once you’re done to prevent it from flinging off as you ride. A well-lubricated chain can make a big difference in how smoothly your motorcycle runs, so it’s worth taking the time to do it right.
Proper Chain Adjustment and Inspection
After cleaning your motorcycle chain, it’s important to inspect it for any signs of wear and make any necessary adjustments. Here’s how:
Step 1: Get your motorcycle on a rear stand
A rear stand will keep your motorcycle upright and stable while you work on the chain. Make sure the rear wheel is off the ground before you begin.
Step 2: Spray chain lubricant on the chain
Before inspecting the chain, spray it with chain lubricant to make it easier to move the metal on metal links. This will also help protect it while you work on it.
Step 3: Check the sprocket teeth for wear
Look closely at the rear sprocket , teeth, checking for signs of wear and tear. If the teeth are worn down to the base, you’ll need to replace the sprocket.
Step 4: Inspect the chain for any damaged links
Check each link in the chain for any signs of damage, such as kinks or cracks. If you find any damaged links, replace the chain immediately.
Step 5: Ensure the chain tension is correct
Check the chain tension by pushing on it midway between the sprockets. It should have no more than 1 inch of slack. Adjust the tension as necessary.
Step 6: Clean the chain again
Once you’ve made any necessary adjustments, clean the chain again using the same process outlined earlier in this article. This will remove any excess lubricant and debris.
Keeping your motorcycle chain clean and properly maintained can extend its life and ensure your safety while riding. With these tips, you’ll be able to keep your chain in tip-top shape for years to come.
Are Motorcycle Tire Changing and Cleaning the Chain Connected Processes?
Changing a motorcycle tire in 13 steps requires careful attention to detail. This task, however, is not directly connected to cleaning the chain. While both processes are crucial for maintaining a motorcycle, they are separate procedures. Tire changing focuses on replacing worn-out or damaged tires, whereas chain cleaning involves removing dirt and lubricating the chain to ensure smooth performance. Remember to prioritize safety and follow appropriate instructions for each task.
Section 8: Maintaining Your Motorcycle Chain
Proper maintenance of your motorcycle chain is essential to prolong its life and prevent expensive, premature wear. The chain life largely depends on the conditions in which it is used, so it is essential to keep it clean and lubricated regularly. Here are some tips on maintaining your motorcycle chain:
Chain life
The average lifespan of a motorcycle chain is between 20,000 to 30,000 miles, but this can vary based on various factors such as the quality of the chain, your riding style, and the conditions in which the bike chain is used. Inspect your chain regularly for signs of wear and tear, including kinks, rust, or stiff links.
Wet or dirty conditions
If you ride in wet or dirty conditions, your chain requires more frequent cleaning and lubrication. Dirt and grime can accumulate on the chain, increasing friction and causing the chain to wear quickly. Use a chain cleaner and a motorcycle chain brush to remove dirt and grime regularly.
Chain type
Make sure you use the right type of chain for your motorcycle. There are different types of motorcycle chains such as O-ring, X-ring, and sealed chains. Sealed chains require less maintenance and last longer as they are better protected from dirt and grime.
Sprocket tooth wear
The sprocket teeth wear over time, causing the chain to ride higher on the teeth and resulting in poor performance. Inspect your sprockets regularly for signs of wear and replace them if necessary.
Front sprocket cover
A front sprocket cover protects the front sprocket from dirt and debris, extending its lifespan. Make sure the cover is always in place and replace it if it is damaged.
By following these tips, you can ensure that your motorcycle chain remains in top condition, giving you a smooth and safe ride every time.
Conclusion
Taking care of your motorcycle chain is crucial for ensuring smooth and safe rides. By following the proper steps for cleaning and lubricating your motorcycle chain, you can extend its lifespan and avoid potential mechanical problems. Remember to gather all the necessary tools and materials, properly prepare your motorcycle chain maintenance, and inspect your chain regularly for signs of wear and tear. While it may seem like a daunting task, cleaning and maintaining your motorcycle chain can become part of your regular motorcycle maintenance routine. Don’t forget to consider the type of chain you have and the conditions you ride in when selecting achain lubricant. Regularly cleaning and lubricating your chain can help prolong its life and prevent costly repairs down the line. So, the next time you’re in the garage preparing for a ride, remember to give your motorcycle chain a little bit of extra attention. Your bike will thank you for it, and you’ll enjoy a smoother, safer ride.
FAQ
Q: How often should I clean my motorcycle chain?
A: It is recommended to clean your motorcycle chain every 500-1000 miles or whenever it appears dirty or is making excessive noise.
Q: What should I use to clean my motorcycle chain?
A: You can use a specific chain cleaner or a mild solvent such as kerosene or WD-40. Be sure to follow the manufacturer’s instructions.
Q: Do I need to remove the chain from the motorcycle to clean it?
A: In most cases, you do not need to remove the chain from the motorcycle to clean it. However, if you notice any damage or need to perform more thorough maintenance, you may need to remove the chain.
Q: How should I lubricate my motorcycle chain?
A: Apply a high-quality chain lubricant evenly to the entire length of the chain. Be sure to follow the manufacturer’s instructions for application and reapplication intervals.
Q: How often should I lubricate my motorcycle chain?
A: It is recommended to lubricate your motorcycle chain every 300-600 miles or whenever it appears dry or is making excessive noise.
Q: Can I use any type of lubricant on my motorcycle chain?
A: No, it is important to use a lubricant specifically designed for motorcycle chains. Using other types of lubricants can damage the chain or attract dirt and debris.
Q: How can I tell if my motorcycle chain needs to be adjusted?
A: You may need to adjust your motorcycle chain if it appears loose or tight, makes excessive noise, or if you notice uneven wear on the sprockets.
Q: How often should I inspect my motorcycle chain?
A: It is recommended to inspect your motorcycle chain every 500 miles or before long rides. Regular inspections can help identify and prevent potential issues.
Q: Can I reuse the excess chain lubricant that drips off after applying?
A: No, it is best to wipe off any excess lubricant that drips off the chain. Reusing the excess lubricant may introduce dirt or debris back onto the chain.
If you want to use your motorcycle for a long time, you need to clean the accumulated rust and moisture from its gas tank at regular intervals. Otherwise, these contaminants will seriously damage the tank of your bike and you will be left with no option other than to replace it with a new one.
When it comes to cleaning the tank of a motorcycle, many riders ask this common question how can they do the task with vinegar?
If this is the same question that is bugging you for a long time, you’ve come to the right place. In this guide, we will provide you with all the details including a step-by-step guide on how to remove rust from motorcycle gas tank with vinegar effectively.
What is Motorcycle Fuel Tank Rust Abatement?
Motorcycle tanks are often made of aluminium or steel. This is a critical part of the motorcycle as it contains fuel for the engine. Rust and corrosion can form on the surface of the tank and if left untreated, will cause pitting and holes in the metal.
Mild acid like muriatic acid can effectively clean rust from the gas tank interiors of the motorcycle. You can also rinse the fuel chamber with phosphoric acid to clean rust from the surface and interior of the fuel chamber. Also, you can use baking soda to clean the gas cap and fuel box before you fill the tank with fresh fuel for optimal performance. Use a fuel soluble sealer to protect the fuel filters after the cleaning process. The flash rust or surface rust can be easily cleaned using baking soda or muriatic acid.
Rust abatement is the process of removing rust from a surface. This can be done with a number of different methods, but vinegar is one of the most popular and affordable methods.
How to Get a Rust-Free Motorcycle Gas Tank with Vinegar?
Now that you know what motorcycle rust abatement is, let’s take a look at how to get rid of rust with vinegar.
The first step is to gather all the materials that you will need to make the process smooth. These are as follows –
Materials Needed for Removing Rust with Vinegar
Distilled White Vinegar Paint Scraper, steel wool, spare piece of cloth or towel wire, and stripper sandpaper/sanding sponge.
STEP 1: Prepare the Tank for Cleaning
Before you start removing any rust, prepare the tank of the motorcycle by removing the side covers so that you have better access to all sides of the tank. This will help in removing all dirt and debris without much hassle.
Remove both side covers using a wire stripper before moving on to the next steps. It is advisable not to remove anything else except what is merely required during the tank cleaning job. You might end up damaging other parts if not careful.
STEP 2: Soak the Tank in Vinegar
Now that your tank is prepped, it’s time to soak it in vinegar. Pour distilled white vinegar into the tank until it is full and then seal it with a spare piece of cloth or towel.
Make sure that the vinegar covers all areas of the tank, especially where rust is present. Let the tank sit for at least 12 hours so that the vinegar can work its magic.
STEP 3: Rust Removal for the Tank with Steel Wool for Interior Protection
After 12 hours have passed, remove the tank from the vinegar and start scrubbing away at the rust with steel wool.
The steel wool will scrape off any loose rust and corrosion from the surface of the tank. Be sure to use gentle pressure when scrubbing so that you don’t damage the metal.
STEP 4: Soak Again in Vinegar for Added Shine
Once you have removed all the rust with steel wool, it’s time to give the tank another soak in vinegar. Pour distilled white vinegar into the tank until it is full and then seal it with a spare piece of cloth or towel.
Let the tank sit for at least 6 hours so that the vinegar can work its magic.
STEP 5: Rust Cleaning with Paint Scraper for Ultimate Gloss
After 6 hours have passed, remove the tank from the vinegar and start scraping away at the rust with a paint scraper. The paint scraper will scrape any remaining rust and corrosion from the surface of the tank.
Don’t forget to dispose of all rust and dirt particles in a place where they can’t cause any harm or damage.
STEP 6: Clean & Dry the Tank Before Refill
Now, that you have removed all the rust from the tank, it’s time to clean and dry it thoroughly. Pour distilled white vinegar into the tank until it is full and then seal it with a spare piece of cloth or towel.
Let the tank sit for at least 2 hours so that all traces of vinegar are removed from inside the tank. After 2 hours, remove and discard everything in your gas tank and pour new gasoline in before resealing it using side covers and other materials which were removed during the preparation process.
What Kind of Vinegar to Use in Cleaning Motorcycle Fuel Chamber?
Distilled white vinegar is the best option to use to clean a motorcycle fuel chamber because it doesn’t contain any impurities whatsoever.
Apple cider vinegar and malt vinegar are also good choices but if you can get your hands on distilled white vinegar, then that’s even better.
How to Keep Rust Out of Gas Tank After Cleaning?
Now that you have removed all the rust from the fuel chamber of your motorcycle, it’s important to keep it out in the future. The best way to do this is by applying a coating of protective paint or clear gloss over the entire surface of the tank.
This will protect the metal underneath and prevent corrosion from re-occurring. Another great option is to apply wax, which offers similar protective properties as paint but doesn’t require any painting process whatsoever.
Conclusion
Motorcycle gas tank rust removal doesn’t have to be difficult if you follow these simple steps.
Using distilled white vinegar for removing rust from inside the fuel compartment might seem like an odd choice at first but when you think about it, it makes perfect sense as white vinegar contains acetic acid, which is a powerful rust remover.
Make sure to prepare the tank before cleaning by removing all side covers and other materials that might be.
Iron oxide reaction causes rusting of the motorcycle if they are not kept in a ventilated area. A metal rescue is possible by rubbing alcohol on the parts or dipping the entire chamber in a solution for a few hours. You can get accurate equipment and different products at the hardware store to clean your motorcycle.
Follow this guide to get a rust-free fuel cage for your motorcycle using distilled white vinegar. Also, remember that rust can form on the surface of the tank and if left untreated, will cause pitting and holes in the metal. So, if you want your motorcycle to have a long life, remember to clean your gas tank at regular intervals with the most affordable option of distilled white vinegar.