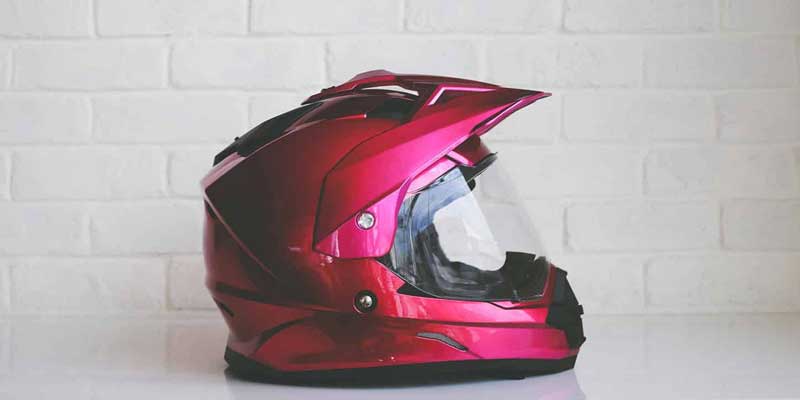
Author: Joel Hathaway

  • How to Paint a Motorcycle Helmet? (A Step By Step Guide)

    How to Paint a Motorcycle Helmet? (A Step By Step Guide)

    Reading Time: 7 minutes

    Many young riders are deterred from wearing helmets because they do not look cool. This is an extremely unwise decision to make because the looks of a helmet have nothing to do with its protecting capabilities.

    If you are riding your bike without wearing a sturdy helmet, you are endangering your life and compromising your safety with each and every second you spend riding on your two-wheeler.

    However, for the wise ones who want to ride their motorcycles safely by wearing their helmets we’ve got good news for you. If your helmet has gone old and you want to do a paint job on it, this guide is what you need.

    We are providing you with all the steps that you can undertake to give your helmet a new stylish look so that it can complement your bike along with your dashing personality.

    Step by Step Guide to Paint a Motorcycle Helmet

    1. Get all the Tools & Disposables
    2. Disassemble the Helmet
    3. Prepare the Helmet for Painting
    4. Mask the Pattern (if needed)
    5. Apply Primer/Undercoats
    6. Add a Guide Coat
    7. Apply the Paint Colour
    8. Paint the Visor to Improve Vision (if needed)
    9. Add Multiple Colours (if needed)
    10. Add a Clear Coat
    11. Unmask Carefully
    12. Reassemble the Helmet

    Get all the Tools & Disposables

    In order to paint a helmet, you will have to gather some tools and disposables. The list of these items is as follows –

    Self-explanatory Disposables: Gloves – Latex/Rubber Solvents/Sealers – Mineral Spirits Newspaper Masking Tape – 3/4″ or 1″ Rags – For masking tape

    Tools: Hacksaw Zip Tie Drills – Screwdrivers Punches – Paintbrushes – Foam Roller Tray – Squeegee Brush Applicator – Sponge Sandpaper – Coarse & Fine Scotch-Brite Pad Putty Knife Face Shield Pliers- Masking Paper (Optional)

    Disassemble the Helmet

    The first thing that you need to do is to disassemble the helmet. This process may vary according to the type of helmet that you are working with. However, generally speaking, most helmets have a simple design that can easily be dismantled in order to paint it.

    Take off all the decals and stickers on your helmet because once you paint them they will not look good anymore.

    You will need to get rid of all the things like strap clips, vents, etc which are present on your helmet before painting it.

    Prepare the Helmet for Painting
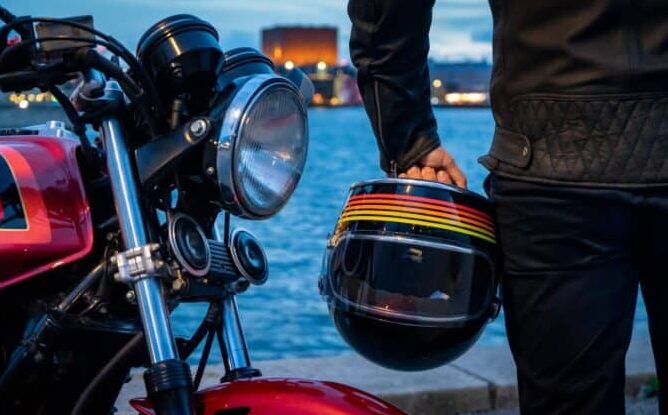
    Shiny Surface Motorcycle Whole Helmet

    Now you need to prepare your helmet for painting by removing small parts like screws or nuts if any parts are still attached to your motorcycle helmet after disassembly.

    You can use drills or punches even screwdrivers for this purpose depending on what type of bolts your helmet has.

    Next, you should sand the surface of your helmet to get an even finish before painting it. You can use sandpaper that is coarse or fine depending on how smooth you want your helmet to be after painting it.

    Also, note that if there are some areas on your helmet which need to be smoothened more than others, make sure to give them extra sanding time while working on other parts as well.

    Mask the Pattern (if needed)

    This step is only necessary in case you are looking for a custom paint job with unique patterns and designs over the entire surface of your helmet instead of just applying one single colour all over it.

    If this is not the case with your helmet, then you can skip this step.

    First, use a grease remover or basic cleaning detergent to remove all dust particles and the existing paint. Add a clear coat of base paint to cover the entire helmet surface.

    If you do need to mask the pattern of your helmet, make sure to use masking paper for this purpose because it is a very difficult process and will take a lot of time. This is why we recommend that only professional painters should try this technique.

    Apply Primer Undercoat

    Primers are used for preparing a surface before painting it by filling up all the small holes and crevices in it so that paint can be applied evenly.

    Always wear latex gloves for protection. You can use spray paint, wet paint or fresh paint to design your helmet’s base material. Two or three coats for the whole helmet will give you a finished product.

    In order to prime your motorcycle helmet properly, just add some primer or undercoat on the areas which have been sanded previously and then let them dry before moving on to the next step.

    Add a Guide Coat
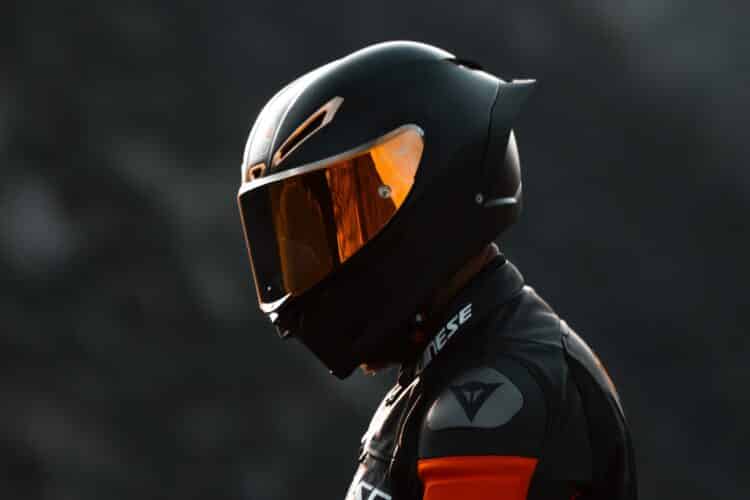
    The next step is to apply a guide coat so that you can easily paint your motorcycle helmet later on.

    For this step, first, dip some foam brush into some white spirit or mineral spirits and then spread it evenly on some newspaper using the brush. Once done, lay this coated paper onto the surface of your helmet and let it dry for about an hour.

    This will make sure that primer or undercoat remains on the surface instead of getting absorbed by the spray inside your helmet.

    Apply the Paint Color

    Now you are ready to use paint for the motorcycle helmets.

    Simply follow all safety procedures while doing this like wearing gloves and applying masking tape around areas where you don’t want to apply paint.

    Also, remember that if you are using spray paint it would be better to apply multiple light coats of colour instead of applying one thick coat.

    Paint the Visor to Improve Vision (if needed)
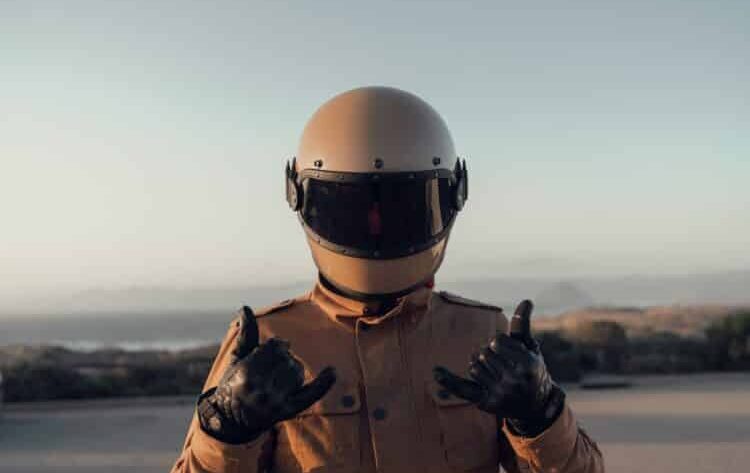
    Paint a Motorcycle Helmet Visor

    If you are painting your helmet visor, make sure that you use a primer for this purpose, or else it will not stick on properly with the paint.

    However, if possible try keeping the original colour of your visor intact because changing its colour can actually reduce visibility while riding at night.

    Once done, apply some protective lens over it to avoid any damage in the future due to sunlight effects on the newly painted visor.

    Add Multiple Colours (if needed)

    If you want to add multiple colours to the helmet, then the best technique is to use a basic coat of colour as an undercoat and then add other colours on top of it later.

    In order to do this, first, apply a base paint all over the surface including visible vents and screws or nuts. After it dries up, simply follow the same steps as mentioned above for applying paint to make sure that there are no bubbles in between coats.

    Add a Clear Coat

    Finally, use a clear coat to protect your helmet paint job.

    Clear coats are highly recommended for this purpose because they not only make the surface look sleek but also provide extra protection against dust, sunlight, wind, and other factors which can damage your painting over time.  

    But make sure that you are using a UV-resistant type of clear coat in order to avoid any problems with exposure to ultraviolet rays.

    Unmask Carefully

    After letting the helmet dry up for about a whole day, carefully remove all masking tapes and papers from your motorcycle helmet.

    Use a heat gun if possible or a hair dryer to dry the painted surface of the helmet.

    Then inspect your helmet carefully to see if you have done a good job or not.

    Reassemble the Helmet
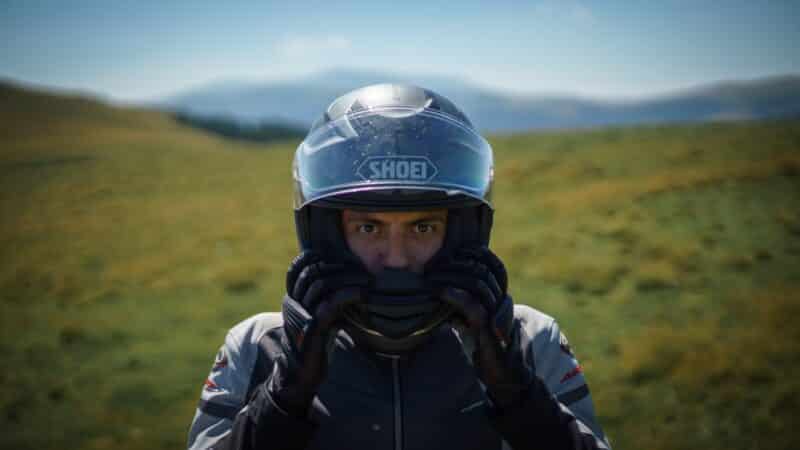
    Finally, reassemble your motorcycle helmet by adding all the nuts and bolts back in their respective places working from inner to outer.

    But make sure you tighten all these screws before using them because if they are lost during riding it can cause discomfort while wearing the helmet.

    And that’s it!

    Conclusion

    Now you know how to paint a motorcycle helmet step by step guide.

    The next time you want to repaint a helmet, follow this article and if any confusion arises, you can also watch YouTube videos of other people who have done it themselves first. The process may vary depending on the type of helmet but the overall method will always be the same as described in this comprehensive guide.

    So, have fun painting your helmet!
  • 7 Things To Know About A Motorcycle With High Handlebars

    7 Things To Know About A Motorcycle With High Handlebars

    Reading Time: 4 minutes

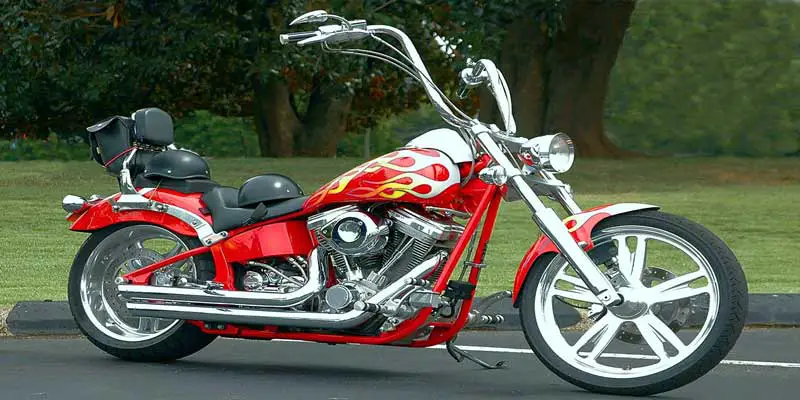
    Custom-built bikes with high-rise handlebars have been a thing since the ’60s. This has eventually led to manufacturers taking a liking for high handlebars in motorcycles.

    These motorcycles were designed with cruiser riders in mind, who prefer a laid-back riding position. People often modify their motorcycles to fit this style, but it’s not the only reason why motorcycles with high handlebars are built. They are often used to make riding comfortable.

    A motorcycle with high handlebars is not for everyone though, so here are a few things you should know before buying one.

    7 things to know about a motorcycle with high handlebars

    1. Self-rise the bike when you stop using it

    The first thing you will notice about a motorcycle with high handlebars is that they have low ground clearance which makes them difficult to balance during stops. In order to keep your bike from tipping over, you will need to get off the bike and lift the front wheel into the air yourself every time you want to stop. This can be done by either supporting it on one of your legs or parking blocks when available.

    2. You will never drop your motorcycle by accident

    Motorcycles with high handlebars are heavy and the taller they are, the easier it is to lose control of them. You can avoid this by always making sure that you know where your front wheel is at all times when riding – keep your eyes up! Plus, even if you do happen to make a mistake, it won’t be as bad since you will likely stay on top of the bike until it comes to a complete stop.

    3. Let others ride your motorcycle before you take it out

    The learning curve for motorcycles with high handlebars can be steep since riders who are not used to riding one were most likely brought up on low-rise bars bikes which have caused them to develop certain riding techniques over the years. If someone crashes your motorcycle, you will most likely have a hard time inheriting it after that person is done with it.

    4. Practice braking on a safe surface

    The braking force of motorcycles with high handlebars leans mainly on the hands and not the knees as with low-rise handlebars bikes. This can cause some riders to use their legs as if they were using a car or truck brake pedal – this is incorrect! In order to avoid damaging the rear wheel as well as hurting yourself in an accident, always make sure you know how much pressure you need to apply for breaking safely before hitting the road.

    5. Never rely solely on the center stand when parking

    Motorcycles with high handlebars have a weird balance point that makes it difficult to use their centers and in order to park them up, especially if you attempt to do this around a corner where it is harder to stand on. Instead of risking leaning the bike over while trying to pull it off its kickstand by force, make sure you know how much effort is needed for lifting any motorcycle properly before taking it out.

    6. Expect turn signals to be ignored when they are activated

    Motorcycles with high handlebars will place the turn indicator lights very close or even above head height which can cause problems for other motorists since they might not be looking at that height while driving. To avoid this, you should either buy yourself a good pair of riding glasses with flip-down inner lenses or use hand signals whenever you are turning.

    7. Motorcycles with high handlebars are not for everyone

    Motorcycles with high handlebars are typically styled to look more like cruisers than regular sport bikes which have lower bars. This is because manufacturers have decided to go for a specific market when designing these types of machines so it would be best if you knew what your needs were before making your decision about buying one or not. Don’t let these things scare you away though – some riders love having motorcycles with high handlebars and swear by them even though others might disagree!

    Conclusion

    If you are not looking for any performance improvement, it is better you leave the handlebar as it is. In case you are thinking of changing it, make sure that the new handlebars are designed for your motorcycle model and year.

    Finally, modify at your own risk. What works for some might not work well with others. Before making a decision about modifying your motorcycle’s handlebar or any other part, always research first to avoid buying faulty parts that might do more harm than good.

    Be sure you have all the proper equipment before riding your motorcycle to avoid accidents and injuries, learn how to use it properly so you won’t damage the machine or cause injury to yourself. If you are looking for a good motorcycle that will suit your needs then check out the different types of motorcycles available.

  • How Much Does It Cost to Paint a Motorcycle?

    How Much Does It Cost to Paint a Motorcycle?

    Reading Time: 6 minutes

    If you have had a bike for years which has gone through many cosmetic damages, probably it’s time for you to give it a nice and professional paint job. And if you are wondering how much does it cost to paint a motorcycle, you’ve come to the right place.

    As far as painting a motorcycle goes, there are a couple of ways to go about it – regular paint, DIY and professional custom fit, which by the way can be done by the riders themselves or from a paint shop.

    Additionally, you can paint different motorcycle parts or the entire motorcycle. It is easy to do a DIY project to paint the gas tank, oil tanks, side panels, fuel tank and other parts. A professional job in a body shop can be helpful too.

    The cost involved in each method is different and in this article, we will provide you with all the information regarding the cost along with details of each of the three methods so that you have every bit of information in your hand before proceeding with the actual paint job.

    Cost of a Regular Motorcycle Paint Job

    You can expect to get a good regular paint job done for between $300-$1,500.

    For regular motorcycle paintwork, it is completely disassembled and sanded. The new colour coat is applied and after that two coats of clear coat are applied to the colour coat to protect it from scratches and nicks.

    The price range for this kind of job varies from one shop to another depending on a number of factors including the original cost of your bike, its current condition, whether you have taken it in parts from different shops or somebody just slapped some paint over it ’cause they couldn’t be bothered about how it looked after that one unfortunate accident.

    A regular paint job in most cases is carried out by service station or garage mechanics, which means the job will be done by professionals. It costs a few hundred dollars but creates a lasting impression. However, the quality of paint used in this process is generally average.

    Cost of a DIY Paint Work for Motorcycles

    DIY Motorcycle Painted

    Expect to pay between $100-$500 depending on your skills at coming up with the desired paint job yourself.

    In the DIY painting method, you will need two colours which you will need to mix together to get the desired colour. Then, the motorcycle has to be sanded and all parts have to be painted separately with detail on each part of your bike. You can use leftover old paint to remodel the motorcycle.

    In the case of the DIY paint job, the only thing you need to worry about is the final result as it will solely depend on your skill. Also, it’s fair to say that the ultimate cost of a DIY method will depend on a number of factors like the quality of paint and equipment you choose and whether you are painting the whole bike or some selected parts of it.

    Can Backfiring Cause Damage to a Motorcycle’s Paint Job?

    Backfiring is a common issue faced by motorcycle owners, and it can potentially cause damage to the paint job. When the fuel-air mixture is not burned properly, it can explode in the exhaust system, shooting out flames or hot gases. These intense bursts can lead to discoloration, peeling, or even melting of the paint. To avoid such damage, addressing the causes of motorcycle backfire, like a rich fuel mixture or faulty spark plugs, is crucial. Regular maintenance and tuning can prevent backfiring, keeping your motorcycle’s paint job pristine.

    Cost of a Custom Motorcycle Paint Job

    Custom paint work for your motorcycle will cost between $600-$3000.

    For doing a customized paint job on your motorcycle, there are no limits in terms of how much money you want to spend on that job because essentially you are getting an entirely new design slapped onto your bike which is not restricted by any rules and regulations unlike professional race teams and such.

    The options open for customization here also include painting different sections of your bike with different colours by using an airbrush or hand-painting it.

    Custom paint jobs are done by professionals who have experience in the field and since these people will be using quality equipment, paints, and resources; you can expect to pay between $600-$3,000 for custom painting on your motorcycle.

    Choose the Perfect Motorcycle Paint Method

    Motorcycle Custom Paints

    Looking at all three methods that are discussed above, it is clear that choosing the best method primarily depends on your budget as well as how concerned you are about the appearance of your bike.

    If you feel like spending more money than required on something which is cosmetic – go ahead with a custom paint job because not only will it last longer but would also give you better resale value if someday you want to sell your bike.

    If you are not too bothered about the overall appearance of your bike but would like to get rid of the scratches and nicks on it – choose a DIY option so that you can at least try to fix things yourself instead of looking up professional help which might be more expensive than doing it yourself.

    The last option i.e. regular paint job is suitable if all you want is to slap some paint over your motorcycle in order to change its colour or give it a new look with no intentions of spending too much money on that task.

    However, it’s worth keeping in mind that this method will most probably lead to peeling off the paint after a short while due to poor quality materials used during painting or lack of protective clear coats which do provide protection to the paint.

    Conclusion

    In the end, it comes down to your own personal preference whether you choose a regular paint job, DIY method, or go for a custom paint job that involves professional help.

    So what are you waiting for? Go ahead and pick up that can of spray paint or take your bike over to a professional who knows what they are doing.

    Happy Painting!

  • How To Wear A Bandana For Motorcycle Riding

    How To Wear A Bandana For Motorcycle Riding

    Reading Time: 5 minutes

    Motorcycle bandanas, commonly known as doo-rags are both functional and fashionable. While offering the required safety, bandanas also allow motorcyclists to feature their favorite logo, design, or color.

    A functional accessory while still being fashionable is always a good thing, so we are here to tell you all about bandanas for riding a motorcycle and how they can be used to compliment your outfit while staying safe.

    How To Wear A Bandana For Motorcycle Riding 


    bandanna for motorcycle riding

    Motorcycle riders are generally dedicated to their rides, donning gear that allows them protection from road debris that could potentially cause injury or death during the course of their ride. Other riders are dedicated to looking good, sporting various types of clothing that complement their bad-ass get-up on two wheels. Either way, having an extra covering one’s ears and mouth can be a valuable asset while motorcycle riding.

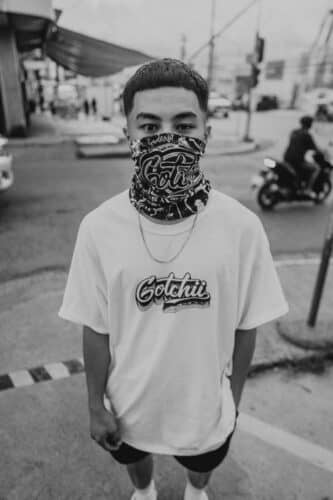
    Bandanas come in a variety of colors and designs, allowing riders to choose a bandana that suits their style or a bandana that fits a specific purpose. A rider could sport a skull-patterned bandana for an edgy look, while another helmet-wearing biker could opt for camouflage print if he finds himself hunting on the road. Bikers wear bandanas mainly to protect his lungs from inhaling dust or exhaust fumes could also use a colorless tie around his head to accomplish this goal.

    Tying a Bandana While Riding

    Once you have chosen the right bandana for you, it is time to put it into practice. You should not tie your bandana low around your forehead while driving as this can cause limited vision, but it should be tied tightly enough to keep flying debris out of one’s eyes. Wearing motorcycle bandanas safely can provide you with a little more protection.

    Wearing motorcycle bandanas safely before starting up your ride is good practice, but riders who are on the go may opt instead to secure their bandana once they are already riding. To do so properly, simply put the straight folded side of your bandanas over your head with the knot resting in the occipital area at the back of one’s skull. Pull each side of the bandanas forward and across one’s face until they meet in front of one’s mouth. Tie them at the front of one’s neck and adjust until it fits snugly.

    A Bandana is a cloth head ware. However, riding with a bandana tied around one’s neck may not be as comfortable as wearing a motorcycle helmet, but they can still serve their purpose. The purpose of these cloth head ware protects your face and ears from flying debris that could prevent you from seeing the road ahead. Most importantly, these bandanas are stylish so don’t be afraid to switch up your look now and then by sporting different colors or designs as you see fit.

    Can Wearing a Bandana Help Keep You Cool When Riding a Motorcycle in Hot Weather?

    Can wearing a bandana help keep you cool when riding a motorcycle in hot weather? Absolutely! Motorcycle clothing for hot weather can include lightweight bandanas designed to absorb sweat and provide a cooling effect. These breathable accessories offer protection against the scorching sun, help prevent dehydration, and keep you comfortable during your ride. Donning a bandana is a simple yet effective way to beat the heat while enjoying your motorcycle adventures.

    What To Look For In Motorcycle Bandanas

    motorcycle bandana

    When choosing bandanas for motorcycle riding, there are several things one should take into consideration before making a purchase:

    Material                  

    One should look for bandanas made out of materials that are not only flexible but also comfortable, allowing the wearer to wear them over their ears and mouth without feeling restricted. Stiffer bands may irritate one’s skin while flimsy netting may offer little protection from a windy day on a motorcycle.

    Pattern                  

    One can choose from a variety of patterns when purchasing a motorcycle bandana, including skull prints, camouflage prints, tie-dye effects, paisley textures, or tie-dyed effects. A rider may choose to match his helmet’s design with his choice in a pattern or go with an entirely different combination that reflects both his personality and personal style. In any case, the most important thing is choosing a style that fits one’s needs and lifestyle.

    Color  

    Most bandanas for motorcycle riding come in black, white, or red colors. However, some manufacturers sell more colorful versions such as blues, greens, yellows, and oranges that reflect a biker’s preference for style or safety while riding on two wheels.

    Why Wear A Bandana?

    A bandana is a square piece of cloth that measures about twenty inches by twenty-two inches. They are made up of various materials which can include cotton, flannel, or silk. While riding a motorcycle, bandanas are not only worn around one’s neck but also used to wipe the sweat from one’s face, cover the nose and mouth in dusty conditions, and keep long hair out of one face. Also, such cloth head ware protects one’s head in cold weather keeping the head warm or from sunburn in hot climates.

    Conclusion

    Motorcycle helmets are great at protecting the skull from injuries or death that could be caused by flying debris or an accident, but wearing a motorcycle bandana is another way to protect one’s head during the course of a ride. While it may not provide as much safety as a motorcycle helmet, wearing a bandana is better than not having anything around one’s neck when riding on two wheels.

    The above-mentioned are just some of the ways riders can use motorcycle bandanas. There are many more uses for these versatile pieces of fabric, all of which reflect one’s unique personality and help to keep them safe during their ride.

  • Motorcycle Shift Pattern: How to Shift Gears on a Motorcycle?

    Motorcycle Shift Pattern: How to Shift Gears on a Motorcycle?

    Reading Time: 7 minutes

    To motorcycle riders, no experience is as thrilling and exhilarating as hitting the road on their beloved motorcycles. When it comes to riding a motorcycle, knowing how to shift gears is one of the most critical aspects of it and you will be surprised to know that many young riders really struggle on this matter.

    However, shifting gears on a motorcycle is quite simple, and to do it effortlessly, all you need is the right knowledge and a bit of coordination. In this guide, we will provide you with every detail and information that you need to know for shifting gears on your motorcycle.

    What is the Shift Pattern on a Motorcycle?

    In simple words, the Shift Pattern on a motorcycle literally means the layout of the vehicle’s gear. Information on Shift Pattern is invaluable to a rider as it will guide the rider on the specifics of which direction the Shift Lever should be moved into in order to reach a certain speed.

    Traditionally, most motorcycles have manual transmission until and unless you are driving a scooter or an electric bike. And in manual transmission, there is a rule of thumb that is generally applicable to the majority of bike models.

    The rule is “1 Down 4 Up” or “1 Down 5 Up” Shift Patterns. The “1 Down 5 Up” transmission could be broken into 1 N 2 3 4 5 6 (N stands for Neutral). What this thumb rule translates into is that for shifting to first gear, you need to move the Shift Lever in the ‘Down direction’ and for higher gears, you need to move the Shift Lever in the ‘Up direction’.

    As far as the Neutral gear is concerned, it comes in between the first and the second gear.

    Having stated this rule of thumb, it is important to note that there are some vintage motorcycles or even a few non-US motorcycle models that come with a different shift pattern. In the case of racing bikes, there is another shift pattern called ‘Reverse Shift Pattern’, which is popularly known as ‘GP-Shift’ in the racing world.

    Also, another important thing to remember is that all motorcycles come with a sequential transmission pattern, which means, as a rider if you wish to ride in the top gear, you will have to go through all the gears in between to reach the top one.

    So, as a rider, you simply can’t take a leap to 5th gear from 2nd gear. As a matter of fact, you cannot even jump directly to Neutral from any gear as you will have to be either on 1st or the 2nd gear.

    Do All Motorcycle Models Have the Similar Shift Pattern?

    Although many riders believe that all motorcycles have the same shift pattern, but to break the myth, not all motorcycles share the same shift pattern.

    Most of the motorcycles that you will find in the world today come with a “1 Down Rest Up” sequential transmission. This means for the first gear the Shift Lever should be Down and for all other gears, the Shift Lever should be moved in the Upward direction.

    However, there are many vintage bikes, especially the ones that were manufactured before the ‘70s have a different shift pattern. In fact, many bikes with smaller engines between the volumes 100 to 125 CC have different shift patterns. You can find these small-bore bikes widely available in the motorcycle market of India.

    For example, if we look at the Hero motorcycles in India that come under 150 CC, we will find that the model has all gears in the ‘Up’ direction. Again there are some TVs and Bajaj motorcycles where all the gears are designed to be in the ‘Down’ direction.

    All these bikes come with the sequential transmission but, depending on the model and the manufacturer, the Neutral gear in these bikes can be found either in the ‘Up’ or in the ‘Down’ direction.

    So, the bottom line is there are bikes in the world with different shift patterns but mostly you will find either “1 Down 4 Up” Shift Patterns for 5-Speed motorcycles or “1 Down 5 Up” Shift Patterns for 6-Speed motorcycles.

    What About the Shift Pattern in Racing Motorcycles?

    When it comes to the world of racing, motorcycles are equipped with another type of Shift Pattern called the Reverse Shift Pattern. It involves the gear layout as 6 5 4 3 2 1 N and is also known as ‘Racing Shift Pattern’ or ‘GP-Shift’.

    The reason this difference is present in racing bikes is that ‘Reverse Shift Pattern’ makes it easy for the riders to carry out the Upshifts. Also, this pattern makes the process of cornering at high speeds extremely safe and secure.

    In a race when a heavy bike is leaning around the corners and the biker is hanging tantalizingly to his motorcycle, it becomes almost impossible for the rider to get his foot below the shift lever to change gears.

    In these situations especially, the rider does not want to make any changes to his body position as it could turn out to be riskier in terms of properly balancing the vehicle at high speeds around the corners. One wrong move and the rider would lose control of his bike which could even result in fatalities.

    So in order to shift to higher gears, a rider simply presses the Shift Lever in the ‘Downward’ direction as it will be difficult to get his foot under the lever. Therefore as far as safety counts, the Reverse Shift Pattern is quintessential for the race tracks.

    But do you know that racing bikes are not actually manufactured with different transmission patterns?

    The shift pattern is simply reversed on these bikes using a little trick –

    How to ‘Reverse’ the Shift Pattern on a Motorcycle?

    You might think the process involves technical knowledge but surprisingly, the trick is extremely simple and anybody can do it.

    In order to ‘reverse’ the shift pattern on your motorcycle, all you need to do is alter the connection between the Shift Lever and the Shift Spindle. You will find a sleeve on the end of the Shift Spindle and what you need to do is flip the sleeve on the other side.

    Once you do this, the Shift Spindle will start rotating in the opposite direction just like the Shift Drum which is present inside your gearbox.

    Why is the 1st Gear ‘Down’ on Motorcycles?

    You might be wondering Why the 1st Gear is the only gear that is designed in the ‘Downward’ direction on a motorcycle?

    Well, there are in fact three reasons for this –

    Number one is safety, number two is the factor of convenience, and the third reason is to be legal. Also, the reason the Neutral gear is positioned between the 1st and the 2nd gear is that it would be detrimental for a rider who is riding at high speeds to accidentally shift to neutral, because of an emergency situation.

    Neutral is meant for stopping. When a rider wishes to stop, naturally the speed of the vehicle will be on the lower side, which means the bike will be on lower gears. So, shifting to Neutral is easy when it is placed between the 1st and the 2nd gear.

    To cut the long ‘legal’ reason short, motorcycle transmission systems were standardized in the United States of America around the ’70s. Upon the standardization, motorcycles were supposed to have a specific Shift Pattern along with their Shift Lever to be placed on the left side.

    Now, since the US market was huge for motorcycles, each and every manufacturer started to comply with these standardization rules. Sooner rather than later, it became a global norm for motorcycle transmissions.

    Conclusion

    Now that you know everything about shifting patterns on a motorcycle, as a young rider it won’t be difficult for you to master the skill.

    Always remember that riding a motorcycle safely needs a lot of practice and patience on the riders’ part. So, do not rush until and unless you are confident of your riding abilities.

    And never compromise your safety when you are on the road with your two-wheeler. Always wear protective gear and be attentive to your surroundings.

    Happy & Safe Riding!  

  • Who Makes The Victory Motorcycle?

    Who Makes The Victory Motorcycle?

    Reading Time: 8 minutes

    Victory Motorcycles have been a part of the motorcycle industry for over two decades now. Though its last plant closed down about 5 years back, plenty of Victory motorcycles are still doing their rounds in the market. A new generation of Victory’s cruisers debuted in 2013 with the release of the Victory Gunner bike. In the most recent array of cruiser-style motorcycles now available on the market, this cruiser style motorcycle dominates the competition. Even after production of Victory Motorcycles ceased, some dealerships are still providing owners with service and warranty coverage on a limited basis. However, such spare parts for such Victory vehicles are not easily available in many areas which makes it difficult to get your hands on one.

    Manufacturer of the Victory Motorcycle

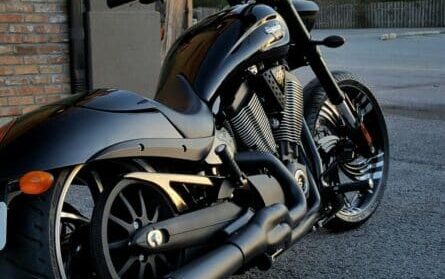
    Victory cross country motorcycle

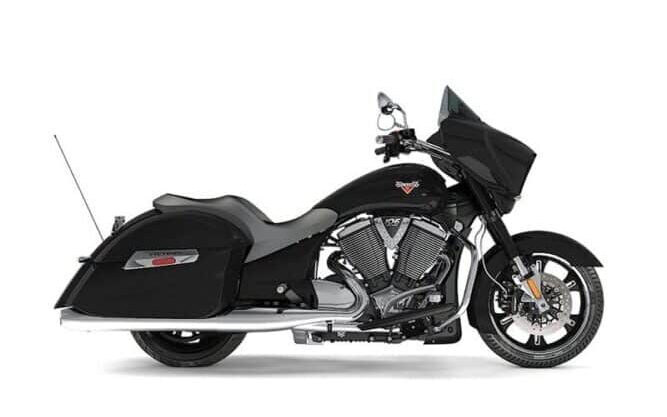
    Victory Motorcycles were manufactured by the company Polaris Industries which still has many other brands under its belt, including Indian Motorcycles. The company introduced Victory Motorcycles in 1998. This motorcycle brand was specifically designed for the US market and was sold through a number of dealerships within the country. Victory Motorcycles is a relatively new motorcycle brand when compared to previous ones including Indian Motorcycles. However, it managed to make a lasting impression on the contemporary motorcycle market.

    The motorcycle was in direct competition with Harley Davidson Motorcycles. They were known for their sporty look and low price. Victory modified the front and rear spring rates and damping to enhance ride quality by making use of the cartridge forks’ greater tuning capacity. They not only compete with Harley Davidson brand but also gave them tough competition and helped the motorcycle industry as a whole to grow during those times.

    Victory had respectable sales. However, in 2011, the parent company Polaris Industries bought the Indian Motorcycle name rights. Thus, Polaris became the owner of both Victory and the Indian Motorcycle brand. Only a 2017 variant, the Victory Octane, shares 35% of its components with the Indian Scout. Polaris decided to shut down the production of these motorcycles as they weren’t able to recover from the economic downturn that struck the United States. Consequently, all showrooms stopped selling new motorcycles, and existing motorcycles were sold through fleets. However, many dealerships continue to sell used and even rebuilt parts on a limited basis.

    The Models of Victory Motorcycle

    The Victory engine debuted with single overhead cams, twin connecting rods, hydraulic lifters, five speed transmissions, fuel injection, and most fuel injection parts are made by GM standard parts. Similar to most automobiles, the 92 cubic inch Victory engine has 6 US quarts (5,700 ml) of oil in the sump. This helps make it dimensionally larger than other motorcycle engines, like Harley-Davidson, which carry oil in tanks but is also meant to reduce the possibility of low-oil damage. In a racing setting, the sheer amount of oil can also hinder engine performance. The EPROM can be programmed to override the ECM’s rev limiter, which has a maximum speed of around 120 mph at 5,500 rpm. Victory engines are air-cooled, and a cooler positioned between the front frame downtubes is used to cool crankcase oil as well. To replace the drive belt or the back wheel, a portion of the rear swingarm can be taken off. The user may simply tweak the V92C engine thanks to its simple design. The V92C, which at the time was the second-largest production motorcycle engine on the market, spurred competition among motorcycle manufacturers to create ever-larger motorcycle engines. Also, it became known as the Classic Cruiser.

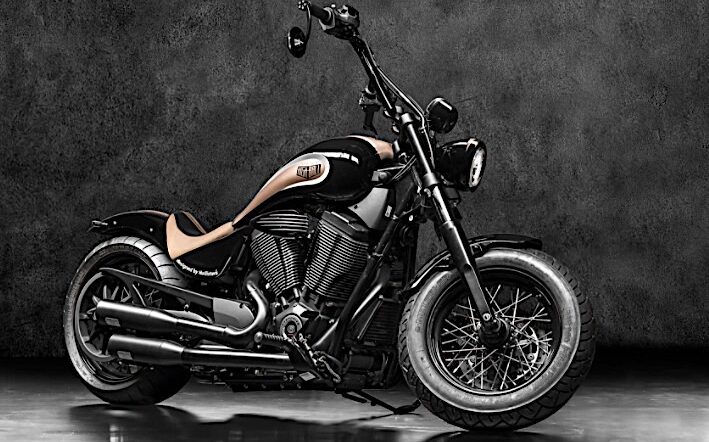
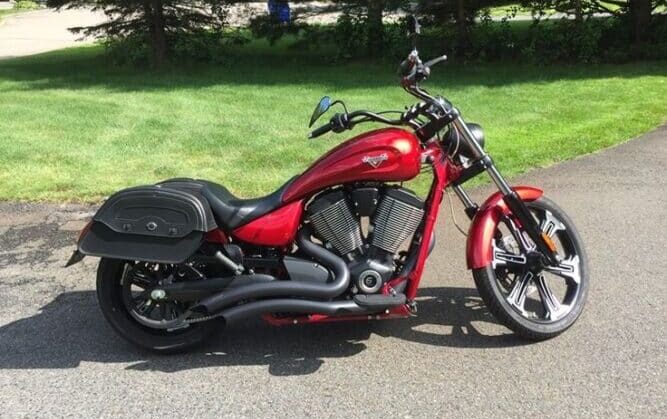
    For the better part of the last decade, Victory Motorcycles was manufacturing three models; Vision, Hammer, and High Ball. All these models showcased different characteristics and features. Each model had its own fan following with distinctive strengths and weaknesses. Thus, they were all exclusive in their own ways.

    Victory Vision 

    Victory's debut cruiser model - Sport cruiser

    The first model of the Victory motorcycle is known as the vision. With production starting in 1999, this model has been around for about two decades now. Following the historical success of Harley-Davidson, Polaris created Victory. However, the company encountered a weaker than expected market and could not sell satisfactorily. As a result of a lack of wise investment in the brand, a preference for releasing new model years with only cosmetic changes to popular models, and poor investment decisions in electric and three wheeled motorcycles. The age didn’t show on its performance but this Victory bike did make used motorcycles difficult to locate sport bike category but rather occupied its own niche in between.

    Thus, though this model was quite popular among motorcyclists around America, it could never reach great heights because of its limited production status. Additionally, victory motorcycle owners who bought a used motorcycle know that these motorcycles are difficult to find especially if they do not want to go past $4000 for their purchase price. This model was inspired by Harley Davidson Street 750 concept bike which made it quite popular among motorcyclists across the globe. The Vision is a touring configuration. While most other manufacturers were trying to chase down the big motorcycle cruiser for their mass appeal, Victory Motorcycles decided to chase after the super nimble motorcycles which made it stand apart as an industry motorcycle manufacturer.

    This model was powered by an 8-valve, liquid-cooled engine which made 54 horsepower at 6500 rpm and 65 Nm of torque at 4000 rpm. The motorcycle came with a 5-speed manual transmission system. This Victory bike did not fit into either of the usual categories of motorcycles as it was neither a sports bike nor a cruiser. In fact, it had a superb power-to-weight ratio for making quick turns and also delivered great fuel economy which made it popular among victory riders who didn’t want a lot of fumes coming out of their motorcycle.

    Victory Hammer 

    Victory Hammer Rear Wheel

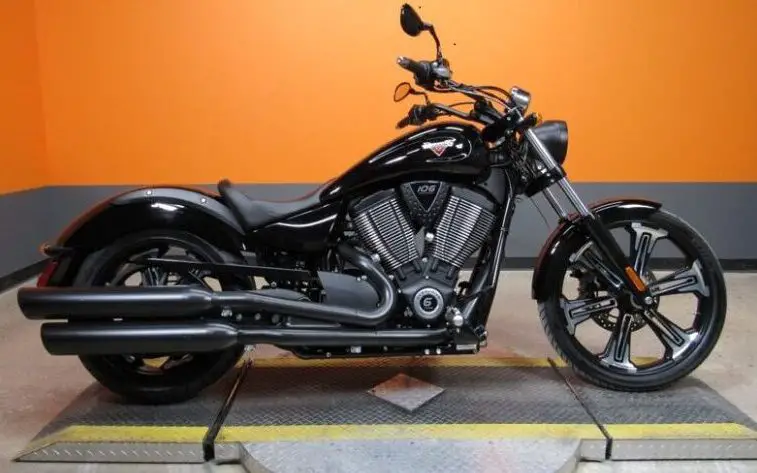
    The second model to come out from Victory Motorcycles was called the hammer. This model is regarded as Victory’s Muscle Cruisers and known for its American racing heritage and has been quite successful in many racing events around America since its release. It was launched in 2000 and stayed with the company till 2008 before production ceased due to falling demand as new models came into markets such as the Indian Scout Sixty and Harley Davidson Sportster Seventy Two. Another variant named Vegas 8 ball was launched in 2016. The stodgy cruiser riders, who frequently ride with the “cruiser face” associated with Harley-Davidson riders, were left aghast by the styling of this new bike. The styling featured swept-back cowls and cargo coverings complementing bold paint schemes of fluorescent or flame.

    With this model, they tried to tap into the cruiser market and were one of the best examples of how a company can successfully pull that off. The motorcycle was powered by a 70 degree, 9-valve V twin engine which produced 69 horsepower at 5750 rpm and 91 Nm of torque at 4100 rpm.

    This model also came with 5-speed manual transmission system but lacked in the power department when compared to the Harley Davidson Forty-Eight model. However, it was very successful due to its stylish look, lightweight, and simplicity which made life easy for many motorcyclists around America.

    Victory High Ball 

    victory cross roads motorcycle

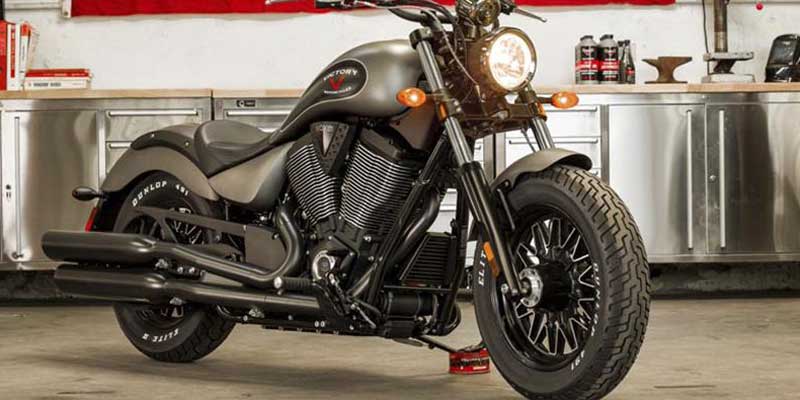
    The third bike from Victory is known as High Ball. This bike is a naked streetfighter model introduced in 2009 with production ending in 2015. However, it still remains very popular among the fans of Victory touring bikes and there is a huge demand for used High Ball motorcycles as well. Polaris decided to concentrate its design, research, and manufacturing resources on the memorable Indian brand instead after realizing how much more well-known it was.

    Two options become available for 2014. Judge cast alloy wheels were included with the custom paint schemes of suede black and white. And keeping the wire wheels, a fresh paint scheme of suede black with red flames appeared.

    This model was muscle car-inspired styling powered by a 71 degree, liquid-cooled V twin engine which produced 76 horsepower at 6250 rpm and 113 Nm of torque at 3400 rpm. It also featured a 6-speed manual transmission system which made the model quite unique in its class. The motorcycle came with standard ABS brakes along with traction control to make things easy for motorcyclists even in bad weather conditions.

    Sellers of the Victory Motorcycles in Today’s Time

    Victory Brand

    Some of the older dealerships are still dealing with customers who own Victory motorcycles but have no means to service them without proper spare parts. Additionally, some individual sellers may sell used or second-hand models at various online portals that deal with such victory bikes. However, it is difficult to determine whether these are genuine units or not unless they come from an authorized dealership.

    When Victory decided to produce motorcycles, it opted to market it as its own company and to sell independently.

    Conclusion

    As we discussed in this motorcycle blog, the motorcycle industry has seen many great moments of innovation since the beginning of time. While Victory Motorcycles may not have been the most popular, it was quite successful in its own right and had a loyal customer base who still have a deep affection for this brand. Also, there is a club of this brand’s motorcycle fans called The Victory Motorcycle Club. It was founded in 1998 by a number of motorcycle owners of this brand as an autonomous, not-for-profit organization. If you are planning to buy a Victory motorcycle, then talk to some of the local dealerships and see if they have any units in stock. Most importantly – happy riding!

  • Who Makes The V Star Motorcycle?

    Who Makes The V Star Motorcycle?

    Reading Time: 5 minutes

    The V Star Motorcycle starts in extremely well-maintained conditions and performs well time after time even when used frequently and heavily. The big bike can perform better than many other bikes in the market by today’s standards if it is properly maintained. The custom looking cruiser has highly controllable stopping power. No wonder so many people buy this classic machine. But who makes the V Star Motorcycle?

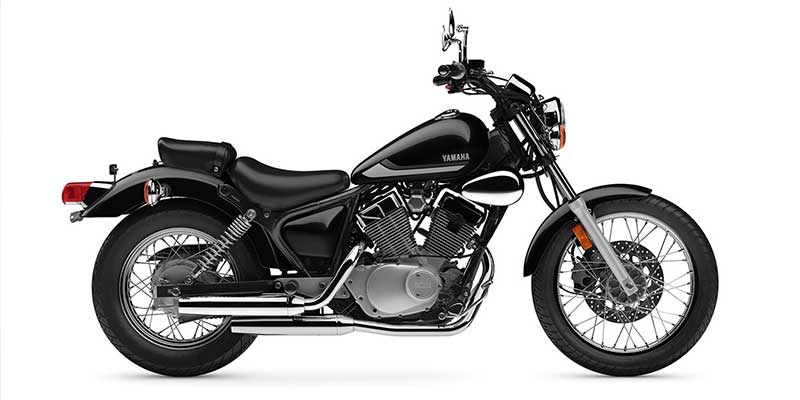
    The star motorcycles are one of the finest creations in the biking world, manufactured by the Yamaha motor corporation. This motorcycle is a cruiser that offers high performance and great comfort. The V Star has an impressive engine, durable suspension, smooth roll on power, and stylish looks and offers a comfortable riding position at mid-range speeds.

    This article will give you much insight into the maker of the V Star motorcycle. This article covers such topics as what makes Yamaha such a popular brand for bikers, and What does Yamaha has to offer that keeps them ahead of its competitors? Is it because of the technology they use with their bikes? Does Yamaha have a history of making motorbikes?

    What is so special about Yamaha motorcycles, what do you think about Yamaha Motorcycles? Read on to find out more.

    The Popularity of Yamaha Motorcycles

    Yamaha certainly has made some very high-quality machines over the years and its fair share of groundbreaking models that helped to define new genres within the bike world.

    Motorcycle enthusiasts love Yamaha star motorcycles because of their advanced technology. The company has always tried to involve new technologies in its bikes; for example, it was one of the first companies to use titanium valves in its engine design. Titanium valves allow them to be more durable than steel ones but weigh only half as much. They also help motorcycles to be more fuel-efficient.

    Yamaha has also made use of the air cooled V twin engine design in many of its models, like the V Star that is featured here. This sort of v twin engine offers outstanding torque, which makes it very popular among bikers who need to lug heavy bikes up hills or other inclines. The fuel injected v twin cruiser motorcycles by Yamaha also come with lighter engine versions, for example, 1-cylinder, 2-cylinder, and 4-cylinder designs. While these may not be as reliable as the v twin ones, they certainly perform well over varying speeds.

    Yamaha Motorcycles are especially renowned for their great braking systems. They have employed some truly cutting-edge technology in this area including Anti-lock Braking Systems (ABS) along with a superior front disc brake for an entry level motorcycle. ABS makes sure that the wheels of the bike do not lock up while braking on slippery surfaces, which can lead to accidents. Yamaha has not only made some very reliable bikes but also ones with some great safety features.

    What Makes Yamaha V Star a Popular Choice?

    You will find the Yamaha V Star may be one of the best options for anyone who wants to experience a bike that can run at high speeds while providing outstanding comfort.

    With its cruiser design, this motorcycle offers great balance and stability to riders during longer rides. It is very easy to handle with engines including 1-cylinder, 2-cylinder, and 4-cylinder designs. This selection provides you with an engine size suited for your riding needs.

    Yamaha has long been known as one of the leading makers of quality motorcycles in the U.S., Europe, and Asia. For more than 50 years it has built up a reputation for excellence by making durable bikes that offer top performance. The company pays attention to every detail when it makes its bikes, from the quality of the paint to the smoothness of the engine.

    Variants of Yamaha V Star Motorcycle

    The Yamaha V Star has had several variants over the years including V Star 950, V Star Custom, V Star 950, V Star 650, V Star Classic, V Star Silverado, V Star 1300 Tourer, and more.

    Each of these variants has specific characteristics of its own that make them stand out. For example, the V Star 950 Tourer has a very high seat compared to other models. This makes it uncomfortable for average-height riders but is great for taller bikers. The V Star 650 Custom has a low seat to provide greater comfort.

    The V star 1300 bike has a passenger backrest as well. Go on a fun ride with leather wrapped hard sidebags attached to your middleweight cruiser. These bikes have extensive chrome details, two into one exhaust, high fuel capacity, excellent bottom end torque, high-quality multiplate wet clutch and more than you can ask for in a single motorcycle.

    Yamaha V Star is available in many different colours for you to choose from, which also makes it stand out compared to other models of motorcycles that are usually only painted one colour. If you want your bike to be distinctive, then this one will certainly fit the bill!

    There are many people who are not just riding fans but also have great admiration for Yamaha Motorcycles. Beginning with its first motorcycle sold in 1955 to the present day, Yamaha continues to produce some of the best motorcycles in the world. The company has made bikes that offer superior performance and modern technology while updating classic designs to meet today’s needs. It is no surprise that there are so many people who think highly of this brand because of its legendary status worldwide as one of the greatest names in motorcycles history. So what do you think about Yamaha?

    Conclusion

    Yamaha Motorcycles also offers a few different ways to choose the right bike for your needs such as deciding between a cruiser motorcycle or a sport-touring motorcycle.

    The royal star bikes by Yamaha dealerships are made for serious middleweight performance. Some common base model star motorcycles manufactured by the company include V Star 1300 and V Star 950 Tourer. The large cruisers offer easy handling, 5 speed, 249cc air cooled and liquid cooled engines, low seat height, plush suspension, a long wheelbase and exceptional comfort.

    Once you know what type of bike you want the company has several features that distinguish each option from one another so that you can be sure that it will meet all of your needs. You will also be able to check out reviews on popular models like the Yamaha V Star motorcycles to see how other riders have liked them before making a final decision.

  • 9 Places Where To Buy Motorcycle Gloves

    9 Places Where To Buy Motorcycle Gloves

    Reading Time: 5 minutes

    When enjoying a motorcycle ride, fingers and hands are just as vulnerable as your face and head and usually the first things that hits the road. The motorcycle gloves play a crucial role in protecting your hands from injuries and keeping your grip steady. With this guide, you will have plenty of options to choose the best motorcycle gloves for yourself.

    Why is Important to Wear Gloves While Riding?

    The obvious advantage of wearing motorcycle gloves is that they can save your life when you go into a nasty fall. As the glove faced outward in the impact, they protect your hands from road burns and other injuries. The majority of motorcycle gloves are made with leather to maximize this protection.

    In addition, wearing motorcycle gloves also gives a motorist a better feel for the throttle and brakes compared to going bare-handed. The gloves absorb some of the vibrations produced by operating these controls so that you have a smooth ride every time out on the road.

    When you’re looking for your next pair of gloves, take a look at these options. Whether it’s fingerless gloves to match your riding style or something for those extreme conditions to keep your hands warm, we have listed the best places to find your next pair of gloves.

    selective focus photo of man wearing motorcycle suit

    Top Online Stores to Buy Motorcycle Gloves

    1. Amazon | OEM Parts & Accessories

    Motorcycle Gloves Buying Guide on Amazon includes top brands with complete product information that allow you to comparison shop effortlessly without leaving the comfort of your home. A list of features includes price comparisons, customer reviews, ratings by brand name, delivery times, special discounts and more details about protective gear for riders will help you select the right pair of protective gear at very affordable prices!

    2. RevZilla | High-Quality Motorcycle Gear

    With a huge collection of motorcycle gear for sale, RevZilla is a great place to buy anything from helmets to boots from the most trusted brands. FAQs and videos on products will help you get more information about your favorite product before buying it. You can also use their store locator to buy products based on your location. In addition, there are various discounts and promo codes available if you check them out in advance.

    3. Motorcycle Superstore

    Besides having a wide range of products with reasonable prices, this website also offers excellent customer service and a fast shipping process that make shopping here a really pleasant experience overall! If you have any problems or questions with your recent purchase, their friendly staffs are always ready to help you.

    4. Cycle Gear | Huge Collection of Sports Gears

    Almost every major sports brand can be found on Cycle Gear for their customers that love adventure and like to try some new sports like bicycling, skiing, camping, and rollerblades. They also offer a wide range of motorcycle gear such as helmets, jackets, pants, gloves, and boots at very reasonable prices! You can also make use of their learning center and FAQs on products before buying any items from them.

    5. Twisted Throttle | The World’s Toughest Riding Gear

    This site offers a variety of motorcycle gear and other products like snowmobile suits and ATV riding gear. Product reviews and customer feedbacks on selected items will help you find the right product to buy here without any risks. For those riders who seek high-quality, unique designed products at reasonable prices, this is definitely a great choice!

    6. LeatherUp | Quality Leather Clothing

    When it comes to buying gloves online, LeatherUp is one of the best choices as they offer such a huge collection of leather apparel that suits every style preference! Along with gloves, they also sell jackets, pants, chaps, and boots. You can use their price calculator, sizing chart, and FAQs on product pages to compare items and get more information about products before buying them.

    7. CheapCruiser | Bikers’ Paradise

    This online store offers various kinds of motorcycle gear for those riders who are fond of vintage styles. With such a great variety of products, you will certainly find what you need here! You can also make use of their blog as it is definitely a good place to read about the latest trends in the biking industry as well as useful advice from experienced bikers.

    8. Old School Motorcycle Supply Inc | Stylish Bike Gear

    If you think that buying motorcycle gloves online is a somewhat risky business, this site might be your best option as they only sell factory outlet stuff with highly competitive price tags! However, you should be aware that factory outlet items usually come with some minor defects such as tiny paint stains and slight size variation. That being said, this is definitely a great place to buy motorcycle gear without any risks!

    9. BTO Sports | Competitive Price Tags

    This site offers various kinds of protective gear for multiple sports including bicycling, skiing, snowboarding, and rollerblading at very reasonable price tags! You can even find many high-quality products from our list here!

    Conclusion

    Whether you are looking for motorcycle gloves or any other kind of gloves, finding the right place to buy them should be based on three important criteria which include price tags, product range, and customer services. With all these things combined together, you can surely find a great online store to buy products from!

  • What Is A Motorcycle Catalytic Converter?

    What Is A Motorcycle Catalytic Converter?

    Reading Time: 7 minutes

    In today’s day and age of global warming, it is important that all automobiles including motorcycles become responsible for their fuel emissions. In simple words, catalytic converters help in the decrease of fuel emissions that contain harmful and toxic contaminants.

    So, the question arises do all motorcycles have catalytic converters installed in them? The answer is most of the modern motorcycle models have catalytic converters installed in their exhaust systems. However, not all of them have these converters that help reduce harmful fuel emissions.

    However, it’s safe to say that with growing concerns of global warming, catalytic converters will soon be a standard norm for all motorcycles, worldwide.

    In this guide we will discuss what exactly is a catalytic converter, how does it reduce harmful emissions, and we will also provide you with some useful tips to protect your motorcycle’s catalytic converters.

    What is a Catalytic Converter?

    As mentioned above, catalytic converters are specifically designed and installed in the exhaust pipes of motorcycles to reduce their harmful fuel emissions.

    Gasoline is the type of fuel that most motorcycles use and this motorcycle gasoline consists of a component called hydrocarbons. In an ideal situation, these hydrocarbons react with oxygen and give out carbon-di-oxide (CO2) along with water (H2O).

    But this is in an ideal situation and the combustion that takes place in the engine of a motorcycle is not perfect. Combustion involves a lot of heat generation in the engine and because of this heat, many reactions inside the engine remain incomplete as dirt and other impurities get mixed in the reaction.

    This heat is responsible for creating several molecules of chemicals that usually do not occur under normal conditions. As a result of this ‘imperfect’ reaction, instead of CO2 and H2O, carbon monoxide (CO) and Nitrogen Oxide (NOX) get released which are extremely harmful gases for our environment.

    In scientific terms, these gases are known as Greenhouse gases and it is these gases that are responsible for causing damage to our environment and atmosphere in terms of causing acid rain, ozone layer depletion, global warming, etc.

    Here, steps in the catalytic converters. The primary role of these converters is to reduce all kinds of harmful emissions that come out of the exhaust pipes of motorcycles.

    Catalytic converters get their name from ‘Catalyst’ which are chemicals or elements that help in carrying out a chemical reaction. A catalytic converter consists of a catalyst that turns the molecules of harmful gases into comparably safer gases that do not damage our atmosphere to a greater extent.

    Is the Clutch Located Near the Motorcycle Catalytic Converter?

    When looking to locate the clutch on a motorcycle, you may wonder if it is located near the motorcycle catalytic converter. While the clutch and catalytic converter are both important components of a motorcycle, their respective locations differ. The clutch is typically situated near the engine, within the clutch housing, while the catalytic converter can usually be found further downstream in the exhaust system.

    How Does a Catalytic Converter Reduce Emission of Harmful Gases?

    In order to understand exactly how a catalytic converter works, we will have to first know its components of it. A typical catalytic converter consists of two parts:

    • Ceramic
    • Rare Metals

    Ceramic is a material that is non-reactive. This means it does not react with any chemicals that are present inside the gasoline or inside a heated motorcycle engine. The unique property of ceramic is that it has the ability to stay extremely hot when the engine gets heated up during combustion. The ceramic basically allows the chemical reactions to take place inside the catalytic converter in very high temperatures.

    The next part of the process involves the rare metals. For example, Palladium (Pd), Rhodium (Rh), and Platinum (Pt) are some of the rare metals that are present inside a converter and it is these metals that act as catalysts for the reaction to complete.

    Inside a catalytic converter, these rare metals are present in a very negligible volume like 3-7 grams. The Platinum and the Rhodium together act as Reduction Catalysts, while Palladium and Platinum together act as the Oxidation Catalysts.

    The Reduction Catalyst plays the critical role of extracting Oxygen from Nitrogen Oxide and releases the gas as harmless and benign Nitrogen (N2). Simultaneously, the Oxidation Catalyst pulls in the freed-up Oxygen to make another harmful gas (carbon monoxide) a little less harmful in terms of turning it to carbon-di-oxide. Apart from this, the Oxidation Catalyst also plays an important role in turning all hydrocarbons that are left un-burnt into harmless carbon-di-oxide or water molecules.

    When this process gets completed, harmful gases in the emission like un-burnt fuel contaminants, CO, and NOX gets converted into harmless components like CO2, N2, and H2O. As a result, the final emissions coming out of the exhaust pipe of a motorcycle remains much safer than otherwise, it would have been without a catalytic converter.

    Now, you might think that climate change is an all-important reason for motorcycles and other automobiles to come equipped with some sort of harmful emission converter. But you will be surprised to know that although most modern bikes have them installed, there are still many bike manufacturers who haven’t yet taken a firm step in the direction of installing a converter.

    Given the current condition of our green planet, it’s needless to say that sooner rather than later having catalytic converters installed in your bike, would be a standard global norm. So, you better move towards a safer and greener world today than be left with the harmful and useless ruins of tomorrow.

    Tips to Protect Catalytic Converters

    Just as a functioning catalytic converter can help you immensely in keeping your harmful level of fuel emissions low, a damaged or defective converter can, in fact, fast track the emission of harmful gases along with causing serious damage to your motorcycle engine.

    So, if you have a faulty converter, it’s paramount that you fix the issue immediately. Here are a few tips to keep your catalytic converter protected at all times and give it a longer running life –

    Always Settle for Unleaded Gasoline

    This is the first and most important tip when it comes to the health of your beloved bike. If you want your engine as well as your catalytic converter to stay protected, never use leaded gasoline for it can seriously damage your converter and can result in the emission of more harmful and dangerous gases.

    Keep Your Bike’s Engine in Good Working Condition

    Always remember that the engine of your motorcycle is the soul of the bike. Therefore, any damage in the engine can result in either your catalytic converter not getting heated up properly or getting extremely heated up at the wrong time.

    It is important to know that a catalytic converter works best in heated conditions but at the same time, it’s important that it does not get overheated. So, if you have a bad engine it can easily damage your converter or your vehicle.

    Be Aware of Your Engine’s Misfiring or Stalling

    If you are experiencing a problem with the engine of your motorcycle, for example, it’s not firing properly or it keeps stalling, immediately take your bike to a certified mechanic. Engine issues can be detrimental for the catalytic converter installed in your bike and therefore before it puts a hefty repair cost on you, you should take notice and look for fixing the issue professionally.

    In addition to these aforementioned tips, remember the quality of fuel is also responsible for the health of your converter. So, if you want to protect your engine, catalytic converter, and your fuel-inject system, make sure you get gasoline that is:

    • Only Unleaded
    • Recommended for your bike with a certain Octane number. If you settle for gasoline with a lower octane number, it will for sure damage the performance level of your engine.
    • Low on the alcohol concentration
    • Free of any kind of contaminants or mixture of oil

    Conclusion

    In the end, just be mindful of your bike’s environmental safety and let catalytic converters do their work.

    Plus, remember to take care of your engine as well as the fuel system so that you can prolong your bike’s life and save a lot of fuel costs in the long run. If you have a faulty converter, it’s paramount that you fix the issue immediately.

    And also, keep moisture and dirt away from the engine of your bike as much as possible if you want longevity for the catalytic converters.

    Happy & Safe Riding!

  • HOV Lane Rules: Can Motorcycles Use Carpool Lane?

    HOV Lane Rules: Can Motorcycles Use Carpool Lane?

    Reading Time: 6 minutes

    There are many motorcycle riders who have this common question in their mind as to whether they are legally permitted to ride their bikes in the carpool lane?

    The short answer to this question is YES! Motorcycles are allowed in the carpool lane. The common usage is restricted to only one rider but the primary reason why motorcyclists are allowed to take their bikes in these lanes is to actually promote greater safety for the riders.

    However, it’s important to note that although motorcycles are allowed to be ridden in carpool lanes, these rules can be amended anytime by the State DOTs as they are the final authority in this. So, we recommend you follow up with your own State rules to know the current state of the regulations that are in place.

    In this comprehensive guide, we will discuss what is a carpool lane, the rules of riding a motorcycle in a carpool lane, and the tips for riding safely. We will cover each of these points in great detail and therefore, if you want information on riding in the carpool lane, you’ve come to the right place.

    What is a Carpool Lane?

    The carpool lane is also known as the HOV lane which stands for High Occupancy Vehicle. These lanes are basically express lanes designed for vehicles that have 2 or more passengers on them. The primary intention of these HOV lanes is to promote safety and ridesharing.

    The idea behind carpool or HOV lanes is that these lanes will have more carpooling that will essentially reduce the number of vehicles on chalk-a-block highways, especially during the rush hours of the day in a metro city.

    Now, as a rider, if you are not at all familiar with HOV or carpool lanes, you should know that knowing about these lanes is of importance to you. Why? Because these lanes were designed in the first place to ensure safety for motorcycle riders only.

    So, whether you are going to work or you are on a cross-country trip, the option of HOV lanes is great in terms of getting around the congested traffic. On a normal day, an HOV lane will be typically empty compared to the other express lanes.

    Can I Drive in the HOV Lane with a Motorcycle Permit?

    Motorcycle permit privileges vary from state to state regarding HOV lane use. While some states allow motorcyclists with a motorcycle permit to use the HOV lane, others require a full motorcycle license. It’s crucial to understand your state’s specific regulations and requirements before utilizing motorcycle permit privileges in the HOV lane.

    Rules for Riding a Motorcycle in the HOV Lanes

    Before we discuss some specific rules about riding a bike in the HOV lane, let’s start by saying that the traffic rules for motorcyclists in the carpool lane remain the same as it is for other vehicles on the road. Having said that, there are a few rules that you need to keep in mind to be safe on your two-wheeler in an HOV lane. These are as follows –

    Take Your Time Before You Merge & Double Check the Blind Spots

    HOV lanes are typically designed to be on the farthest left on the highways and as a result, you need to change a lot of lanes before you get in there. Therefore, there will be a lot of merging involved and if you are not attentive to it, the event can be quite risky.

    Never forget to use your turn signals including your hand signals to make sure that other drivers and riders on the road are aware and alert of your merging. When the traffic is heavy, do not forget to double-check your blind spots as you do not want any dangerous situation to arise unnecessarily when you are trying to get in the HOV lane.

    Different states have different sets of regulations for their HOV lanes but generally, there will be certain sections in the lane specified for merging. Usually, these sections are marked by dashed white lines, or otherwise, there will be solid white lines that separate the HOV lane from the regular lanes.

    An important point to note here is that whether you are going into the lane or are coming out of it, crossing this solid white line is not legal, and therefore, you could be liable to pay some fine. In the case of other vehicles, if you are a single rider you are not legally permitted to drive in the HOV lane and you can be subjected to fines by State authorities.

    For example, in the State of Washington, the WSDOT authorities have introduced a program called the HERO, to specifically reduce solo drivers from going into the HOV lane. Whenever other riders or drivers see a violation of the law taking place, they can simply report the incident by calling a number, and immediately the violator will receive an email, reminding him or her of the State laws and the violation taking place.

    As per the State’s official website violating the rules of the carpool lane is 5% less in Washington when compared to the national average.

    Be Careful with the Speed of Your Motorcycle

    A carpool lane has the same speed limit as other lanes but since these lanes remain fairly empty compared to the usual lanes, there can be a difference in speed for vehicles in the different lanes.

    Therefore, always keep an eye on a rider who suddenly jumps out of the heavy traffic to get into the HOV lane. Usually, most GPS services have their local speed limit displayed on a screen on the highway. But if you cannot find one, be on the cautious side and keep your speed in the line of the other vehicles on the road.

    Remember, speeding is an offense in the HOV lane and can attract some hefty fines. So, be very careful!

    Tips for Riding Safely in the HOV Lanes

    As stated earlier, the simple idea behind the design of HOV lanes is to keep motorcycle riders safe. It is considered that it is much safe for motorcycles if they keep on moving rather than being stuck in a stop-and-go mode in congested traffic.

    Especially during rush hours, people are much prone to get tangled in road rage. Again, motorcycles lack visibility than bigger vehicles, and therefore, they are much more in a state of danger than others. The HOV lane on the other hand allows riders to bypass such heavy traffic and go to their desired destination in a safe and secured manner.

    Here are a few tips for safe driving in an HOV/Carpool lane –

    • Always Use Turn Signals When Merging (including hand signals)
    • Always Be on the Safe-Speed Side
    • Always Check the Mirror & Double-Check Your Blind Spots
    • Always Be More Cautious Near the Merging Zones
    • Always Yield to Emergency Vehicles
    • Always Obey Traffic Laws  

    Conclusion

    Now that you know in great detail that motorcycles are legally allowed in the carpool or HOV lanes and are even encouraged to, for a safe ride. As HOV lanes usually stay empty, instead of starting-and-stopping in the heavy traffic motorcyclists could use these lanes to keep moving during heavy traffic and save some precious time.

    Although there are no specific rules for HOV lanes, as recommended in this guide always be on full alert while merging and be careful of your speed limit. In order to save some time, you would not like to meet with any kind of fatal accident, right?

    Overall, the carpool or HOV lanes are designed for better management of traffic. So, motorcycle riders should definitely take advantage of it!

    Happy Riding to You!

  • 7 Steps To Motorcycle Hotwiring: How To Start A Motorcycle Without A Key

    7 Steps To Motorcycle Hotwiring: How To Start A Motorcycle Without A Key

    Reading Time: 7 minutes

    Anybody can start a motorcycle without a key but the only thing is that you need the right knowledge of its electrical systems. The overall technique is quite simple but as you will be dealing with wires, you need to be careful and attentive in the whole process.

    The process of starting a motorcycle without a key is called hot wiring and although it is difficult to do on most modern bikes, and new bike models, many old bike models can still be started using the method of hot wiring.

    Hotwiring does not involve any key to start the motorcycle, all you need to do is connect some wires properly before hitting the ignition switch connector and if done correctly, your motorcycle engine will start without any key. This process also can be done for the motorcycles that have the feature of kick start instead of electric start. However, since a kickstarter motorcycle is required to spin the engine, a motorcycle engine might not start without a key.

    So, let’s look at the steps of hotwiring –

    7 Steps to Start a Motorcycle Without a Key

    how to start motorcycle without a key
    1. Get a Speaker Wire
    2. Remove the Covering from the Ignition System
    3. Look for the Wiring Socket/Cap
    4. Detach the Wiring Socket/Cap
    5. Insert the Speaker Wire into the Socket/Cap
    6. Connect the Other End of the Speaker Wire to the Battery
    7. Give it a Try

    1. Get a Speaker Wire

    The first thing is to get yourself a speaker wire.

    This type of wire has two clips on both ends which are usually made up of copper and are very thin, somewhere around 0.5mm in thickness.

    Make sure that the wire you have got is thin enough for hotwiring purposes or else it will be difficult for you to connect your wires with the ones inside the motorcycle ignition system.

    Also, you need to peel off the plastic covering from both ends of the wire so that the inner copper coils get exposed.

    2. Remove the Covering from the Ignition Wiring System

    motorcycle without a key

    After getting hold of the wire, you need to remove any kind of covering over your ignition system so that you can access the socket/cap underneath.

    Usually, speakers come with electrical tape or some kind of covering so make sure that you pull it off before proceeding forward with hotwiring steps.

    After you remove the ignition cover, you need to look for the location of the ignition wiring system. If you are unable to find the ignition wiring hang up system, look for its location in the manual of your bike. If still, you cannot locate it, then you can conduct an online search with your bike model and surely you will come across videos that cover the ignition wiring system.

    When you find your ignition system, start looking for the socket/cap.

    3. Look for the Wiring Socket/Cap

    The ignition wiring is usually underneath a cap and in order to get access to it, you need to pull it off.

    Usually, there are four screws that hold down that particular part of wiring cover on the motorcycle so you need to use a screwdriver or any other tool that you feel will come in handy in removing those screws and when done properly, you will be able to remove the cover of the bike’s ignition system and wiring. You may locate them by taking a close look at the collection of wires that connect the motorcycle’s ignition switch to the engine and other main parts. In a wiring sleeve, tri-coloured wires will be bundled together. All you need to do is to find the plastic wiring cap or socket where the tri-coloured wires terminate by scouring the wiring sleeve. There might be other wires plugged into the wiring cap.

    Now check out for a socket or a plug inside your engine where wires are connected from one side and turning the key is the only way they get connected to each other. If it’s not a complete socket then do some more digging until you find a socket that is complete and has at least two or three wires plugged into unused spaces.

    4. Detach the Wiring Socket/Cap

    how to start motorcycle without a key

    When you have located the wiring socket, it’s time to detach the battery power to it from the ignition system.

    There are two ways of doing it – one is by using a screwdriver and the other is by using your hands.

    If you are using a screwdriver then insert it into the slots located on either side of the socket and twist it inan anti-clockwise direction. If done correctly, the screws will loosen up, and eventually, you will be able to locate the ignition wires and take off the wiring cap.

    If you are using your hands then try to prise off the socket with your fingers or use a flat head screwdriver and it will come off with ease.

    5. Insert the Speaker Wire into the Socket/Cap

    motorcycle without a key

    Once you have the wiring cap in your hand, it’s time to insert that speaker wire inside itas we need to hotwire battery wires to our motorcycle now. There is no significance to the wires connected to the handlebars.

    The wire has two ends like every other wire but for this method, you don’t need both sides of the wire.

    You only require one end since we need to make a connection between this particular end and one side of an ignition switch. So detach this single-end wire from its socket letting the ignition wiring hang down and cut off any excess wires if there are any, using a pair of scissors or a sharp knife.

    Now stick this stripped end directly to one side of the ignition socket and make sure that it’s tightly in place.

    6. Connect the Other End of the Speaker Wire to the Battery

    The other end of the wire needs to be connected to the battery, and for this, you need to find a positive and negative terminal on your battery.

    If you are not sure about where these terminals are depending on your settings, then have a look at your bike manual or conduct an online search with your battery model number because there are plenty of images and videos that show you exactly where these terminals are located on modern bikes with different batteries.

    Once you have found the positive and negative terminals, use a pair of pliers or anyother tool that you feel comfortable using and crimp/twist the wire around them so that it forms a secure connection to cap socket.

    7. Give it a Try

    motorcycle without a key

    Now the only thing left is to try whether your motorcycle starts or not, so sit on your bike with both feet placed firmly on the ground and turn your ignition key clockwise at least three times before you start your engine.

    If done correctly then your motorcycle will start up without any problems whatsoever but if not, then there are chances that you have made a mistake somewhere during this entire procedure which means you need to go back over these steps again until everything turns out perfect.

    Can Jacking Up a Motorcycle Make it Easier to Start Without a Key?

    Jacking up a motorcycle does not affect its ability to start without a key. Removing the key from the ignition or using alternative ignition methods are independent of the motorcycle’s position. However, raising the motorcycle can provide more convenient accessibility for maintenance or repairs.

    Conclusion

    So what are you waiting for? If your bike isn’t starting up no matter how many times you turn the key or if you just don’t feel like getting your hands dirty, then give this method a try because it’s worth a shot. And who knows, maybe it’ll work for you too!

    Well, after trying this method on my own bike I can say for sure that this method really does work because ever since I started using it myself, I’ve had no issues starting my bike whatsoever. It’s quick and easy to do and doesn’t require any sort of professional skills, so anyone can do it. Also, it’s important to consider acquiring enough knowledge of its electrical systems before getting into it for the best results.

    Please do not use this technic to steal someone else’s bike. Bike thieves are as bad as motorcycle squids!

    Happy Hotwiring!

  • What Does a Motorcycle Permit Allow You to Do?

    What Does a Motorcycle Permit Allow You to Do?

    Reading Time: 6 minutes

    As a young motorcycle enthusiast, the thrill of riding a motorcycle on a free highway is incomparable. But in order to experience that thrill and speed, you need to have a valid motorcycle driving license otherwise, you can be booked under the law, and if worse, you have to spend some jail time as well.

    If you have to legally ride your bike on public roads and spaces, before you are eligible to get a motorcycle driving license, you will need a motorcycle permit in almost all the States in the US.

    Surely, you must have questions in your mind regarding what is a Motorcycle Permit, what will it allow you to do, how to get one, and what’s the cost of obtaining one.

    Relax and keep reading for we’ve got you covered on all fronts!

    What is a Motorcycle Permit?

    As the name suggests, a Motorcycle Permit is a document you need in order to legally ride your motorcycle on public roads and spaces. In other words, it’s a mandatory requirement before you can get a motorcycle driving license.

    In most of the US states, usually permit holders are not allowed to drive their motorcycles on freeways or expressways. They may have to take a lot of equipment with them while riding their bikes too so that they comply with all the rules and regulations related, which will be explained later in this article.

    One more thing worth mentioning about the permit is that it hasn’t been established by any federal law; rather each state has its own set of rules for obtaining one. So if you want to get your hands on a permit, you need to check with the DMV in your state.

    How can you get a Motorcycle Permit?

    If you are eligible for getting one, which means if you are over 18 years of age and have met all other requirements, getting your Motorcycle Permit is fairly easy.

    You will have to pass a written exam on road regulations for motorcycle riders once you apply for it. The test will be based on some questions related to traffic rules and regulations put forward by the DMV.

    Some states may consider allowing applicants to take their Motorcycle Exam Online. Moreover, there’s no practical or physical examination required while applying for a permit.

    What are the Restrictions of Riding a Motorcycle with a Motorcycle Permit?

    Even though getting a Motorcycle Permit is not as tough as getting a Driving License, it does come with some restrictions and thus holds the distinction of being an Intermediate license between ‘L’ and ‘full’ motorcycle licenses.

    Once you receive your permit, you cannot drive your bike on freeways or expressways. What’s more, if you are riding without a supervising rider (normally who has been granted full licensure) then your speed should be under 30 mph (48 km/h).

    And of course, there goes that mandatory equipment list to carry while driving your bike which will vary from state to state.

    What Does a Motorcycle Permit Allow You to Do?

    When you have a motorcycle permit, it’s mandatory in most of the US States that Motorcycle Permit holders carry the following equipment when they drive their motorcycles:

    Helmet – This is a must-have for almost all states. 

    Eye Protection – This is also compulsory in many states. So, you will need to make sure that you have worn safety glasses or a face shield while riding your motorcycle. 

    Wearing Leather Jacket and Pants – Wearing leather jackets and pants along with other protective accessories like goggles and gloves can help ward off injuries in case of an accident, and it’s mandatory in some US States too. 

    Insurance – You should always keep a valid insurance policy on your bike in accordance with the set laws by the authorities so that if something unfortunate happens, at least your family isn’t burdened with the financial cost.

    Is It Legal to Ride a Motorcycle Without a License if You Have a Permit?

    Is it legal to ride a motorcycle without a license if you have a permit? The answer is no, it is not. Riding a motorcycle without a license is against the law, even if you have a permit. A permit allows you to practice under certain restrictions, but it does not give you the full authority to ride without a license. It is important to abide by the regulations and obtain the necessary license before hitting the road.

    What are the Requirements for Obtaining a Motorcycle Permit?

    There are certain requirements set by the DMV of every US state which you should be aware of before applying for a permit, such as: 

    The minimum age requirement to apply is usually 18 years in almost all states. Some exceptions may include Wisconsin where it’s 16 years and Massachusetts too has this age restriction set at 17 years only. 

    You have to have a valid driver’s license or learner’s permit along with a regular motorcycle insurance policy in most cases. In addition, some states allow applicants to add their names under an already existing insurance policy if they want to do so. But there are also quite a few States that require permitting riders to have their own policy [take California, for example, where the requirement is that the riders should be at least 21 years old].

    You must have logged a minimum number of road hours prior to getting your permit. Most states require at least 10 hours behind bars with your instructor. The only exception to this is New Jersey where no specific figure has been stated by its DMVs. But you will still need to pass a riding test in order to get your motorcycle permit there.  

    If you are planning on carrying passengers while operating your bike with a Motorcycle Permit, then it’s mandatory for you to display L-tags (number plates). These plates are colored yellow and are available for purchase from either your state DMV or local dealerships that sell motorcycles.

    Also, you will need to pass the written test on motorcycle regulations and safety guidelines before you can get a Motorcycle Permit. Along with this written test, in some States, there will be an additional vision test to check if your eyes are healthy enough to be riding a bike.

    Remember that the simplest way to get your motorcycle permit is to enroll in an MSF Basic Rider Course. These courses provide information about the safe control and operation of motorcycles, including skills related to preparing for tests, passing the tests, and operating safely after getting licensure.

    How Much Does a Motorcycle Permit Cost?

    In most states, the cost of getting a motorcycle permit is $5-$40. For example, in Hawaii, it’s just $3 while in New Mexico and Oregon, it comes to around $15-$35.

    On the other hand, there are some states that have waiting periods before you get your license after passing the tests. In California, for instance, you will need to wait for at least 3 months or more before you can get your license or endorsement for riding a bike.

    However, if you want to avoid all of this hassle and get a Motorcycle Permit without even taking a course or test then go straight ahead and contact your state DMV office on its website [or phone number]. Many offer free services [but really, have you ever heard of a free lunch?] so they will guide you through the process. But there are also some states which may charge as little as $3 to as much as $75 permit fees.

    Conclusion

    The motorcycle laws and Motorcycle Permit requirements differ for each US state. This article has been generalized to help those seeking information on licensing in the US. Some restrictions do apply and therefore, we recommend you to visit your local DMV office for more details and/or refer to their official website.

    Motorcycle laws and permitting requirements also can change at any time. Therefore, if you have specific questions about them, it is best that you contact the DMV in your state for more details.