Author: Joel Hathaway

  • Motorcycle Backfire: What Causes a Motorcycle To Backfire?

    Motorcycle Backfire: What Causes a Motorcycle To Backfire?

    Reading Time: 9 minutes

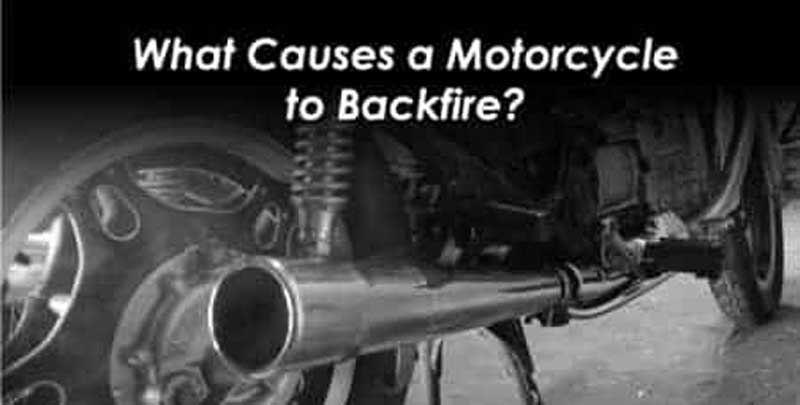
    We’ve all heard a motorcycle backfiring. It is a loud bang that makes everyone around you jump and look. But a motorcycle backfire is nothing more than a small explosion in your exhaust system. Sometimes a motorcycle backfire happens in the intake system.

    A motorcycle backfire usually means is that there your engine is running too rich, or too lean. This doesn’t allow the combustion process to burn thoroughly and a small backfire occurs.

    In this article, I’ll talk about the different issues that cause backfiring, and explain what you can do to prevent a motorcycle backfire.

    What causes a motorcycle to backfire?

    A motorcycle backfire is caused by a mismanaged air to fuel ratio in the engine of your motorcycle. Anything that interferes with that delicate balance between too much fuel (running rich) and too much air (running lean), can be considered a cause of backfiring.

    One cause for motorcycle backfires is replacing your stock exhaust with an aftermarket exhaust pipe. When you do that, you interrupt the way the motorcycle’s engine is set to run by the manufacturer.

    The change to a custom exhaust system changes the airflow and causes an imbalance in the air to fuel ratio. You either get too much air or too little air and the combustion process cannot handle the change correctly.

    Whenever you change from a stock exhaust, you will need to re-jet your carburetors. This is the process of replacing the jets which control the amount of fuel that is released into the combustion chamber. If you don’t do this step, your motorcycle is more likely to sputter and backfire with the custom exhaust system.

    Another cause for motorcycle backfires is a bad fuel pumps. Your engine is not getting enough fuel and this lack allows for too much air to enter the chamber. In newer motorcycle models, this could be a problem with the fuel injection system.

    The third cause for motorcycle backfires is the fuel filter. A clogged filter can restrict the flow of gas into the combustion chamber, leaving too much air to burn the fuel. A clogged fuel filter can also be the reason behind the low gas pressure.

    Finally, too much fuel can cause a motorcycle to backfire. If there is any fuel left in the chambers when you shut down your motorcycle, that fuel will burn off, causing a motorcycle backfire.

    Backfiring on Acceleration

    If your motorcycle backfires when you accelerate, you may have a problem with your intake system. It is possible that your intake system has developed some air leaks that allow for too much air to enter into your engine.

    This extra air does not work well with the way your motorcycle engine has been set up to function and causes combustion problems, resulting in backfires.

    Also, you could have a problem with bad wiring. The ignition system wiring may not be hooked up properly and this causes the combustion system to malfunction. Your motorcycle’s engine timing may be altered and allows for a build-up of air or fuel present in the combustion system.

    Another reason why your motorcycle engine backfires on acceleration is that there may be a problem in your carburetor. Low compression inside the carburetor can cause fuel or air to build up and result in letting your motorcycle backfire.

    Additionally, there could be a problem with the valve springs. Then if you have carburetor issues, it may be a sign that your accelerator pump is not functioning at 100%. When you hear your motorcycle backfire, there can be a variety of problems with your motorcycle’s engine.

    Backfiring on Deceleration

    Backfires on deceleration is simply the process of burning the excess fuel present in the combustion chamber. It normally happens in your exhaust system and there are three reasons for this.

    The first, is when the exhaust ports open, the change in pressure causes a very lean mixture of fuel and air. The fuel and air are still burning at this time, but very slowly. The open exhaust moves the burning mixture to the exhaust system, where it explodes when the combustion process is over.

    Second, a deceleration backfire comes when the fuel and air ratio is not correct. With too much fuel to burn, the combustion chamber fails to ignite it all. When the exhaust ports open, the unburned fuel is transferred to the exhaust system where it ignites. Once it ignites in the exhaust, you get a backfire as you slow down.

    The third reason you get a backfire when you decelerate is because you have lost compression in your engine. The low compression cannot burn the fuel at the same rate the air fuel mixture is coming into the combustion chamber.

    Once the exhaust ports are open, the slow burning mixture exits the combustion chamber still burning and enters the exhaust system causing a backfire.

    All of these types of backfire can happen when you are stopping at a red light too quickly, or idling at the side of the road after you have stopped for a rest from high speed travel.

    What is the difference between rich and lean and how does it affect my motorcycle backfiring?

    If you’re like me and your motorcycle’s first backfire results in other riders telling you “your bikes too lean”, you’re probably thinking what the hell does that mean?

    In short, running rich or lean is a way to describe the ratio between fuel and air in your combustion chamber, the below might help:

    Running Rich = Too much fuel, not enough air
    Running Lean = Too much air, not enough fuel.

    How does running rich affect my motorcycle backfiring?

    If your engine is running rich then the lack of air in the combustion chamber will cause a lack of explosion in the combustion chamber. And when you have a combustion engine that misses the explosions necessary to drive the pistons, this leads to excess fuel being passed out through the exhaust. This fuel is heated up by the touch of the exhaust and well… Results in KABOOM!

    How does running lean affect my motorcycle backfiring?

    If your engine is running lean then the extra air in the combustion chamber will cause a ‘starving’ of fuel in the combustion chamber. This is usually to do with low fuel pressure or a clogged fuel filter. The starving of this fuel in the combustion chamber means that there will still be some excess air and fuel that isn’t used up by the time the exhaust valves open. Resulting in KABOOM!

    Is backfiring bad for my motorcycle?

    Backfires when rolling onto throttleBackfires when rolling off throttleBackfires when fixed or steady on throttle
    Indicates a seriously lean condition which is harmful to your engine.this is just a release of combustible gases and is not harmful to your engine.This is generally due to too tight or burned valves and is harmful to your engine.

    Can a Motorcycle Catalytic Converter Prevent Backfiring?

    A motorcycle catalytic converter explained Can it prevent backfiring? A motorcycle catalytic converter plays a crucial role in reducing harmful emissions by converting them into less harmful substances. However, its primary purpose is not directly related to preventing backfiring. Backfiring in a motorcycle can occur due to various factors, including fuel-air mixture issues or problems in the exhaust system. Although a motorcycle catalytic converter can contribute to improving combustion efficiency and reducing emissions, it may not solely address backfiring concerns.

    Does backfiring mean something needs fixing?

    Not necessarily. Sometimes a backfire can be fixed by the simple turn of a mixture screw which changes the air to fuel ratio, and a little adjustment is all you need to clear up the problem. But not all backfires can be fixed this simply.

    But, always check the most simple problem first. If it can be fixed with a turn of the screw, you have saved yourself some time and money. If the backfire is not stopped with this quick fix, then you may have to do some motorcycle repair work.

    As laid out in the earlier sections, you have to search your engine for any unknown problems. Again, you should start with the easiest and cheapest options first. Check your fuel line to see if there is a lack of pressure and then go to your fuel filter. New fuel lines and fuel filters are easy to fix and should not cost you a lot of money.

    After that, you move on to your fuel pump to see if it is defective and unable to pump fuel from your fuel tank. You might want to check your accelerator pump at this time as well. Finally, you should check out your carburetor to see if there is a problem with its internal parts.

    Also, check your intake system to see if any air leaks have made their way into that system. All you have to do is fix the defective parts once you find it. Your motorcycle repair should be done logically. Keep in mind that motorcycle backfires are merely a warning that something could possibly be wrong with your motorcycle engine.

    How to prevent motorcycles from backfiring?

    When it comes to preventing your motorcycle from backfiring make sure that you regularly clean your carburetor, check your fuel filter is clean and clean your jets or fuel nozzles.

    There is always a solution to your motorcycle’s backfiring problem. You do not have to wait till there is an actual problem before you fix it. Some preventive maintenance can save you a lot of money in the future.

    There is an old saying, ‘an ounce of prevention is worth a pound of cure’ and that saying does apply to motorcycle backfiring. A little regular maintenance on your motorcycle can go a long way to preventing engine trouble and backfires.

    4 tips to prevent your motorcycle from backfiring

    1. Regular cleaning of your carburetor: Regularly cleaning your carburetor will flush out any dirt that restricts both air and fuel flow. A good carburetor cleaning agent should do the trick.
    2. Check your fuel filter: When you check your fuel filter make sure it is clean and able to handle the workload. There is nothing wrong with replacing an old fuel filter before it starts causing problems.
    3. Clean your jets or fuel injector nozzles: If these parts get clogged with dirt, you may have backfire issues. Another good cleaner should do the trick and make your life a little easier.
    4. Use better quality fuel: Another problem that may cause your motorcycle to backfire is the fuel you are using. Lower-grade fuels are not as clean as you think or they do not burn as well as you want. Changing the fuel you use can help maintain your engine and keep it from backfiring.

    Some Final Words

    Hearing your motorcycle backfire is not the end of the world. You do not have to panic and rush into the motorcycle repair shop and spend lots of money fixing the backfire issue.

    All you have to do is remember the causes of backfires and take the appropriate steps to fix those issues. The backfires could be in the intake system or it may be in the exhaust system. A little time on your part should locate the issue and focus your repair work.

    Also, a little preventive medicine on your part, which can be as simple as changing the fuel you use, can go a long way to prevent backfires from taking place.
  • Why is My Motorcycle Clutch Lever So Stiff?

    Why is My Motorcycle Clutch Lever So Stiff?

    Reading Time: 10 minutes

    If you find that your motorcycle clutch is so hard to pull that your hand starts to hurt after 20 or 30 pulls, the fix may be a lot more simple than you think. I’ve ridden older motorcycles with pretty stiff clutch levers and I’ve wondered if there was something I could do to make it easier. Let us glance through motorcycle clutch lever systems and how to maintain them.

    There are several factors that can contribute to a stiff clutch. An old, worn or dirty clutch cable is one reason. Other factors include dirty lever, stiff clutch springs, dirty or worn actuator arm or pushrod. Clutch position and hand strength can also be a factor. Riders need to maintain clutch levers and motorcycle brake to ride effortlessly. To keep the motorcycles running from Mon Fri, riders have to look into different clutch lever components like clutch cable, cable routing and other adjustments. Since the clutch levers highly impact a motorcycle brake, damaged or unused items should be replaced. An unused item inside the clutch levers can affect the overall motorcycle performance. Sell an unused item to get a better clutch lever system for the motorcycle.

    In this article, I’ll cover all the reasons why your clutch could be stiff, including ways to rectify the problem, starting from the simplest solution to the more complicated repair.

    Clutch Cable

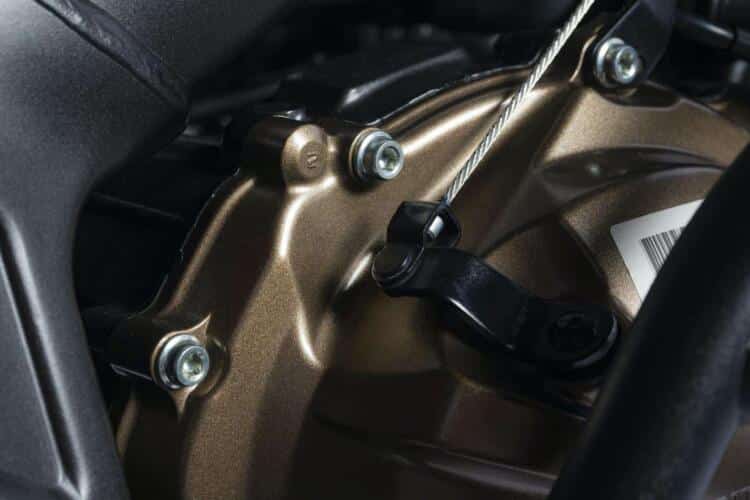
    The first place to look is your clutch cable. Over time, old lube can dry up inside the casing preventing the cable from sliding freely. Part of your annual maintenance should include inspection and lubrication of the clutch cable.

    1. Start by inspecting the clutch at the point where it connects to the clutch lever and to the actuator arm. If the cable is frayed, even by one strand, you must replace it. Also check for cracks or worn spots on the housing.
    2. To lubricate the cable properly, it should be removed from the motorcycle. Follow the repair instructions for your make and model motorcycle.
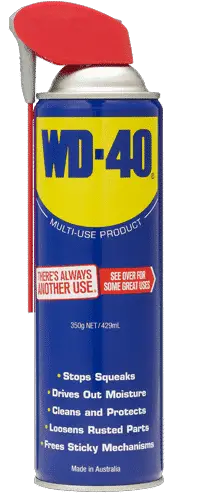
    3. Once removed, you will need to squirt clutch lube down the cable until it drips out the other end. You can use any type of lube, but avoid solvents like WD-40 or degreasers. Another method is to use a cable luber, attached to the end of the cable, then apply the lube. This is a faster and much cleaner method. You can get a simple cable luber on Amazon here.

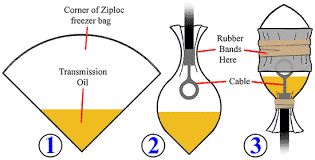
    A second method for lubricating the cable is the plastic bag method. Take a common, plastic freezer bag and squirt a little bit of lubricant in it so it pools in one corner of the bag. Place one end of the cable into the bag and wrap a rubber band around it so the fluid won’t leak out. Next, turn it upside down and allow the fluid to drain down the clutch cable until it drips out the other end. Quick, simple and clean as long as you get that rubberband tight enough.

    Cable Routing

    When inspecting your clutch cable, or when re-installing a new one, make sure the cable is routed properly to avoid pinching or crimping. The cable should make wide bends around the handlebars and then straight down the side of the tank. If the bend is too sharp, this will prevent the cable inside the casing from siding feeling, resulting in a stiff clutch.

    Clutch Levers

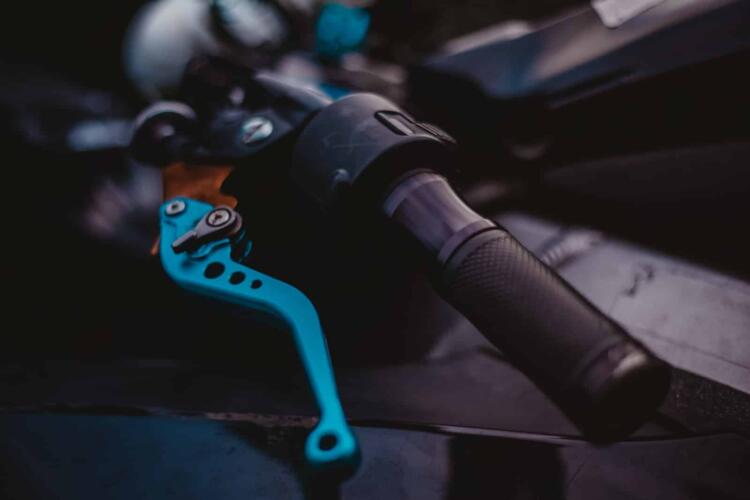
    The next thing to inspect is the clutch lever. Stiffness in the lever can sometimes be caused by sticky grease and dirt at the pivot point, as well as worn bearings. Remove the clutch levers to clean and inspect all the contact points include the screw. If your lever has a bearing, check to make sure it spins smoothly. If it’s stiff or seized, it’s time for new levers.

    But, if everything is in good condition, simply clean away the dirt and old grease, apply a thin coating of fresh grease and reinstall the lever. Clutch Cable Lubricate Clutch cable – replace if worn or old

    Clutch Lever Adjustments

    Difficulty squeezing clutch levers can sometimes be caused by their position in relation to your grip. For instance, if your lever is positioned too low, you are forced to bend your wrist down slightly, to grab the clutch. This weakens your grip, making the clutch feel stiff.

    • Position your clutch lever so that your wrist is in a flat, neutral position when you reach for the lever. This will give you the most grip strength and reduce hand fatigue.
    • Another option is to move the lever an inch or two closer to the center of your handle bars. This will cause you to pull the lever farther away from the pivot point. And, if you recall from your high school physics class, this will make pulling the clutch easier.
    • Consider replacing the clutch lever with an adjustable one. Decreasing the reach will make it easier to pull the lever, therefore reducing fatigue.

    Install Hydraulic Clutch or EZ-Pull

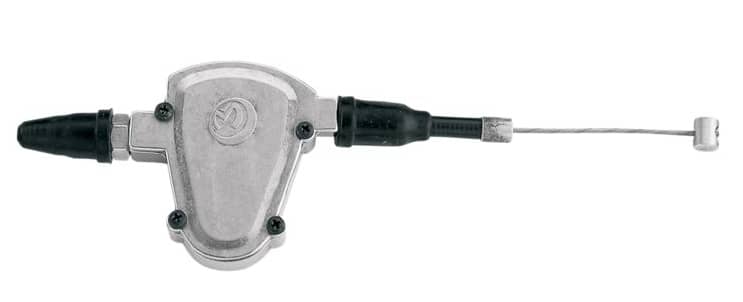
    There are a few aftermarket parts that you can install to make your clutch easier to pull. The less expensive option is the EZ-Pull system. It attaches to your existing clutch lever and cable and uses leverage to assist in pulling the cable. They are easy to install and can be adjusted at different assist levels to fit your needs.

    Moose Racing Easy-Pull Clutch System

    Another option, and one that is a bit more expensive, is to install a hydraulic clutch conversion kit. A lot of the larger, fancier touring bikes already come with hydraulic clutches to make the ride easier. But, if your motorcycle doesn’t have one, you can install one.

    Hydraulic clutches use fluid to assist in moving the clutch actuator instead of your grip force alone.

    The biggest benefit of hydraulics is that your clutch will be easier to pull. You also don’t need to fiddle with cable adjustments since there is no cable to stretch. The clutch lever will adjust itself when it’s used.

    Some riders complain that you can’t feel the clutch friction zone as well, but it’s something you get used to over time. Another downfall; they are more expensive to purchase and to repair if a seal fails.

    Conversion kits come specifically to the motorcycle make and model and are one of the more popular brands in the Maguro Hymec conversion kit. They continue to add kits for more motorcycles, the most popular type being dirt bikes, adventure bikes and smaller touring motorcycles.

    Clutch Actuator Arm and Push Rod

    In most cases maintaining or replacing the clutch cable and levers will be enough to reduce stiffness, but, sometimes the problem can be at the other end of the cable. So, your next step is to inspect the clutch actuator arm and pushrod.

    The purpose of the clutch arm and pushrod is to transfer the movement of your clutch cable to the clutch pressure plates, taking the pressure off the plates, which disengages the clutch plates and allows you to shift gears.

    Over time, the clutch arm and rod can start to wear out, or in an extreme case, the rod can bend, causing the clutch to feel stiffer and less responsive. Inspect the clutch arm and rod, clean it, and replace it if you find any excessive wear or broken seals.

    Check the service manual for your make and model of motorcycle to see how to access the clutch actuator arm and pushrod. Sometimes you can inspect the actuator without having to disassemble anything more than the clutch cable bracket. But sometimes, it will involve draining the motorcycle rider of its oil and removing a cover.

    Stiff Clutch Springs

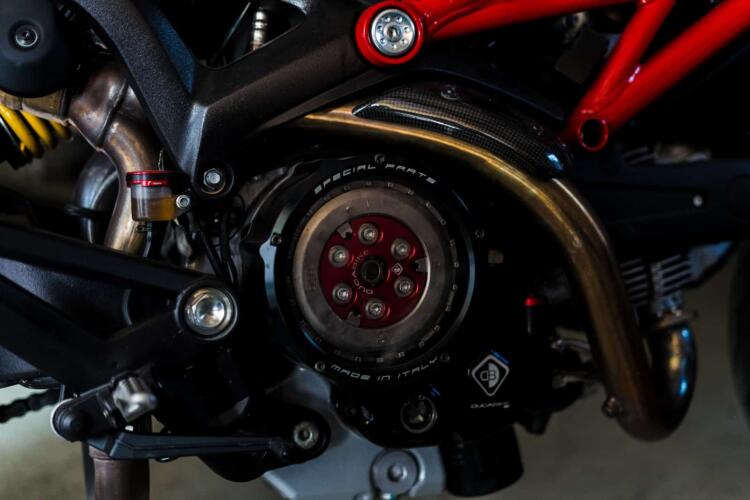
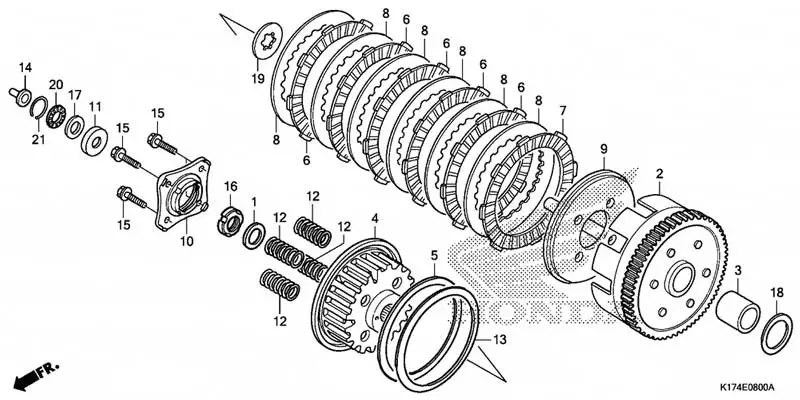
    The clutch assembly consists of 4, 5, or 6 springs, depending on your motorcycle. When you pull the clutch you are compressing these springs. One way to help with a stiff clutch is to install springs that are slightly looser and take less effort to compress. Sometimes switching back to OEM springs will help. This is something you have to experiment with until you find a tension that works for you but still allows the motorcycle to shift properly.

    clutch assembly
    Diagram of Motorcycle Clutch assembly.

    Note: to access your clutch springs and the clutch assembly, you will have to drain the motorcycle of its oil and remove the clutch cover. You should also replace the gasket on reassembly, after removing the cover.

    Another trick is to add washers to the spring bolt, which will reduce the spring tension. Start by adding thin washers 1mm thick, or less, then test the clutch pull. You can safely add up to 2mm thickness, but, you must test it to make sure the bike is shifting properly under load, at high acceleration. If the washers or spacers are too thick, your motorcycle will miss a shift, which will destroy your clutch plates over time.

    So, just to be clear, if you do any modifications to the clutch springs, always test the gears under load to make sure it is shifting smoothly.

    Damaged Clutch Plates

    A less likely reason for a stiff clutch, but still one that should not be overlooked if you’ve tried everything else, is damage to the clutch plates and clutch basket. Grooves in the plate surface or notches on the sides of the clutch basket can cause friction when pulling the clutch lever. It can also cause slippage when shifting. These are usually signs of a bigger problem and shouldn’t be ignored. If you have an unused item you can sell Mon Fri with guaranteed holiday delivery services in exchange for clutch levers.

    Improve Your Grip Strength

    The last thing I want to mention is your grip strength. If you’ve done everything to improve the ease of your clutch and you’re still having a hard time, maybe it’s time to increase your hand strength.

    1. Pick up a Grip Master and start squeezing.
    2. Grab a tennis ball or racquetball and squeeze it.
    3. Add dumbbell wrist curls to your workout.

    Related Questions

    Are short levers easier to pull than long, stock levers? Actually, no. Longer levers give you more leverage to make the pull feel easier as long as you are gripping it closer to the end of the lever. Short levers, are designed to be pulled using only two fingers so that you can maintain your grip while using the clutch. They are popular on dirt bikes and adventure bikes. But, they don’t necessarily make the clutch easier to pull. Get them on exclusive offers on shopping portals for guaranteed holiday delivery.

    Does my posture affect the clutch pull? Sometimes it can. If your handlebars are too far forward, too high, this can cause your wrist to bend in a way that makes it difficult to pull the clutch. Be sure to adjust your clutch lever to match a natural seating position on your style of motorcycle.

    A bike shop has exclusive levers and different categories of accessories for optimal motorcycle performance. Customers can shop from brands for vehicle accessories at the best price. They can subscribe with brands to get the best deals on future model releases. There are different categories and components for levers offered by different brands. A bike shop offers the best price to ship, shop, gift and assembles different types of levers for all types of bike model. Brands for bike levers offer exchange and discount offers on their virtual shop.

    Fun Fact: You can actually perform a clutchless shift. Read by clicking the link!

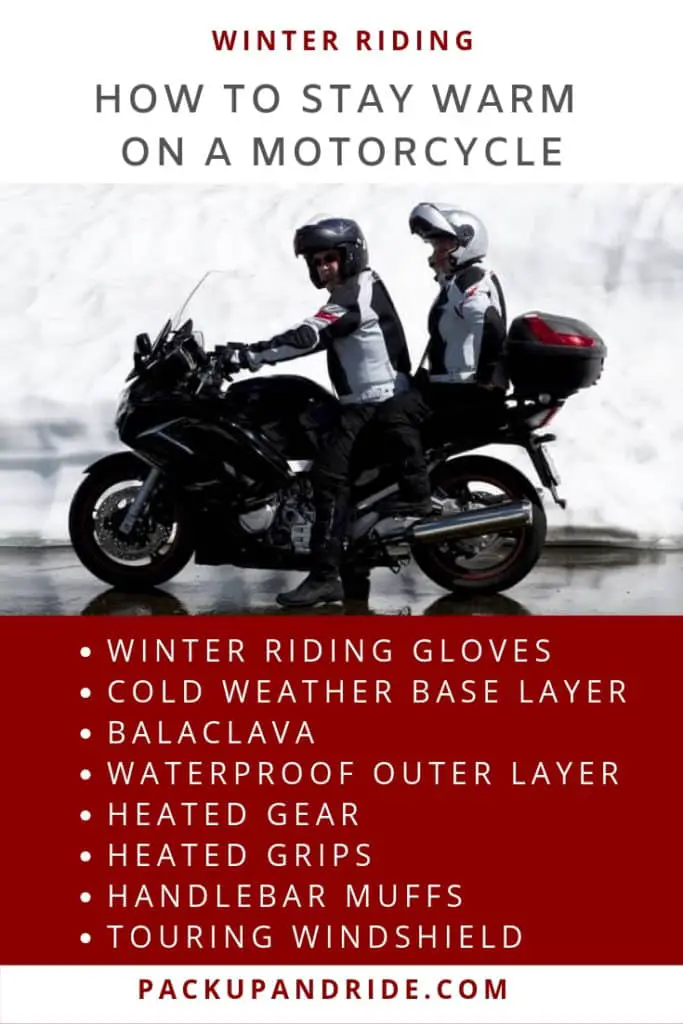
  • How to Stay Warm on a Motorcycle:  Tips, Gear and Gadgets

    How to Stay Warm on a Motorcycle: Tips, Gear and Gadgets

    Reading Time: 14 minutes

    This morning, yes, literally the morning of the day I’m writing this post, I left my house at 6:00AM, pre-sunrise, on my motorcycle, to ride 2 hours to volunteer for an event. Morning ambient temperature: 34°F. I layered up, put on my warmest gloves, wore thick leggings under my jeans, etc. But, within a half hour, my hands and legs were painfully cold, to the point where I had difficulty pulling in the clutch.

    I stopped to warm up for a few minutes, then mentally tapped out, turned around and went home. Now, before you judge and call me a wimp, please note that I have a normal to high tolerance for pain and don’t normally call off a day of riding. But I was cold. Really cold.

    It made me think; How can I better prepare myself for riding in cold weather? What kind of gear or accessories can I use to ride safe and warm? So I did some searching for every piece of gear, every gadget for sale that I could use to stay warm on my motorcycle in the winter. Here’s what I found.

    Clothing

    What you wear is crucial. The most common advice is to layer up, but on a motorcycle, too many layers make it difficult to ride. The simple act of buckling your helmet is impossible if your arms are so layered up they don’t bend. So, here’s a good list of layering options.

    Cold Weather Base Layer

    Advancements in textile technology have made cold-weather base layers so much more effective over the years. Long gone are the old cotton thermals that your grandpa used to wear. They’ve been replaced with synthetic fabrics or high-quality natural fibers like Merino Wool.

    Features to look for in a base layer are thickness, comfort, moisture-wicking, odor control, and durability. Synthetic fibers, such as dry yarn, offer all of these features while keeping the garment thin enough to not interfere with mobility.

    • Alpinestars Ride Tech Winter: Keeps heat locked into areas where it’s needed most.
    • Dainese D-Core Thermo: Comes in a women‘s size and design specifically for a woman’s curves. Yay! Finally!
    • FXR Vapour: Merino Wool. Breathable, soft, natural fiber.

    Balaclava or Face Mask

    What the heck is a balaclava? It’s a garment that covers the entire head, neck, and most of the face, leaving openings for eyes and breath boxes for easy breathing. They are more commonly known as ski mask or face mask. It’s designed to be worn under your helmet and offers protection from the cold air that can swirl up under your chin while you ride.

    Here are a few things to look for when selecting the right balaclava.

    1. The neck skirt should extend low enough to add a layer of protection to your upper chest and upper back, under your jacket.
    2. The elastic around the face should be thin, wide, and soft to reduce pressure points when wearing your helmet.
    3. It should have a tapered shape to fit over your head and snug at the neck.
    4. Breathability. By this I mean, how easy is it to breath with the fabric over your nose and mouth? Some come designed with a breath box that allows for easier breathing.

    Here are a few suggested brands that make balaclavas specifically designed for cold weather motorcycle riding.

    • Rev-It Blaze: provides waterproof protection all around the front and back of the neck area.
    • Alpinestars Winter Touring Balaclava: Features holes near the nose and mouth for easier breathing, and an extra long neck skirt.
    • Klim Arctic Balaclava: For very cold weather. Includes large breath box for easy breathing and controls fogging. Extended skirt in the back.

    Wind and Waterproof Outer Layer

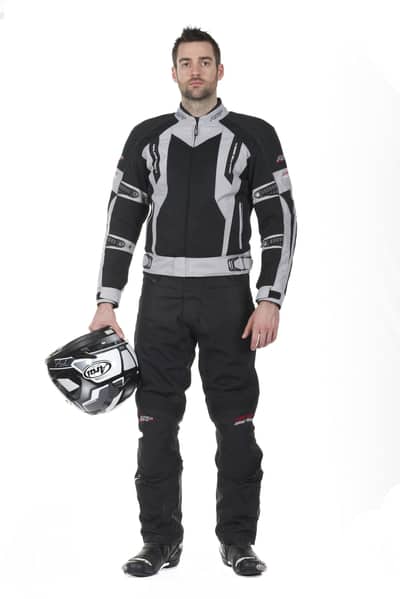
    Your outer layer of motorcycle gear is your first defense against the elements, so, if you ride in any kind of cold weather, make sure you have a good, quality riding jacket and pants.

    When choosing an outer layer, you want to look for features that will seal up any openings and prevent the wind from flowing through the jacket. Look for things like, flaps that cover the zippers, adjustable waist belt, and adjustable straps on the sleeves to keep them snug around your arms. Sealed seams will also provide water and wind protection.

    Cold weather, especially in the morning, can often include a moister in the form of fog, mist, or even rain, so it’s important that your jacket is waterproof. Look for jacket and pants that are rated to be waterproof, so you don’t have to add a rain jacket on top. GoreTex is an excellent material for all weather riding.

    For year-round riding with one set of gear, look for jackets and pants that have plenty of openings for ventilation. Even on a cold ride, if you feel yourself heating up, you can open a couple vents to regulate your temperature. A good riding jacket will position the vent ports so that rain can not get in, but a breeze can.

    Jacket Liner

    In addition to your cold weather base layer, or layers, and your weather resistant outer layer, consider purchasing a jacket that includes a liner. This will add more warmth and it is an easy layer to remove if the weather starts to warm up. Some jackets come with a lining vest, which won’t add a layer to your arms, but it will provide extra protection to keep your core warm.

    Wool Socks

    A good pair of wool hiking socks will help keep your toes warmer and the natural wool fiber will wick away sweat. Also, knee high socks will add an extra layer of comfort and warmth to your legs.

    Socks with waterproof liners are also a good option. The waterproof feature will, of course, keep your feet dry if you’re caught in the rain, but the added protection will also add a thermal layer as well.

    Winter Riding Gloves

    Motorcycle gloves not only provide hand protection in the event of a crash, but, in cold weather, your gloves are the only thing between your fingers and the elements. You need to have protection against the wind chill that’s created by moving at 60 to 80 mph. A lot of riders don’t like wearing winter gloves because of the bulk which makes using your bike’s controls more difficult.

    Too much padding in the palms and fingers will cause your hand to slide inside the glove, causing slower reaction time in your throttle hand. Materials like Thinsulate and Hypura fabric will provide warmth and water protection without adding thickness.

    Here’s what you should look for when choosing a winter riding glove.

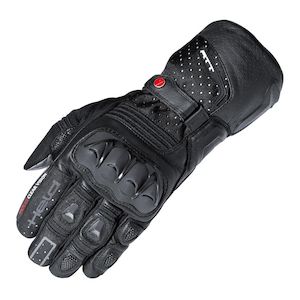
    • Look for gloves with thin leather at the palms for a good feel on the controls, and thick material on the tops for warmth in the fingers and hands.
    • A rubber squeegee on the thumb is handy for wiping rain off your visor. Note: a squeegee on the left thumb is a lot more handy.
    • Look for silicone fingertips to make it easy to grip the levers even if they are wet.
    • A drawstring on the gauntlet is a plus so you can cinch the gloves tight over your sleeves.
    • Armor in the knuckles. Don’t sacrifice crash protection for warmth. A good winter glove should include armor too.

    Rev-it: Hydra H2O Gloves: comes in women’s sizes too. Yay! Leather palms for good grip, textile or GoreTex exterior for water proof. Good winter gloves can be used together with heated grips to get the full, warm experience.

    Heated Gear

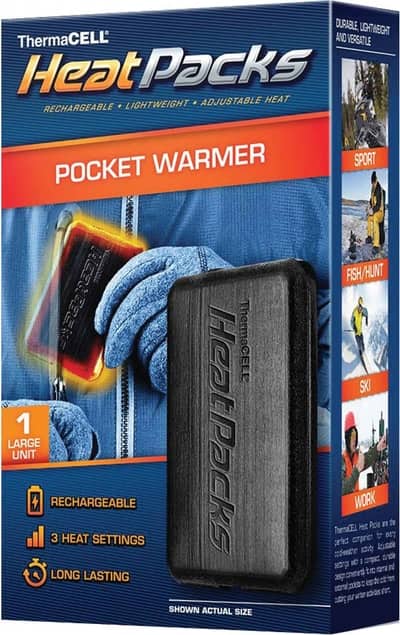
    Thermacell Pocket Warmer

    A thermacell pocket warmer is a rechargeable heating device that fits in your pocket. More popular with hunters, skiers and other cold weather outdoor enthusiasts. They come in two sizes; small hand warmers, to fit in your pockets and warm up your hands, and large: to fit in your chest pocket to keep your body warm. They will stay warm up to 6 hours on one charge and come with adjustable heat settings: 104°, 112° and 122°.

    Pros: They are less expensive per use than the chemically activated pocket warmers. You can turn them off if you get too warm or when not in use.

    Cons: On a motorcycle, you can’t use them to warm your hands, but you can place them in your jacket for body heat.

    Heated Jacket Liners

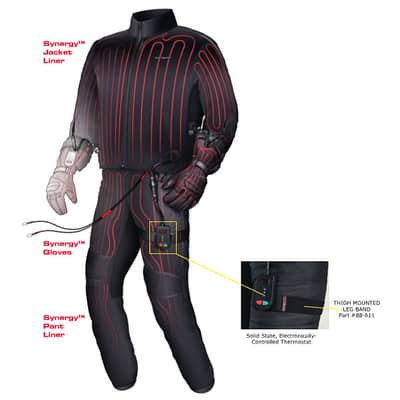
    Riding with a heated jacket, vest or pants will help keep you warm without have to bulk up with layers upon layers of clothing under your jacket. A heated jacket liner is a great way to go so you use your year-round jacket and only use the heated liner when you need it.

    Heated liners come with copper wiring zig-zagging throughout the jacket. When the wiring is connected to a power source, they heat up, distributing warmth evenly. There are a number of brands on the market with a variety of features, but here are a few features to look for.

    Most liners will come with all the controls and wiring needed to connect it directly to the battery. That main connector will plug into the controller which is either installed on the jacket, or, can be strapped to the thigh for easy access.

    The better jackets come with thermometers to regulate the heat automatically without you having to constantly make tiny adjustments if you get too hot or too cold. You can set it at your desired temperature, and forget about it.

    Most jacket liners also come with additional connectors on each sleeve so that you can plug in heated gloves or glove liners. Heated pant liners are also available and generally come with their own separate heating control.

    A decent set of heated liners will set you back by about $200 and up, although if you want only a jacket, then the Sedici Hotwire 2.0 can be purchased for under $200. Like any motorcycle gear, if you do a lot of riding, it’s worth the investment.

    Heated Insoles

    If your thermal socks aren’t cutting it, if your toes are still freezing, then some heated insoles might be what you need. The function similar to heated liners and will plug in via a wire attached to the heal which is designed to go up your boot. Keep in mind that if you have tight boots, the cord could cause some discomfort.

    Heated Socks

    A step up from heated insoles are heated socks. They also connect to your heated gear and provide a controlled amount of heat. The are thin enough to be worn over a thin pair of socks inside your boots without feeling too cramped.

    Heated Gloves and Liners

    Heated motorcycle gloves come in a couple of types, battery powered, or those that connect to your heated gear. Good battery powered gloves come with rechargeable lithium ion batteries and include controls that are easy to access and to operate with the other gloved hand.

    If you chose heated gloves, don’t skimp on quality or protective features. Better quality gloves will include armor at the knuckles as well as extra protection at slide points. Some people complain about the bulk of the glove and the lack of true feel on the throttle and levers while wearing them.

    Another option is a pair of heated glove liners. These are designed to be worn inside your regular motorcycle gloves. They will add a little more bulk and some complain that it interferes with the touch on the throttle and lever. So, heated gloves may not be for everyone, but are still a viable option for warm hands.

    Accessories and Farkles

    FARKLE

    Derived from a combination of the words Function and Sparkle. Also rumored to be an acronym for
    Fancy Accessory Really Kool Likely Expensive.
    A farkle is any accessory designed to improve or embellish the original equipment. Any modification to one’s motorcycle.
    Used in a sentence: “Dang, that motorcycle is all farkled up.”

    Here’s a list of accessories that you can add to your motorcycle that will help keep you warmer.

    Heated Grips

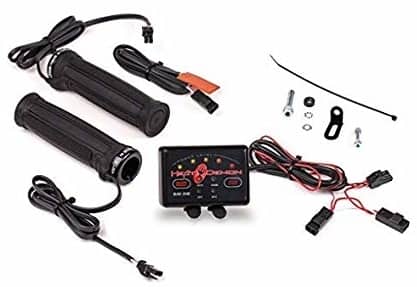
    Installation of heated grips can help keep your hands warm with the flip of a switch, and usually come with multiple heating levels to get just the right amount of heat. Of course, they can be turned off when they are not needed.

    There are a couple of ways to heat up your handlebars. One, is to purchase a system that includes new grips, that will replace your old grips. These will come in many different grip styles and sizes to fit your type, or brand, of motorcycle.

    Heated Grip Kit

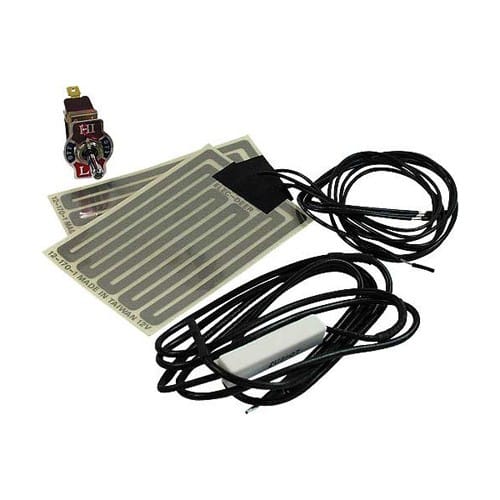
    You can also purchase heating elements that are installed under your existing grips. The benefit of a heating element is that you can use whatever grip you prefer yet still have the heat that you need.

    Either method of heating will work just fine. It’s best to look for heated grips that have multiple settings, and a switch that can be mounted on the bars for easy access while you’re riding.

    They can be installed directly to the battery, or, if you are handing with wiring, you can install them switched to your ignition system to insure that they are off when you turn off the motorcycle. I have heard stories of people leaving their heated grips on by accident, only to come back to a dead battery.

    Touring Windshield

    One of my complaints on my morning ride was the cold wind blowing on my shoulders and arms. My Honda CB500x has a stock windshield and it’s not very big. A wider, taller windshield would have eliminated, or at least reduced that problem.

    If you’re not much into windshields, there are a lot of options for aftermarket windshields that can be installed for winter riding, then removed for the summer.

    >> Related Article:
    Motorcycle Touring: 10 Reasons Why you Need a Windshield >>

    Barkbuster Storms

    Any handguard is going to provide you will some protection against the wind on your hands, but Barkbuster makes a handguard specifically designed for colder conditions. The Storms prove a full wrap-around design wrapping around the sides and over the top of the hands.

    Barkbusters include mounting systems that are specific to your motorcycle and, with the aluminum brace, they provide crash protection in addition to weather protection. But, if you’re only looking for weather protection, they also make a model with no aluminum brace; simply a plastic cover that fits on your handlebar grips. Protection from the elements without the added weight.

    Handlebar Muffs

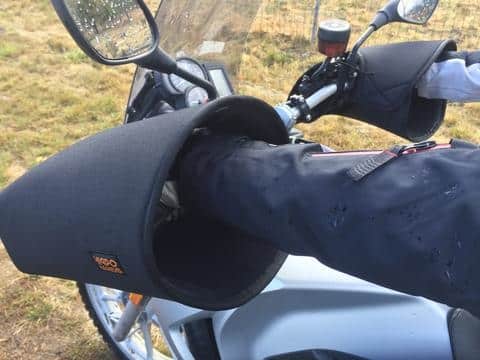
    Handlebar muffs are insulated, waterproof covers that fit over the ends of your handle bars and provide full, wrap-around protection for your hands. Reach into the covers and operate your controls as you normal would. The hand covers will block out the wind, rain and cold keeping your hands warm. I wish I had these on my ride this morning; I probably wouldn’t have bailed out if I did.

    Hippo Hands Handlebar Muffs
    • Tucano Urbano: requires removal of hand guards and bar ends for installation and removal. Somewhat complicated install. May require some modification to work around the mirrors. Small size
    • Hippo Hands: Large enough to fit over your handguards. Installs quickly with only a couple of snaps. Easy on and easy off.
    • BarkBusters Blizzards: Installs with an adjustable strap but requires you to screw them onto the bar ends. Still, a quick install. Fits over smaller barkbusters, but not over larger ones like Barkbuster Storm, you may have to remove them first.

    Full Face Helmet

    A lot of motorcyclists like to ride with anything other than a full face helmet. But, in cold weather, the smaller the helmet, the less protection you’re going to get from the cold. The addition of a face mask will help, but, to ensure that your entire head and face are protected, a full face helmet is the way to go.

    Tricks and Hacks for Staying Warm

    All of this winter riding gear and heated gadgets can take a big bite out of your budget and not every rider is in a position to gear up to the nines. So, here are some tricks and life hacks to help you stay a little bit warmer on the motorcycle.

    1. Wear surgical gloves under your riding gloves. Adds a small layer of protection from cold and keeps your hand dry in rain.
    2. Add an oversized chemical glove, or dishwashing glove over your normal riding gloves. Blocks wind and rain, keeps your hands warm.
    3. Hand and toe warmers. Grabber Mega Hand Warmers are air activated heating packets that you can place inside your pockets.
    4. Plastic bags over your socks. Before you stick your feet into your boots, put them in a couple of plastic grocery bags. Works good in a pinch.
    5. No rain gear? No problem. Use a large plastic trash bag as a rain resistant cover. Wear it under your riding jacket. Yes, your jacket will get wet, but you will stay dry.
    6. Sheepskin seat covers will help regulate the heat in your seat.
  • Throttle Hand Pain Causes: Motorcycle Riders Wrist Pain Mystery

    Throttle Hand Pain Causes: Motorcycle Riders Wrist Pain Mystery

    Reading Time: 8 minutes

    Wrist pain, carpal tunnel or tendonitis, are common ailments for people who ride motorcycles and it can be a real pain (bad pun, I know). I’ve suffered through rides where my clutch hand is on fire, right behind the thumb, where every time I had to pull in the clutch made me want to give up the sport. So, I started looking at ways to reduce the pain and keep my wrists from hurting.

    So, Why do my wrists hurt when I ride a motorcycle? Throttle Hand Pain can be attributed to bending the wrists, supporting your body weight on your wrists, poorly adjusted controls, weak forearms or grip, or vibration. Throttle Hand Pain puts extra strain on the tendons in your hands, wrists and forearms, resulting in hand pain.

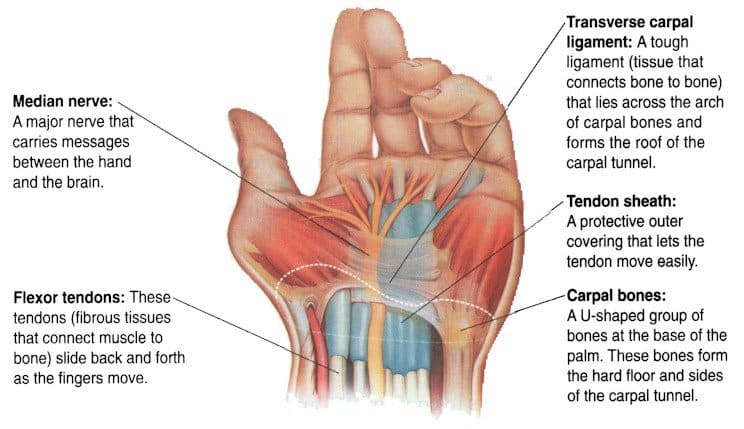
    Here’s a quick lesson in wrist anatomy so you can understand what’s going on when you’re in hand pain.

    The wrists and hands are an intricate grouping of bones, tendons, nerves and a little muscle tissue. Our fingers actually have no muscles and they are controlled by the muscles in your wrists and forearms, connected to tendons in our fingers. Weird, I know.

    All the nerves that give us the ability to feel, pass through one opening at the wrist called the carpal tunnel. When those nerves become irritated through constant pressure or repetitive motion, they will become inflamed and cause hand pain. Too much weight impacts the hand position. Keep the arms loose whenever possible to avoid the painful sensation.

    There are also tendons that run down the backs of the fingers, through the wrist and are attached to the muscles in your forearm. Another tendon runs down the back of the thumb, through the wrist; this is the one that cause me the most problems. So, there are many opportunities for these tendons to become irritated with overuse.

    Reduce Vibration

    Constant vibration in the handlebars can impede blood flow to your hands and fingers causing numbness. Over time, this will damage nerves in your hands and wrists. But there are some ways you can reduce the vibration in your handlebars.

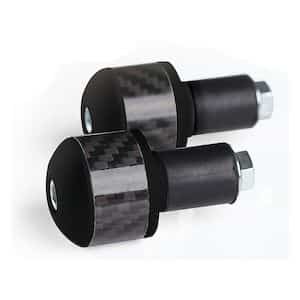
    • Add weighted bar ends. Installing heavy bar ends will help steady the vibration at the grips and that transfers to a smoother ride on your hands.
    • Install padded grips or grips with gel padding. More cushioning in your grips will absorb some of the vibration and reduce numbness.
    • Make sure the vibration isn’t caused by issues in your bike’s front end or front wheel. If so, get it properly services.
    • As a last resort, if numbness due to vibration continues to be a problem, consider riding a different motorcycle with a smoother engine and smoother ride.

    Ride with Correct Body Position

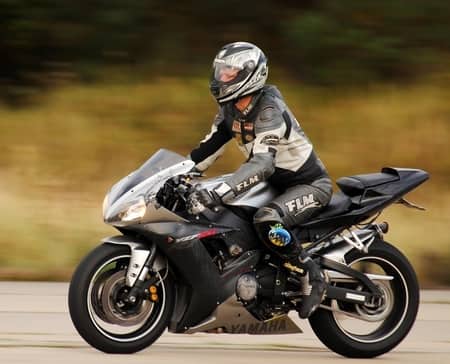
    If you ride a sport bike, hand pain could be caused by poor body position. Riding with your elbows locked and your wrists bent will eventually result in sore wrists. Bending the wrist places excessive strain on the nerves. Throttle hand or the death grip adds to the carpal tunnel syndrome. Death grip or throttle hand is a common condition for sport bike riders.

    Even when your wrists are straight, the weight of your body resting on the heel of your hands will place pressure on those nerves, causing numbness in the fingers and eventually, pain.

    So, on any motorcycle that has a forward lean riding position, your arms should be slightly bent at the elbows. Your bodyweight should be supported by your core muscles (the lower back and abs), and your wrists should be straight and even with your forearms with vary little weight resting on your hands. If the muscles become fatigued, sometimes squeezing your knees into the tank will take some pressure off the back.

    If your motorcycle has adjustable footpegs, consider adjusting them so that they are slightly more forward. This will bring your body position back slightly, taking weight off your wrists. Also, consider modifying or replacing your seat so you remain in a more neutral riding position.

    Relax Your Grip

    Often riders will forget to relax their grip on the handlebars and that constant squeezing will result in pain. Some squeezing is necessary in order to twist the throttle.

    One solution to a sore throttle hand is to use a throttle lock or a handy little gadget like a Crampbuster. Throttle locks, when engaged, prevent your throttle from snapping back when you let go of it, so you can remove your hand without slowing down. This gives you a minute to shake out your hand or rest it.

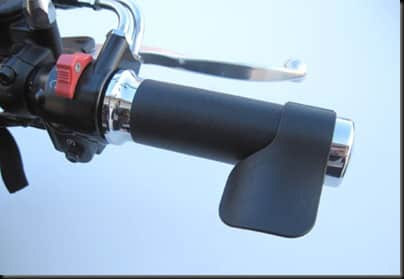
    A Crampbuster is a plastic paddle that fits over your throttle. You position it so that the heel of your hand presses against the paddle portion and it twists the throttle. It requires less grip pressure giving your hand a break. A Crampbuster takes a little practice, but I’ve used one many times and it’s really saved me on long stretches of highway.

    Another solution for reducing wrist pain due to your grips or throttle hand pain is to decrease the size of your grips. If you have small hands, and the circumference of the grip is too large, you will have to grip harder to twist it. A smaller grip might be better.

    Adjust Your Handlebar Angle

    Handlebars that are too far forward or too close to you can sometimes cause you to bend your wrist too much. A simple adjustment in the handlebar angle can help more than you realize. Start by rolling the bars forward or backwards a half inch at a time. Even this small adjustment can be a solution to wrist, arm and even shoulder pain.

    If you ride a motorcycle with clip ons you may not be able to adjust them a great deal. Often you can adjust the width of the grips which could help with your body position and wrist position.

    Adjust the Angle of Your Levers

    My clutch hand is where I experience the most pain and it was partly due to my clutch lever being too low. This caused me to bend my wrist down every time I reached for the clutch which put a lot of strain on the tendon in my thumb. I quickly learned that lever position is vital for rider comfort. It’s a simple solution; loosen the clips to your clutch and brake levers and move them either up or down until they are in a comfortable position.

    Your wrists should remain in a straight, neutral position when you reach for the lever. You should not be bending your wrist either up or down.

    Adjust the Reach in your Levers

    If your hands are small, like mine, you can sometimes have problems reaching the clutch lever to the point where it’s easy to pull in. Especially if your clutch is a little stiff, it can be hard to grab and pull. So, one thing you can do is install adjustable grips and choose a setting that brings the lever closer to the grips so you don’t have to reach so far.

    Strengthen your Grip

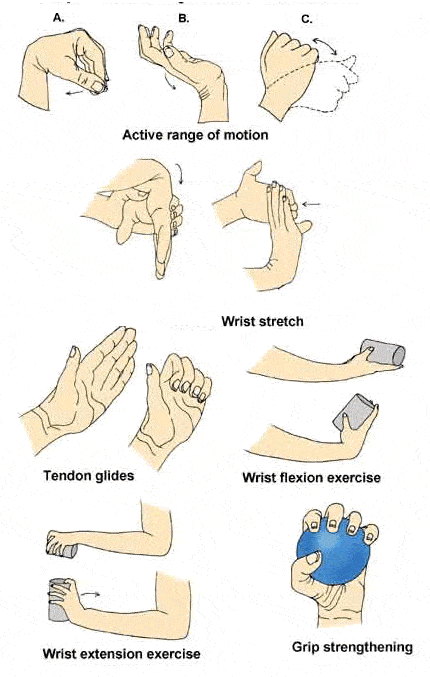
    One way to prevent wrist pain is to take proactive measures by strengthening the muscles in your forearms. Essentially, strengthen your grip. This is particularly smart during the offseason if you are unfortunate enough to live in a cold winter climate.

    Here are 5 exercises you can do to strengthen your grip for motorcycle season. Add a few of these to your off season workout and you’ll be ready when it’s time to ride. Always start off a workout with some stretching to get the blood flowing into your muscles first.

    • Wrist curls and twists with weights
      • Hold a dumbbell in each hand. With your arms bent at the elbows, rotate your hands; palms up, palms down, palms up, then down. Repeat for 12 – 15 reps. Do 3 to 4 sets.
    • Pinch Grip Plate Holds
      • Take a barbell weight, one that you’re comfortable with, and grip the edge with only your fingers. Hold the weight at arms length for as long as you can.
    • Dumbbell hold
      • Choose a dumbbell weight that you’re comfortable with. Grip the end of the dumbbell and hold it, at arms length, for as long as you can.
    • Use hand exercisers
      • Squeeze a hand grip spring 10 times with each hand for 3 or 4 sets.
      • Squeeze a tennis ball or racquetball, 8 to 10 times for 3 or 4 sets, each hand
      • Use a heavy rubber band wrapped around the outside of your fingers. Stretch the rubber band out using only your finger tips.

    What if the Pain Persists?

    If the pain doesn’t seem to be going away, or if it is so severe that it is getting in the way of you doing normal life activities, then you should see your doctor and get medical treatment. You don’t want to let it go and become a serious problem. For mild pain you can try some home remedies such as rest, heat/ice, wraps, gentle massage of the forearms, ibuprofen to help with swelling and pain.

    Don’t let the influence of pain stop you from enjoying your motorcycle rides or keep you from getting out there on two wheels.

  • Motorcycle Windshield: 10 Reasons You Need One

    Motorcycle Windshield: 10 Reasons You Need One

    Reading Time: 9 minutes

    Over the years, and over several different motorcycles, I’ve experienced riding with and without a motorcycle windshield. My old SV650 had an aftermarket 3/4 front fairing and a small windshield that helped keep the wind off my chest and shoulders.

    When I removed it, to get back that naked bike look, I noticed a huge difference and it took me several weeks of riding to really get used to it. Motorcycle windscreens offer a flexible riding style. Most Harley Davidson motorcycle models come with pre-installed motorcycle windscreens. It helps to protect the bike from rain x and the min max bar on the front. It also gives optical clarity in difficult weather conditions. Motorcycle windscreens make your ride smooth and improve your riding style. Bikes that do not have a windscreen shield are prone to external damage. Different bikes have different windscreen style. A windscreen for motorcycles is one of the integral business accessories for bike sellers in the USA.

    My CB500X has a small, adjustable windshield that offers about the same amount of protection as the old bike, and it’s fine for commuting, or weekend trips, but, would it be enough for long-distance riding, day after day, mile after mile?

    So, in trying to determine if I need an aftermarket windshield for touring, I started looking into the benefits of riding with motorcycle windshields. My verdict, if you are doing any long-distance riding you’ll thank yourself for getting a bike with a motorcycle windshield.

    Here are 10 reasons why you need a motorcycle windshield:

    1. Wind Protection
    2. Protection from Heat and Cold
    3. Rain Protection
    4. Debris Protection
    5. Reduced Fatigue
    6. Reduce Back, Neck and Shoulder Pain
    7. Noise Reduction
    8. Improved Fuel Efficiency
    9. Protects Your Electronics, GPS, Cell Phone
    10. Reduces Helmet Buffeting

    1. Wind Protection

    antique

    Reason number one seems to be a no-brainer. I mean, that’s what motorcycle windshields are designed for, to shield you from the wind. Motorcycle windshields are designed to disperse the oncoming wind around your motorcycle and around the rider. Shields with a slight upward lip at the top, push the wind up and over the rider’s head, depending on the height of the windshield and the rider.

    A wider windshield will help push the wind around the sides of the rider, reducing the force against the chest and shoulders. Often, the simple act of diverting the wind can cause other wind-related issues like buffeting of the helmet, or wind blowing up from below. Motorcycle windshields for touring often come with a small opening at the bottom, allowing some wind to flow through just enough to equalize the pressure behind the motorcycle windshield and reduce buffeting.

    Touring motorcycle windshields often come with adjustable extensions which can be raised when riding at faster, highway speeds. The difference in speed will affect the way air flows over the windshield, and the extra lip adjusts for it.

    On some cruisers with large, aftermarket motorcycle windshields, riders sometimes find it necessary to install extensions on either side of the forks. This prevents air from flowing under the windshield and up into your legs and chest area.

    2. Protection from Heat and Cold

    When it’s cold outside and you’re cruising down the highway, a windshield will reduce the effects of windchill significantly. Windchill is the perceived drop in temperature and is calculated with some, fancy, complicated formula. (like math). But, to give you an idea, let’s say it’s 40°F outside and you’re riding at about 55 miles per hour. It’s going to feel like it’s 25°F.

    Obviously, you’ll be wearing a jacket among other layers, but, a windshield is going to divert much of that head-on cold air, reducing the effects of windchill.

    Similarly, a windshield will protect you in hot, dry weather. When you sweat, the wind provides an amazing cooling effect and feels great after sitting at a hot stoplight for even a few minutes. But, over long periods of time, the wind evaporates your sweat at such a rate that you’re body may not be able to keep up, increasing your risk of dehydration. So, having a windshield to take away some of the brutal heat blastings on your chest, will help you last longer on the bike.

    3. Rain Protection

    I’ve been caught in the rain on a naked motorcycle, and even though I had a waterproof jacket, I was miserable having all that rain blasting me. It sucked. A larger windshield will provide much more protection against rain. It’s not going to keep you 100% dry, of course, but, it will divert much of the oncoming water up and over your head, and around your chest and shoulders.

    If you run with a windshield so large that you have to look through it, consider applying a water repellent. This will help the water bead up and slide off rather than creating a sheet of water that’s difficult to see through.

    A windshield will also help protect your instrument panel and your mounted electronics, depending on their position. It will not, however, keep them 100% dry and you should not rely on a windshield to fully protect your electronics from water.

    4. Debris Protection

    Another benefit of the windshield is protection from debris that can come your way. If a small pebble thrown up from a tire is enough to crack a car windshield, just think of how much that would hurt if it hit you. A windshield will help catch road debris that is flung from other vehicles.

    Bugs are another argument in support of a motorcycle windshield. If you’ve ever had a dragonfly smack you in the helmet, then you understand. Yes, it will get dirty over time, with all the bug guts, and if you let it go, it will build up and become a visual obstruction. But, the simple solution to that is to clean it when you stop.

    Most Motorcycle Windshields are polycarbonate windshields, polycarbonate is an extremely durable material and perfect for motorcycle windshields.

    5. Reduced Fatigue

    The reduction of wind blasting into you helps reduce riding fatigue over long distances. When the wind is pushing against you, you’re working harder to keep your posture upright, and you’re gripping the bars tighter. Your arms are pulling yourself forward to counteract the force.

    It seems very subtle when you’re used to riding without a windshield, but over time, after hours on the road, it begins to fatigue the back and shoulder muscles as well as the forearms and hands. Before you know it, you’re tired and you’re not really sure why.

    But, with protection from the wind, you are able to relax your grip on the handlebars, relax your shoulders more, relax your core. This will help prevent overall fatigue and, at the end of the day, you won’t be so burnt out.

    6. Reduce Back, Neck and Shoulder Pain

    This benefit follows directly on #5. Holding yourself up from the forces of oncoming wind can, over time, cause shoulder pain or pain in the upper back. Continuous, unchecked pain can become an issue if you’re on an extended motorcycle tour.

    Another vulnerable muscle group is those in your neck. Constantly fighting your head from blowing around, with that big helmet on it, will begin to take its toll on your neck muscles, which can lead to headaches and more fatigue. A properly sized motorcycle windshield can reduce the risks of these aches and pains so you can have a comfortable motorcycle vacation.

    7. Noise Reduction

    Let’s face it. Riding a motorcycle is a noisy affair. For riders who don’t ride with a full-face helmet, the wind noise can be even more bothersome. But, a properly fitted windshield can help reduce that noise. I say ‘properly fitted’ because a motorcycle windshield that’s too low will do little to reduce the noise. So, if noise reduction is important to you, make sure you find one that forces the wind over your head instead of directly into it.

    Many riders have noticed that, with the reduction of wind noise, they can hear their engine and other bike noises much better. This is a plus for many riders. If there’s something strange going on with your chain, your wheels, your brakes, etc., you’re more likely to notice it.

    8. Improved Fuel Efficiency

    Motorcycle windshields are designed to be aerodynamic, and in most cases, Motorcycle windshields will make you and your bike move more efficiently through the wind. How much more efficient would depend on the area of the motorcycle windshield, but, a smooth, consistent surface will cut the wind better than all the exposed parts on the bike that can break up the wind randomly.

    As far as improved fuel efficiency, it makes sense that a motorcycle windshield would help. But, probably not a great deal. Still, consider this; an average motorcycle gets 40 or 45 miles to the gallon and even slight savings in fuel could save you from walking a few miles to the next station. Every little bit helps.

    9. Protects Your Electronics

    If you ride with a lot of electronic gadgets mounted on your dash or to your handlebars, they are fully exposed to rocks and bugs while your riding. However, a windshield can offer some protection to your expensive navigation system and your cell phone.

    A motorcycle windshield can also provide you with good mounting options. Placing your GPS unit front and center can put it more at eye level making it easier and safer to read navigation instructions.

    10. Reduces Helmet Buffeting

    When selecting a motorcycle windshield for your motorcycle it’s important to consider the height of the windshield along with your own height. The motorcycle windshield can be an excellent solution for helmet wind buffeting, but it can also be a contributing factor.

    To reduce wind buffeting, it has to push the wind up and over the rider’s head, or, push it at least towards the top of the helmet, then over. Buffeting is caused when the wind hits just underneath the helmet and causes the helmet, as well as your head, to shake or wobble around. This can cause blurry vision, neck pain, and headaches from trying to keep your head steady.

    If you experience helmet buffeting when riding a motorcycle that has no windshield, then it might be a good solution for that problem.

    Cons of Motorcycle Windshields

    Not all riders like the idea of a windshield and prefer to ride without them. Here are a few common reasons why some riders decide to go without.

    1. Motorcycle windshields are un-cool and look dorky.
    2. Cross winds can cause the bike to move around more.
    3. Can cause wind buffeting in some new, odd places that you’ve never noticed before, such as, up under the feet and legs.
    4. Too much work cleaning off the bug guts.

    Quite honestly, the pros outnumber the cons. And, while cleaning off bug guts can be a pain, being able to ride longer without getting beat up by the constant wind is a huge plus for getting a windshield installed on your motorcycle. Ultimately it’s about increasing comfort while riding.

    Best Motorcycle Windshields

    Now when it comes to the best motorcycle windshields, I would recommend Memphis Shades. They seem to be one of the most popular choices among motorcyclists looking for aftermarket motorcycle windshields.

  • A Motorcycle Riding Position Guide [For All Bike Styles]

    A Motorcycle Riding Position Guide [For All Bike Styles]

    Reading Time: 8 minutes

    Riding a motorcycle long distances can be exhausting in itself, but the fatigue can be worsened by improper riding posture.

    So, what is an appropriate motorcycle riding position for different motorcycles? Posture will depend slightly on the motorcycle style, but on any motorcycle, Your ears, shoulders and hips should all be aligned vertically. Your back should be straight, your arms slightly bent with hands relaxed on the bars. Your legs should be placed comfortably on the pegs and your reach should not impede your ability to steer the bike.

    The best riding positions for a motorcycle involve a straight upper body and an appropriate body position to evade pain. A proper motorcycle riding position varies on different motorcycles. However, there are uniform rules for all types of motorcycles to prevent pain and exhaustion. There is a standard riding position for motorcycle riders for a safe and enjoyable ride. Keeping the upper body forward allows you to take control of the motorcycle. A slightly pushed head position can cause pain. Slight leaned forward while riding motorcycles is a standard position for the body.

    Let’s go further into the specific riding position for each motorcycle style.

    Sportbike

    Sportbikes, which are designed for speed, force your body into a more aggressive, racing position with foot pegs that are higher and farther back, and drop handlebars to put you in an aerodynamic position. But let’s assume you’re not on the track. What’s the most comfortable riding position for a sport bike rider?

    With your feet placed firmly on the foot pegs and your butt comfortable on the seat, you should be leaning forward with your arms relaxed on the handlebars, you wouldn’t want your wrist hurting while riding your motorcycle. Your upper body weight should not be 100% supported by your arms. Instead, much if that support should come from your back muscles.

    Even though you are leaning forward on the bike, your ears, back, and hips should be in alignment. Your back shouldn’t be hunched over or arched, and your core muscles should be slightly engaged.

    Your elbows should be slightly bent and your wrists should also be straight and neutral; no bending at the wrist. Because of a sportbike’s drop handlebars, it’s tempting to lock the elbows and put your weight on the bars. But, over time, this can cause pain in the wrists and shoulders. So, be sure to keep your arms relaxed.

    An alternate position, to allow your arms to rest, is to get into a tucked, racing position. This is a good one if you have a long, straight stretch of highway to get through. Sit back in the seat, lean forward and rest your chest on the tank, let your elbows drop down on either side of the tank and keep your hands relaxed on the bars. Be extra cautious because you won’t have easy access to the clutch and brake which will slow your reaction time.

    If you’re not used to this type of bike riding position, or if you have a week core, you may find it difficult to take your special bikes on long distance rides. Many riders complain of back or wrist pain after long rides on straight roads. But, as soon as they get into the canyons and the posture of their body changes to a more active riding position, those aches and pains go away. It makes sense because this is what those bikes are designed for.

    Standard Motorcycle

    Standard bikes, like the Bonneville, or the Honda CB1100, are inherently more comfortable than sportbikes. Their foot beg position is more forward, which places your legs in more of a regular sitting position. The upright handlebars mean you don’t have to lean forward as much.

    But, you still need to practice good posture when riding. The most important is to keep your back upright and straight and avoid the temptation to slouch your shoulders. Your chest should be upright, which will help keep your shoulders down and your back straight.

    The handlebars should be adjusted so that when you’re in a comfortable, upright position, you should not be reaching for the bars. Instead, the bars should be at a distance where your elbows are slightly bent and relaxed. The ideal position for a standard motorcycle should look similar to someone sitting at their desk, typing. (But having a lot more fun)
    Adventure Bike

    Adventure motorcycles are designed for long distance riding, but a rider still needs to be aware of good posture. Find a position on the seat so that your pelvis is in a neutral point, not rotated forward and not rotated back, which can cause slouching.

    You also want your back muscles to be relaxed, using the structure of your spine for support. Your shoulders should be down and aligned even with your back. Avoid puffing your chest up and shrugging your shoulders. This will cause shoulder and neck in a very short time. So, keep your shoulders down.

    Adventure riding often requires us to stand while riding. Good posture while standing means you should be leaning slightly forward, over your tank. Your legs should be flexible, but straight and should support most of your weight so you’re not putting your weight on the handlebars. When approaching a corner, you can bend your knees and shift your weight towards the back of the motorcycle.

    Sport Touring Motorcycles

    A sport touring motorcycle is one of the more comfortable styles of motorcycle you can own. It has a neutral riding position which makes it difficult to get your posture wrong. But, like any other motorcycle, it’s important to keep your back straight and shoulders relaxed.

    The biggest concern with larger motorcycles is the handlebar position. Adjust the bars so your arms are slightly bent and you’re not leaning on the bars. I feel a bit like a broken record with this rule, but, it’s the most important one. Too much stress on the arms and shoulders will wear you out pretty quick.

    Cruiser

    Cruiser motorcycles generally have footpegs in a more forward position. Many riders prefer this foot position because it reduces stiffness in the knees and hips. One thing to be concerned with is your reach to the handlebars. Because your legs are already forward, handlebars that are too far forward will cause you to either hunch over, or lean over into a C shape, which won’t result in a comfortable ride over time. So, a cruiser position can add to your back pain.

    Even with the legs forward, your back should be straight, and your ears, shoulders and hips should be in a vertical line. Adjust your handlebars so that your arms are slightly bent, wrists are level, and you’re not reaching out so far that you can’t control the bike in a turn.

    Ape Hangers

    Some riders love tall handlebars, commonly referred to as ape hangers. I personally have never ridden with them, but I’ve often wondered if it is comfortable and if it impedes your ability to control the bike. The answer depends on how high the rider has to reach up.

    The general consensus is to make sure the handlebars are at a height somewhere between your heart and your shoulders. Then the bars put your hands higher than your shoulders, blood flow to the fingers is reduced, and riders will often experience numbness. Once your fingers go numb, it’s more difficult to control the bike and use the clutch and brake levers.

    On the plus side, some riders notice that they have less back pain with higher bars. It prevents them from having to lean over, yet it still allows them to keep their back upright. As with any motorcycle, it’s still important to avoid slouching, and keep the shoulders relaxed.

    Dirt Bikes

    Dirt bikes are a whole different ball game when it comes to proper body posture. Being such an active riding style, there are many different body positions that are used for different parts of a ride. Standing, sitting, high on the tank, back in the seat, etc. Dirt bike body positioning should be a separate article and would be too much to cover here.

    So, the final bike riding tip, you’ll notice that there are a lot of commonalities in the correct motorcycle riding position no matter what style of motorcycle you ride. The most important one being to relax, especially your arms and shoulders.

    Proper riding posture starts with choosing the right size motorcycle for your height and arm length, and continues with proper adjustments of the handlebars and controls, ending with you being aware of your body position as you ride.

  • How to eat healthy motorcycle camping food on trips

    How to eat healthy motorcycle camping food on trips

    Reading Time: 8 minutes

    I’ve been on a lot of motorcycle camping trips, both solo and with groups, and one thing I’ve noticed on every trip is that my eating habits take a dive while traveling.

    So, how do you eat healthy while on a long motorcycle trip?

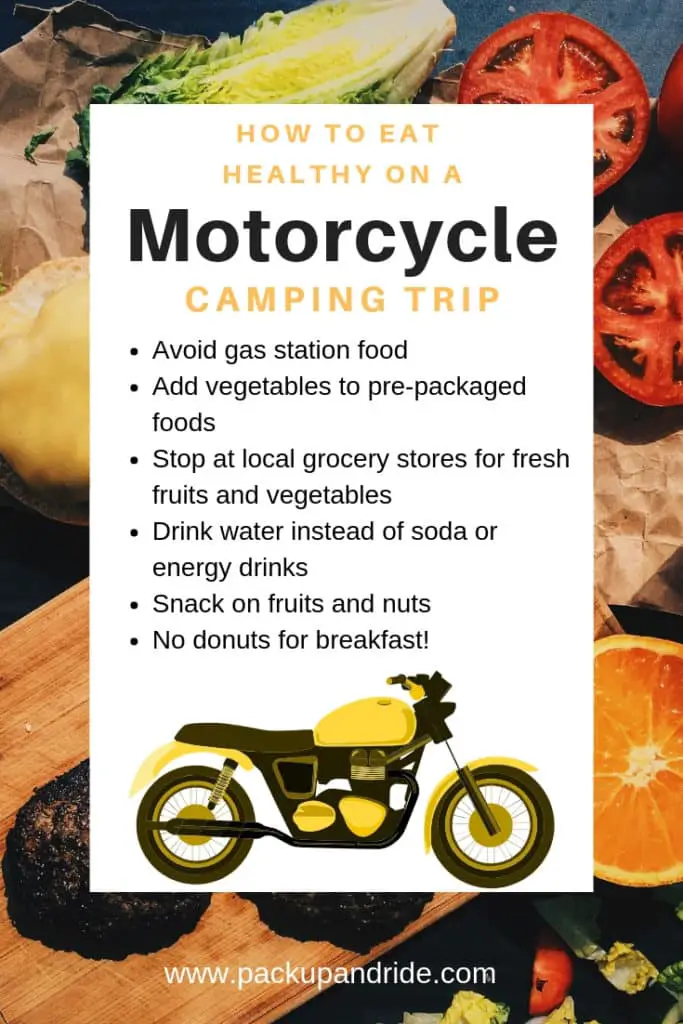
    Eat as clean food as possible. Avoid gas station foods, greasy spoons, and processed foods. Shop at local grocery stores for a few days worth of fresh foods and cook your own food. Keep foods cold in a small, insulated lunch bag. In this article, I talk about how to eat healthy while on the road.

    When I first started motorcycle camping, I would take the easy route and resort to eating junk that was quick, easy, taste great, and loaded with too many calories. It’s much too easy to eat fast food, greasy spoons, and processed foods. This might be ok for short trips of one or two nights, eating like that on an extended trip can take its toll on my health.

    So, I started thinking about what kind of motorcycle camping food I can eat when I’m on a long motorcycle tour that is a week, or even months long. That’s a tough one, because, on a bike, you have limited space and have to pack light for an easy journey.

    So, I’m looking for is food that is easy to pack, takes less space, easy to prepare at a campsite, but is still as clean and fresh as possible. There will be nights where I’ll stay at a hotel, so I’ll need to learn how to cook and eat healthy based on what’s available at the time.

    Avoid Gas Station Food

    white car parked in front of red and white building during night time

    It’s tempting to grab a snack or meal at the gas station when you stop to fill up. It’s so convenient. I mean, it’s right there and you don’t have to make a special stop just to eat, and a lot of rest stop style gas stations have good things like hot burgers, burritos or hot dogs ready to eat. Stop. Don’t eat them.

    Those foods are high in calories and very high in sodium. If you want a snack at a gas station, look for a piece of fruit or a bag of nuts instead.

    Limit Sweet Craving

    If you’ve got a sweet tooth, grab a small bag of trail mix, or a small bar of dark chocolate. Dark chocolate is a nice thing it has antioxidants and is a much better option than a regular candy bar. Often you’ll find smaller pieces of chocolates or other candies at the cash register. Buy just one piece to satisfy your craving, instead of buying a whole candy bar. Plus, the last thing you want is a melted Snickers bar in your tank bag.

    Motorcycle camping food

    Avoid the huge refrigerated wall of drinks. Stick with your plan of drinking only water during the motorcycle trips instead of sodas or energy drinks.

    Shop at Grocery Stores

    motorcycle camping food

    Whether you’re looking for something to eat for lunch or you’re buying food for a few nights of camping, one of the best places to stock up is at a grocery store, just like when you’re at home.

    A lunch break at a grocery store can give you a lot of options, assuming you’re traveling in a well populated area. But, even small, rural towns will have quality grocery stores with lots of excellent stuff. They will often have deli counters where you can get a sandwich, and a lot of stores are providing soup and salad bars.

    Healthy Motorcycle Camping Food at Grocery Store

    If you’re loading up on food for camping, there’s no reason why you can’t eat clean and healthy. Here’s a list of healthy, packable food to buy on a camping trip.

    Motorcycle camping food
    • Go to the butcher counter and purchase a single chicken breast, fish, beef steak or hamburger, just enough for one proper food serving. Moreover, don’t forget to get some salt and spices for seasoning.
    red tomatoes
    • Small bag of baby carrots
    • A small head of broccoli
    • A handful of fresh green beans and a couple of onions
    • Tomatoes are easily bruised, but roma tomatoes are a bit more sturdy. Store it at the top of your bag to avoid crushing.
    • A small sweet potato, red, or white potato, which usually come smaller than russet potatoes.
    • Bagged salad mixes. These come with dressing and all the fixin’s. Don’t make the entire salad at one time. Instead, portion it out before you put the dressing on.
    • Single serving pack of tuna. Avoid cans which are heavy and bulky, and instead buy the resealable pouch or envelope style packing.
    • If you like cheese, grab hard cheeses, like parmesan. They keep well without refrigeration. Babybell cheeses, those little wax covered single servings, will stay fresh for several days without refrigeration.
    • Oranges and apples are perfect fruit choices. Grab a banana if you’re going to eat it right away, or store it carefully so it doesn’t get bruised.
    • Get a small bag of rice if you can ignite a fire or have a compact stove and bowl to boil water.
    • Also, get a bag of coffee for the morning brew.
    • Buying some snacks and healthy drinks like chips, juices, crackers, and biscuits is beneficial.
    • Lastly, learn some backpacking recipes to add spices to your dinner

    These are only a few suggestions for fresh, clean, healthy motorcycle camping food that you can grab at a grocery store and take with you into the woods for a few days of camping. Don’t forget to pack utensils like a plate, cup, fork, spoon, and pot. You can also keep a small hook and wire for fishing if the camping site is near a lake or stream.

    How to Keep your Motorcycle Camping Food Cold

    When you buy fresh vegetables and meat to take into the woods, you’re going to need a way to keep it cold, especially the meat. Raw meats will begin to spoil after only two hours without refrigeration and must be stored at below 40°F, so, if you’re not going straight to your campsite to cook it, you must keep it on ice.

    I carry an insulated lunch bag to use as a cooler. I fill a slightly larger heavy-duty ziplock bag with ice whenever I need to keep something cold. You can grab some ice from a soda machine at a gas station, or from a hotel ice machine, but sometimes you’ll have to buy it.

    How to Prevent Cross-Contamination

    To prevent cross contamination between different kinds of meats and between meats and other foods, keep the meat in individual, leak proof bags, and store them at the bottom of the ice container. If they do leak, they won’t drip on the rest of your food spoiling it.

    As long as it’s not 100° outside, and you keep the cooler bag out of direct sunlight, the ice will melt fairly slowly and the motorcycle camping food will stay fresh for at least 24 hours.

    Eat up your most perishable foods first. Most fruits and veggies will keep much longer with only moderate refrigeration. If you’re able to refill your bags with ice, of course, your food will stay fresh longer.

    Packaged Foods

    Packaged, dehydrated meals are popular with backpackers and they are a good option for motorcycle camping too, simply cut open the bag and enjoy a nice meal. However, keep these types of food to a minimum and don’t make them your everyday meals.

    A dehydrated meal is great for backpackers who are burning 3,000 to 4,000 calories a day, they are too high in calories and sodium for riders sitting on a motorcycle all day.

    So, limit your intake of frozen dehydrated food like Mountain House or Backpacker’s Pantry. They are excellent options for an emergency meal or when there is no other option available. While you don’t have to completely avoid these foods, they shouldn’t be your main staple.

    Prepackaged pastas are a pretty good food choice for a motorcycle camping trip and you can make them healthier by adding fresh vegetables. Usually, these packages are enough for two people, so consider dividing them in half.

    Order healthy options when eating at a restaurant. Avoid grease spoon diners. If there are no healthy restaurants in a small town, go to the grocery store.

    Limit Freeze Dried/Dehydrated Motorcycle Camping Food

    When asked what kinds of food people take on a motorcycle camping trip, they will often suggest backpacking foods such as freeze dried or dehydrated meals. It makes perfect sense because they are easy to prepare, just add hot water, and they don’t spoil. However, they are high in calories.

    person carrying yellow and black backpack walking between green plants

    A day of backpacking or hiking can easily burn 3,000 calories or more, so refueling and putting those calories back into your body is important. Not so much on a motorcycle. An average day on the motorcycle is not going to burn 3,000 calories if you’re chasing the sun on paved roads.

  • How to Stretch While Riding a Motorcycle

    How to Stretch While Riding a Motorcycle

    Reading Time: 9 minutes

    When I’m out on a long motorcycle ride, after a couple hours, my body starts to stiffen up and sometimes the aches and pains build up. But I don’t always want to stop and take a break. So, I’ve figured out ways to stretch out and get the blood flowing while I’m still in motion.

    So, how do you stretch while riding a motorcycle? To stretch out your legs you can stand up or rest your leg on a highway peg. You can stretch your arms and shoulders one at a time. You can stretch your back by twisting. In this article I go into more detail about stretches that can be done while the motorcycle is in motion.

    Before you read on, I feel it’s the responsible thing to do to tell you to be careful. These stretches require you to move around and ride with one hand, etc. So, do it at your own risk, and always keep your eyes on the road.

    Also, doing a set of stretches before you get on your bike will help keep the aches and pains away for a while. Stretch out every time you stop for gas, for a snack, for sight seeing or for a break. But, you can also stretch while you’re riding.

    3 Ways to Stretch Your Legs

    Depending on what kind of motorcycle you ride, staying in a riding position for long periods of time can cramp up the legs. This is particularly true on sport bikes, or smaller bikes. There are two main areas of the legs that usually cause problems; the knees and the hips. So, let’s explore different ways to get blood flowing through these stiff joints.

    1. Stand Up

    One of the easiest ways to stretch out your legs is to stand up. Standing requires a little bit of practice, but it’s pretty easy to do. Not all motorcycles allow the rider to stand on the pegs, and some of my cruiser riding friends have a hard time doing it. But, on any standard bike, sport bike, or dual sport, it can be done.

    To stand up, start by placing your feet firmly on the pegs to make sure you have a secure platform. Lean forward until you feel your weight balanced over the pegs. Then, keeping your hands steady on the handlebars, push yourself to a stand. Keep a light grip on the handlebars and keep your weight even on both foot pegs.

    If you place a little bit of pressure on one foot peg, you’ll notice that it causes the bike to lean and go in that direction. This is a common steering technique for dirt bike riding, and you an use it to keep the bike going in the right direction.

    To add some extra stretching while standing, bend your knees slightly and ride for awhile with your quads engaged, like a racehorse jockey. This will get blood flowing into your muscles and knees.

    Next, straighten your legs and lean your hips forward as much as you can. This will stretch out the hip flexors. Don’t forget to give your glutes a good squeeze to keep your tooshie from going numb.

    If you’ve never ridden while standing up, start by trying it on a long piece of straight highway with little to no traffic. As you get more comfortable with it, you can stand while riding the twisties. Use your foot pegs to initiate a turn and let you bike flow through it. Sitting back down is easy. Just sit. Simple as that.

    2. Highway pegs

    Installing additional footpegs on the front of your motorcycle allows you to stretch out a leg, like a recliner for your motorcycle. The pegs can be installed on the bike’s frame, or on the engine guard. The ideal position is far enough away so that you can rest the heel of your boot on the peg. But, any change of position will be beneficial.

    Highway pegs come in a lot of styles and sizes. Some fold up and some don’t and they are much more popular on cruisers and touring bikes, but you can easily install them on sport bikes too. If you ride cruiser with foot plates or floor boards, they sell a heel hooker that attach to the front of your floor board allowing you to hook your heal and stretch your leg.

    3. Rest your Leg on the Passenger Foot Pegs

    Standing and highway pegs will help stretch your knees, but sometimes your hips need a little extra stretching. That’s where your rear foot pegs come in handy. This method is not going to work on every motorcycle, but I’ve done it on all three motorcycles I’ve owned, SV650, Yamaha FJ1100, and I do it on my CB500X. Also, saddle bags can get in the way so this method is not 100% perfect on every bike. But, if you can do it, the stretch in the hip flexors feels great.

    To get your foot on the rear peg, I suggest doing one leg at a time to maintain good control over the bike. Do it on a stretch of highway where you don’t have to shift or maneuver around. Make sure your rear pegs are down before you leave, because it’s not easy, and it’s dangerous, to try and reach back to lower the pegs. Scoot back in the saddle, lean forward and swing your foot back and up until it hooks onto the peg. You have to do this blind so it may take a few tries to get your foot up there.

    When you do, your leg will be bent and you’ll get a good stretch in your thigh. To increase the stretch, roll your hip forward and you should feel it more in your hip flexors. Repeat the stretch on the other leg.

    How to Stretch Your Arms and Shoulders

    While riding, your arms are in one position for long periods of time. This can cause a lack of blood flow into your hands and sometimes you’ll experience numbness in your hands or fingers. A forward riding position will also put pressure on your wrists and shoulders. So, how do you keep the blood flowing? Here are a few stretches you can do for your arms and shoulders.

    1. Ride with one hand for a while. We’ve all seen the sport bike riders do this. It’s a cool, chill way to ride and let that arm relax a bit. Just rest it on your thigh for a while. Ok, it’s not just sport bike riders, we all do it.
    2. Get a throttle lock so you can relax your right arm too. A throttle lock is designed to prevent your throttle from snapping back. It is not the same as cruise control. It’s really convenient for resting your throttle hand for a minute or two. Use it only for short periods of time and when traffic is light as it will greatly reduce your reaction time if you have to stop quickly.
    3. Stretch your shoulder by placing your arm behind your back and press it against the small of your back. At the same time, pull your shoulder blade down and your shoulder back. You should feel a stretch in the front of your shoulder muscles and a slight stretch in your upper chest. Hold this for 30 seconds to a minute. Do the same on with the other arm if you have a throttle lock.
    4. Another way to stretch your shoulders is to extend your arm and rotate it in a windmill fashion. Yeah, you’re going to look like a dork and you might get some looks, but who cares. This will get blood flow into your rotator cuff and to all the connecting tissues in your shoulder joints as well as all those little muscles that stabilize your shoulder. Do 5 or 6 rotations in both directions, in both arms. You really need a throttle lock. I recommend this one on Amazon.

    How to Stretch Your Back

    Stretching your back while in motion is a little more difficult and you won’t get as good a stretch as you will off the bike. But, there are still a couple things you can do that will make your back oh so good.

    A wonderful way to stretch your back and spine is to do a common yoga pose called cat-cow. Usually this pose is done on your hands and knees, but you’re going to do a sitting variation of it while on the bike, of course.

    Here are the step to take for your cat-cow pose while on the bike, zooming down the freeway. If you’ve ever done yoga, you’ll know that tilting your head up and down is an integral part of these poses, but, while on your motorcycle, you’re going to have to keep your head upright and eyes on the road.

    1. Start in an upright position, back straight, hands relaxed on the handlebars and feet firmly on the foot pegs. Take a deep breath in.
    2. Move into the cow position first. While exhaling, roll your shoulders up, back and around, then, with your shoulders down, arch your back as much as possible, allowing the top of your pelvis to roll forward, and press your chest forward. Hold this pose for about 10 seconds. That’s a lot of steps, but it should be one fluid motion. Practice while your bike is parked in the garage. You’ll feel it.
    3. Move into the cat pose. This one feels really good. Take a deep breath in. Then, while you exhale, in one fluid motion, allow your shoulders to move forward and your chest to collapse. Push your navel back, into your spin and push your tailbone forward. Feel your spine stretch. If you feel some cracking and popping in your back, you’re doing it right.
    4. Relax and return to an upright riding position and take a couple of deep cleaning breaths. You can repeat these poses a couple of times. The combination of the breathing and stretching really helps reduce rider fatigue.

    There is one more stretch for the back that you can do, but it’s a little more dangerous as it involves twisting, so be extra cautious when doing these.

    1. We’ll call this one the shoulder twist for lack of a better name. Starting in a relaxed riding position, lean slightly forward and drop one shoulder down and to the inside twisting the back slightly. Repeat this motion on the other side. Do this three or four times on each side to stretch the back and shoulders.
    2. For this one, you’ll be reaching back with one hand. Start in a relaxed riding position, take your left hand and reach way back, twisting your back as your reach. Remember to keep your eyes forward because you’re still in motion. Try to twist your lower back as much as possible without upsetting your riding. Repeat this motion on the other side.

    I realize that through these exercises you’re not going to get as good a stretch as you would when you’re off the bike, but, they can bring you a lot of relief to your aching bones when you’re on the road and in between stops.

  • Outdoor Motorcycle Storage: How To Store A Motorcycle Outside

    Outdoor Motorcycle Storage: How To Store A Motorcycle Outside

    Reading Time: 10 minutes

    Not every motorcycle owner has the luxury of outdoor motorcycle storage to park their bikes safely in a cozy garage. Some riders have no choice but to park their motorcycles outside in the elements. If this is you, then you have more things to be concerned about, such as security, hot summer sun, rain, snow or winter cold. In this article, I’ll talk about how to store your motorcycle outside in winter, summer, short term and long term.

    A motorcycle shed is a storage shed that can be portable, indoors or outdoors. Motorcycle storage sheds that are indoor offer ample facilities to protect the bike from external threats. However, an outdoor motorcycle shed may not be as safe. Steel reinforced walls are a great option for outdoor parking of motorcycles. It is a maintenance free way to keep your motorcycles anywhere. A bike shed can solve all motorcycle storage solutions. It is essential to determine the storage capacity for the bike and the space to park. Storage buildings have flexible plans for safe motorcycle storage options.

    A motorcycle storage shed is not a luxury everyone can afford. Motorcycle storage is not a big deal but there are external threats always. A motorcycle cover is sometimes the maximum a rider can get than finding storage sheds. The best motorcycle storage shed is your own garage. For riders, who have motorcycle storage sheds of their own are the luckiest. Motorcycle storage tent is given on rent to riders. A motorbike shed helps to protect your motorcycle from the different weather conditions. The best motorcycle storage sheds are usually indoors. A storage unit in the house can be converted into the best motorcycle storage space. An outdoor storage shed should be such that it protects the motorcycle from natural light. A motorcycle cover is a portable shed that allows riders to park their bikes safely outside. A motorcycle shelter is a public area for riders to park their bikes. Since all motorcycle owners cannot find versatile outdoor storage, bike storage garages that house multiple bikes are the safest option from harsh weather conditions. Synthetic plastic polymer bike shield covers also serve as a great alternative. A bike capsule with ventilation windows is another great choice for riders with a budget. Steel frame sturdy outdoor unit is now available for parking bikes safely outside. UV resistant steel panels protect the motorcycle from extreme weather and save garage space. Heavy polyurethane coating is used to make a motorcycle tent. These portable units are a long term storage solution.

    Parking Outside During Summer

    motorcycle summer parking

    Summertime is riding season and, for most motorcyclists, the bike doesn’t stay parked in one spot for too long. But, the summer heat and sun can take their toll. So, here are some steps to take if you have to park your motorcycle outside during summer.

    Keep it out of the sun. Prolonged direct sunlight can fade the paint. The color on plastics will fade more quickly and will often fade to a different color than metal parts. Give your bike an uneven color. Also, plastics can become dry and brittle when exposed to sunlight and they will begin to crack. You may not see it right away, but when you try to remove a plastic cover, it is more likely to break if it is brittle. The seat cover will also take its toll from exposure to the sun and will begin to crack and peel.

    So, try to park your motorcycle out of direct sunlight. Under a carport, a covered porch or patio, or under a breezeway is ideal.

    Parking under the shade of a tree is also a good choice. However, you will have to deal with other problems left by birds or the tree itself. Bird droppings are nasty and gross and can destroy your paint. During spring and summer, most trees are blooming and many will drop fruit or seed pods, not to mention sticky sap.

    A motorcycle cover is your best bet if you park under a tree or if you have no shade available. Purchase a cover with UV protection, one that is waterproof, and made specifically to fit the shape and size of your motorcycle.

    Arguably you could throw a tarp over it, or a cloth cover such as an old sheet. But, even if you live in a dry, hot climate, you want to be prepared for the unexpected summer rainstorm. And, what if you throw a sheet over your bike thinking it’s good enough, and the sprinklers come on during the night? So, a cover specifically for a motorcycle is your best bet. Here is our top recommended cover.

    Parking Outside During Winter

    motorcycle winter garage parking

    During the winter, riders are more likely to store their motorcycles for weeks at a time, if not all winter long. Probably the biggest concern, depending on where you live, is protecting your bike from rain and moisture. Just like in the summer, it’s best to park your motorcycle under a structure that will protect it from rain.

    Additional protection from a cover is also recommended. If you know your bike is going to get rained on, choose the right cover for it. Make sure it is waterproof. It’s also important to purchase a cover that fits your bike properly. For example, if your cover is too big for your bike, it can sag in the middle and rest on the seat and tank. Add some rain to this scenario and the cover could become saturated. Now, you’ll have a wet cover sitting directly on your bike’s paint which could cause discoloration even within a few days.

    Another winter concern is wind. If you use a cover, you want to do what you can to prevent wind from blowing the cover off. So, make sure the cover is secured over both front and rear tires, and use the cover’s bottom straps to secure it to the bike.

    What if the temperature is below freezing? Will your gas freeze? No. Don’t worry about your gasoline freezing. The freezing point for gasoline is somewhere below -40 degrees Fahrenheit. Even the average arctic winter temperatures don’t drop quite that low.

    Over-inflate your tires. When the outside temperature drops, the air inside the tire will compress causing the tire pressure to lower. If you do any riding in cold weather you will want to check your tire pressure to make sure it is up to the recommended PSI. It is often necessary to add more air to your tires for the winter.

    Storing your motorcycle outside requires more than just protecting it from the elements. Theft can be a serious problem. There are several things you can do to help keep your motorcycle home where it belongs.

    Cover it. Often covering your bike will be enough to discourage a bike thief by taking away the temptation or adding a level of inconvenience, but a cover alone is not going to be enough.

    Lock your motorcycle. Ideally, you should lock your motorcycle to an object, like a post, or an anchor. Kryptonite makes an anchor that secures to the ground with concrete anchor bolts and it has a low profile when not in use. They can be found on Amazon. Check the current prices here.

    If you’re not able to install an anchor, then use other locking methods. A disk lock is a good start and many come with motion sensor alarms for added protection. Some motorcycle covers come with grommets where you can insert a U-lock through the cover and through the front wheel. Also, a heavy chain with a good lock, like this one, is an excellent investment.

    In addition to covers and locks, you can also take the extra step of parking your motorcycle in a well lit area. If you live in an apartment complex, it’s actually better to keep your bike parked in an open area where people can see what’s going on around it.

    Parking your bike in a hidden area is not always a good idea. Keeping it hidden from view might deter the opportunistic thief. But, the thief who plans ahead to steal your bike, would love to do his work out of sight.

    Long Term Motorcycle Storage

    motorcycle garage parking

    Storing your motorcycle for longer than 30 days involves some additional steps whether you store it in winter or summer, inside or outside. Here are the steps you should take whenever you store your bike for more than 3 months, 6 months, or even a year.

    Wash the Bike Before Storing

    Wash the bike before you store it. Get all the hidden chain gunk and road grime out of all those hidden areas and dry your bike thoroughly after washing it.

    Lubricate!

    Lubricate your chain and apply anti-corrosion oil to any metals that are more susceptible to corrosion, such as chrome. marine grade vinyl conditioner to prevent it from drying out during storage. Good lubrication will prevent moisture from penetrating and rust forming.

    Fill up the Gas Tank

    In just a matter of a few months, gasoline will begin to deteriorate, causing build up of gunk. Once that build up hits your carburettors, your engine could start to have problems. A lot of people say you should empty the gas tank prior to long term storage, but condensation and varnish can still build up inside the tank. Instead, fill the tank as full as possible and use a fuel stabilizer, like Sta-Bil. This additive will keep the fuel fresh and prevent corrosion. When long term storage is over, you’re not as likely to have any fuel problems when you start it up for the first time.

    Tender the Battery

    Remove the battery from the motorcycle, or at least disconnect the terminals. Keep the battery plugged into a battery tender, or trickle charger to keep it fully charged while the bike is not being ridden.

    Drain the Carbs

    If you have a fuel switch or petcock then you can drain the carburetors dry. Turn off the fuel and run the motorcycle until the engine runs out of gas. Draining the carbs dry will help prevent corrosion from building up over time.

    Plug the Exhaust Pipe

    Small critters, like mice, are always looking for dark, cozy places to make a home, so it’s a good idea to plug up any holes in your exhaust. Often tape will not be good enough. Moisture could cause the tape to come off, and any determined mouse can tear right through it. Instead, use something plastic, or rubber to insert into the pipes.

    Protect your wheels

    Ideally, you should put your motorcycle on its center stand, or on front and rear stands. If you can’t, then inflate your tires as much as possible according to the manufacturer. This will help prevent flat spots from forming. Invest in some wheel covers and keep them on the bike during long term storage. You can find a good set here on Amazon.

    Keep it Covered

    Again, a cover is an important part of long-term storage and you may want to consider a cover that is a bit more permanent.

    The Bike Shield shell style motorcycle shelter.

    Shell-style covers, or motorcycle shelters, come with a rigid frame that folds over the bike like a clam shell. It’s like a mini-garage for your motorcycle. The solid frame will protect it from wind and the waterproof material will protect it from the rain. They often come with vents to prevent condensation inside the shelter. You can also lock the shelter closed to prevent theft. The Bike Shield is an excellent choice in motorcycle shelters.

    To wrap it all up, it looks like the most important thing to do when you store your motorcycle outside is to use a good, quality cover designed specifically for your bike. In winter, summer, long term or short term, covering your bike will provide you with the protection you’re looking for.

  • Motorcycle Chain Cleaning: Is WD 40 Motorcycle Chain Good Or Bad?

    Motorcycle Chain Cleaning: Is WD 40 Motorcycle Chain Good Or Bad?

    Reading Time: 10 minutes

    WD 40 seems to be a regular staple in most American garages and when I was a new motorcycle owner, it was the first thing I reached for when I needed to lube my chain.

    Proper chain maintenance extending o ring chain links increase the shelf life of a roller chain. Inner chain links can be damaged if WD 40 is applied to the motorcycle. But I have since learned that there are much better options for chain maintenance. But, some still ask the question.

    So, can I use WD 40 on my motorcycle chain? 

    It is highly recommended that you do not use Multi-Purpose WD 40 on the chain of your motorcycle. The WD stands for Water Displacement, and it is designed to disperse water away from metal parts to prevent rust.

    It is not designed to be a lubricant and using it on your o ring chains can reduce the life of your chain in comparison with using lubricants designed specifically for motorcycles.

    wd-40 photo

    To understand how chain maintenance works and why it’s not the best solution to clean the chain links of the motorcycle, you need to understand the makeup of a chain. Motorcycle chains generally come in two types; with rubber seals or without rubber seals.

    Both these types will need a two-part cleaning process that involves a clean and lube. But let’s start with WD 40 and why it is not a proper chain lube product to use.

    WD 40 Motorcycle Chain Cleaning On Different Chain Types

    Chains with No Seals

    Motorcycle rear chain

    If you are using an all-metal chain, one with no seals, then you can use just about anything to clean away the dirt and grease. Heck, you could use a pressure washer if you really wanted to.

    But, be extremely cautious about using products like gasoline or camp stove fuel as they are extremely volatile and the fumes can combust with the slightest spark. POOF…goodbye eyebrows. Kerosine is a much less dangerous cleaning solution and the fumes are less harsh, but still should be used in a well-ventilated area.

    Powerful engine degreasers are ok to use if your chain is extremely dirty and grimy. After you clean a roller chain or an o ring chain that is all metal, you can give it a quick rinse off with water. Before applying lubrication, dry your chain with a towel to remove as much moisture as possible.

    If there is any argument for using WD 40 multi-purpose on your chain, this would be a good time. It will help displace leftover water inside the pins and rollers. Wipe it clean again, and apply long lasting lubrication formula or wax as your final step. Do not use WD 40 as a lubricant.

    Chains with Seals

    Texture of roller chains use for background

    Some motorcycle chains are built with a tiny rubber ring placed between the plate and the bushings. They come pre-lubricated from the manufacturer and the seals are designed to keep the lubricant in place. The seals come in two types, O-rings and X-rings.

    They function slightly differently. O ring chain seal by applying pressure to them, and X-rings seal by twisting as the chain is in motion. Some will argue that X-rings are better, but they serve the same purpose, which is to prevent the original lubrication from leaking out.

    Using heavy solvents or harsh cleaning methods can deteriorate the seals, and eventually cause the original lubrication, which was designed to be permanent, to leak out, reducing the life of your motorcycle.

    So, one of your goals in motorcycle chain maintenance is to protect the ring seals and use a cleaner and lubricant that is designed to maintain these seals rather than destroy them. WD 40 was not designed for such a purpose and so it’s best to keep away from your motorcycle chain.

    Best Motorcycle Chain Cleaner

    Close up of man holding chain during repair of motorcycle

    To clean your motorcycle chain you need something that is strong enough to break away the grease, dirt and road grime, but gentle enough that it won’t erode the seals. Some de-greasers are much too harsh for this job. Here’s a list of products you should and should not use to clean motorcycle chains.

    Good ProductsBad Products 
    Kerosine
    Motorcycle Chain Cleaner

    Gasoline
    Camp stove fuel
    WD-40 Multi-Purpose
    Engine Degreaser
    Any industrial strength degreaser

    So, why not use engine degreasers on your motorcycle chain? While they are perfect for eating away stubborn grime like the stuff found on your car’s engine, they will also eat away at the rubber seals and your chain won’t last as long as it’s designed to last.

    Since we are on the topic of WD-40, they do make a specialized line of motorcycle chain maintenance products that are designed to clean and lube your chain without damaging the seals. I’ve never used their products so I can’t speak to their effectiveness.

    Choosing a brand of chain cleaner is a personal choice and, I often will use Maxima chain cleaner on my bikes. But, ask just about anyone who rides and maintains their own bike, Kerosine is arguably the best bike chain cleaner around. It’s cheap, safe, and works great.

    Best Motorcycle Chain Lube

    There are two different types of chain lube, oil, and wax.

    They both work effectively at protecting your chain seals but, since they have different properties, they behave differently and are designed for use in different conditions.

    Oil vs. Wax.

    This is a common argument among motorcycle owners and both lubricants will do their job at protecting your chain, rear sprocket, and seals. Your best bet is to experiment with both conventional lube types to see which one works best for your riding style (dirt bike, commuter, track) and for the conditions in which you ride (rain, dry weather, mud). Just make sure there isn’t any excess lube build up which can happen with both oil and wax lubes.

    How To Lubricate Your Motorcycle Chain?

    black and silver bicycle wheel

    In either instance, you should apply it properly to make sure it seeps into and around the seals and rollers. Ideally, apply the lube to a dry chain. If you use an oil-based lubricant, the chain can be cold. Spray the lube onto the inside of the chain and wipe away any excess oil that may be dripping off. Let the bike sit for 15 to 30 minutes before your ride to allow the oil to penetrate.

    The same instructions apply to chain wax. Apply it to the inside of a clean, dry chain and allow it to sit for about 30 minutes so the wax can penetrate between the pins and rollers. If you are going to re-apply the wax after riding, do so when the chain is still warm from a ride. This will help be wax penetrates into the chain faster.

    Personally, I ride a standard motorcycle that I use mostly for street riding in fair weather conditions and for occasional dirt roads. I try to avoid riding in the rain and doing water crossings so, you could say that I ride mostly in dry, and dusty conditions. That way my rear wheel & chain isn’t exposed to too much gunk.

    I have been using chain wax for a few years and I’m very happy with it. However, I have found that if I overapply the wax, there will be some fling, so I’m careful to not use too much. But, I’ve never had a problem cleaning it off or having it gunk up as some people have expressed.

    I’ve used oil-based lubricants in the past, but find there is a lot more flinging of excess oil when I ride and I tend to find more dirt and gunk on my swing arm and chain guard when I use oil-based lubricants. That’s one reason I switched to wax. Both options are solid choices for motorcycle chain maintenance.

    Maxima is the brand of chain cleaner and chain wax that I’ve been using for several years and I am more than happy with it. There’s a nice bundle of Maxima products on Amazon here. Or, you can usually find them at most local motorcycle shops.

    If you live in a humid climate, such as on the coast where rust is more of an issue, I’d recommend using chain wax instead of oil. The wax forms a good seal protecting the chain from moisture. Chain tension and chain slack also play an important part in how often motorcycle chain needs to be cleaned.

    Related Questions

    close-up photo of teal and black motorcycle

    Are Chain Oilers a Good Idea?

    An automatic chain oiler system is a mechanism that is installed on the motorcycle that adds a constant supply of oil, a drop at a time with an adjustable flow rate. Their claim is to increase your chain life. If you hate lubing your chain, if you live in a wet climate, or, if you are planning an extended trip where chain maintenance will be more of a hassle, a chain oilers would be a viable option.

    How often should I clean my chain? 

    motorcycle chain

    This will depend on what conditions you are riding in. For normal riding, motorcycle chains should be visually checked every few hundred miles. A quick wipe down before lubrication is often all it will need, but if it’s visibly filthy and gunked up, then you know it’s time to clean a motorcycle chain.

    Cleaning your motorcycle chain & looking after your drive chain is key to proper motorcycle maintenance and can actually save you money and hassle in the future! I’ve also written a great article about how often you need to replace your motorcycle chain.

    How often should I lubricate my chain?

    You should apply a small amount of lubrication every 300 to 600 miles or after you clean it. This rule is standard for normal riding conditions. But, if you ride in harsh weather, live in a humid climate, you may have to lubricate it a bit more often. Motorcycle chain maintenance such as lubricating your chain is a really important habit to follow to ensure the proper running of your bike and helps you avoid future motorcycle repairs.

    Best Chain Maintenance Gadgets

    motorcycle clean chain

    The Grunge Brush. A must-have in every motorcycle garage. Plastic bristles are more gentle on O-ring seals. A three-sided brush wraps around the chain.

    Tirox 360 Degree Brush. This brush wraps around the entire chain making contact with every surface. Being able to brush the entire chain like this is a game-changer.

    The Grease Ninja. This chain oiler is a cool little gadget that attaches to your favorite can of chain lube. It sits on top of the chain while applying an even flow of lube to the most important parts of the chain. Avoids overspray. Only available on their website.

    Center Stand – A center stand for your motorcycle make it really easy to do motorcycle repairs, maintenance and in this instance cleaning your motorcycle chain.

  • Recommended On-Board Motorcycle Tool Kits

    Recommended On-Board Motorcycle Tool Kits

    Reading Time: 11 minutes

    Whenever I’m planning a motorcycle camping trip I always make sure I have a set of tools with me, as well as other small items, so that I can make minor repairs while on the road. In the past I would throw a handful of tools in the cheap plastic bag that came with my motorcycle, but that bag didn’t last long. So, it was time to look for a good tool roll.

    While shopping for a simple tool roll I found so many different options for storing tools and other repair items, so I thought I would share what I found here.

    Features to look for in a tool roll

    Depending on where you mount or store your tool roll, you’re going to want to look for certain features. If you mount it on the outside of your bike, especially up front on the forks, then you’re going to want something that is weather resistant or waterproof if you plan on riding in the rain.

    Do you plan to carry sockets? Then choosing a bag with individual elastic bands for sockets would be a good choice. An inside zippered pocket is very handy feature. It’s perfect for carrying small, loose items such as spare tubing, spare wire, a roll of tape, etc.

    Molle straps on the outside of the bag will give you more mounting options. A good tool roll should include top and bottom flaps that fold over your tools to protect them from slipping out when the bag is rolled up. It also provides you with a work surface when the bag is unrolled and unfolded.

    A good tool roll will include durable stitching, often double stitched at the seams. Look for good, thick materials, especially if you opt for a canvas bag. There are some very inexpensive canvas tool rolls on the market, but you often get what you pay for as these cheaper bags will deteriorate rather quickly.

    Another feature to look for is the mounting method. If you choose to strap your tool roll to the outside of your motorcycles, on the fender, on the forks, or onto one of your panniers, look for quick and easy mounting options. Quick release clips are nice to have.

    Decide What to Put in your Tool Roll

    Before decide on a tool roll you first need to decide what you are going to put in it. This will help you determine what size you need. I recently wrote a post about repair items to take with you on a motorcycle trip, you can read it here.

    You can start with the tools that came with the motorcycle from the manufacturer (if you have them). This set usually comes with a few of the proper size wrenches, a screwdriver with multiple points, maybe some pliers, and a couple allen wrenches.

    Example of OEM on board tool kit that usually comes with a new motorcycle.

    Once you have those standard tools in your bag, decide on what extra tools or repair items you will want to include, such as tapes, wire, fuses, clamps, first aid items, a rag, etc. Choose which tools are “must haves” and which tools are “nice to haves”. Once you have your set of tools ready, you will know more about what size and type of tool roll to choose.

    If you’re starting from scratch there are a few good choices for pre-stocked tool rolls. The quality of the tools in these sets are certainly not the highest quality available, but, then again, they are there for emergency repairs rather than everyday use.

    Pit Posse Starter Motorcycle Tool Roll

    The Pit Posse Motorcycle Tool kit is an excellent starter kit. It comes in a standard set for American built motorcycles, as well as a metric set. The nice part about this kit is the zippered pouch for screws and small, loose items. And, it’s very affordable.

    Find the current price of the Pit Posse Tool Roll HERE on Amazon.

    The basic, no frills tool roll.

    Often a simple, no frills tool roll is enough for most riders who simply want to stow away a small set of tools into their luggage or saddle bags. These tool rolls have no fancy snaps, straps or mounting systems and are simply a good place to keep your tools organized and easily accessible.

    Materials can vary from canvas, to leather, to ballistic nylon. The nylon bags are durable, water resistant and will last a long time if not abused too much. Choose a bag with reinforced stitching in areas of stress, like the tops of the pockets.

    Here’s a great tool roll that will hold just about anything you need for roadside repairs, or basic maintenance when you’re on a long tour. Fill it with your motorcycle brand specific tools and additional necessities.

    Find the current price of the 32 Pocket Tool Roll on Amazon here.

    Canvas Tool Rolls

    A lot of people like the look and feel of waxed canvas. It has that classic vintage look and gets more rugged looking as it ages and with more use. Look for the same type of features in a canvas tool roll than you would with any tool roll such as strong seams, a small pocket, fold-over sides and multiple mounting options. 

    Canvas tool rolls have that old style, military look to them, especially when they have leather accents and buckle straps. Canvas is a heavy, cotton material and bit more flexible than leather or nylon, which will make it easier for your bag to roll up, however, it is not waterproof or weather resistant. Waxed canvas will provide more protection against the elements and it makes the material more water resistant. 

    Burly Brand Voyager Canvas Tool Roll.

    For a top-of-the-line, vintage-looking canvas tool roll, I recommend the Burly Brand Voyager tool roll, manufactured and sold in the USA. It’s very durable, comes with quick release clips cleverly concealed by leather straps, and a fold-over flap to keep your tools in place. Inside it features 8 pockets of varying sizes and a zippered pocket. The strap system that wraps it up can also be used to mount the bag to your bike’s handlebars or front forks. It can also be stored inside your saddlebags if you like.

    See the latest price of the Burly Brand Tool Roll here on Amazon.

    Fork Mounted Tool Bags

    If you ride a cruiser or a vintage-style naked motorcycle instead of a touring motorcycle, then it’s likely that you have room to mount a tool bag on the front forks either above or below the headlight. Front fork tool bags are often an expression of style and come in so many different materials and looks.

    Leather tool pouches come in a bunch of styles and designs and choosing one depends on your personal taste. You may want clean black leather or a cool brown vintage leather look. Or maybe you want one with buckles, studs, and fringe. Whichever you choose it should be an extension of your motorcycle style and your riding style.

    Fork mounted tool bags are, in most cases, simple bags or pouches. They don’t often have an inside pocket and they don’t come with handy sleeves for every wrench and socket. On the upside, they are conveniently located and you don’t have to unload all your other gear to get what you need.

    One thing you need to consider when choosing a fork-mounted pouch is exposure to the elements. The bag will be right up front bearing the brunt of whatever the road throws at it. Sun, wind, road grime, and rain (if you ride in the rain) will take their toll. Simple tool pouches are not usually waterproof, so consider that when choosing a bag.

    Fork mounted bags can also be mounted on a sissy bar or behind the passenger backrest. But, keep in mind how you will mount it if you’ll be carrying luggage, like a sissy bar bag, which might interfere with the tool bag.

    You should look for a bag that is real leather instead of vinyl, has strong double stitching where it counts and comes with easy mounting methods.

    Fender Mount Tool Bags

    When considering a fender-mounted tool kit you have to keep in mind that it will be out in the elements. Fender mount tool bags are most often found on dual sports and dirt bikes but don’t discount them if you have a street bike or a light dual sport (that is, a bike that’s 80% street and 20% dirt). There are often other mounting options other than the fenders. You have to ask yourself if you want something waterproof.

    Fender-mounted tool bags are most popular with dirt bikes, dual-sport bikes, or enduro motorcycles. These bikes have the fender style necessary to accommodate a tool bag. The bags use clips and straps to either wrap around or grasp the edges of the fender.

    Fender bags are super easy to install and remove. Place the bag on top of the fender as close to the headlight as possible. Place the 4 gutter hooks each under the edges of the fender, and tighten the straps. Once tightened, they stay in place really well and won’t affect your riding at all.

    When choosing a fender mount tool bag, you will need to consider the weight of the loaded bag. A typical dirt bike fender will not be sturdy enough to hold a heavy bag of tools. Most dual sport riders use the fender mount bags to hold an extra tube, some tire irons, and a few other things, so keep that in mind when deciding on this style tool bag.

    Here are two choices in fender mount tool bags, both are excellent quality.

    Giant Loop Fender Tool Bag

    Giant Loop: While the Giant Loop bag is designed to be installed on a fender, the molle straps on the outside of the bag allow you to mount it in other places on the bike. The bag is waterproof and is big enough to hold an extra tube, tire irons, and quite a few other items. Check out the latest price on Amazon.

    Wolfman Enduro Fender Bag

    Wolfman Enduro Fender Bag: The wolfman fender bag is quite a bit smaller than the Giant Loop and its mounting design is limited to strapping it to a fender. But, its small size may be just what you’re looking for if you need a little more space to keep a few items. Check out the latest price on Amazon.

    Tool Tubes

    Tool tubes are a very clever and convenient way to carry not just your tools, but a lot of other items including fuel bottles. They are more popular among adventure riders and they require a hard surface to be mounted on.

    Riders most often mount them to the inside of their side pannier frames in that empty space between the frame and the motorcycle. Others mount it to the rear of their hard panniers. And other riders find they need to be more creative and have found ways to mount it to the rear fender or other parts of the motorcycle.

    A lot of people like to build their own DIY tool tubes made from PVC pipes. If you’re the DIY type and enjoy a good project, then this might be a viable option for you. But, if you’re not up for building your own, there is an excellent tool tube out there for sale.

    Tool tubes are waterproof. However, I should note that there is often a very small hole to allow for air to escape when the pressure changes as you change altitude. Still, the hole is so small, it won’t likely let water in and you can orient it in such as way that rain will not drip on it.

    DrySpec Tool Tube:  This is arguably the most popular tool tube on the market. It is large enough to hold plenty of tools, or it will hold a 30 oz. size MSR fuel bottle. It comes with a complete mounting kit that even includes the proper size drill bit.

  • 12 Ways to Carry a Spare Helmet on a Motorcycle

    12 Ways to Carry a Spare Helmet on a Motorcycle

    Reading Time: 6 minutes

    Every once in a while I will take a friend out riding with me on the motorcycle, however, my friend, whomever it may be, doesn’t always have a helmet. So, I have to sometimes carry the helmet with me. My motorcycle has a top case which makes it easy to store a spare helmet. But, I started thinking about all the other ways you can carry a spare helmet and I came up with 12 of them.

    Cargo Net

    A cargo net is a woven net made of elastic cords with multiple hooks around the edges. They come in a variety of sizes with different style hooks, either plastic or metal with plastic coating; like a bungee cord. They are easy to use. You simply set the helmet on the pillion seat, throw the cargo net over it, and secure it to the motorcycle using the hooks. For a helmet, it’s best to get a smaller size net with smaller weave so it holds the helmet nice and tight. Make sure the strings of the net are placed evenly over the helmet so it doesn’t slip out. I’ve been pretty happy with this one from Amazon.

    Modified Cargo Net

    Some riders are not too crazy about placing hooks on their motorcycles and risking their paint or chrome getting scratched. One solution for this is to take the hooks off the cargo net. Remove the seat and hook one side of the cargo net under the rear seat and secure the seat back on the bike. Next, place helmet on seat and stretch the net over the helmet. Hook the other sides of the net at various points on the bike such as, around the rear foot peg, or under tail subframes spools. Potential problems with this method would be finding something to secure each point and will depend on what your motorcycle is equipped with.

    Hook Under Passenger Seat

    A lot of motorcycles come with helmet hooks under the passenger seat. There are a couple of ways to use this hook, but the best way is to hook the D-ring on your helmet strap over the hook, rest your helmet on the side of your bike, then secure the seat. A couple pro tips: the pull tab on one of the D rings will make it easier to get the ring on the hook. Also, be aware of where the helmet rests. If you’re riding, the helmet will likely move around and scratch your paint, so, consider placing a cloth underneath if necessary.

    Strap it to a Back Rest

    If you’re motorcycle has a back rest or sissy bar then you have a great place to secure an extra helmet. The easiest way is to simply secure the strap around a back rest post, however, the helmet is likely to move around alot while riding if you can’t get it tight enough. So, consider the additional security of a bungee cord or two.

    Strap to Grab Bar

    If your motorcycle has rear grab bars or hand holds, you could attach the helmet strap around it. Try and get it as tight as possible to reduce movement while the bike is motion. Also be aware that it could be resting on your bikes body work and you run the risk of scratching your paint. Of course, this all depends on how your motorcycle is designed. One last thing, make sure it’s not hanging so low that it touches your exhaust pipe.

    Helmet Carrier Strap

    Caddystrap, available on Amazon, is a nylon strap with two D-rings at one end. To use it, remove your rear seat, lay the strap across the bike, and secure your seat on top of it. Now, place the helmet on top of the rear seat with the chin strap together and tight. You can run the Caddystrap around the helmet’s chin strap, then pull it tight using the two D-rings.

    Elastic Helmet Strap

    This strap is similar to a cargo net, but it only has two hooks. Four strong elastic straps are gathered together and attached to a hook at each end. Secure the hooks to whatever is available on your motorcycle, such as grab handles or rear foot pegs. The four individual straps can be arranged to secure the helmet. The position of the straps is adjustable so you can arrange the straps to secure different helmet styles. You can pick them up on Amazon here.

    Carry it on Your Arm

    If you have absolutely no other place to carry a spare helmet while you ride, you could always slide it up on your arm. Hook the chin strap together, and slide the hemet up to about your elbow, like a giant elbow pad. This method would be ok for short distances, but I can’t imagine it’s the safest option. While it probably won’t impede your ability to control the bike, if you were to crash and land on that arm, I’d hate to imagine the bruises you’d have, if not worse. So, use this method at your own risk.

    Backpack

    Some motorcycle backpacks come equipped with a special pocket to carry a helmet. It’s a good thing that today’s helmets only way a few pounds so weight would not be an issue, however, the bulky size of a full face helmet seems a little awkward. But, I’ve never carried a helmet in a backpack while riding so I really can’t say. But, it’s definitely a viable method for transporting a spare helmet.

    Oxford Lidlash Helmet Bag

    lidlasher

    The Lidlash helmet bag is made by Oxford Products, a UK company that sells a huge variety of outdoor gadgets including cool motorcycle stuff. Basically, the product is a bag with straps. You place your helmet in the bag and the straps fit under the rear seat, securing the helmet to the top of the seat. They can be found in the US at lockitt.com, or, if you live in the UK, go straight to the Oxford products website.

    Saddle Bags

    This one’s easy. If you have saddle bags large enough to fit a helmet, you’re problem is solved. Whether your bags are hard panniers, leather, or canvas saddle bags, as long as it’s a big enough space, you’re good to go. However, if you have smaller saddle bags and you are carrying a full-face helmet, this might not be the best solution. I use the SWMotech Blaze saddlebag system and, unfortunately, the opening on the top is not nearly enough to fit a full-face helmet.

    Tail Bag

    When I bought my Honda CB500X used it came with a Givi hard tail case. I’m not too crazy about the way it looks so I leave it home if I don’t need it. But, I have to admit, it’s the perfect place to stow away a full face helmet. Plus, if I’m carrying a passenger, it serves as a nice back rest. So, a tail bag or hard shell top case is a great way to carry an extra helmet. The added benefit of a hard shell case is security, as it can be locked.

    So, there you have it. There are plenty of ways you can carry a spare helmet if you need to. So, unfortunately, if you don’t want to ride with a passenger, you can’t use the helmet excuse.