Author: Joel Hathaway

  • How to Pack for a Motorcycle Camping Trip

    How to Pack for a Motorcycle Camping Trip

    Reading Time: 8 minutes

    I’ve been on motorcycle camping trips at least a couple of dozen times over the past few years and I’ve gotten pretty good and packing my motorcycle with everything I need to be comfortable, well fed and relaxed.

    The way you pack your motorcycle for camping is going to depend greatly on what kind of motorcycle you ride. Adventure bikes are designed specifically to carry a lot of gear, but other bikes, like sport bikes or, say, a Sportster, it gets a little trickier.

    No matter what type of motorcycle you have, there are some basic rules to follow when packing a motorcycle for a camping trip. These motorcycle camping tips are from years of experience camping!

    Pack for the destination location.

    Where are you going? What’s the weather going to be like? Will you be tent camping in the wilderness, or staying in a campground or at a cabin? What kind of animals are in the area?

    These are the things you want to consider when you’re selecting what gear to take, which clothes to pack, and how to pack it. It will determine how much space you’ll need on your bike, where and how you will store your food, and possibly how to tie everything down securely. If you want to know more about what to pack, check out this blog post. And remember, when packing food you always want to make sure you’re eating healthy on a motorcycle trip.

    Lay it out before you pack

    Once you’ve decided what you’re going to bring, gather it all up and lay it out on the floor. Start separating items that should go together. For example, put your tent, sleeping bag, and other sleeping gear in one pile. Put all your cooking gear, utensils, stove and fuel in another pile. Same goes for all your food and all your clothes.

    With everything laid out and separated, take another look and ask yourself if there is anything that you really don’t need to take. Eliminating unnecessary items now will help save space and weight.

    Most used items easy to reach

    You should separate items that you know you’ll want quick and easy access to. These are things like your cell phone, camera, wallet or your motorcycle registration.

    It can also include items like lip balm, sun screen, a water bottle, charging cords for your phone or GoPro, headphones, sunglasses, snacks. The list is up to you.

    If you ride with a tank bag, these are the items that should go in the tank bag. If you don’t have a tank bag, designate an outside pocket of your side bags or duffle bag to keep these items. Just make sure that you can reach them easily without removing straps or other bags. You don’t want to have to dig for these items.

    Keep your gear dry

    I doesn’t matter if the weather report says clear skies all the way, always assume it’s going to rain. Murphy’s law states that if you don’t pack for the rain, it will rain. So, make sure you have a way to keep everything dry.

    If you don’t have waterproof luggage, you can use a number of different methods. Here are a few alternatives for keeping gear dry.

    • Heavy duty trash bags: stuff your duffle bag, tent, sleeping gear into a large trash bag. I’ve done this many times when I didn’t have waterproof luggage.
    • Gallon size Ziploc bags: these are great for your clothes or electronics
    • Dry bags: at any camping store you can find a set of dry bags like those found here on Amazon. They’ll add an extra layer of protection and they are great space savers too.

    Keep your food separate

    I like to pack my food in my hard shell top case because it’s all in one place the hard case protects it from animals. If you have soft bags, you can use the provided food storage at the campsite such as a bear box or food pantry. If you use a wooden pantry at the campsite, be sure to lock the door. Racoons are clever, so you need to make it as difficult as possible for animals to get into your food.

    If you’re camping in an area where there are no food lockers at the campsite, store your food in a bear proof container, or bear proof bag. Sometimes bear containers can be big and bulky, so often a bag is an easier option.

    But, even if you’re not camping in bear country, other animals like coyotes, foxes and racoons will be happy to run off with your food. Hanging your food out of reach is a great option.

    Keep toiletries separate

    Just like any overnight trip or vacation, it’s helpful to pack your toiletries in a separate bag to keep them organize and to prevent them from spilling onto all your other belongings.

    Items like shampoo, perfume or cologne, sunscreen or makeup can leak, so it’s best to keep those in a water proof bag. Also, if you’re only camping for one or two night, consider leaving some of these items home. Bring only the absolute necessities. If you’re feeling really hard core, bring a toothbrush, toothpaste and deodorant, done.

    You also want to keep your bag of toiletries out of your tent. Animals not only love the smell of food, anything with a scent can attract them and you don’t want them sniffing around your tent at night. Keep them and store them with your food.

    Keep emergency items and tools accessible

    Most motorcycles have space under the seat for a small set of tools for roadside repairs. This is great unless all your luggage is packed on top of the seat. Suddenly, you have to unpack everything just to get to a wrench.

    The solution is to keep your on-board tool kit where you can find it without removing any straps. Consider carrying it in a saddle bag, near the top.

    You could also consider carrying your tools in a fender bag. These are a great option if you have the right type of front fenders with enough room to secure the bag without impeding the front shocks.

    Another option is to keep tools in a handlebar bag. These options will depend on the type of motorcycle you ride, but, the important part is to make sure your tools are accessible.

    Pack snacks and water

    When on a long motorcycle ride you want to make sure you stay hydrated and keep your energy up with snacks. Choose high energy snacks that are individually wrapped and that won’t melt. A chocolate bar will be a mess, go for M&M’s instead if you need a chocolate fix.

    Other great snacks are trail mix, energy bars, mixed nuts, a piece of fruit. Avoid packing junk food like chips or soda. Drink water instead and wait until you get to your campsite before you crack open a beer.

    PRO TIP: if you want a cold beer at your campsite, don’t pack it when you leave. Instead, buy it at a store closest to your campsite so it will be nice and cold.

    Balance the load

    To make your ride easier distribute your gear by weight evenly on each side. If you can remove your saddle bags to pick them up and compare the weight with each other, then that’s awesome. If not, do your best to distribute the weight evenly.

    Heavy items on the bottom

    To keep the center of gravity as low as possible on your motorcycle, pack the heaviest items on the bottom, light weight items on top. This can be a little tricky sometimes.

    So, when you lay out all your gear and items on the floor, start deciding which items will go into which bag and on which side. Getting a good mental picture of where it will all go will make the packing process go faster.

    Keep in mind that it’s not a perfect science. There are going to be things that are on the heavy side, but because of their size, they have to go on top of your seat. Often the culprit is the tent, or your on-board tool kit, but do your best to keep the weight as low as possible.

    Securing it to the bike

    It is so important to secure your gear on the bike so that there is absolutely no chance of something flying off down the highway. Whatever method you use is going to depend on your motorcycle and what type of bags you have.

    There are really cool luggage sets that click together and strap down to the bike making it super quick and easy. But, if you’re like me, and you use a duffle bag, follow these tips to secure your stuff.

    Use cinch straps instead of bungee cords. Elastic cords can stretch and give when you go over bumps and the hooks can actually come loose. This happened to me once with an air mattress. I haven’t use elastic chords since.

    Keep your dirty clothes separate

    At the end of the day, you’re going to have some dirty clothes and nasty socks. Use a simple plastic grocery bag and designate it as a dirty clothes bag. Put your dirty clothes in the bag, toss them to the corner of your tent, and they won’t get mixed up with your clean underwear.

    Another benefit of this is when you get home all you need to do is dump everything from that bag into the washing machine.

    Charge electronics while you ride

    This last tip doesn’t really have to do with packing your motorcycle, but it’s a smart idea to charge all of your electronics while you’re riding. If you bring extra battery chargers for your devices, charge them while you ride to use the power of the motorcycle’s battery so you don’t run out of power at your campsite.

    I hope you use these tips the next time your pack for a motorcycle camping trip. Get out there and ride, be safe and have fun.

    Related Topics:

  • Riding Motorcycle In Rain: 13 Tips To Stay Dry, Warm & Safe

    Riding Motorcycle In Rain: 13 Tips To Stay Dry, Warm & Safe

    Reading Time: 8 minutes

    Riding a motorcycle in the rain is not usually a rider’s first choice, but sometimes a sunny day turns into a rainy day and the rain is unavoidable. I have ridden plenty of times in the rain and have remained safe, warm and dry. So, here are 13 tips for riding a motorcycle in the rain.

    Wear Waterproof Gear

    Nothing can ruin your ride quicker than getting soaking wet. Combine that with the wind and you’re going to get cold. Suddenly your not just a little uncomfortable, but it becomes dangerous.

    Invest in a decent set of waterproof gear. Waterproof riding gear comes in a wide range of prices and can sometimes be pretty expensive. But you don’t have to break the bank for a set. Ignore a rain suit unless you’re doing a huge touring trip, normal waterproof gear is plenty good enough.

    Choose jacket and pants that you can quickly put on if it starts to rain. Get something that packs down small so you’re more likely to take it with you “just in case”. Choose a visible color. Visibility is impaired when it’s raining, so make sure you’re seen.

    Don’t forget the gloves. A good pair of waterproof gloves will keep your fingers warm and dry. To top off your new outfit, add a pair of boot covers if your riding footwear isn’t waterproof.

    Make Sure your Tires are Good

    yellow and black honda motorcycle

    While some motorcycle tires are designed specifically for riding in the rain, most street tires are perfectly safe for riding on wet roads. However, don’t go riding in the rain if your tires are worn.

    The tread on your tires should be well above the wear indicators and tires should be inflated according to the manufacturer. While you’re being extra cautious in wet weather, it’s important to still trust your tires. If they are in good shape then they actually have a lot more grip than we often expect. Good tires really do make a huge difference once the rain starts.

    Take the Corners Slow

    Don’t take the corners too fast when riding motorcycles in the rain. If you’re used to getting a good lean angle into the corners on a dry road, you’ll have to make some adjustments when riding motorcycles in the rain. While some lean is perfectly fine, you want to keep your speed down so that the rear tire doesn’t lose its grip on the road. And don’t even get me started on what happens if you are cornering in the rain and hit manhole covers.

    Riding in the rain is nothing like riding on dry pavement, your traction control & braking distance is significantly reduced. Therefore, keeping your bike upright more often is one of the essential riding tips you’ll need to remember when riding in wet conditions.

    Don’t make any sudden accelerate or decelerate while you’re turning and definitely avoid hitting the brakes in the turn. Sudden changes in speed can cause your tires to lose traction, and down you go. You never know what residue might be on the road that’s been brought up to the surface with the rain. Oil or brake fluid mixed with water makes for a very slippery experience.

    Leave More Space Around You

    While riding in the rain, leave more space between you and the vehicle in front of you. A sudden stop in wet weather could cause you to skid out of control into the car in front of you.

    Maintain your distance so you have more room to react and slowly apply the brakes if you need to stop unexpectedly.

    Avoid Road Paint

    white and black stripe textile

    Road paint is not your friend when it’s wet, avoid riding anywhere close to it. All those painted lines and cross walks become slippery in the rain so, when you’re turning a corner, especially when making a left turn in an intersection, go slow with no sudden throttle bursts, and keep your bike as upright as possible.

    It’s not just the paint that’s a problem. Metal grates, manhole covers, and railroad tracks can all be a hazard when they’re wet and you’re riding motorcycles in the rain. Ride over these surfaces carefully when you have to and avoid riding over them whenever possible.

    If you have to ride across a bridge with a metal grated surface, keep your arms and grip relaxed, your speed even and consistent, and keep your focus far ahead of you. Thinking of your route ahead of time will allow you to plan out ways that might avoid riding over these dangerous obstacles.

    Make Yourself More Visible

    Now is the time to wear bright colors. Choose a jacket or rain gear that is bright yellow. Yeah, you may look like a bumble bee in yellow and black, but your chances of being seen are greatly increased in rainy weather.

    Before you take off, make sure all your lights are working properly. Check your tail light, brake light, high beams and turn signals. When you come up to a red light plan ahead by tapping your brake lever multiple times so other vehicles behind you know you are stopping. The braking distances of cars are significantly reduced on wet roads.

    Open your Helmet Vents

    You can help prevent your visor from fogging up if you open the vents on your helmet, especially the vents at the front. If it gets too cold, wear a face covering to keep the cold air off your face.

    Sometimes rain doesn’t necessarily mean it’s cold outside, so opening your helmet vents will keep you more comfortable. Having your helmet visor open will also help you see slippery surfaces easier. Heavy rain on a closed visor without windscreen wipers are impossible to see through.

    Pick a Dry Line

    When riding in the rain try to ride along the tire line of the car in front of you. Let the cars move the water away for you and you can ride safely through. This will help reduce the risk of hydroplaning.

    Hydroplaning is when a thin layer of water gets between your tire and the road. You’re basically floating, which can quickly cause your tires to lose their grip on the road. That brings us to tip #9.

    Avoid Puddles

    motorcycle rider crosses puddle

    Do your best to avoid puddles and stay away from standing water. Often after heavy rain, you’ll find puddles on the sides of the roadway, in intersections, or on corners where water hasn’t drained properly.

    You might also find water on country roads where heavy rains can wash out low sections of the roads. Many small roads are prone to flooding, so watch out for street signs saying so.

    If you do have to ride through standing water, go slow, relax, keep your line straight and your eyes focused ahead of you, not down at the water.

    Use a Pinlock Face Shield

    black and orange helmet on black motorcycle

    Pinlock ready helmet visors come with pins attached where you can snap in a second visor on top of the larger one. This will prevent your visor from fogging up by trapping air in between the two layers.

    Pinlock inserts come in a variety of shades and are quick and easy to install so you can install a clear lens for the rain and swap it for a shaded insert when the sun comes out.

    Keep your Starts and Stops Smooth

    Somethings that can cause your tires to lose their grip on the road are jerky movements or quick starts and stops. So, when you’re accelerating from a stop, apply an even throttle until you get up to speed.

    Likewise when you stop, let off the throttle smoothly and apply the brakes evenly, both front and rear, until you slow down to a stop.

    When turning a corner, keep your accelaration minimal until you finish the turn. Stay steady on the throttle during the turn.

    Don’t ride during the first 15 minutes of rain

    wet road

    The first 15 minutes of a rain storm are usually the most dangerous, especially if it hasn’t rained in a long time. All the built up road grime and oil will make a slimy coating until it has time to wash away. Usually 15 minutes of rain is enough to clear it up, then it’s safer to ride.

    Keep your Belongings Dry

    A good rule of thumb is to always pack your camping gear, clothes or whatever you’re taking, as if it’s going to rain. That means packing items in waterproof bags. Get a set of dry bags for clothes or small items that can fit inside your saddle bags.

    For camping gear, invest in a good dry bag that will keep your tent and sleeping bag dry in a rainstorm. You can also use gallon size ziplock bags to keep your clothes dry.

    If you have soft saddlebags use the rain cover if they came with them. Make sure they are secured properly so the wind doesn’t blow them off. Also, keep in mind that these rain covers are not guaranteed to keep your gear dry.

    If you follow these tips, riding in the rain won’t be a miserable experience and you’ll stay safe and dry. In fact, you might actually start to find rain riding enjoyable!

    Related Topics

    Recommended Products for Riding in Rain

    The following list of products are items you might consider so that you can ride in the rain safely. As a disclaimer, some of these links are affiliate links.

  • How to Tow a Motorcycle?

    How to Tow a Motorcycle?

    Reading Time: 11 minutes

    Swivelwheel Trailer Review

    When I decided to purchase a 30-foot Class A motorhome, I had to find a way to take my motorcycle with me. Unfortunately, I couldn’t find a toy hauler that fit my needs, or that I could afford, so towing the motorcycle was the best way to go.

    There are many ways to tow a motorcycle behind a motorhome, but there was one method that really caught my eye and seemed like the perfect solution. The Swivelwheel Trailer by Cruiser Lift.

    Within this article I call out Pro Tips and, I’ve provided solutions that hopefully will be of help to you.

    Swivelwheel Trailer Description

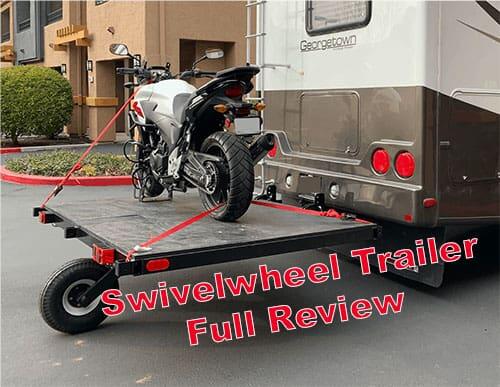
    The Swivel Wheel trailer is made by Fastmaster Products who also make the Cruiser Lift. It is a flatbed trailer that is designed to follow the path of your vehicle when you back up. Different from a ball and hitch trailer which moves in the opposite direction of the vehicle when you back up. The swivel wheel is incredibly easy to maneuver, no special trailer backing skills are necessary.

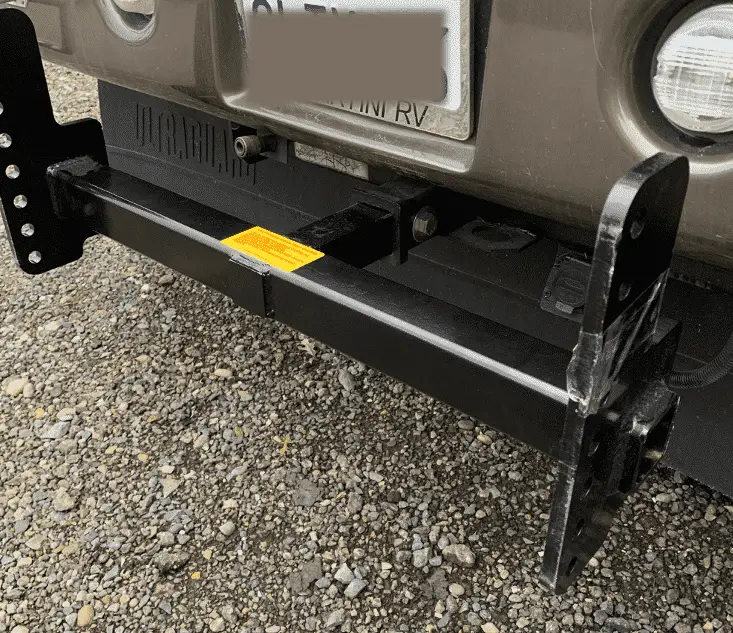
    Instead of using a ball and hitch, the trailer connects directly and squarely into the hitch receiver. The trailer platform connects to the T-bar with two pins. The height is adjustable depending on the height of your tow vehicle. This forces the trailer to move exactly as the vehicle moves when backing up.

    The trailer is supported underneath with a single or double swivel wheel, depending on the model you purchase. This wheel turns and moves just like a giant caster wheel. Turn your vehicle and the wheel will turn wherever it needs to go. Back up your vehicle and the swivel wheel will flip around and turn wherever it needs to go.

    The wheel assembly includes a disk and adjustable brake pad and you’ll adjust the amount of friction placed on the disk. This prevents the wheel from shaking and jittering like the dreaded shopping cart wheel.

    This Swivel Wheel Trailer is an excellent option for towing behind a fifth wheel, or for those who are trailer challenged (like me) who don’t want the hassle of learning to properly back a traditional trailer.  

    It’s also a good solution for vehicles that don’t have the proper tongue weight to handle a hitch mount or hydraulic lift, such as a Cruiser Lift, for your motorcycle. In my case, my motorhome had only a 500 lb. tongue weight, however, my motorcycle is about 450lbs on its own, so a hitch mount was not an option. The swivel wheel trailer takes the weight of the load off the tongue and onto the trailer’s wheel.

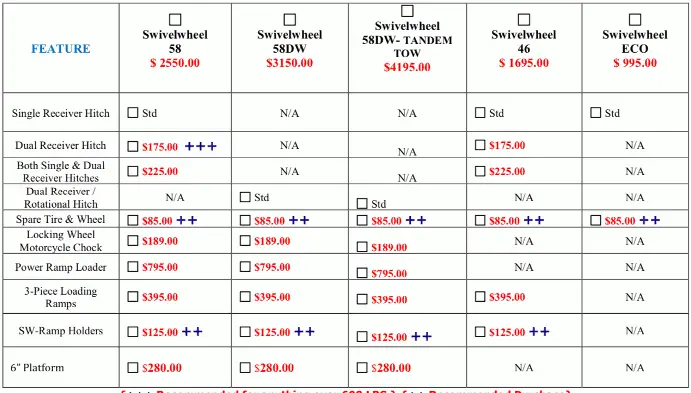
    How much does a Swivelwheel Trailer Cost?

    The manufacture offers several different models with different load capacities. Here’s the price list from their website.

    Pro Tip: If you plan on doing a significant amount of highway driving, I recommend purchasing the trailer model with the larger tire and purchase a spare. These tires are rated for highway speeds up to 65 mph.

    How to Order the Swivelwheel Trailer.

    When ordering, you will be speaking directly to the manufacturer, located in Texas. I recommend going on their web site and filling out the order estimate form. It will ask detailed questions about the vehicle you are towing with, its tow capacity and tongue weight, etc. The company will follow up with a phone call to place the order and take your payment. They are incredibly friendly and will answer any questions you may have about price, options, shipping costs, shipping methods, etc.  

    After ordering, they will communicate with you through email giving you updates on when your trailer ships, all the shipping details, including freight company contact information so you can communicate directly with the freight company to arrange pick up. My trailer took about 4 days before they shipped it and another 5 days to ship. Of course, shipping times will vary depending on where you are located.

    Shipping the Swivelwheel Trailer

    The entire package or crate, weighs about 700 lbs. so it must be shipped using a freight company and the crate will not be delivered to your residence. You can arrange to pick up the crate at the loading dock directly, or, you can arrange to have the crate delivered directly to your home for an extra cost. That cost for me was about $325 just to deliver it another 15 miles to my house, so I elected to pick it up directly from the freight company.

    The trailer will be delivered with the following pieces:

    • The trailer frame and plywood platform will come welded and assembled as one piece.
    • Swivel wheel assembly – weighing nearly 100 lbs.
    • Wheel – recommended that you purchase a spare wheel.
    • Assembly hardware such as pins, lug nuts, etc.
    • A box with two support posts.

    All pieces will be stacked and protected with cardboard and shrink wrap.

    Pro Tip:  Do not attempt to pick up the merchandise with a standard pick-up truck or one with a smaller bed. IT WILL NOT FIT!! I highly recommend renting or borrowing a flatbed pick-up truck similar to ones you can rent from Home Depot. A moving van would also be a good option. This will allow the freight company to load the crate onto your vehicle with a forklift.

    Assembling the Swivelwheel Trailer

    Once you get your trailer home, the fun of assembly begins. I highly recommend you do not attempt this assembly on your own. It is two, three or even four-person job depending on the tools you have at hand. I had the help of three friends, and it turned out to be so much easier and a lot of fun. Who doesn’t love a little wrench time with good friends?

    There are assembly instructions included and they seem to be very accurate and the assembly is not too difficult other than dealing with the weight of the parts. Assembly will take a couple of hours at the most.

    Here are a few tips for making the assembly process easier and successful.

    1. Repack the wheel bearings!! Use a good heat resistant grease made specifically for trailer wheels. Don’t skip this step, and always include this step a part of your regular trailer maintenance.
    2. The instructions say to place the platform on two sawhorses. If you don’t have sawhorses you can use four jack stands, one at each corner, to raise the platform. Note that you must be able to raise it at least 24” off the ground in order place the wheel assembly under the platform.
    3. The wheel assembly is heavy. If you find it to be too heavy to lift by hand, use a hydraulic jack to lift it in place.
    4. When attaching the wheel, you can use that same jack to lift the installed wheel assembly and trailer platform up a bit.
    5. Don’t skimp on using a torque wrench to tighten all the lug nuts to the recommended setting, 100 lbs. The last thing you want is your wheel falling apart on the highway.
    6. Trailer wiring: It is pre-wired so all you have to do is connect the plugs. However, the colors indicated in the instructions might not match your wires.

    Pro Tip: Don’t finalize and wrap up your wiring until you’ve connected the trailer to your vehicle and tested all the lights. Once you know it’s correct, take the extra step to use heat shrink sleeves on the connections to give it a professional quality.

    Now that your trailer is assembled, it’s time to hook it up to your vehicle. Follow the instructions and recommendations provided in the assembly instructions. If you fail to do so, you could really mess up your trailer and vehicle. Here’s why.

    The trailer must be allowed to pivot up or down as the vehicle’s rear end rises or falls, i.e., over a speed bump, a driveway or any slight incline. So, be sure to install one pin at each hitch point. Don’t be confused because the bag of assembly hardware comes with 4 pins. I haven’t figured out what the other 2 pins are for. You only need 2.

    Pro Tip: You may have to purchase an adapter for the trailer plug. The trailer wiring harness is a 4 pin connection, however, many motorhomes or fifth wheel trailers are equipped with a 7 pin, round plug. A simple adapter will do the trick.

    Loading and Unloading Your Motorcycle

    Once your trailer is properly hooked up to your vehicle, motorhome, or fifth wheel, with all the safety chains and properly plugged in, you’re ready to load your motorcycle on the trailer.

    The manufacturer offers a number of options available to help you load your motorcycle onto the swivel wheel trailer. Those items include:

    ItemCruiser Lift’s Price
    Wheel Chock$189
    Power Ramp Loader$795
    3-Piece Aluminum Ramps$395

    In my opinion, the triple ramp was a bit overpriced and would have added to the shipping weight and cost. That’s why I decided to buy a ramp elsewhere. They had a wide, folding, aluminum ramp like this one found on Bike Bandit. It has worked perfectly for me, so far.

    Load your swivel wheel trailer from the side using your preferred method, just as you would loading your motorcycle onto a truck or traditional trailer. I choose to ride my motorcycle up the ramp. While this method takes some nerve the first few times, I prefer it over trying to walk the bike up, which is a bit heavy for my height and stature.

    With the motorcycle loaded and the front wheel secure in the wheel chock, I noticed my trailer tends to tilt to one side due to the front weight of the motorcycle. I have the single hitch model, so I assume this would be a bit more stable on the dual hitch model. It hasn’t been an issue while driving. My Honda CB500X weighs about 450 lbs. so, if you have a heavier motorcycle, it’s recommended that you upgrade to the dual hitch model.

    Unloading is pretty simple; you either back it down the ramp, or, you can simply place the ramp on the other side of the trailer and ride the motorcycle down. This is my preferred method.

    Due to the lean mentioned earlier, I sometime have trouble lifting the front of the motorcycle out of the wheel chock. I have to rock it a few times and give it a good heave hoe. Again, that’s due to my height and stature and strength.

    How to Secure Your Motorcycle to the Trailer.

    To secure the motorcycle to the trailer use ratchet straps secured to the handlebars and the other end secured to the trailer frame. Here are some tips to securing your motorcycle to wht swivel wheel.

    • DO NOT rely on tie-down rings that you install directly to the plywood to hold the force of your motorcycle with compressed shocks during travel. The screws holding the plywood to the frame are not strong enough. On my trailer, a screw broke in two and the plywood was being pulled up from the frame. Always secure the motorcycle directly to the trailer frame.
    • Use carabiners. If you simply hook the end of the strap to the frame there is the possibility of your strap coming off during travel. When going over speed bumps or a driveway entrance, the trailer will tilt either foreword or backward. A sudden bounce can cause the bike’s front forks to compress just enough to release the strap. This happened to me twice, and if not for the wheel chock, my motorcycle would have ended on the pavement.
      The solution was to attach carabiners to the ends of the straps and secure it to the trailer frame. So, if the motorcycle bounces, causing slack in the strap, it will not come off.
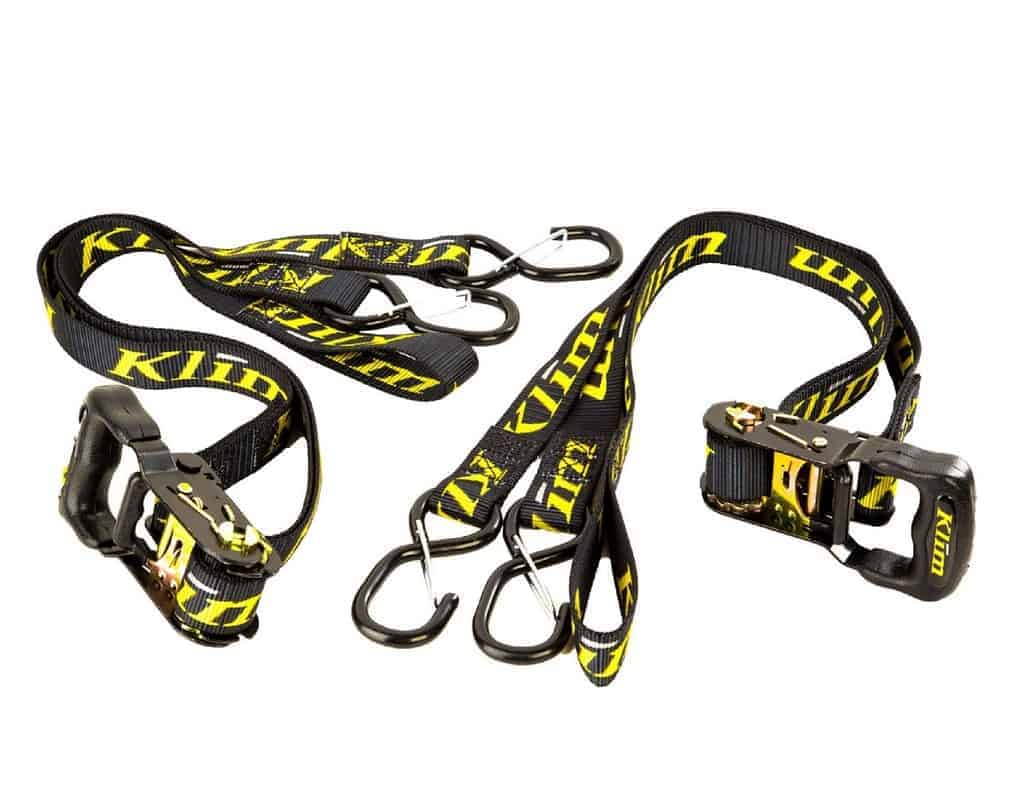
    • These ratches straps by Klim would work great. The hooks won’t allow the strap to fall loose if a bump or curb causes slack to the line. Purchase them on Twisted Throttle.
    The perfect ratchet straps for the Swivel Wheel Trailer.
    • Secure the rear wheel from both sides of the trailer. If you don’t, the rear wheel will slide around a bit. This may not be an issue if you have nothing else on the trailer. It was a problem for me because I also have my bicycle there. The motorcycle was sliding into the bicycle.

    Here’s a picture of my set-up. The cover shown is a bit cheap, I’ve had it a long time and I’d love to get a better-quality cover. I cut slits for the straps so the motorcycle can remain covered during travel. My bicycle is mounted on a simple clamping fork mount and covered when traveling.

    Everything is locked up with cable locks and secured to the frame of the trailer. I’d hate to lose one of my toys.

    Summary

    So far, and I’ve had this set-up for about 8 months, I had no issues driving or backing in anywhere. You only need to be aware of the extra length added to your vehicle.

    Here are a few final reminders:

    1. Keep your speed under 65mph so you don’t overheat the trailer tires.
    2. Go slow, really slow, over speed bumps or driving in and out of driveways.
    3. Use Carabiners to secure the ratchet straps to the trailer frame.
    4. Don’t overload the trailer past its capacity.
    5. Lock up your toys.

    The Swivel Wheel trailer has been the perfect solution for me. I can safely take my motorcycle with me wherever I take my motorhome. I hope you found this review helpful.

  • Sticky Motorcycle Throttle: Fixed In 8 Simple Steps

    Sticky Motorcycle Throttle: Fixed In 8 Simple Steps

    Reading Time: 5 minutes

    A motorcycle throttle that sticks while your riding can be annoying, but it can also be dangerous. Ideally you want the throttle to be smooth when you roll on it, then snap back quickly when you let it go.

    So, why does a motorcycle throttle stick? Several things can be the cause. The throttle cable needs lubricating, it’s being pinched somewhere, cables need adjusting, or the bar ends are too tight. Let’s look at all of the causes and determine how to resolve them.

    Lubricate the Throttle Cables

    There are two cables associate with the throttle, one opens the carburetor intakes, and the other cable, attached to a spring, is responsible for snapping the throttle back when you let go. Over time, the original lubricants can become dry and dirty, causing the throttle cable to stick a little.

    Inspect the cables at both ends to make sure there are no frayed wires. If there are, you should replace it.

    Remove the cables from the throttle at the handle bars. You don’t necessarily have to remove them at the carburetor end, but, put a rag down to catch the lube that drips out the ends.

    Next, using a throttle cable lubricator tool, found on Amazon, squirt some throttle cable lubricant down the housing until it comes out the other end.

    Re-attach the throttle cable to the throttle and, hopefully, that will take care of the problem.

    Adjust the Cable

    Sometimes, if the cables are adjusted too tight, it will cause the throttle to stick a little. Also, a throttle should have a certain amount of free play, usually 2 -3mm. Check the owner’s manual for your motorcycle for the exact number.

    Free Play: How far you can spin the throttle before you feel resistance.

    Loosen the lock nut, then turn the adjuster nut in or out until you get the right amount of free play. Turning the adjust nut out will lengthen, or stretch the cable, reducing the amount of free play.

    Next, check the cables where they attach to the carburetor. Loosen the lock nuts and turn the adjuster nuts so that the cable is snug, but still snaps back when you let go.

    Check the Cable Routing

    Sometimes the cables can be routed in a way that causes a pinch, or a sharp bend. This bend could be just enough to cause the cable to stick within the cable housing. Check the routing to make sure nothing is getting in the way.

    Next, turn the handle bars fully to the right and to the left to make sure it isn’t pulling excessively on the cables.

    Check Bar Ends or Throttle Lock

    If your motorcycle has bar ends, make sure they are not too tight. I experienced this when I install new bar ends. I just kept tightening the up as much as I could. Suddenly the throttle was completely stuck. It was a simple fix. Loosen the bar ends so they don’t interfere with the throttle and you don’t end up with a sticky throttle again.

    Throttle locks can cause similar problems. If you have a throttle lock installed, double check how tight it is. It could be causing the throttle to stick.

    Clean and Lubricate the Throttle Tube

    The throttle itself consists of a tube, either plastic or aluminum, that fits over the handle bar. The grip fits over the top of the tube, and the cable also attache to the tube. This is what the cables are attached to, an

    Over time, dirt and grease can build up under the tube, causing it be feel sticky. You can remove the tube and the grip and clean off the handle bar and the inside of the throttle tube. Apply an all purpose grease to the inside of the tube when you reinstall it.

    Also, check the tube for cracks and replace it if needed. This is an opportunity to upgrade your throttle tube to something more durable. Replacing the tube is a quick, easy job. You’ll need to remove the throttle housing and the cables to get the tube off, and slip on the new one.

    Replace the Throttle Cables

    Often the cables can be so worn or sticky that they will need to be replaced. Purchase a new set of cables specific to your make and model of motorcycle.

    When you remove the old cables, take note of where they were routed and route the new cables in the same way. Adjust them so that the throttle does not stick, snaps back when you let go, and has a small amount of free play.

    Is the Issue With the Carburetors?

    If none of these steps fixed the problem with a sticky throttle, then your issue may be somewhere in the carburetors. You can visually inspect the springs where the throttle cable attaches, and make sure they are springing properly.

    If the carbs are dirty it could cause the throttle slider to stick, or the air intake valves to stick. A sticky slider can sometimes be cleaned without having to remove the carbs from the bike. Try spraying WD-40 or a degreaser where the slider arm rotates. Turn the throttle several times to work it in and see if the sticky throttle is fixed.

    You can try cleaning your carbs by running seafoam through them to clean out the varnish that develops over time. But, if this doesn’t work, the carbs will have to be removed for a thorough cleaning.

    Test the Throttle

    Once all the repairs and adjustments are done and you think you have the throttle behaving as it should, take it out for a test ride to make sure it’s operating properly. Take it up to full throttle and back down. Make slow left and right turns with the handlebars fully turned so make sure it doesn’t affect the throttle.

    Throttle cable inspection should always be a part of your regular maintenance and your pre-season inspection. Keeping the throttle operating smoothly and avoiding sticky throttle issues will help keep your throttle hand comfortable on long ride, and will keep you safer.

    Related Questions

    Why does my motorcycle die when I give it throttle?

    This is most likely caused by clogged pilot jets in the carburetor. Pilot jets are responsible for giving the carbs that initial supply of fuel right when you turn the throttle. Cleaning or replacement may solve the problem.

    What if my throttle doesn’t have enough free play?

    Without a sufficient amount of free play, the throttle may twist on its own, particularly when you turn the handlebars, which will pull on the cables.

  • How Many Miles Should You Ride a Motorcycle in a Day?

    How Many Miles Should You Ride a Motorcycle in a Day?

    Reading Time: 5 minutes

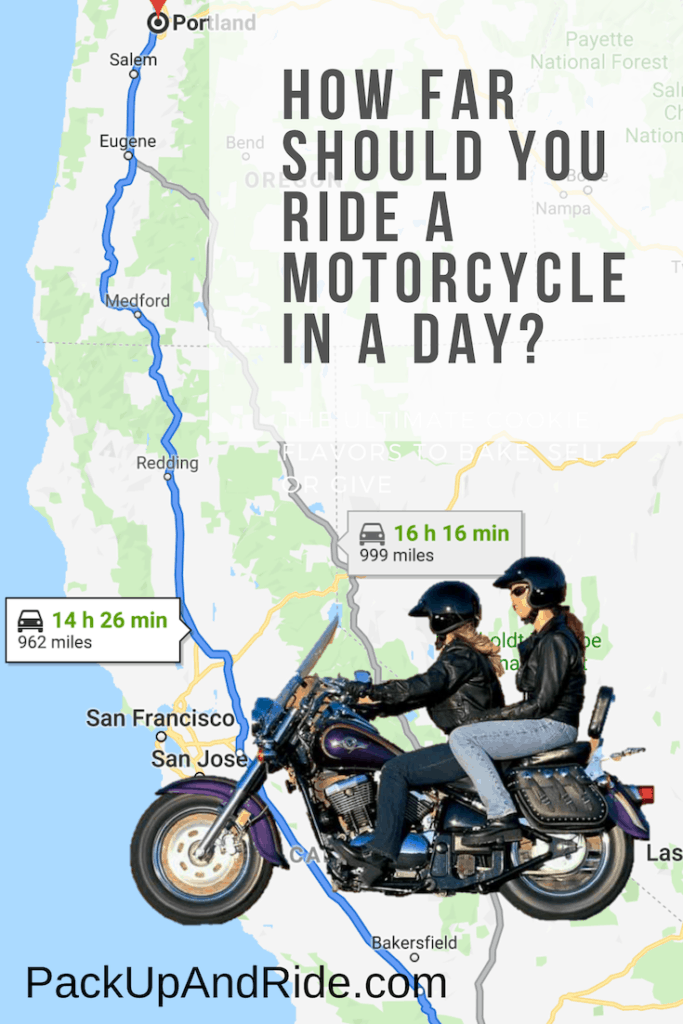
    Part of planning a good motorcycle trip is figuring out how many miles to ride in a day. Most riders can handle about 250 – 300 miles on average in one day. But, there are a lot of different factors that will determine how far you should ride a motorcycle in a day.

    Riding Experience

    A new, inexperienced motorcycle rider is not going to have the endurance that a seasoned rider has. If you’re new to riding, and your rides have on consisted of commuting, short rides close to home, or a trip to your local bike night, then pulling off a 300 mile day might wear you out.

    Building up saddle time gradually, will help you build endurance for long rides. Start by riding 150 miles in a day, then 250, etc. Gradually increasing your mileage will also give you time to learn what’s comfortable and what’s uncomfortable on your motorcycle.

    For instance, if your seat starts getting uncomfortable after 100 miles, you can address that problem by, say, purchasing a custom seat, or adding a seat pad. Take care of the little things that cause you discomfort, before you commit to a 500 mile day of riding.

    Fun Fact: according to Google maps, 500 miles, at average driving speed on the interstate, with no traffic delays, will take about 8 hours without breaks.

    Type of Roads

    The type of road you will be riding on is a huge factor in determined how many miles you can go in a day. Winding canyon roads will slow you down significantly, so, you can’t expect to ride 300 miles of twisties in one day.

    The same goes for dirt roads. Even if you’re on a well maintained gravel road with the proper type of motorcycle, you still can’t cruise as fast as you would on a paved highway.

    But, if your riding day consists of only highways that allow faster speed limits (80mph on some roads), then you’ll be able to cover 300 miles in a day with not problem, as long as your body can handle it.

    Condition of the Road

    Road condition is another factor. Take a twisty road and add a bunch of pot holes or patches in the asphalt, and you’re going to have to take those roads slower, which will shorten your trip for the day.

    Total Duration of the Trip

    How long is the total duration of the trip? Sometimes you can manage a huge 500 or 600 mile day of riding. But, keep in mind what kind of riding you’ll be doing the next day. Trying to pull off that many miles day after day is going to wear you out.

    When planning a multi-day motorcycle trip, mix the long days of riding in with a couple of low mileage days, or even a day off to rest. Sometimes you will need to put in the miles to get from one destination to the next, but once you’re there, take it easy for a day and relax.

    Type of Motorcycle

    What type of motorcycle are you riding? It’s obvious to most that some motorcycles are designed for comfort and long distance travel. Touring motorcycles, will allow you to ride more miles than a smaller bike.

    Cruising motorcycles with large front fairings and windshields will keep you from getting too fatigued when riding long miles. Seats and foot peg position that places you in a comfortable, upright seated position will help keep you for comfortable too.

    On the other hand, a sport bike with an aggressive body position designed for racing, might make a rider tired sooner, reducing their miles traveled in one day. You get the idea; comfortable motorcycles means you can ride a longer distance.

    Hours Instead of Miles

    So, now you know some of the factors that determine how many miles you can ride a motorcycle in one day. There’s a better way to judge this, and that’s by hours instead of miles.

    When mapping out a road trip, use Google’s My Maps, or your favorite route planning software. Let the software determine how many hours it will take to travel those roads based on average travel speeds. This will give you a much better indication of how many miles you should travel in a day.

    If the route you take is 300 miles, but the mapping software tells you it will take 8 hours to complete it, judge from that. Do you really want to be on the bike for 8 hours? But, if it says it will only take you 5 hours, because it’s all straight down the freeway, then maybe it will be easy.

    The longest I rode my motorcycle in one day was a 500 mile ride from Sacramento to Joshua Tree. It rained half the day and took me about 10 hours with stops and breaks. I was exhausted. That was a bit too much.

    Gayle of PackUpAndRide.com

    How to Ride Longer in a Day

    While there are many factors that determine how many miles you can ride in a day, there are a number of steps you can take to help you ride farther while still staying safe. The main thing to consider is comfort.

    • Wear appropriate gear for the weather. Excessive heat or cold will cause fatigue much faster than you realize. Make sure your riding gear and base layers prepare you for the elements
    • Windshields. Even if you’re used to riding without one, you’re still working against the wind to hold your riding position. Adding a good windshield will make the ride easier.
    • Wear earplugs. Loud noise on a consistent basis, will wear you out faster. Wearing earplugs will not only protect your hearing, but it will also help you stay alert longer.
    • Properly adjusted motorcycle. Make sure your handlebars are properly adjusted for a comfortable riding position.
    • Take frequent breaks. Take some time to get off the bike and stretch.
    • Eat often but avoid large, heavy meals. Healthy snacks throughout the day will keep your energy levels up.
    • Drink plenty of water. At every break, hydrate with water and avoid sugary energy drinks.

    Planning out how many miles you will ride each day on a multi-day motorcycle trip can be tricky. Don’t overdo it. Keep the daily mileage lower than you think you can do. Stay safe by preventing fatigue. Allow yourself time to rest, take a break and enjoy the journey.

    Are you going on a long trip?

    Thank’s for reading this article all the way to the bottom! I really hope you found the answers you were looking for.

    Listen, if you’re going on a long trip, whether its a weekend away or a cross country tour, we highly recommend an on-board tool kit.

    Click Here to see out Recommended On-Board Tool kit

  • Get Your Motorcycle Ready for Riding Season: a 26 Step Guide

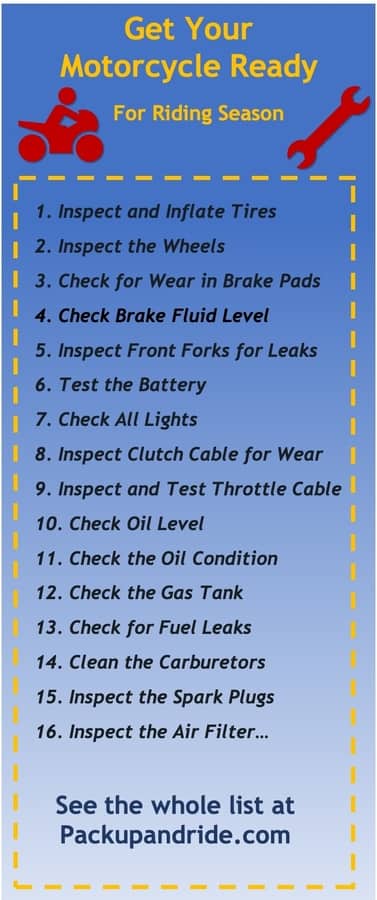
    Get Your Motorcycle Ready for Riding Season: a 26 Step Guide

    Reading Time: 17 minutes

    The sun is out, the weather is warm, and you’re ready to ride. But, is your motorcycle ready for riding season? This guide will help you get your bike ready to be safe on the road whether it’s been sitting for a couple of months, or for a couple of years.

    There are some basic checks that you should do every time you ride, and those are listed first in this article. Then, we will go into a more thorough inspection list for motorcycles that have been sitting unused for a few months, and, an even more thorough check list for bikes that have been in storage for a year or more.

    Pre-Ride Checklist

    Let’s start with a pre-ride checklist. This is a quick inspection that you should do often during riding season. A pre-ride check only takes a few minutes and can save you a lot of hassles on the road. It’s best to do this inspection a day or two prior to a planned ride so, if anything needs maintenance or repairs, you have time to do so.

    Pro Tip: Pre-Ride check may be all you need to do if you have a new motorcycle, or if it’s only been a few months since your last ride.

    • Tire pressure: Adjust the PSI to match the type of riding you do. Lower PSI for dirt riding, higher if you’re riding fully loaded with gear.
    • Tire Condition – check the tread wear, look for cracks in sidewalls.
    • Chain tension – there should be about 1.2 to 1.6 inches in slack.
    • Chain condition – inspect the chain for excessive wear, kinks, rust, dirt and grit. The chain should be lubricated every 300 to 500 miles.
    • Oil level – hold the motorcycle level, off the kickstand, and check the oil through the sight window. Make sure it is between the full and low lines. Top off if necessary.
    • Turn signals – test front and rear sets of turn signals to make sure they all come on.
    • Brake light – Apply the front brake and the back brake individually to make sure the brake light comes on for both.
    • Headlight, low and high beam – Make sure both beams are working
    • Give the horn a quick blast. You never know when it will come in handy.

    Post Winter Storage Checklist

    If you live in a part of the world where riding becomes close to impossible during the winter months, you’re likely to let your motorcycle sit in the garage waiting for spring.

    Or, if you’ve had your motorcycle sitting in the barn, left alone and forgotten, maybe it’s time to get it up and running again. This thorough checklist will help you keep track of everything that you should inspect, repair and/or replace.

    1. Inspect and Inflate Tires

    Check the tire’s age. Check the four digit date code on the sidewall. The first number is the week, the second number is the year. For example, if you see the number 1419, the tire was made in the 14th week of 2019. Tires are generally rated to last 5 years.

    Check the tread wear. You can do this two ways.

    1. Stick a penny with Lincoln’s head inside the tread. If you can see the top of Lincoln’s head, your tires are worn and should be replaced.
    2. Within the grooves of your tires you will find tread wear indicators, or tiny bars. If they are flush with the surface or your tire, your tires need replacing.

    Tire pressure. Check the owner’s manual for the recommended pressure. Take into consideration what type of riding you do. If you do basic street riding, the recommended PSI should be sufficient. However, if your motorcycle will be loaded with luggage, you should increase the pressure by 1 or 2 PSI.

    Pro Tip: The PSI printed on the sidewall is actually the maximum the tire will hold, but it is not the correct PSI for riding.

    If you have tires with tubes, be sure to replace the tubes at the same time you replace the tires.

    2. Inspect the Wheels

    If you have alloy wheels, inspect them for cracks. Especially if you just acquired a previously owned motorcycle. A cracked wheel may also mean the wheel is bent. You can get a cracked or bent wheel welded and repaired by a specialty shop in lieu of buying a new wheel.

    Also check the bead of the rim for dents. Hitting a pothole while riding can often bend the rim and we don’t always realize it. A minor dent is usually not a problem, but, a larger dent could cause a surprise blowout. It’s best to have dents inspected and repaired by a professional.

    If you have spoked wheels, inspect the wheel for broken spokes. Then, using a spoke torque wrench (found here on Amazon), tighten each spoke to the recommended amount of torque. A tip to keeping your wheel true and prevent wobble, is to tighten every 4th spoked as you go around the wheel.

    3. Check for Wear in Brake Pads

    Visually inspect the brake pads on both front and rear brakes. If there is less than 3mm thickness, replace them. Sometimes this is difficult to see when the brakes are still on the bike, even with a flashlight. If you suspect that they are close to worn, it would be a good idea to quickly remove the brake caliper from the wheel and measure the brake pad to be sure.

    If you ride your motorcycle with worn brake pads, there is a chance of metal grinding against metal, causing damage to the rotors. Unlike a car’s brake rotors, motorcycle rotors can’t be turned and trued, and will have to be replaced if damaged.

    4. Check Brake Fluid Level and Clarity

    Check the level of brake fluid in the reservoir located on the handlebars, usually near the front brake lever. Most of them have a sight window. Make sure the motorcycle is level and cold. The fluid line should be between the full and low indicators.

    If it is low, you can carefully add a minimal amount of brake fluid to top it off. It usually only takes a couple of tablespoons. Do not overfill. Also, use only the recommended DOT brake fluid. While most cars use DOT3, motorcycles almost always use DOT4 which is designed to withstand the high head motorcycle brakes can often produce. Check your owner’s manual for the correct type of fluid for your bike.

    Tips for adding brake fluid:

    • Keep everything clean
    • Prevent dust or debris from getting into the reservoir
    • Make sure your hands and tools are clean
    • Always clean the surface of the reservoir before removing the cap
    • Lay towels over your motorcycle’s tank and plastics to protect it from accidental spills or splashes. Brake fluid can easily damage the paint.

    Pro Tip: NEVER squeeze the brake levers with the reservoir top removed. Doing so can cause air to enter the brake lines and require you to completely bleed the lines and ad new fluid.

    If the brake fluid appears dark and cloudy, or if the bike has been sitting idle for more than a couple of years, you should bleed the brakes lines and add fresh brake fluid to the system. Follow this link to read about how to bleed your brakes.

    5. Inspect Front Forks for Leaks

    Visually inspect the fork seals and look for any signs of fork oil leaking around the seals or dripping down the fork onto the brakes. Sometimes leaky seals will collect dirt in the fork seal area. Check for cracks at the edges of the seals. If your forks have dust covers, inspect them for cracks, rips or holes.

    Most motorcycles require that the fork oil be replaced every two years, but, if they are not leaking, and your front suspension is still performing well, the oil can last much longer. Most forks only need maintenance every 12,000 miles, but, check your motorcycle owner’s manual for the recommended replacement intervals.

    6. Test the Battery

    If you own a motorcycle, you’re certain to be familiar with a battery tender. If not, you can purchase one on Amazon. Keeping your motorcycle plugged in to a trickle charger like that is one of the best ways to keep your battery fully charged when you’re not riding. But, you should still do a check on your battery depending on a few factors.

    When was the last time the battery was replaced? If you’re not sure, test it to see how much charge is left on your current battery. If the battery is dead, try giving a start with a portable charger, or use these other jump starting methods found in this article. Or, you can place it on a trickle charger over night, then test it to see if it’s holding a charge. If not, time to replace it.

    Visibly inspect the battery terminals for signs of corrosion and clean the terminals if necessary. If you do not have a sealed, maintenance-free battery, check the fluid level in each cell and top it off with distilled water.

    7. Check All Lights

    Do a visual inspection of all lights on your motorcycle. The headlight and tail lights should be on when you turn on the ignition. Test the high beams on your headlight. If they don’t come on, it’s time to replace the bulb.

    Test the brake lights with both the front brake lever and rear brake pedal separately. Test all turn signals, left and right, front and rear.

    If you have any auxiliary lights, or other lighted safety features, such as a flashing license plate frame, test them all to make sure all bulbs are functioning properly, and they turn on when they are supposed to.

    8. Inspect Clutch Cable for Wear

    Do a visual inspection of clutch cable at the point where it connects to the lever as you pull the lever in. This is the most common area where they start to fray. If even one of the cable wires is broken, the cable should be replaced.

    If the cable looks blackened and dirty, or if the clutch lever seems stiff, lubricate the cable. You don’t always have to take the cable completely off the motorcycle to do this.

    Disconnect both ends of the cable, and spray lubricant down the cable until it comes out the other side. Slide the cable back and forth inside the housing to distribute the lube. Reinstall each end and tighten the adjuster to get just the right friction zone in the clutch lever.

    9. Inspect and Test Throttle Cable

    A motorcycle throttle will have two cables, a push cable, and a return cable. To test the throttle cables, Roll the throttle back, then let it go. It should immediately snap back into place. If it sticks, it’s time to lube the cables.

    Use the same method as lubing the clutch cable: remove the cables at the throttle end and squirt cable lubricant down the cable. When you reinstall the cables to the throttle, adjust the free-play according to your motorcycle’s specifications, usually only a few millimeters.

    If you find any rust on the cables, or any broken strands, then replace the cables with new ones. A broken throttle cable can leave you stranded.

    10. Check Oil Level

    • Start the engine and let it warm up to normal operating temperature
    • Turn it off and let it sit for about 5 minutes
    • Place the bike on a level surface and stand it up straight with both wheels on the ground
    • Inspect the oil by looking at the sight window located on the right side of the bike, near the bottom of the engine casing.
    • The oil level should be in between the two lines located next to the window
    • Top off the oil a little at a time if it is below the bottom line.
    • Be careful not to over fill, which can damage the seals on the engine casing. If the oil is higher than the top fill line, it is recommended that you change the oil and fill it to the correct level.

    Note: Some motorcycles have dip-sticks to check the oil, but the same rules apply regarding oil level.

    11. Check the Oil Condition

    Generally, the oil should be changed about every 5,000 miles. But, if you don’t know the last time it was changed, you can tell by inspecting the color and clarity of the oil.

    The oil should be a golden color and it should be translucent. If the oil is dark brown, grey, or foggy, it’s probably time for an oil change.

    Open the oil fill cap and check for any unusual odors. The smell of gas inside the oil can be an indication of a problem with the fuel system, or the carburetors.

    Check the engine casing for any oil leaks. Works better if you wash the bike first, then let it sit for a few days. If you see anything leaking, look for the source and resolve the issue.

    Depending on how long the motorcycle has been sitting idle, you may have to do some work on the fuel system, which includes the gas tank, fuel lines, fuel filters, petcock, and carburetors. The next section addresses everything related to fuel system.

    12. Check the Gas Tank

    • Inspect the inside of the gas tank for rust. When a motorcycle is stored, it should have a full tank of gas with a fuel stabilizer additive. This will prevent rust from developing.
    • If the tank is rusted on the inside, it needs to be properly cleaned before it can be used again. But, the good news is, rust usually doesn’t form unless a bike has been sitting in a barn for a few years.
    • If the gas inside the tank is more than 6 months old, it should be drained and replaced with new fuel.

    13. Check for Fuel Leaks

    Once you get fuel running through the engine, check all the areas that fuel runs through.

    • Check all fuel lines for leaks or cracks, especially at the ends where they connect.
    • Check the fuel switch, or petcock, for leaks.

    14. Do the Carburetors Need Cleaning?

    Often, if a bike has been sitting for a long time, the carburetor jets can become clogged and the engine will run rough, or will run only with the clutch open. There are a lot of different symptoms that indicate dirty carbs, so, if it makes sense for you, take the time to clean the carbs.

    • Start by running some Seafoam through the carbs to remove varnish or residue created by old gasoline. This may be all you need to do.
    • Next step is to remove the carbs and clean, clean the jets, and inspect the needles.
    • If cleaning doesn’t work, you can purchase a carburetor rebuild kit for your make and model, and replace the jets and needles.

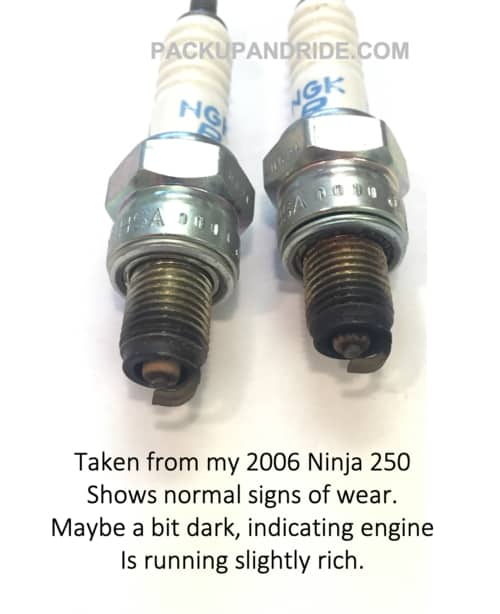
    15. Inspect the Spark Plugs and Gap

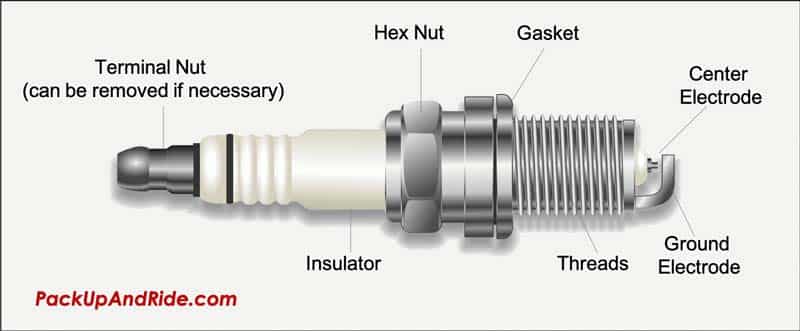
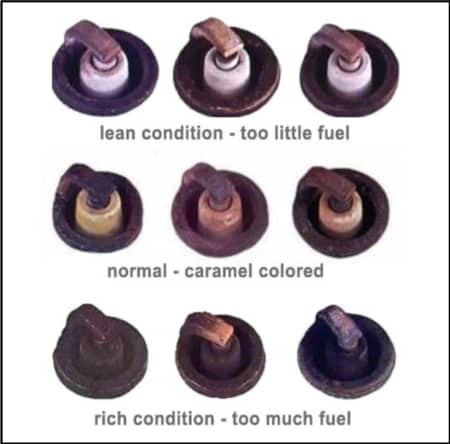
    When was the last time the spark plugs were inspected or changed? If it’s been over 5,000 miles, you should inspect them. The condition of the plugs can tell you a lot about how the engine is running. Check out this article on when to replace spark plugs.

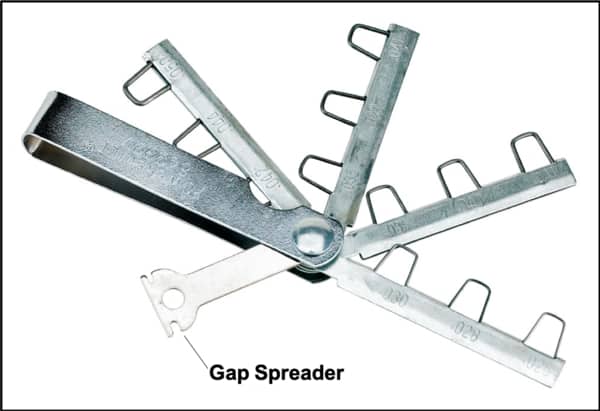
    Changing the spark plugs often involves removing the gas tank, but, it’s a very basic DIY repair job that is inexpensive and doesn’t take long to do. Lastly, use a gap tool to measure and adjust the spark plug gap.

    Pro Tip: Install spark plugs that are designed to withstand high heat. NGK is an excellent brand for motorcycles.

    16. Inspect the Air Filter

    When was the last time the air filter was changed? Motorcycle air filters come in a wide range of styles, sizes and shapes, and a visual inspection on some filters can be difficult.

    However, some motorcycle allow easy access to the air filter and are a style that allows you to view how much dust and dirt has accumulated.

    Some air filters are washable, allowing you to clean them with water, let them dry completely, then place it back in the motorcycle.

    It’s best to check your motorcycle owner’s manual for the filter replacement interval and use that information to make your decision.

    17. Clean, Lube and Adjust the Chain

    While chain maintenance is part of a pre-ride check list, if the bike has been sitting for a while, now is the time to do a little extra maintenance work.

    • Clean the chain with a cleaner designed specifically for chains with seals. Or, use Kerosine to remove grease and dirt. Kerosine won’t corrode the seals and has a fairly low ignition point making it safe to use in a ventilated area. Never use engine degreaser or gasoline to clean a chain.
    • Once clean, lubricate the chain with your favorite style of chain lube or chain wax.
    • Inspect the chain for signs of rust, kinks, or too much stretch.
    • Adjust the tension on the chain so that there is approximately 1 inch of slack.

    Related Article: Should You Use WD-40 on Your Motorcycle Chain?

    18. Inspect Wiring Harnesses

    Grab a flashlight and visually inspect all wire housings for wear. Look under the instrument panel or behind any front fairings for wires that have slipped out of their ties, or are dangling loose.

    Make sure none of the wiring is pinched or touching the engine or exhaust; or anything that can melt the housing. If you see any exposed wires, secure them with zip ties, or wrap them with electrical tape to avoid a short.

    19. Check the Coolant Level

    Check your motorcycle owner’s manual to see where your bike’s coolant overflow tank is located. Most will have indicator lines to tell you if more coolant is needed. Top it off if necessary.

    When was the last time the coolant was flushed? Check your owner’s manual for the recommended interval, and do a flush and replace if necessary.

    Inspect all the hoses coming from the radiator to make sure they are free from cracks and that the clips are secure.

    20. Inspect the Frame for Cracks or Rust

    Do a quick inspection of the frame. It’s better to do this step if you have removed the gas tank as you’ll have better access to the entire frame. You are looking for hairline cracks which most often occur at the weld points.

    Also inspect the frame or any other metal portions for rust. This is usually not a problem for most motorcycles unless it’s been sitting in a barn for years.

    21. Check for any missing clips, cotter pins, zip ties.

    Little bits of hardware like clips on hoses, a cotter pin on the rear axle bolt, or zip ties holding everything secure and in place, are important details to keep your motorcycle running properly and keep you safe.

    Go around the motorcycle and make sure all these pieces are in good condition and are tightened and secure.

    The mechanics of your motorcycle are not the only things you should check when you’re getting ready for riding season. There are other little details that will make your life a lot easier when you’re out on the road.

    22. Assemble an On-Board Tool Kit

    Most motorcycles will come new with a tool kit. A very minimal tool kit. An on-board tool kit is a compact set of basic tools that you can store under your seat. It should contain tools needed to do the most basic repairs on the road.

    Take some time to gather tools that are specific to your motorcycle. Include things like zip ties, spare fuses, a bit of duct tape and electrical tape.

    Check out this article about on-board tool kits.

    23. Updated Paperwork

    One of the items you need to carry with you at all times is your registration and proof of insurance paperwork. Make sure you have the most current printouts on board with you. Most riders will carry a copy protected in a zip-lock plastic bag, stored under the seat.

    If you’re motorcycle camping, and you have luggage or a duffle bag packed on top of your seat, it’s a good idea to store your paperwork somewhere that is easily accessible.

    Pro Tip: I always keep some cash stored in a plastic bag under my seat. You never know when some extra cash could come in handy.

    24. Keys

    Where did you put the keys? This is the time to make sure you know where your spare key is. Make sure you have all the keys to your locking side cases, or top case. Find a place to keep your motorcycle key so you always know where it is if you get the urge to ride.

    25. Clean and Polish the Motorcycle

    Your last step is to give your motorcycle a good bath and polish up all the chrome bits and shiny pieces.

    26. Bonus Step: Get Your Riding Gear Ready

    Make sure all your gear is in good condition. Keep your helmet, gloves, boots, everything handy where you need it when you get the riding bug. Saddle bags, tank bag, should be stored in their designated garage area so they are easy to find and grab.

    Keep a few necessities in your tank bag at all times. Things like chapstick, phone charger, hair brush for riders with long hair, hat, bandana, or whatever you might need on the ride.

    Taking the time to go through this pre-season checklist will insure that you’ll have a smooth, trouble free riding season.

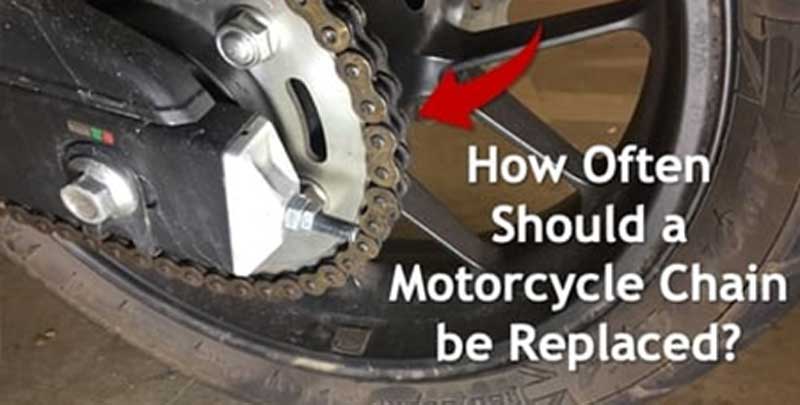
  • How Often Should a Motorcycle Chain be Replaced?

    How Often Should a Motorcycle Chain be Replaced?

    Reading Time: 11 minutes

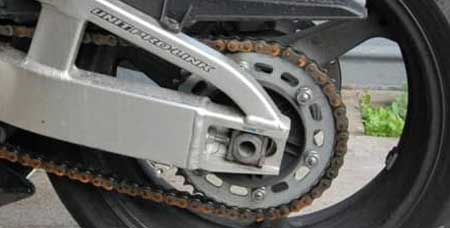
    Chain maintenance is one of the first things you should learn about when you own a motorcycle. Without a well-fitted and properly lubricated chain, there’s no way to transfer power from the engine to the wheels. But chains wear out over time and need replacing.

    So, how often should a motorcycle chain be replaced? In general, a properly maintained motorcycle can last 20,000 to 30,000 miles, sometimes more. But, some last as little as 5,000 to 10,000 miles. This difference is due to the type of chain, how and where you ride, and how well you maintain it.

    Type of chain
    Older style chains that do not have O-ring or X seals will not last as long as modern chains with seals. They are more difficult to keep clean because dirt and moisture can get inside the pins and rollers. If they are not constantly kept clean and properly lubed, they will not last the 30,000 plus miles that a sealed chain will last.

    O-ring and X seal chains are designed to keep dirt and moisture away from the pins and rollers and to keep a special lubricant inside. As long as you use cleaners and lubricants that do not deteriorate those seals, your chain will last a long time.

    Type of Riding
    Riding in rough conditions, such as off-road, doing water crossings, or riding in mud or sand, will make it more difficult to clean and maintain the chain and possibly lessen the life of your chain.

    Also, excess stress on the chain and sprockets due to racing, track days, constant high speeds, will cause the average chain to wear more quickly. It’s recommended to upgrade to a high-performance chain and sprocket set if you do a lot of track riding or racing.

    Chain Maintenance
    It goes without saying that improper chain maintenance will cause your chain to deteriorate much sooner. Regular cleaning and lubricating of your chain are probably one of the most important maintenance items you can do, so, clean, lube, inspect your chain on a frequent basis.

    Signs that Your Chain Needs Replacing

    Chain inspection should be a part of your pre-ride check inspection. It’s just as important as tire pressure and oil level. There are a few things to look for that will tell you when your chain needs replacing.

    Rust
    Rust can form fairly quickly if your motorcycle gets wet and the chain is not properly lubed. A little surface rust does not always mean your chain is completely ruined, but if the pins and rollers are also rusted, it likely means the seals are bad. In that case, it’s time to replace the chain.

    rust chain

    Kinks
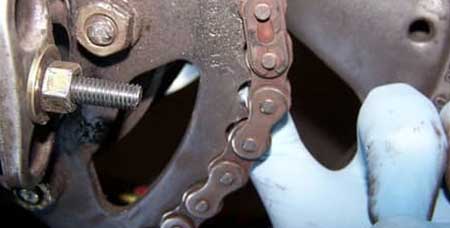
    Look for links that are stuck causing kinks in the chain. Kinks indicate a weak point where the seals are no longer keeping dust and dirt out of the pins. This weak point is at greater risk of breaking and can cause excess wear on your sprockets.

    Kinked Motorcycle Chain Link

    Noise
    A normal chain will make a little noise, but it’s smooth, not clunky. If your chain is making a rattling noise or squeaking, it’s a sign that it needs your attention. If normal cleaning and lubrication don’t get rid of the noises, then replacement is recommended.

    Over-Stretched
    Chain stretch is normal over time, but there is only so far a chain can stretch before the links are weakened. In fact, the word “stretch” is sort of a misnomer. Your motorcycle isn’t actually pulling a chain hard enough to physically stretch the metal. Instead, the holes where the links attach to each other wear and get slightly larger over time, so the chain appears to expand. In any case, if you find that you can no longer adjust your chain to the proper tension, it’s time for a replacement.

    Here’s a good method for checking to see if your chain is stretched too far. For safety, make sure the motorcycle is OFF! With one hand, press down on the top of the chain to add tension. Then check the chain tension around the rear sprocket. The chain should be tight equally, all the way around the sprocket. If portions of it are loose, that means the chain is stretched.

    stretched chain
    Over Stretched Chain

    Here’s another way to check to see if your chain is stretched. When your chain is new you should measure the distance between 100 links. Write it down and whenever you take the chain off to clean it measure again. When you can only fit 99 links in the same space you need to change out your chain and sprockets.

    How Dangerous is a Worn Out Chain?

    Does it really matter if you ride on a worn chain and sprockets? The honest answer is yes, it matters a great deal. A broken chain while riding can be extremely dangerous.

    The best case scenario is when the chain breaks, you lose power, and simply pull over to the side of the road and call for a tow.

    In the worst-case scenario, a broken chain can be potentially lethal, especially if it causes you to crash at a high speed. Imagine cruising at 70mph, your chain breaks and gets tangled in the rear wheel, ceasing it up.

    Another possibility if for the chain to whip around your legs, ankles, and feet, potentially causing injury. Proper riding boots will help, but, any unprotected ankles or feet could end up cut or broken. Ouch.

    A broken chain can be flung from the motorcycle into traffic, causing a hazard to other drivers. It’s easy to see why a broken chain is the last thing you want on your ride.

    Replace the Sprockets Too? Yes, or No?

    A common rule is to replace both front and rear sprockets every time you replace your chain. This is a good rule to follow if your chain has lasted for its full life of, say, 15,000 miles.

    But, sometimes a sprocket replacement can wait in cases where you’re replacing a prematurely worn chain. Nevertheless, you should inspect your rear sprocket for signs of wear during normal motorcycle maintenance days.

    If you were to replace your chain and keep your old, worn-down sprockets, it will wear out your new chain faster. Likewise, if you replace your sprockets, without replacing your chain, both will wear out prematurely.

    Check for Wear in the Sprockets

    So, how can you tell if your sprockets need replacement? Sprockets have three really obvious clues to tell you it’s time for a change. You should replace your sprocket:

    1. If your sprocket is bent or warped.
    2. If some of the teeth are broken off.
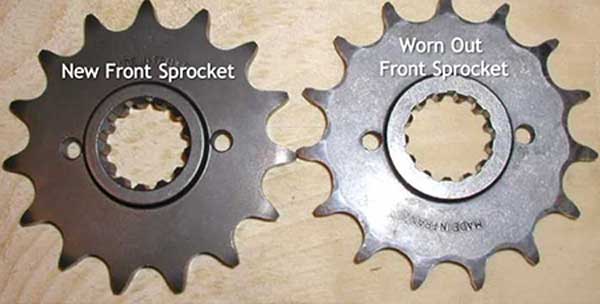
    3. If the tips of the teeth look sharp and come to a point.
    4. If the teeth are more curved in one direction, causing a wave like shape.

    The teeth of a good sprocket should be evenly shaped, with equal space in between each tooth, and should have a flat spot at the tip, not a point. In the image below, notice how the worn sprocket teeth have a wave-like shape to them.

    socket

    It would be more accurate to say it’s gaining unwanted flexibility, but you don’t need to get technical as long as you understand why a ‘stretched’ chain is bad and how to spot it. When your chain is new you should measure the distance between 100 links. Write it down and whenever you take the chain off to clean it measure again. When you can only fit 99 links in the same space you need to change out your chain and sprockets.

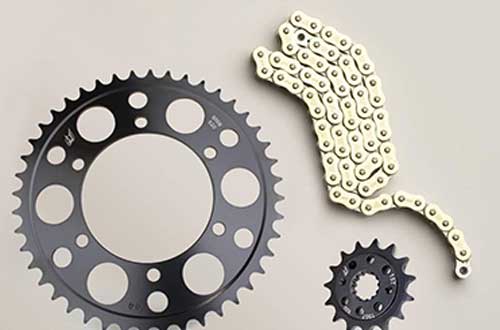
    New chains can often be purchased in kits that include both sprockets and you can often upgrade to a better quality chain than the original OEM chain/sprocket set.

    socket and chain
    Upgrade your current Chain and Sprocket set with a better quality set like this one.

    If you purchase your chain and sprocket set on Amazon, like this Driven Racing Gold RK 520MAXX set, be sure you are purchasing the correct size for your year, make, and model of motorcycle.

    Proper Chain Maintenance

    Keeping your chain clean, properly lubed, and adjusted will extend the life of a chain by thousands of miles. It’s good practice to quickly wipe down your chain after a long day of riding, (more than 100 miles) then give it a quick spray of chain lube.

    In general, you want to lube after riding while the chain is still warm. This gives the lubricant time to set into every crevice and lets any excess fluid evaporation happen before your next ride.

    You will want to do a thorough cleaning of the chain and sprockets every 500 to 600 miles, or when it just looks nasty and dirty, even if you haven’t ridden that far.

    Additionally, you should always wipe down and lube your chain after riding in the rain. Don’t let it sit in the garage wet, as rust will start forming before you know it.

    For a complete walk-through and video on how to properly clean and lube your chain, check out this post: Can I Use WD-40 on My Motorcycle Chain?

    How to Replace the Chain and Sprockets

    Changing out your own chain and sprockets is a fairly easy job, but there are a few things about it that can be tricky and require some specialty tools and maybe help from a friend.

    If you’re new to motorcycles, or if you usually take it to the shop, you’ll find that doing the maintenance yourself is incredibly satisfying. Not to mention, you never know when you’re going to need DIY skills.

    Below is a list of tools needed, with links on where you can get them.

    • Rear Wheel Stand like this PitBull Stand, or put your bike on its center stand
    • A Motorcycle Chain Breaker set
    • Spare Cotter Pins if your rear axle requires them
    • Socket that fits your front sprocket nut
    • Impact wrench, or, if you don’t have an impact wrench, get a breaker bar for the socket and an friend to help with this step.
    • Motorcycle chain lube or chain wax, whichever you prefer – Like this stuff
    • A piece of wood that fits through the rear wheel
    • Having your phone camera on hand helps when you need to note exact positions.

    Below is a very quick and simple walkthrough of the steps. If it’s your first time, keep your service manual on hand in case you need a quick reference.

    1. Set your bike up on a paddock stand or it’s center stand. This will allow you to remove the back wheel.
    2. You’ll need to remove the front sprocket cover. If your gear lever needs to be moved then do this and make sure you know where the position of the splined boss that bolts to the shaft is. If you have trouble with remembering these details use a cell phone camera or another digital camera snap a fast shot for later reference.
    3. Remove the nut, which is either a tabbed locking washer or self-locking. If it is tabbed you’ll need to use a punch and hammer or screwdriver to push the tab back.
    4. A piece of wood inserted through the back wheel will keep the wheel from rotating. You can wrap it in a soft cloth and make sure it rests against the rear swingarm. If you have a helper, you won’t have to use the wood to keep the wheel from rotating. Instead, have them press on the rear break while you remove the front sprocket nut.
    5. Use an impact wrench or breaker bar to remove the nut on your front sprocket but leave the sprocket in place for now.
    6. Take off the back wheel. Note: when you lay the wheel on the floor, place it on top of two pieces of wood to keep the brake disk off the ground. This well prevent accidental bending of the brake disk.
    7. Undo and remove rear sprocket nuts and the sprocket.
    8. Replace rear sprocket.
    9. Replace the front sprocket and wrap the OLD chain around it.
    10. Loosen the chain adjusters at the swing arms.
    11. Refit the wheel and old chain without tightening your spindle nut.
    12. Using the chain breaker tool, split the old chain now, but do not remove it from the bike yet. Instead, connect it to one end of the new chain.
    13. Use the old chain to pull the new one around your new sprockets and then dispose of the old chain.
    14. Connect the new chain with your riveting tool. This is part of your chain breaker tool.
    15. Place the front sprocket nut back on and tighten it with the wood back in place on the rear wheel, or with your partner pressing the rear break. Tighten the nut to the required torque settings for your motorcycle.
    16. Finally, adjust the tension on the chain and tighten down the rear axle.

    Your final steps include a quick inspection to make sure you didn’t miss anything. Re-install the front sprocket cover and chain cover. Take the motorcycle out for a short, slow test drive and inspect the chain once again to make sure everything is working properly.

    To wrap it up, keep in mind that proper maintenance of your motorcycle chain will make it last a long time, and means your motorcycle will run smoother and be safer. If you’re interested in reading more articles about motorcycle maintenance you might want to check out our article How Often Should Motorcycle Brake Fluid be Changed?

  • Why Does My Motorcycle Only Run with the Choke On?

    Why Does My Motorcycle Only Run with the Choke On?

    Reading Time: 10 minutes

    It can be very frustrating to gear up and pull out your motorcycle for the first ride of the season, only to find that you’re bike won’t run unless the choke is fully on.

    It seemed to be running fine last summer, right? Problems like this don’t just happen when your motorcycle has been sitting for a while either. They can also happen quite suddenly.

    So, why does a motorcycle only run with the choke on? It means your motorcycle is not getting enough fuel, and this can be caused by dirty or clogged pilot jets, clogged fuel line, clogged fuel filter, dirty petcock, loss of vacuum in the carburetors, among other carburetor issues.

    Narrow Down the Cause

    Nine times out of ten the cause is clogged pilot jets. The pilot jets are responsible for providing fuel to the carbs during idle and during the first phase of acceleration, i.e. when you first roll on the throttle. So, if these jets are clogged, even in the slightest, it will prevent fuel from getting into the carbs enough to keep it idling.

    Opening the choke, blasts fuel into the carbs to keep it going. But, if you’ve ever had this problem, you know that running on full choke is not feasible. The mixture is much, much too rich, the engine revs much too high, and the bike is almost impossible to ride for any significant distance.

    How to Fix It

    Let’s start from the simplest solution to the most complicated one. There’s no need to rebuild your carburetors if you don’t have to.

    Run Sea Foam Through the System

    The first, quick and easy solution (hopefully) is to run Sea Foam engine treatment through the engine to flush out any gunk in the carbs. Sometimes this works if you don’t have a major clog in the jets. Note: if you have a fuel injection system, this is a good way to clean the fuel injectors.

    Start by using it as a fuel additive. Fill your tank with the recommended grade fuel for your motorcycle. Add to the tank one ounce of Sea Foam for every gallon of gas in your tank. Ride your motorcycle and allow the additive to work its way through. If this doesn’t work, go to the next step.

    The next step is to run the Sea Foam directly into the carburetors. When you do this, be sure to run the bike in a very well ventilated area as the fumes from the burning Sea Foam will be pretty harsh.

    • Remove fuel line from the the tank. The one that feeds the carbs.
    • Drain the float bowls of any fuel.
    • Using a funnel, pour a small amount of Sea Foam into the fuel line allowing the float bowls to fill up again.
    • Start your motorcycle and keep pouring about 1/4 to 1/3 can of Sea Foam into the funnel while it runs. Note: you’ll see a lot of white smoke coming from your exhaust. That’s normal.

    When your engine burns all the Sea Foam, it will stop. Reattach the fuel line to the tank and let your bike sit for 10 to 15 minutes. Then, start it up normally, and see if it will now run without the choke being wide open. You will have to open the choke to get it running again.

    Clean the Carburetors

    Did the Sea Foam work? No? Not surprising. Often a clogged pilot jet is too clogged for Sea Foam to be effective. So, to properly fix this issue, you’re looking at a thorough carburetor cleaning involving removal and disassembly of the carbs.

    The main task or goal when doing a carb rebuild or cleaning, is to remove the jets and clean each one of them individually using carburetor cleaning and compressed air. You will also clean the inside of the carbs and float bowls, and any inline fuel filters.

    I recommend purchasing a carburetor rebuild kit for your specific make and model of motorcycle if you suspect that the jets or needles will be beyond cleaning. These kits run around $50 for a two cylinder engine and $100 for 4 cylinders. It’s a good investment and often means you’ll fix whatever carburetor issues you’re having. Even the ones you didn’t know you have.

    Another argument for buying a rebuild kit is, the jets are made of brass, a very soft metal. If you accidentally strip the screw on one of these jets when removing it, you’re screwed, and you’ll need to replace it anyway.

    Removal and Dissaembly of Carbs

    tips for carb rebuild

    The procedure for the removal and disassembly of your carburetors is going to depend on the make and model of your motorcycle. This article won’t go into the specific steps for this, but I will share my knowledge on how NOT to screw up the job.

    Tip #1 Label Your Hoses

    When removing the gas tank, you will need to keep track of what hose goes where when you put it back together. By simply labeling the hoses with some masking tape, you won’t be scratching your head wondering where they go. You can number each hose, and also place a number on the part where the hose attaches. Or, you can use a color-coding system and use a sharpie to mark where the hoses go. However you decide to do it, those labels will be a lifesaver.

    Tip #2 Keep Track of Screws, Clamps and Brackets

    Before you take something off, take note of where it came from and what screws hold it together. Taking pictures of the process on your cell phone is a great way to do this. Keep all the screws, bolts, and brackets in a container away from work area so that they are not accidentally stepped on, knocked over, or spilled. Using separate small containers for different sections of the bike is very helpful. Again, use the labeling system so you don’t forget where the screws go.

    Example of keeping track of screws by poking them into cardboard and labeling them.

    Another trick is to take a thin piece of cardboard or heavy paper and trace out the pattern of the screws on the paper. When you remove a screw from your carbs, stick it through the paper; kind of like a map of where everything goes. This is a perfect trick for those of us who have trouble remembering where that one odd screw is supposed to go.

    Also, magnetic parts bowls work great for this kind of job too. You should have one bowl for every carburetor you’re working with so you can keep the jets and screws from getting mixed up.

    Tip #3 Organize your Work Area

    Once you have the carburetors out of the motorcycle and on your workbench, you will want to keep this area clean and organized. When you start taking the carbs apart, removing little screws, springs and brackets, you will need to keep the parts organized and in order.

    Gather only the tools you will need for this detailed work. Limit it to just a couple of screwdrivers, a small wrench, small containers for screws and a small container for cleaning solution. Also, a couple of lint free rags. Lint free is super important. You don’t want to wipe down a part that you just cleaned only to leave a tiny piece of lint inside your carbs.

    Lay your carbs and tools on a solid, clean work surface free from cracks or gaps where your screws or jets can fall into. I have an old kitchen cutting mat that I use for jobs like this.

    Tip #4 Be Gentle With the Jet Screws

    Brass is a very soft metal. Stripping the screw heads is easier than you think. They are also quite small and require a small screwdriver head. So, when you get in there to remove the pilot jet screws, the smallest of the bunch, make sure your screwdriver is properly seated in the groove before you start turning. Turn firmly, while pressing down on the screw. Don’t rush. Once you hear a snap, the seal is broken and the screw should come out with no problems.

    Tip #5 Clean Jets with Carburetor Solution and Compressed Air

    When cleaning the individual jets, some people will recommend sliding a piece of wire through each hole to clear out gunk. This should be done with extreme caution. You do not want to scratch the inside of the jets or the holes. Remember, brass is soft and it doesn’t take much to scratch it.

    The best method for cleaning jets is to soak them in a carburetor cleaning solution, then blow out the jets with compressed air. If you have an air compressor, then you’re all set. But, if you don’t, a can of compressed air will work. Word of caution when using canned air; always hold the can upright when spraying so the chemicals in the can remain in the can where they belong.

    Adjusting the Pilot Jets

    At this point, let’s assume you have done a proper cleaning or rebuild of the carbs and you’ve successfully put them back together. Don’t put them on the bike just yet. It is super important to make sure the pilot screws are adjusted to your bike’s manufacture specifications. Check your service manual to see how many turns out the screws should be.

    When adjusting pilot screws, again, be gentle. Screw them all the way in until you just feel them seat. DO NOT tighten them any further. From there, turn the screws out the recommended number of turns for each carburetor. They may be different, i.e. one carb maybe 2 1/2 turns while the other will be 1 1/2 turns.

    Install Carburetors onto the Motorcycle

    Once you have all parts reassembled on your carburetors, and your pilot jet screws properly adjusted, then you can install them back onto your motorcycle.

    Now you will be glad that you labeled the hoses. Make sure you reattach all the appropriate fuel hoses as well as all the vent hoses, which are equally as important. Make sure the air intake hoses are properly mounted to the mouth of the carbs and that they are properly seated on the air intake box. Leaks in the air intake portion of the system can affect the air to fuel mixture. While you’re at it, make sure the air filter is clean and properly installed.

    When installing the gas tank, make sure no hoses are pinched or kinked. Make sure the vent hoses are properly routed down the motorcycle and clear from hot pipes, gears, and the chain.

    Once everything is back on the motorcycle and connected again, it’s time to give it a test. Startup the bike with the choke on. Remember, it will take a bit to get the fuel running through the carbs at first. Hopefully, with clean, and properly adjusted jets, your motorcycle will be idling properly without the choke being fully open. Take it out for a test ride.

    Other Causes

    Vacuum leaks can also cause problems with idle speed and performance. While you have your carbs disassembled, you should inspect the rubber bladder around the main needle for any holes. When assembling your carbs, make sure you do not pinch the edges of the bladder which can cause leaks in the vacuum.

    Clogged fuel filters can prevent fuel from flowing freely into the carbs. Check your service manual for the location of any inline fuel filters. Remove them carefully and make sure there is nothing clogging them. If your motorcycle has a gravity fuel delivery system, and a petcock or fuel switch, you should remove the petcock and check the filter at that point. Often, debris from the tank can clog this filter too.

    To wrap it up, clean carburetors, fuel lines, and fuel filters will ensure that your motorcycle runs properly. While a carburetor rebuild is somewhat tedious and intricate, it’s definitely something that you tackle do yourself. It takes patience, but, if you don’t rush and if you follow the tips I’ve laid out here, you can get your motorcycle up and running again.

  • Why Does a Motorcycle Helmet Visor Fog Up?

    Why Does a Motorcycle Helmet Visor Fog Up?

    Reading Time: 7 minutes

    Due to a variety of different reasons, it is common for motorcycle helmet visors to fog-up; nonetheless, no matter the extent of the fogging present, this can be a dangerous and annoying matter; thus, it would be best to prevent it from arising in the first place.

    Why Do Motorcycle Helmet Visors Fog-up?

    Unfortunately, it does not matter if you have the most expensive visor that money can buy; every helmet visor is susceptible of fogging-up throughout the year. Studies have shown that cold air, rain, and chill from the winds can lower your visor’s temperature; thus, moisture from the air being exhaled by you will condense on the surface of the visor. As a result, a mist will become apparent. This would cause you to take a break from the road to try to remediate the issue.

    Taking Matter into Your Own Hands Is Not a Go-to Option

    There are a lot of people who tend to take this matter into their own hands, trying to solve it either by using rags or even their own hands. These approaches might appear to be two great options, but they will only aid for a few minutes once you get back on the road. This could certainly become very frustrating. Let us not forget to mention that it will make you lose time, which is something you do not want to deal with if you are heading to a very important event. Arriving late would reflect negative elements about your character, which you should avoid from occurring at all costs.

    One approach that could help in the meantime until you find an adequate solution is to let visor free, but by doing so, you would be placing your health at risk, becoming more prone to suffering from a cold, flu, among other illnesses. This could cost you dearly, especially if you do not have health insurance.

    Even though numerous individuals are aware that there are various methods geared toward solving this type of matter, they opt not to take them into consideration due to believing they are more than likely on the expensive side. It is vital to highlight that this is the case for several methods, but not for the vast majority.

    In this day and age, most manufacturers who focus in providing different types of methods for motorcycle riders are aware that they have to be very cost-conscious in order for their products to sell well on the market. This is definitely a good thing for consumers who are on a budget. Manufacturers want to beat the competition, and they know that one of the best ways to achieve this, besides providing first-class approaches, is providing low-cost approaches.

    If you stop to think about it, taking matter into your own hands should not be the go-to option, as you want a solution that is going to be of long-term aid when implemented.

    What Are the Dangers Associated with a Fog-up Visor?

    Over the years, thousands upon thousands of accidents have taken place across the country, ones linked to a motorcycle rider not being able to see clearly due to his or her fogged-up visor. You would be putting yourself and others in danger if your visor is fogged-up. There are several men and women who have faced prison time, as the accident was found to be their fault. It quite astonishing how having a foggy visor could result in an immense problem, one that could end up negatively impacting your life for many years to come. This is why it should not be taken lightly. A lot of people’s lives have taken a drastic downfall due to not taken this issue, which might appear not to be a big deal, seriously from the time it was first noted.

    Another danger is of getting pulled over by police due to a violation. If a visor is fogged-up, it is more than likely that you will not be 100% attentive of every sign, and every traffic light that is on your path. You might miss something along the way. The fines that you could acquire from not following the rules, unintentionally or not, are definitely meaningful. These dangers reflect that it is always better to prevent than lament.

    Top Solutions to Prevent Fogging from Attacking Your Motorcycle Helmet Visor All Year-Round

    There is an immense number of anti-fogging approaches that are promoted to be heaven sent; nonetheless, not all of them should be put into practice. If you want to play it safe, take note on the following information. They are the top solutions to prevent fogging from attacking your motorcycle helmet visor all year-round.

    Ventilation

    The main goal is for your visor to be free of moisture. One of the ways this can be achieved is when ventilation is increased. This might appear like a simple trick, maybe too simple to function, but it certainly does work.

    Pin-lock Inserts

    This is one of the most selected solutions. By opting for it, you will be creating a double-glazed window type of effect once the attachment has taken place. There will be a pocket of air, one that is trapped between the visors. It would act as an insulator. It has absorption properties that do not fail, hence why its popularity keeps augmenting.

    Anti-Fog Treatments

    If you take a look at the market, you will notice there are numerous formulation-based products that are geared toward aiding the anti-fog matter from affecting your motorcycle helmet visor. There are some more popular than others due to their distinctive formulations. Compared to the formulations that were present on the market a decade ago, they are more innovative and thus more helpful. There are now innovative anti-fog cleaning tissues, oil-based solutions, water-based solutions, among others. The endless choices available might cause some confusion to arise when it comes time to deciding which one of them is your best bet. In this instance, you should take a look at which ones are the bestsellers and then opt to read the reviews they have garnered from consumers.

    Water Repellents

    This particular solution keeps garnering more popularity, as well. It does not seem like this is going to come to a halt anytime soon. Yes, water repellents are that great! You simply apply repellent to visor. There are not a lot of steps to undertake to begin reaping the benefits they provide to every motorcycle rider who chooses to select them as their go-to option to alleviate the frustrating visor fogging-related issue.

    Shaving Cream

    If you are into DIY methods, then this is one that you should take into consideration. Out of all the DIY approaches, this is one that keeps receiving a lot positive buzz from people around the globe. All you have to do is carefully apply an even coat of shaving cream to visor, leave it on for 30-minutes and then rinse it off with warm water. After you dry it with a clean towel, your visor will be ready to use, without having to worry that it will become a victim of fog anytime soon. This is all there is to it! It does not matter the type of shaving cream you get your hands on. Either for female or for male, scented or unscented, it will get the job done if you follow these steps. Now, if for some reason you do not notice a change, leave the solution for a longer period of time. Although this is not always the case, it has been noted that vintage visors could take longer.

    Making Solution Work for You

    In order to make one of these methods work as you expect, you have to follow the instructions that accompany them, to a ‘T.’ Failure to implementing a step could cause methods to not function its best or not function at all. Just as it would be with any other solution, anti-fogging approaches will only do their part if you do your part when utilizing them.

    What the Near Future Awaits

    Around the globe, motorcycle helmet visor manufacturers have become aware that fogging is an issue affecting millions of riders around the globe on a daily basis. For this reason, more than a handful of them are going the extra mile to innovate in their visor creations. They are looking for ways to prevent fogging from bombarding visors. This intent provides us with an idea of what the near future await us. Until a first-class visor that is fog-resistant, one that works as guaranteed, becomes visible on the market, you will just have to implement one of the above methods.

    Make a Wise Selection

    All of the aforementioned approaches have proven to work. It is up to you to decide which one of them best meets your needs and wants, as what could be ideal for your friend, might not be that much too you, and vice versa. If you are indecisive, go ahead and put them all to the test to make a wise selection.

  • How Often Should I Replace my Motorcycle Spark Plugs?

    How Often Should I Replace my Motorcycle Spark Plugs?

    Reading Time: 7 minutes

    Spark plugs are one of those things that you don’t think about every time you ride your motorcycle. They are not part of the normal pre-ride checklist like tires or turn signals. But, they can’t be ignored completely. At some point they are going to need to be replaced.

    So, how often should you replace your motorcycle plugs? For most modern motorcycles, spark plugs should be replaced every 15,000 to 16,000 miles. But, if your motorcycle is running rough, sputtering, or is losing power, spark plugs should be inspected and replaced if necessary.

    Your first step to answering this questions is to check the maintenance schedule in your owner’s manual for the recommended intervals. If your motorcycle is running properly, or if you’ve purchased it new, you shouldn’t have to replace them any sooner. For most motorcycles, it’s every 16,000 miles.

    But, if your motorcycle is having engine problems, such as, running rough, sputtering, or it dies at idle speed, part of your troubleshooting process should include inspection of the spark plugs and replacement if necessary.

    If you’ve purchased a used motorcycle, especially one that has been sitting unridden for a while, then you should absolutely inspect the spark plugs. Ask the previous owner when was the last time they were changed. If they don’t recall, then replacing them is the safest option.

    How to Inspect Spark Plugs

    Spark plugs can tell you quite a bit of information about the condition of the motorcycle. When you inspect them, there are a few things you need to look for.

    spark plug diagram

    What Does the Color Tell You?

    Under normal conditions, the spark plug electrodes will have combustion deposits which are grayish-brown in color. They should be dry and the electrodes should not be misshapen. This color is normal and means your motorcycle is running normally.

    If the plugs are wet, or covered in oil, this means that the motorcycle is having more serious issues that should be looked into. It often means that oil is leaking from the valves or pistons. If this is the case, the problem should not be ignored. Have the motorcycle inspected and repaired by a mechanic.

    Very dark coloring at the electrodes means that more carbon is being deposited as the engine fires. This is a sign that the engine is running rich, or too much fuel in the mix. The spark plugs should be replaced and adjustments should be made to the fuel/air mixture.

    If you’ve been having carburetor issues, such as clogged jets, you will likely need to replace spark plugs after fixing the carburetor problems. Why? If the carbs have been running too rich, it will leave more carbon deposits on the spark plugs. Also, if you’re going so far as to remove the carburetors from your bike, you may as well go the extra step and throw in some new plugs. The cost and time is minimal.

    Another sign that your spark plugs should be replaced, is unusual erosion or wear on the terminals, or cracks in the ceramic insulation. If you notice uneven wear on the center electrode, if it’s worn to a point, or if it’s worn more on one side than the other, then it’s time to change the spark plugs.

    If the ground electrode is unusually worn or excessively corroded, it should be replaced.

    Replacing the spark plugs.

    Replacing the spark plugs is one of the more simple motorcycle maintenance jobs you can often do yourself depending on the type of bike you have. If your motorcycle engine allows free access to the spark plugs, it’s as simple as remove and replace.

    Some motorcycles require removal of the gas tank to access the spark plugs. While this seems like a tough job, it’s usually pretty basic and can be done fairly quickly. Check your service manual for the procedure for your specific motorcycle.

    Spark plug removal requires a special socket called a spark plug socket, of course. These sockets are fairly long and contain a rubber grommet inside that grips the plug’s terminal, making it easy to pull out the plug.

    A lot of times a motorcycle’s on-board tool kit, provided by the bike’s manufacturer, will include a spark plug socket. If yours does not, then you can easily find one at any local auto parts store, or motorcycle parts store. Before you go out and buy one, check your owner’s manual to see which size you should purchase.

    The steps for replacing your motorcycle’s spark plugs will be very similar to the steps listed below. However, there will be some differences depending on where your plugs are located and how easily they are accessed. A lot of modern motorcycles require removal of the fuel tank. So, before you jump into it, check a service manual for the proper tank removal procedure.

    1. Remove gas tank if necessary
    2. Remove the spark plug wires by pulling, firmly, straight up.
    3. Insert the spark plug wrench into the chamber.
    4. Using a wrench or socket wrench, unscrew the spark plug
    5. Pull out the socket and the spark plug should come up with it

    After removing the spark plugs, inspect them for any signs of unusual wear or coloring. If the color and wear is normal, no further investigation is necessary and you can install the new plugs. However, if you see something out of the ordinary, then you should consider taking steps to fixing any issues your motorcycle may have.

    Before installing the new spark plugs, check and adjust the terminal gap. While most of the time a plug will come properly gapped, you should still double check. Look up the recommended gap in your owner’s manual, then measure the gap with a gap tool.

    If you need to adjust the gap, do not use a screwdriver wedged in there. Doing this can damage the electrodes. A good gap gauge will come with a gap spreader tool.

    To install the new plugs reverse the procedure listed above. Tighten the plugs firmly, but do not over tighten them. You may have to wiggle the socket a little to pull it out.

    Before reattaching the spark plug wires, inspect them for any cracks, which can lead to a loss of power. If it’s all ok, then reattach the wires. Make sure you push them down firmly to make sure they are completely seated onto the spark plug terminal.

    What Kind of Spark Plug is Best?

    Today’s spark plugs have improved a great deal and last much longer than spark plugs that were made 20 or 30 years ago. Also, the material used to make them have improved. The electrode core can be made from copper, platinum or iridium.

    Copper is generally the most common and less expensive type, and will be a perfectly good choice for your motorcycle if you ride under normal conditions.

    Platinum spark plugs will last longer than copper and can handle higher heat without breaking down. If you ride hard, and your bike runs at higher RPMs, these might be a good choice.

    Iridium spark plugs are known for lasting the longest and performing well under harsh conditions, such as racing.

    All brands that manufacture spark plugs will offer a range of quality and performance ratings. If you stick with a name brand such as NGK, ACCEL, Autolite or Champion, you’ll be getting a quality spark plug. But, some riders have a brand preference.

    Spark plug life on a motorcycle is not the same as spark plug life on an automobile. Although cars can go 100,000 miles without a spark plug change, it’s not so with motorcycles. So, now you know, change your spark plugs every 16,000 miles, give or take, or change them if you have engine problems, especially those related to fuel or carburetor issues.

  • Leaving Motorcycle In Rain: Will It Damage my Motorcycle?

    Leaving Motorcycle In Rain: Will It Damage my Motorcycle?

    Reading Time: 8 minutes

    Every once in a while the winter weather will be unusually wet, with days and days of rain. This can make it difficult to get out on the motorcycle. But, it’s not always super cold when it rains, and if you’re wearing the right gear, a little rain shouldn’t keep your bike stuck in the garage. Or should it?

    So, will rain damage my motorcycle? In most cases, no. Manufacturers make sure that wiring, electrical components, and other parts vulnerable to water, are sealed off and kept dry. Riding in the rain will not damage your motorcycle, but, prolonged exposure to rain and the elements, will eventually cause parts of your bike to deteriorate.

    Ever since they were introduced to the public in 1885, motorcycles have always been a favorite option for traveling, either short or long distances. These days, there are more models available on the market than ever before with a host of features even for the most demanding motorcycle owner. Their popularity keeps growing each year, and it certainly doesn’t appear to be ending anytime soon.

    Motorcycles Require Special Care

    Numerous individuals tend to believe that a motorcycle is like any other vehicle. This is true, but only to a certain extent. In several aspects, the structure of motorcycles differs from other vehicles; thus, the care implemented on them should be different, especially when it is about to rain outside.

    Even though it might seem that rain is a good effect due to effortlessly aiding with the cleaning of a motorcycle placed outdoors, avoiding you the hassle of cleaning it yourself, it is not, when you take a look at the bigger picture.

    There have been several studies conducted in past and recent times that showcase just how powerful rain can be—to the point of causing destruction to a lot of things it lands on. There are more than a handful of motorcycle manufacturers who have taken note on these studies and thus have persuaded consumers to keep their motorcycles at bay from the rain. There are even some manufacturers who have opted to include a helpful integration to ensure rain does not have a chance in causing destruction. Without a doubt, these have helped consumers around the world be more alerted about this inevitable fact.

    What Would Happen If Vulnerable Areas Got Wet?

    Electrical connections that are out in the open are the most vulnerable to rain damage. It has also been noted that switchgears, break systems, and batteries tend to take a downfall when rain falls on them continuously. There are a lot of motorcycle owners who believe that these types of issues could be avoided by simply going over motorcycle with a dry rag once rain has subsided, but this is not the case in any situation. Once the rain hits, it penetrates and begins to cause damage, which could become irreversible in some instances.

    If the aforementioned vulnerable areas get wet over and over again, you will soon begin to notice their functions deteriorating more and more until they are no longer responsive. These areas are very sensitive to water; thus, for the time being, until manufacturers can create models that are waterproof, you need to go the extra mile in the type of care you implement on your motorcycle before and after use.

    Motorcycle repair shops are present to solve a variety of different issues, but if the matter is rain related, there tends to be an absence of a guarantee because there is no assurance that an adequate repair can be achieved, no matter how big or small the problem might be. There have been some cases where motorcycle owners had to either purchase new models or forget about their current models due to having meaningful problems that went hand in hand with water damage. As you can conclude, not opting to prevent issues from arising with your motorcycle could cost your dearly in the financial department, hence why it is always better to prevent rather than lament.

    Vintage or Older Motorcycles vs. New Motorcycles

    It does not matter if a motorcycle is vintage or new; both deserve the same type of care. This might be surprising to some individuals because there is this popular assumption that in the past motorcycles were manufactured to be more durable, and resistant to water damage than current models. This might appear to be the case at first glance but ultimately this notion is false.

    Vintage motorcycles have fewer features than new motorcycles, but even so, most motorcycles with vintage structures share several similarities. Even though there is now more plastic involved in their manufacturing, they are also created using the same types of materials that were used before in a lot of areas. The shell of new motorcycles might appear different to that of old motorcycles, which it is, but only to some extent. Their similarities prevail and thus have a lot in common.

    What if you Leave Your Motorcycle In the Rain?

    In most cases, as previously mentioned, leaving motorcycle in the rain for a few minutes every now and then would cause its downfall to take place little by little. Now, this is not what would occur if the motorcycle in the rain was left out for prolonged exposure.

    Damage could definitely become visible right away. If you are lucky, you might not notice anything, but do not let this convince you that this will come to pass if you opt to leave it in the rain for a long time the second time around. There will be overall damage that you will soon begin to note, which will become worse and worse if it is not taken care of.

    Overtime the metal parts of a motorcycle in the rain will also start to rust, especially if areas that don’t have a paint-job for example your brake discs. Also the thin layer of rubber parts on your bike are likely to wear quickly too.

    Should It Be Covered when Left in the Rain?

    It is highly recommended for motorcycles to not be left outside. A garage would be an ideal area for them to be placed in; nonetheless, there are times when it must remain outside for one or more reasons. If this is the case, it does not matter if there is light rain present, any motorcycle on two wheels, street bike, or touring motorcycle, no matter what year it is, it should be covered.

    If you have left your motorcycle in the rain & outside while it was raining and it is somehow not suffering a downfall, purchase a cover as soon as possible to avoid one. Remember that there is no motorcycle exempt from water damage.

    Even though there are some manufacturers who are creating heavy-duty motorcycles that can withstand just about anything, they still cannot withstand water damage. Hopefully, this will change in the up-and-coming years so that you have one less worry on your mind, but for the time being, be wise and thus opt for a cover.

    What Kind of Cover Is Best?

    motorcycle in rain

    It very common to see people opting to cover their motorcycles with blankets or any type of plastic they get their hands on. Although these might seem like good options, they are not, especially if the rain outside is heavy. Since rain can occur at any day of the year and at different speeds, a cover is often suggested, one that is manufactured specifically to shield motorcycles from external factors that could cause harm to their functions.

    There are some individuals who believe that this type of cover is not really worth it and also believe it is more than likely quite expensive to purchase, but neither of these two assumptions are accurate. It is 100% necessary to have a cover for your motorcycle, and it is quite affordable to acquire one.

    There is also a misconception, one that revolves around the idea that a cover is not necessary if motorcycle is going to be kept indoors. This is also incorrect. It is best for every motorcycle to have a cover over it, even if it is in a place that is considered safe.

    Besides being able to shield them from the rain, this type of special cover could also shield them to a meaningful extent from air, soil, thermal, radioactive, light, and other pollutions that have been noted to have harmful effects on uncovered motorcycles in more than one aspect.

    Compared to the choices available a decade ago, there is now a greater variety of different motorcycle covers on the market to choose from. Contrary to popular belief, motorcycle covers are not made equal. This could easily cause some confusion to arise when you are trying to decide which motorcycle cover is a quality cover and the best choice.

    The kind of cover that should be selected is one that is waterproof. Reading the descriptions attached to the bestselling units and then reading the reviews they garnered from consumers could certainly allow you to make a wise selection. Do not think that just because a cover is thin it means that it would do a less successful job in keeping your motorcycle free from water damage than one that is thick. Manufacturers have come up with innovative ways to ensure protection, without having to resort to bulky materials that only result in causing frustration when utilizing them.

    Keeping the Longevity of Your Motorcycle Intact

    Motorcycles are manufactured of durable materials so that they can last you for many years to come, but even so, it is up to you if your motorcycle ends up having longevity or not. It will all depend on how you take care of it; thus, ensure that it always has a cover on, no matter where it is placed. This type of motorcycle maintenance will certainly aid in keeping it intact.

  • How Far can a Motorcycle Travel on a Tank of Gas?

    How Far can a Motorcycle Travel on a Tank of Gas?

    Reading Time: 7 minutes

    For any motorcyclist, planning out gas stops is a typical part of any ride. It seems we are always checking our fuel gage or odometer to see if we can make it to the next town to top off the tank. So, I’m not surprised when this question comes up.

    How far can a motorcycle travel on a tank of gas? Typically, the average motorcycle will get anywhere between 120 to 200 miles on a tank of gas depending on tank size, engine size, and riding conditions.

    Tank Size

    The most obvious determination of distance is the size of the motorcycle’s gas tank, and they can vary greatly from bike to bike. For instance, A Harley Davidson sportster forty eight has a 2.1 gallon tank. When I ride with my sportster owning friends, we have to stop for gas avery 110 miles or so. However, I ride a Honda CB500X with a 4.6 gallon tank. I often skip a gas stop since my bike can travel twice as far on a tank.

    Some motorcycles, which are designed to go longer distances out in the middle of nowhere, will come with larger tanks. For example, the KTM 1190 Adventure has a 23 liter tank, or 6 gallons.

    Most motorcycles come with a reserve tank and a switch that needs to be turned on to allow the reserve fuel to be use. It’s a good idea to know approximately how far your motorcycle will travel on reserve. Generally, it is only about 10 to 20 miles. So, when you switch to reserve, your first thought should be “find a gas station now!”

    Engine Size

    Just like cars and trucks, bigger engines will use more gas. However, manufacturers know this and usually build their bikes with the proper fuel tank capacity to accommodate the larger engine. There’s no point in selling a big bore motorcycle that can only travel a short distance.

    Let’s take the Triumph Rocket III Roadster for example. It’s the largest production motorcycle engine available at 2,294cc. That’s big. It’s average fuel consumption is around 35mpg, and for a motorcycle, that’s not very much. Bu, it has a 6.3 gallon fuel tank. So, a big bike like this can travel and average of 220 miles between fill ups. Probably more like 200 to be safe. That’s pretty good for a big engine touring bike.

    Let’s look at an example of a smaller engine. The Kawasaki Ninja 300, with only a 4.3 gallon tank, gets an impressive 75 miles per gallon, so, it can easily travel over 300 miles on a tank of gas.

    Old Motorcycle vs. New Motorcycle

    The age of your motorcycle will also determine how far it can go on a tank of gas. Modern day motorcycle fuel consumption has greatly improved with all the advancements in technology. Older motorcycles, with gravity fuel supply systems and no fuel injection, will often get fewer miles per gallon, therefore, fewer miles on one tank. So, for older motorcycles, it’s even more important to keep your carbs clean and your fuel system in top shape.

    Riding Style

    Your riding style can effect your fuel efficiency. For example, I used to own a Suzuki SV650, which got about 45 miles to the gallon. On average, I could get about 140 miles of riding in before I needed to fuel up.

    I took this motorcycle out on a couple of track days, and it was a different story. The aggressive, high speed, high rev riding that I did on the track lowered my miles per gallon down to about 30. I had to top off between each session and I wen’t through a lot more gas than expected.

    So, if you do a lot of fast, aggressive canyon riding, you can expect your motorcycle’s fuel efficiency to go down. If you’re cruising down the freeway at a moderate speed, your motorcycle will be at it’s most fuel efficient and you’ll go farther on one tank.

    Other Fuel Efficiency Factors

    There are other factors that can effect your fuel efficiency. One being how much weight you are carrying. If your motorcycle is fully loaded with luggage, you’re going to get fewer miles per tank of gas. Also, if you’re carrying a passenger, you’ll get a lower mpg. Are you pulling a trailer with your Goldwing? You can bet you’ll get fewer miles out of your tank.

    Riding in cold weather can also reduce your fuel efficiency. Although most motorcyclist choose to avoid riding in winter, still, some hard-core riders will tough it out. While reduced fuel efficiency in cold weather is more noticeable in cars and trucks, it only reduces your mileage by about 12%, which, on a motorcycle, is not really a factor.

    Low fuel efficiency can also be an indicator that your motorcycle is not running properly. If you notice a sudden change in your average MPG, you could be dealing with dirty carburetors, under-inflated tires, a clogged fuel filter or faulty fuel pump. These issues should be looked into and repaired before they cause more damage, or leave you stranded on the highway.

    How to Calculate Your Average MPG

    Here are the steps to calculate your motorcycle’s average miles per gallon. To get an accurate number, do these steps 3 or 4 times. Keeping a written log of your mpg is a great way to monitor your bike’s performance, or alert you if there is a mechanical problem.

    1. Start with a full tank of gas.
    2. If your motorcycle as a trip odometer, set it to zero. Otherwise, write down the miles on the main odometer.
    3. Ride your motorcycle as you normally would until the tank is almost empty.
    4. Fill up your tank again, to the top.
    5. Write down the exact number of gallons it took to fill up the tank.
    6. Next, from the odometer, write down the number of miles ridden.
    7. To calculate the miles per gallon, divide the miles traveled by the number of gallons it took to fill the tank again in step 4.

    The formula: Miles Driven ÷ Gallons Used = MPG
    It works the same with kilometers. Same formula.

    Example: If I rode 150 miles, and it took 3.2 gallons of gas to fill my tank back up, then I calculate: 150 miles ÷ 3.2 gallons used = 46.8 mpg

    How to Improve Your Motorcycle’s Fuel Efficiency

    Now that you know a little more about what effects the distance you can ride on a tank of gas, there are some things you can do to increase your miles per gallon, and get more miles between fill ups.

    1. Properly inflate your tires. Underinflated, or over inflated tires can affect your fuel efficiency. Check your bike’s manual or your tire manufacturer’s recommended psi. Always keep a tire gauge in your on-board tool kit so you can check it from time to time. It’s also a good idea to carry a compact air compressor, especially if you’re going to be riding in areas with no services available.
    2. Ease up on the throttle. Faster riding speeds will reduce your fuel efficiency. So, if you need to reduce your fuel consumption, lay off the throttle.
    3. Use higher grade gasoline. It may cost a little bit more at the pump, but, when it comes to motorcycles and their small tanks, it only makes a few dollars difference. The higher fuel grade will keep your engine cleaner and, in the long run, you’ll get better gas mileage.
    4. Keep your bike properly maintained. Carburetors, spark plugs, fuel pump, fuel filter; all of these should be in good condition to keep your fuel consumption low.
    5. Pack Light. If you’re doing any multi-day touring or camping on your motorcycle, keep your load as light as possible. Pack up you ride like a backpacker packs the bag. The lighter the better.

    To wrap it up

    The best thing you can do as a motorcycle owner is to know your bike and how it operates. Calculate your average miles per gallon and keep track of how many miles you can travel on a tank of gas. Keep your bike well maintained and your load light. Be aware of your trip odometer or your gas gauge and play it safe when planning your gas stops.

    Related articles: 5 Ways to Carry Extra Gas on Your Motorcycle